Table of Contents
Advertisement
Available languages
Available languages
Quick Links
Download this manual
See also:
Instruction Manual
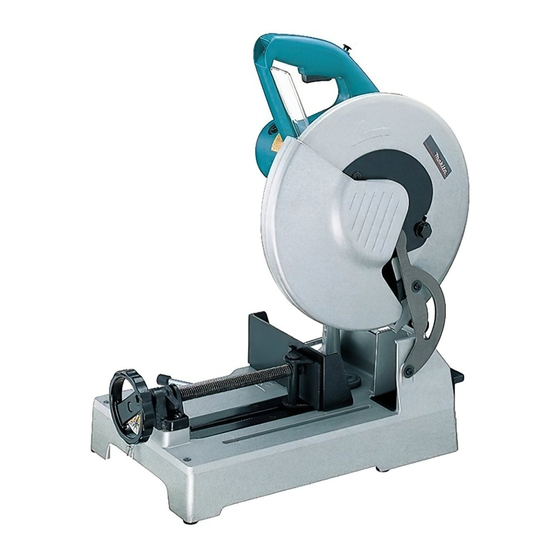
GB Metal Cutting Saw
F
Tronçonneuse à métaux
D
Metallkreissäge
I
Troncatrice
NL Afkortzaagmachine voor metaal
E
Sierra tronzadora
P
Serra para corte de metal
DK Hurtigafkorter
S
Metallkapsåg
N
Metallskjærende sag
SF Metallisaha
GR Τροχ ς κοπής µετάλλων
LC1230
Instruction Manual
Manuel d'instructions
Betriebsanleitung
Istruzioni per l'uso
Gebruiksaanwijzing
Manual de instrucciones
Manual de instruções
Brugsanvisning
Bruksanvisning
Bruksanvisning
Käyttöohje
Οδηγίες χρήσεως
Advertisement
Table of Contents

Related Manuals for Makita LC1230


Summary of Contents for Makita LC1230
- Page 1 Istruzioni per l’uso NL Afkortzaagmachine voor metaal Gebruiksaanwijzing Sierra tronzadora Manual de instrucciones Serra para corte de metal Manual de instruções DK Hurtigafkorter Brugsanvisning Metallkapsåg Bruksanvisning Metallskjærende sag Bruksanvisning SF Metallisaha Käyttöohje GR Τροχ ς κοπής µετάλλων Οδηγίες χρήσεως LC1230...
- Page 3 12-1 12-2 12-3...
- Page 4 14-2 14-3 14-1 15-1 15-2 16-1 16-2...
- Page 5 Symbols The following show the symbols used for the tol. Be sure that you understand their meaning before use. Symboles Nous donnons ci-dessous les symboles utilisés pour l’outil. Assurez-vous que vous en avez bien compris la significa- tion avant d’utiliser l’outil. Symbole Die folgenden Symbole werden für die Maschine verwendet.
- Page 6 DOUBLE INSULATION DUPLO ISOLAMENTO DOUBLE ISOLATION DOBBELT ISOLATION DOPPELT SCHUTZISOLIERT DUBBEL ISOLERING DOPPIO ISOLAMENTO DOBBEL ISOLERING DUBBELE ISOLATIE KAKSINKERTAINEN ERISTYS ∆ΙΠΛΗ ΜΟΝΩΣΗ DOBLE AISLAMIENTO To avoid injury from flying debris, keep holding the saw head down, after making cuts, until the blade has come to a complete stop. Pour éviter toute blessure résultant du vol de débris, tenez l’outil avec sa tête dirigée vers le bas lorsque la coupe est terminée, jusqu’à...
-
Page 7: Specifications
21 Vise plate 11 Spindle 22 Vise nut SPECIFICATIONS Model LC1230 Blade diameter ..............................305 mm Hole (arbor) diameter ............................25.4 mm No load speed (min ).............................. 1,300 Dimensions (L x W x H) ......................516 mm x 306 mm x 603 mm Net weight ................................19.0 kg... - Page 8 10. Watch out for flying sparks when operating. Setting for desired cutting angle (Fig. 7) They can cause injury or ignite combustible CAUTION: materials. Always tighten the hex bolt securely after changing the 11. Do not touch the blade, workpiece or cutting cutting angle.
- Page 9 Cutting operation CAUTION: • Never attempt to cut workpieces less than 2 mm thick except pipe or workpieces which cannot be secured firmly with the vise. The piece cut off may be caught by the blade, causing dangerous scattering of chips and/or damage to the carbide-tips.
-
Page 10: Maintenance
Dust collection (Fig. 17) MAINTENANCE CAUTION: CAUTION: Do not touch any part of the dust box except its handle Always be sure that the tool is switched off and immediately after operation; it may be extremely hot and unplugged before carrying out any work on the tool. could burn your skin. -
Page 11: Technische Gegevens
31 Borstelhouderdop 10 Zeskantbout 21 Klemplaat TECHNISCHE GEGEVENS Model LC1230 Diameter zaagblad ............................. 305 mm Diameter asgat ..............................25,4 mm Toerental onbelast (min ) ............................. 1 300 Afmetingen (L x B x H) ......................516 mm x 306 mm x 603 mm Netto gewicht .............................. - Page 12 Laat het gereedschap een tijdje draaien alvorens Druk de asvergrendeling in om de as vast te zetten, en het op een werkstuk te gebruiken. Controleer op draai de zeskantbout met de dopsleutel naar links los. trillingen of schommelingen die kunnen wijzen Verwijder de zeskantbout, de buitenflens en het blad.
- Page 13 Bediening LET OP: • Probeer nooit werkstukken die dunner zijn dan 2 mm, behalve pijpen, te snijden, en ook niet werkstukken die met de klemschroef niet goed vastgezet kunnen worden. Het afgesneden stuk kan namelijk door het draaiende blad worden gegrepen, zodat er gevaar is voor rondvliegende spaanders en/of beschadiging van de hardmetalen tanden van het blad en eventuele ernstige verwonding.
- Page 14 Snijden van rechthoekstaal (Fig. 16) ONDERHOUD Zet het werkstuk vast in de klemschroef zoals afgebeeld LET OP: in Fig. 16-1 en begin met het snijden. Zorg er altijd voor dat de machine is uitgeschakeld en de LET OP: stekker uit het stopcontact is verwijderd alvorens onder- Snijd het werkstuk NIET zoals afgebeeld in Fig.
Need help?
Do you have a question about the LC1230 and is the answer not in the manual?
Questions and answers