
Related Manuals for Onix ASP4-014


Summary of Contents for Onix ASP4-014
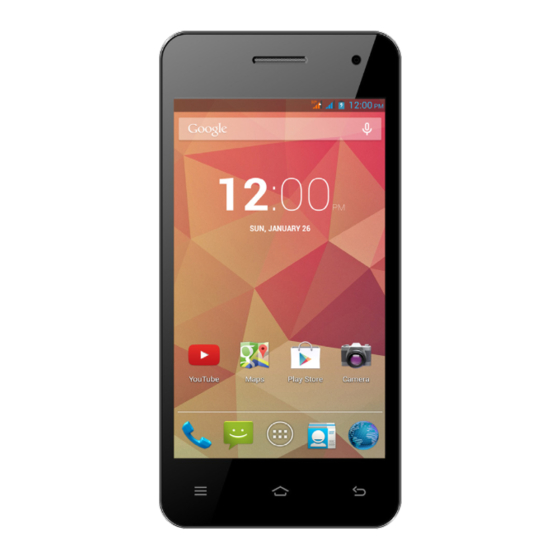
- Page 1 4” Dual SIM Smart Phone Instruction Manual Model: ASP4-014 Customer Helpline 1300 886 649...
-
Page 2: Table Of Contents
Contents Warranty Details Welcome General Safety Instructions Product Overview Getting Started • Before first use, Micro SD Card, Inserting the SIM card(s) and battery • Charging, Buttons, Switch on/off, Turn on/off the screen • Linking with your Google account • SIM management Operation •... -
Page 3: Warranty Details
4” Dual SIM Smartphone Warranty Details The product is guaranteed to be free from defects in workmanship and parts for a period of 12 months from the date of purchase. Defects that occur within this warranty period, under normal use and care, will be repaired, replaced or refunded at our discretion, solely at our option with no charge for parts and labour. -
Page 4: Welcome
Welcome Congratulations on choosing to buy a ONIX product. All products brought to you by ONIX are manufactured to the highest standards of performance and safety and, as part of our philosophy of customer service and satisfaction, are backed by our comprehensive 1 Year Warranty. We hope you will enjoy using your purchase for many years to come. -
Page 5: General Safety Instructions
General Safety Instructions Read this manual thoroughly before first use and keep it in a safe place for future reference, along with the completed warranty card, purchase receipt and carton. The safety precautions enclosed herein reduce the risk of fire, electric shock and injury when correctly adhered to. - Page 6 General Safety Instructions (Cont.) handling a charged battery, particularly when placing it inside your pocket, purse or other container with metal objects. • Power cord: Do not bend or damage the cable of the battery charger. • Damage: Do not use the charger if the cable or plug are damaged. In case of damage, contact the after sales support line for advice.
-
Page 7: Product Overview
Product Overview Display Earpiece Front Camera Volume Up / Down Button Power Button Recent Apps/Options Menu Home Back/Return... -
Page 8: Product Overview
Product Overview (Cont.) 12 13 14 Rear Camera Micro USB Charging Port 3.5mm Hands Free Port SIM Slot 1 SIM Slot 2 Micro SD Card Slot Battery Bay Loud Speaker... -
Page 9: Getting Started
Getting Started Before first use • Unpack the product but keep all packaging materials until you have made sure your new 4” Smartphone is undamaged and in good working order. Plastic wrapping can be a suffocation hazard for babies and young children, so ensure all packaging materials are out of their reach. -
Page 10: Charging, Buttons, Switch On/Off, Turn On/Off The Screen
Getting Started (Cont.) Charging The battery has been partially charged at the factory. To perform all functions, we recommend you fully recharge it as follows: • To charge the device with the battery charger, plug the large end of the USB cable into the charging adaptor and the smaller end into the micro USB port on the 4”... -
Page 11: Linking With Your Google Account
Getting Started (Cont.) Linking with your Google account When you turn on the phone for the first time, you can sign in to your Google Account so you can synchronise Gmail/Google Mail, Calendar and Contacts between your phone and the web. You also need to sign into a Google Account to use Google Apps such as Google Talk™... -
Page 12: Sim Management
Getting Started (Cont.) SIM management This 4” Smartphone can be used with two SIM cards: When you have two SIM cards inserted, you can choose to use either SIM1 or SIM2, or both of them. Unless you have determined use of one particular SIM card as your default card in the settings, you will be prompted to choose an appropriate SIM card every time you want to make a call or send a message. -
Page 13: Operation
Operation Entering your PIN If you want to use a SIM card that is preset with a PIN (personal identification number), you will have to enter the PIN to proceed. Just follow the prompts to enter the SIM PIN and then tap “OK”. - Page 14 Operation (Cont.) Screen buttons There are three buttons at the bottom of the screen. No matter what functions you are using, you can return to the last page or main screen by using these buttons. Button Name Description Go to the last page (even in another application).
- Page 15 Operation (Cont.) Notifications The notification bar shows you at a quick glance the status of your phone. It can be expanded to show more information and quick access to settings. Notification icons inform you of the receipt of new messages, calendar events, set alarms and ongoing settings for things such as active call forwarding or the current call status.
-
Page 16: Phone Calls
Operation (Cont.) Phone calls Making a call You can make a phone call a number of different ways. Calling using the dialler • (call/phone) at the bottom of the screen to enter the dialler screen. • In dialler mode, when you input a number, you have two options to make a call. 1. - Page 17 Operation (Cont.) Incoming phone calls • Receiving a phone call from a contact: When you receive a phone call from a contact, the incoming call screen appears, displaying the caller ID icon, name and phone number of the calling party. •...
- Page 18 Operation (Cont.) Muting the microphone • Tap “Mute” to turn the microphone on or off. When the microphone is turned off, the “Mute” icon appears in the status bar. Putting a call on hold • Tap “Hold” to put the call on hold. When you put a call on hold, the “Hold call” icon appears in the status bar.
- Page 19 Operation (Cont.) Call log tab Enter the dial number and slide to the right to the call log. Then select to: • Tap the name or number in the list to phone the contact. • Tap the contact icon of a name or number in the list to display the options menu where you can choose from the following options: “View contact information”...
-
Page 20: Call Settings
Operation (Cont.) Call settings Voice call Select this option to change settings for your voice mail service and number, voice call forwarding, voice call barring, phone number and call waiting settings. Video call Select this option to change your video call settings such as set a picture to display when the camera not in use, size of peer video and local video, etc. -
Page 21: Contacts
Operation (Cont.) Contacts The contacts application lets you manage your phone, messaging and email communications with the contacts in your contacts list. If you are synchronising contacts with your Google account via your PC tools, any contacts stored in those accounts will displayed. -
Page 22: Messaging
Operation (Cont.) Messaging Messaging lets you compose and send text (SMS) and multimedia messages (MMS) to other mobile phones. Creating and sending SMS and MMS messages • Any text (SMS) messages you compose that contain up to 160 characters will be delivered as one message. -
Page 23: Applications And Widgets
Operation (Cont.) Applications and widgets Enter applications Click to enter the list of all applications and widgets. Click on the APPS tab in the top left corner. • This window will display a list of the applications. • As you install more applications, the first page will fill up and the application icons will automatically spread onto other pages. -
Page 24: Add And Manage Desktop Icons
Operation (Cont.) Add and manage desktop icons Add desktop icons At the application list or widget list, long press any application or widget and the device will shift into desktop, then drag the icon to any place on the desktop. Desktop shortcuts management To create a folder on the main screens, just drag and overlay any icon onto another icon, then release. - Page 25 Operation (Cont.) Then you can view the folder contents by clicking on the folder icon and it will display as pictured below. You can change the icon positions inside the folder by long pressing them, then dragging to the new position. If you want to remove an icon from the folder, long press the icon and drag to outside the folder.
-
Page 26: Connect With Computer
Operation (Cont.) Gallery Choose from the pictures stored on your 4” Smartphone camera gallery or any pictures downloaded onto the device. Wallpaper Choose from the default wallpapers. Live Wallpaper Choose a moving wallpaper Video Wallpaper Choose a video to as your wallpaper Connect with computer Connect the device to a computer with a USB cable. -
Page 27: Browser
Operation (Cont.) Browser to open the browser. to open a new browser window. to close the current browser window. When the internet signal is poor and the web page does not load, tap “Refresh” in the menu to try loading the web page again. There are many useful advanced options in “Settings”. -
Page 28: Screen Compatibility, Background Applications
Operations (Cont.) Screen compatibility When the device is installed with programs designed for small screen and cannot show in full screen, a screen zoom menu will pop up. You must confirm it to open those programs. Background applications Tap the “background applications” (recent applications) on-screen button to show all programs running in the background. -
Page 29: Get And Install Applications
Operations (Cont.) Get and install applications There are two ways to get applications software: download through this device or copy from a computer. Option 1: Download using a “Market” or ‘“Store” application Download applications software using applications such as Google’s “Play Store”. Below are photos showing the process of downloading “Angry birds”... -
Page 30: Uninstall Applications, Play Store And Calendar Error Messages
Operations (Cont.) Uninstall applications • Open the applications window and tap , then tap on “Apps” from the menu on the left. • Use the tabs at the top and scroll up and down through the list of applications until you find the application you wish to uninstall. -
Page 31: Settings
Settings The setting function on this 4” Smartphone is like that on a computer control panel. You can access the settings page from the notifications bar or “Setting” icon in the applications list. Wireless and networks The “Mobile Networks” section is located under the “More” option. •... - Page 32 Settings (Cont.) • Tap “Wi-Fi” to open the Wi-Fi function. • To the right of the “Wi-Fi” label is the button to enable and disable Wi-Fi. • Press the On/Off button to turn the Wi-Fi function on or off • Click on the network you wish to connect to.
- Page 33 Settings (Cont.) There are more useful advanced Wi-Fi settings when you choose to “Show advanced options”.
-
Page 34: Bluetooth
Settings (Cont.) Bluetooth Enable or disable bluetooth Tap “Settings” at the main menu or applications list. In the “Wireless & networks” menu, tap “Bluetooth”. Tap the On/Off button in the menu on the left to turn Bluetooth on or off. Change Bluetooth device name By default, the Bluetooth device will have a name. -
Page 35: Device
Settings (Cont.) Device Audio profiles Set all sound options here. Click on “Volumes” to change the volume levels for multimedia players and applications, and also for notifications and alarms. Display You can set brightness, wallpaper, auto-rotate, and font size options. - Page 36 Settings (Cont.) Storage Internal storage: space for installation of applications (APK software) External SD: storage space on the removable SD card (if inserted) Battery Show battery balance and consumption. Applications Here you can manage applications, such as uninstall them or clear application data.
-
Page 37: Personalisation
Settings (Cont.) Personalisation Location access Allows you to enable or disable the various location services such as GPS. - Page 38 Settings (Cont.) Security The security menu contains many useful options for securing your 3G Smartphone and data. Screen lock: Change or set a protection method for locking the screen. Owner info: Enter text that will be displayed on the lock screen. This is a message that others can see without having to unlock the phone.
- Page 39 Settings (Cont.) Language and input In this area you can change the system language and change settings for the keyboard. Keyboard Some applications can open the keyboard automatically; others require you to click in an input field/area first. You can hide the keyboard by holding down the Back button.
- Page 40 Settings (Cont.) Text selection - Copy, Share, Find • Press and hold on one of the words you wish to select. The word will highlight in blue and a blue tab will appear at both ends. • Press and drag the blue tabs to highlight the text you wish to select. •...
-
Page 41: System, Camera, Downloaded Files Management
Settings (Cont.) System Date and time Contains options for setting the time zone, date and time. Accessibility Contains settings for easy use of applications and services (if installed). About Displays some information about the device. Camera The camera has photo-taking and video-recording functions. There are two cameras on the phone. -
Page 42: Radio
Settings (Cont.) Radio To use your 4” Smartphone to listen to the radio, first inset the earphones, then tap “FM Radio”. Selectable channel • Tap “OK” to select the icon to scan through the frequency band or fine-tune a channel. Adjust the volume •... -
Page 43: Specifications
Specifications MTK6572M Dual Core 1GHz Android 4.2 Display Diagonal 4” Resolution 480 x 800 WVGA Internal memory Built-in 4GB Touchscreen Capacitive screen (2 points) Battery Built-in 1100mAh (removable) WiFi IEEE 802.11b/g/n single band Bluetooth Version 3.0 with A2DP Dual SIM / Standby 2G / 3G module 2G: GPRS/EDGE, 3G: WCDMA/HSPA Frequency... -
Page 44: Repair And Refurbished Goods Or Parts Notice
4” Dual SIM Smartphone Repair and Refurbished Goods or Parts Notice Unfortunately, from time to time, faulty products are manufactured which need to be returned to the supplier for repair. Please be aware that if your product is capable of retaining user- generated data (such as files stored on a computer hard drive, telephone numbers stored on a mobile telephone, songs stored on a portable media player, games saved on a games console or files stored on a USB...
Need help?
Do you have a question about the ASP4-014 and is the answer not in the manual?
Questions and answers