
Related Manuals for Caltech Calaer 2 kW

Summary of Contents for Caltech Calaer 2 kW
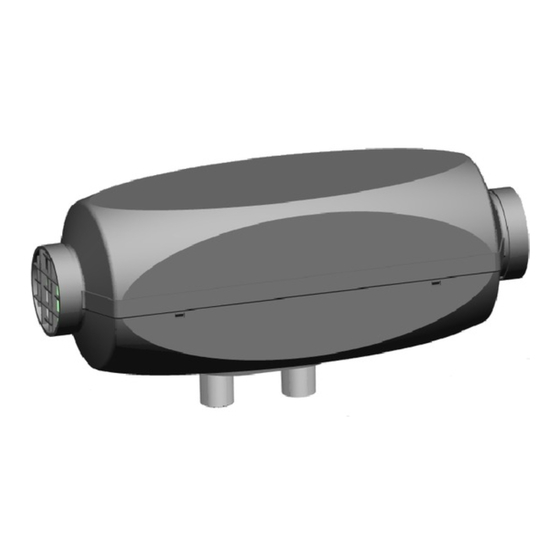
- Page 1 Installation and operating instructions 2 kW Calaer Air Heater 4 kW Calaer Air Heater...
-
Page 2: Table Of Contents
CONTENTS WARNING ....................4 STATUTORY INSTALLATION REGULATIONS ..........5 USE OF THE HEATER (SCOPE) ..............7 INSTALLATION ..................10 .................. 13 NSTALLATION EXAMPLE ....................14 IR SUPPLY ................... 16 OT CABIN AIR OUTLET ............... 16 UEL INTEGRATION AND SUPPLY ..................18 XHAUST YSTEM .................. - Page 3 ....................28 RROR CODES TECHNICAL DATA ..................30 WARRANTY ....................34...
-
Page 4: Warning
Do not insert foreign objects into the heater and moving parts of the heater To repair the heater systems you need to have completed a CalTech Heating Technologies AB training course and you need to have the appropriate technical documentation, special tools and equipment. -
Page 5: Statutory Installation Regulations
The 2 kW and 4 kW Calaer air heaters have been type tested and approved in accordance to the directives ECE R-10 (EMC) and ECE R-122 (Heating) with the following permit numbers: Calaer 2 kW Air Heater E11 122R-00 1689 •... - Page 6 Failure to follow the statutory regulations, installations instructions and the notes contained therein will lead to all liability claims to be refused by CalTech Heating Technologies AB. The same applies if repairs are carried out incorrectly or with the use of parts other than genuine spare parts. This will result in the invalidation of the type approval for the heater and therefore of its homologation/ECE type license.
-
Page 7: Use Of The Heater (Scope)
USE OF THE HEATER (SCOPE) The CalTech Heating Technologies AB air heater is designed to: Heat cabins, boats, trucks, minibuses, vans and motorhomes as • well as to heat cargo onboard vehicles Defrost vehicle windows • All other applications are not allowed, unless explicitly approved in advance by CalTech Heating Technologies AB. - Page 8 Figure 1: Labels with information about the system.
-
Page 10: Installation
INSTALLATION VEHICLE INSTALLATION REQUIREMENTS Subject to paragraph 2.1.2 / 5.3.1.2 combustion heaters shall be installed according to the requirements of this Annex. (Requirements from 2001/56/EG Annex VII 2.1.1 and ECE R122 Part I 5.3.1.1) Vehicles of category O (i.e. trailers including semi-trailers) having liquid fuel heaters are deemed to comply with the requirements of this Annex. - Page 11 The label referred to in paragraph 0 in the following document, or a duplicate, must be positioned so that it can be easily read when the heater is installed in the vehicle. (Requirements from 2001/56/EG Annex VII 2.2.4 and ECE R122 Part I 5.3.2.4) Every reasonable precaution should be taken in positioning the heater to minimize the risk of injury and damage to personal property.
- Page 12 Figure 1b: Dimensions of the 4 kW Calaer Air heater. All dimensions are in mm unless stated otherwise. Figure 2: Required installation positions for diesel heaters. When installed in a vehicle the fuel pump must be installed at a maximum distance of 2 meters from the fuel tank and no more than 6 meters from the heater unit.
-
Page 13: Installation Example
Figure 3: Positioning of fuel system. INSTALLATION EXAMPLE NOTE: It may be required to consult the technical documentation of your vehicle to succeed with the installation of the heater. Refer to the vehicle manufacturer for such documentation. -
Page 14: Air Supply
Figure 4: Typical installation of the heater in a minivan. AIR SUPPLY COMBUSTION AIR INLET The air for the combustion chamber of the heater must not be drawn from the passenger compartment of the vehicle. Combustion air must be taken from outside of the vehicle to guarantee the safety of the passengers. - Page 15 CABIN AIR INLET The heating air supply may be fresh or recirculated air and must be drawn from a clean area not likely to be contaminated by exhaust fumes emitted either by the propulsion engine, the combustion heater or any other vehicle source.
-
Page 16: Hot Cabin Air Outlet
HOT CABIN AIR OUTLET The air outlet ducting is hot when the heater is operated. Any ducting used to route the hot air through the vehicle must be so positioned or protected that no injury or damage could be caused if it were to be touched. (Requirements from 2001/56/EG Annex VII 2.7.1 and ECE R122 Part I 5.3.7.1) The air outlet must be so positioned or guarded that blocking by rubbish or... - Page 17 A notice, e.g. by a sticker, indicating that the heater must be shut down before refueling, must be affixed to the fueling point. In addition a suitable instruction must be included in the manufacturer's operating manual. (Requirements from 2001/56/EG Annex VII 2.3.3 and ECE R122 Part I 5.3.3.3) Figure 5: Fuel filter mounting angles.
-
Page 18: Exhaust System
Figure 7: Tank diver installation. Figure 9: Example of sticker which must be applied near the filler neck. EXHAUST SYSTEM The exhaust outlet must be located so as to prevent emissions from entering the vehicle through ventilators, heated air inlets or opening windows. (Requirements from 2001/56/EG Annex VII 2.4.1 and ECE R122 Part I 5.3.4.1) INSTALLATION... - Page 19 The exhaust pipe must be mounted in such a way that the toxic • exhaust gases cannot enter the combustion air intake, or the cabin air intake. The exhaust gases must always be disposed of outside of the • vehicle. No flammable material is allowed in the vicinity of the exhaust •...
- Page 20 Figure 10: Seal for the mounting bracket. Figure 11: Mounting angle of exhaust muffler.
-
Page 21: Electrical System
ELECTRICAL SYSTEM NOTE: Electrical components, such as switches, fuses, relays, etc., must be installed in a way so that they are protected from the penetration of water (splash water, high-pressure water cleaners etc.) CONNECTION OF CONTROL UNIT TO HEATER The standard control unit consists of a control button with an ‘off’ position and a temperature gradient witch sets the thermostat temperature. - Page 22 WIRING DIAGRAM...
- Page 23 Connector Description Picture AMP282080-1 AMP282104-1 X3, X6 AMP282108-1 X4, X7 AMP282090-1...
- Page 24 DJ7021A-3.5-20 AMP282080-1 AMP282104-1 X10,X11 AMP282105-1 Figure 8: Wiring diagram of the heater and identification of the connectors (valid for installation with the rotary control button).
-
Page 25: Operating Instructions
OPERATING INSTRUCTIONS INITIAL START-UP PROCEDURE After installation and before the heater is run for the first time, the fuel lines and pump have to be filled with fuel. To achieve this, set the control button to the maximum temperature. The heater will operate the fuel pump in the same manner as during a normal start procedure, and fuel will be drawn into the fuel lines. -
Page 26: Emergency Shut Down Procedure
EMERGENCY SHUT DOWN PROCEDURE There is no special manual emergency shutdown procedure. To turn off the heater, switch the control button to the ‘off’ position. The heater will automatically switch off in the event of overheating. CONTROL UNITS There are several supported control units that can be connected to the heater. -
Page 27: Maintenance
If fuel leaks from the heater fuel system, arrange for the damage to be repaired immediately by a CalTech Heating Technologies service partner. When the heater is mounted in a safety housing etc., the installation compartment of the heater is not a stowage compartment and nothing shall be stored or transported on or next to the heater. -
Page 28: Diagnostics And Fault Lock-Outs
DIAGNOSTICS AND FAULT LOCK-OUTS FAULT LOCK-OUT In the event that ignition is not detected within 90 seconds the heater will switch off and retry ignition after 20 seconds. In the event that two sequential failures are detected, the heater will flash the light on the control button to indicate that service is required. - Page 29 Ignition sensor open load 5 long 5 short ▬ ▬ ▬ ▬ ▬ ▪ ▪ ▪ ▪ ▪ Solenoid valve open load or 7 long 5 short shortcut ▬ ▬ ▬ ▬ ▬ ▬ ▬ ▪ ▪ ▪ ▪ ▪ Fan motor open load or 8 long 5 short shortcut...
- Page 30 TECHNICAL DATA TECHNICAL DATA FOR CALTECH HEATING TECHNOLOGIES AB 2 KW CALAER AIR HEATER Except where the limit values are specified, the technical data below refers to the usual heater tolerance of ±10 % at an ambient temperature of +20 ⁰C and at the rated voltage.
- Page 31 Weight (heater 3,1 kg only) Hot air outlet Ø 60 mm in exhaust gas 7,5 % (min power) (normal function range) 10,9 % (max power)
- Page 32 TECHNICAL DATA FOR CALTECH HEATING TECHNOLOGIES AB 4 KW CALAER AIR HEATER Except where the limit values are specified, the technical data below refers to the usual heater tolerance of ±10 % at an ambient temperature of +20 ⁰C and at the rated voltage.
- Page 33 Dimension Length 403 mm Width 150 mm Height 160 mm Weight (heater only) 5,1 kg Hot air outlet Ø 90 mm in exhaust gas 8,3 % (min power) (normal function range) 11,8 % (max power) VERSION The 2 kW and 4 kW Calaer Air heaters are designed for either 12 or 24 V power supply and are to be run on diesel fuel only.
- Page 34 WARRANTY Heaters are backed by a 1-year / 2,000 hour limited warranty. The warranty conditions are as follows: * The replacement of components, whether under warranty or not, during the warranty period does not prolong the original warranty period for the component or product.
- Page 35 CT Heating Technologies AB Skalholtsgatan 2 164 40 Kista Sweden Information in this manual is subject to change without notice, updated on- line manual is available at www.caltechheating.se.
Need help?
Do you have a question about the Calaer 2 kW and is the answer not in the manual?
Questions and answers