Panasonic DMC-G85M Owner's Manual
Lumix
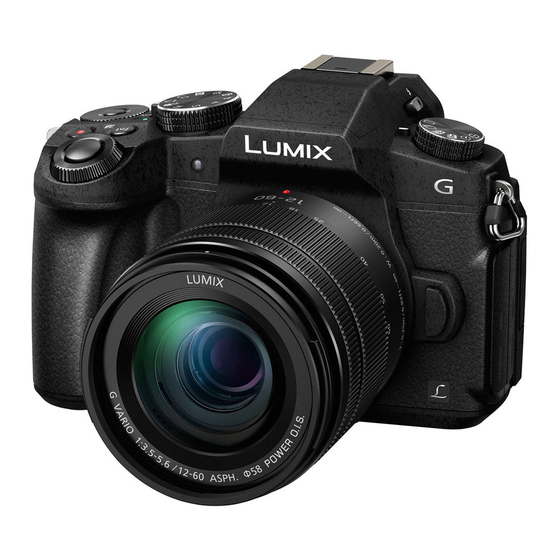
digital camera/lens kit/body
Hide thumbs
Also See for DMC-G85M:
- Operating instructions for advanced features (338 pages) ,
- Basic operating instructions manual (72 pages)
Table of Contents
Advertisement
Please read these instructions carefully before using this product, and
save this manual for future use.
More detailed owner's manual is available in "Owner's Manual for advanced
features (PDF format)". To read it, download it from the website. (P73)
Register online at http://shop.panasonic.com/support
If you have any questions, visit:
USA : http://shop.panasonic.com/support
Canada : www.panasonic.ca/english/support
P
PP
Basic Owner's Manual
DMC-G85M
Model No.
Digital Camera/
Lens Kit/Body
DMC-G85
(U.S. customers only)
DVQX1003ZA
F0816HN0
Advertisement
Table of Contents

Subscribe to Our Youtube Channel
Related Manuals for Panasonic DMC-G85M


Summary of Contents for Panasonic DMC-G85M
- Page 1 More detailed owner's manual is available in “Owner’s Manual for advanced features (PDF format)”. To read it, download it from the website. (P73) Register online at http://shop.panasonic.com/support (U.S. customers only) If you have any questions, visit: USA : http://shop.panasonic.com/support...
-
Page 2: Information For Your Safety
Dear Customer, Thank you for choosing Panasonic! You have purchased one of the most sophisticated and reliable products on the market today. Used properly, we’re sure it will bring you and your family years of enjoyment. Please take time to fill in the information below. The serial number is on the tag located on the underside of your camera. - Page 3 Declaration of Conformity Trade Name: Panasonic Model No.: DMC-G85 Responsible Party: Panasonic Corporation of North America Two Riverfront Plaza, Newark, NJ 07102-5490 Support Contact: http://shop.panasonic.com/support DMC-G85 (ENG) DVQX1003...
- Page 4 THE FOLLOWING APPLIES ONLY IN THE U.S.A. Certification and Compliance See Camera for the certification and compliance mark specific to that device. Select [Wi-Fi] in the [Setup] menu. Select [Wi-Fi Setup] in the [Wi-Fi] menu. Press to select [Approved Regulations], and press [MENU/SET]. Contains FCC ID: VPYLBXN604 This transmitter must not be co-located or operated in conjunction with any other antenna or transmitter.
-
Page 5: Battery Charger
∫ About the battery pack CAUTION Battery pack (Lithium ion battery pack) • Use the specified unit to recharge the battery pack. • Do not use the battery pack with equipment other than the specified unit. • Do not get dirt, sand, liquids, or other foreign matter on the terminals. •... - Page 6 “High Speed HDMI micro cable” (Type D– Type A plug, up to 2 m (6.6 feet) long) • Always use a genuine Panasonic shutter remote control (DMW-RSL1: optional). Keep this unit as far away as possible from electromagnetic equipment (such as microwave ovens, TVs, video games etc.).
- Page 7 • Before cleaning the camera, remove the battery or the DC coupler (DMW-DCC8: optional), or disconnect the power plug from the outlet. • Do not press the monitor with excessive force. • Do not press the lens with excessive force. •...
-
Page 8: Table Of Contents
Contents Playback Information for Your Safety .....2 Playing Back Pictures ......43 Playing Back Motion Pictures ....43 Preparation/Basic Deleting Pictures........44 Care of the camera .........9 Menu Standard Accessories ......10 About cards that can be used with this unit ..........11 Menu list.......... -
Page 9: Preparation/Basic
• To view the latest information on the firmware or to download the firmware, visit the support site below: http://panasonic.jp/support/global/cs/dsc/ (This Site is English only.) • To check the firmware version of the interchangeable lens, attach it to the camera body and select [Version Disp.] in the [Setup] menu. -
Page 10: Standard Accessories
• Description in this owner’s manual is based on the interchangeable lens (H-FS12060). (For U.S.A. only) • If accessories are lost, customers can visit us at http://shop.panasonic.com/support for further information about obtaining replacement parts. (For Canada only) • If any accessories are lost, customers in Canada should visit our support page at www.panasonic.ca/english/support for further information about obtaining replacement parts. -
Page 11: About Cards That Can Be Used With This Unit
(512 MB to 2 GB) • Operation of the cards on the left has been confirmed with SDHC Memory Card Panasonic’s cards. (4 GB to 32 GB) SDXC Memory Card (48 GB to 128 GB) ∫ About motion picture/4K photo recording and speed class ratings Use a card that meets the following ratings of the SD Speed Class or UHS Speed Class. -
Page 12: Quick Start Guide
Preparation/Basic “Quick Start Guide” Quick Start Guide • Check that the camera is turned off. Attaching the Shoulder Strap • We recommend attaching the shoulder strap when using the camera to prevent it from dropping. • Perform steps 1 to 8 and then attach the other side of the shoulder strap. •... - Page 13 The charging time for the battery in hot/cold environments or a battery that has not been used for a long time may be longer than normal. Inserting the Battery • Always use genuine Panasonic batteries (DMW-BLC12PP). • If you use other batteries, we cannot guarantee the quality of this product. •...
- Page 14 Preparation/Basic “Quick Start Guide” Attaching/Removing the Lens • Change lenses where there is not a lot of dirt or dust. • Do not press the lens release button A when you attach a lens. ∫ Detaching the lens Attach the lens cap. While pressing on the lens release button B, rotate the lens toward the arrow until it stops and then remove.
- Page 15 Preparation/Basic “Quick Start Guide” Setting Date/Time (Clock Set) • The clock is not set when the camera is shipped. Turn the camera on. • When the camera is turned on, the status indicator 1 lights up green. Press [MENU/SET]. Press 3/4 to select the language, and press [MENU/ SET].
- Page 16 Preparation/Basic “Quick Start Guide” Formatting the card (initialization) Format the card before recording a picture with this unit. Since data cannot be recovered after formatting, make sure to back up necessary data in advance. > [Setup] > [Format] MENU Set the mode dial to [ Set the mode dial to [¦].
- Page 17 Preparation/Basic “Quick Start Guide” Press the shutter button halfway to focus. A Aperture value B Shutter speed C Focus indication • Aperture value and shutter speed are displayed. (It will flash in red if the correct exposure is not achieved, except when set to flash.) •...
-
Page 18: Names And Functions Of Components
Preparation/Basic Names and Functions of Components ∫ Camera body 24 23 Stereo microphone Focus distance reference mark • Be careful not to cover the microphone with Status indicator (P15)/ your finger. Doing so may make sound ® Wi-Fi connection lamp (P52) difficult to record. - Page 19 Panasonic DC coupler (DMW-DCC8: optional) and AC adaptor (DMW-AC10PP: Viewfinder (P23) optional) are used. • Eye sensor (P23) Always use a genuine Panasonic AC adaptor (DMW-AC10PP: optional). Eyecup • When using an AC adaptor, use the AC [Q.MENU] button (P25)/[Fn2] button (P25) cable supplied with the AC adaptor.
- Page 20 Preparation/Basic ∫ Lens H-FS12060 Wide Lens surface Contact point Tele Lens mount rubber Focus ring (P28) Lens fitting mark (P14) Zoom ring ∫ Removing the Hot Shoe Cover The camera comes with a hot shoe cover attached to the hot shoe. Remove the hot shoe cover by pulling it in the direction indicated by arrow 2 while pressing it in the direction indicated by arrow 1 .
-
Page 21: Basic Operations
Preparation/Basic Basic Operations Cursor buttons/[MENU/SET] button Pressing the cursor button: Selection of items or setting of values etc., is performed. Pressing [MENU/SET]: Confirmation of setting contents, etc., is performed. • This owner’s manual expresses the up, down, left, and right of the cursor button as 3/4/2/1. - Page 22 Preparation/Basic Mode dial (Selecting a Recording Mode) Select the mode by rotating the mode dial. • Rotate the mode dial slowly to select the desired mode. Intelligent Auto Mode (P26) Intelligent Auto Plus Mode (P26) Program AE Mode Records at the aperture value and shutter speed set by the camera. Aperture-Priority AE Mode The shutter speed is automatically determined by the aperture value you set.
- Page 23 Preparation/Basic [LVF] button (Switching the Monitor/Viewfinder) Press [LVF] to switch between the Monitor and Viewfinder. A [LVF] button B Eye sensor Press [LVF]. • The monitor/viewfinder will switch as follows: Automatic viewfinder/ ¢ Viewfinder display Monitor display ¢ monitor switching ¢...
-
Page 24: Setting Menu Items
Preparation/Basic ∫ Pinch (enlarge/reduce) 2.0X 2.0X 2.0X 2.0X Pinch the touch screen apart (enlarge) or together (reduce) with two fingers. Setting menu items Press [MENU/SET]. Press 3/4 of the cursor button to select the menu item and press [MENU/SET]. Press 3/4 of the cursor button to select the setting and press [MENU/SET]. -
Page 25: Calling Frequently-Used Menus Instantly (Quick Menu)
Preparation/Basic Calling frequently-used menus instantly (Quick Menu) By using the Quick Menu, some of the menu settings can be easily found. Press [Q.MENU] to display the Quick Menu. Rotate the front dial to select the menu item. 60 p Rotate the rear dial to select the setting. Press [Q.MENU] to exit the menu once the setting is complete. -
Page 26: Recording
Recording Taking Pictures using the Automatic Function (Intelligent Auto Mode) Recording Mode: In this mode, the camera makes the optimal settings for the subject and scene, so we recommend it when you wish to leave the settings to the camera and record without thinking about them. - Page 27 Recording Taking a picture with a blurred background (Defocus Control) Recording Mode: Press [Fn4] to display the setting screen. Set the blurriness by rotating the rear dial. • If you press [MENU/SET], you can return to the recording screen. • Pressing [Fn4] on the blurriness setting screen will cancel the setting.
-
Page 28: Adjusting Focus Manually
Recording Adjusting Focus Manually Applicable modes: Use this function when you want to fix the focus or when the distance between the lens and the subject is determined and you do not want to activate Auto Focus. When using an interchangeable lens (H-FS12060) with a focus ring Rotate to A side: Focuses on nearby subject... -
Page 29: Select A Drive Mode
Recording Select a Drive Mode Applicable modes: You can change what the camera will do when you press the shutter button. Rotating the drive mode dial. When the shutter button is pressed, only one picture is [Single] recorded. Recordings are made in succession while the shutter button [Burst] is pressed. -
Page 30: Recording 4K Photos
Recording Recording 4K Photos Applicable modes: You can select the desired moment from a burst of pictures taken at 30 frames/second and save that moment as a picture of 8 million pixels (approx.). 1 Record a 4K photo. 2 Select and save pictures. 3 The picture is complete. •... - Page 31 Recording ¢ 4K burst file will be recorded and played back in separate files in the following cases. (You can continue recording without interruption.) – When using an SDHC memory card: If the file exceeds 4 GB – When using an SDXC memory card: If the continuous recording time exceeds 3 hours and 4 minutes or If the file exceeds 96 GB Press the shutter button halfway to exit the menu.
-
Page 32: Controlling Focus After Recording (Post Focus/Focus Stacking)
Recording Controlling Focus After Recording (Post Focus/Focus Stacking) Applicable modes: The camera can perform Burst recording in the same picture quality as 4K photo recording while automatically shifting the focus to different areas. After the recording, you can select the desired area on the screen and save a picture in which the selected area is in focus. You can also merge multiple pictures with different focus areas to widen the focus range. - Page 33 Recording Selecting the desired focus area and saving a picture Select an image with the [ ] icon on the playback screen, and press 3. Touch the desired focus area. • If a picture that is in focus is not available for the selected area, a red frame will be displayed.
- Page 34 Recording (When [Range Merging] is selected) Touch the desired focus area. • Specify at least two areas. • In-focus areas between the two areas will also be selected, and the combined in-focus area will be indicated. • Gray areas indicate areas that may, if selected, cause the merged picture to look unnatural and areas that cannot be selected.
-
Page 35: Taking Pictures While Adjusting A Setting Automatically (Bracket Recording)
Recording Taking Pictures While Adjusting a Setting Automatically (Bracket Recording) Applicable modes: You can take multiple pictures while automatically adjusting a setting by pressing the shutter button. Select the menu. (P24) > [Rec] > [Bracket] > [Bracket Type] MENU Press the shutter button to perform recording while (Exposure Bracket) adjusting the exposure. - Page 36 Recording Exposure Bracket ∫ About [More settings] (step in P35) Sets the number of pictures to be taken and the exposure compensation range. [Step] [3 ・ 1/3] (Takes three pictures with an interval of 1/3 EV) to [7 ・ 1] (Takes seven pictures with an interval of 1 EV) [Sequence] Sets the order in which pictures are taken.
-
Page 37: Image Stabilizer
The image stabilizers to be activated differ depending on your lens. The icon for the currently activated image stabilizer is displayed on the recording screen. When recording When taking pictures motion pictures Panasonic lenses compatible with Dual I.S. Mode (Based on the Micro Four Thirds System Lens + Body standard) Lens + Body (Dual I.S.) (... - Page 38 Recording Applicable modes: • When using an interchangeable lens with O.I.S. switch, stabilizer function is activated if the O.I.S. switch of the lens is set to [ON]. ([ ] is set at the time of purchase) Select the menu. (P24) >...
-
Page 39: Recording Motion Picture/4K Motion Picture
Recording Recording Motion Picture/4K Motion Picture Applicable modes: This camera can record full high definition motion pictures compatible with the AVCHD format or motion pictures recorded in MP4. In addition, the camera can record 4K motion pictures in MP4. Audio will be recorded in stereo. Start recording by pressing the motion picture button. - Page 40 Recording ∫ Setting the format, size and recording frame rate > [Motion Picture] > [Rec Format] MENU [AVCHD] This data format is suitable for when playing back on a high-definition TV, etc. [MP4] This data format is suitable for when playing back on a PC, etc. >...
-
Page 41: Recording Motion Pictures With 4K Live Cropping
Recording Recording Motion Pictures with 4K Live Cropping Recording Mode: By cropping your motion picture down from the 4K angle of view to Full High Definition, you can record a motion picture that pans and zooms in/out while leaving the camera in a fixed position. - Page 42 Recording Button operation Touch operation Description of operation Touching Moves the frame. 3/4/2/1 Pinching out/in Enlarges/reduces the frame. Returns the position of the frame to the center [DISP.] [Reset] and its size to the default setting. [MENU/SET] [Set] Decides the position and size of the frame. Repeat step 3, and then set the cropping end frame.
-
Page 43: Playing Back Pictures
Playback Playing Back Pictures Press [(]. Press 2/1. 2: Play back the previous picture 1: Play back the next picture Sending an image to a web service If you press 4 when displaying images one by one, you can easily send an image to a web service. -
Page 44: Deleting Pictures
Playback Deleting Pictures Once deleted, pictures cannot be recovered. ∫ To delete a single picture In Playback Mode, select the picture to delete and then press [ ]. • The same operation can be performed by touching Press 3 to select [Delete Single] and then press [MENU/SET]. -
Page 45: Menu
Menu Menu list To display explanations of the menu items. When [Menu Information] in the [Setup] menu is set to [ON], explanations of the menu items and settings are displayed on the menu screen. A Explanations of the menu • [Photo Style], [Filter Settings], [AFS/AFF], [Metering Mode], [Highlight Shadow], [i.Dynamic], [i.Resolution], [Diffraction Compensation], [Digital Zoom] and [Stabilizer] are common to both the [Rec] menu and [Motion Picture] menu. - Page 46 Menu [Custom] Operation of the unit, such as displaying of the screen and button operations, can be set up according to your preferences. [Cust.Set Mem.] [MF Assist] [Rec Area] [Silent Mode] [MF Assist Display] [Remaining Disp.] [AF/AE Lock] [MF Guide] [Auto Review] [AF/AE Lock Hold] [Peaking]...
- Page 47 Menu [Aspect Ratio] Applicable modes: This allows you to select the aspect ratio of the pictures to suit printing or the playback method. > [Rec] > [Aspect Ratio] MENU [4:3] [Aspect Ratio] of a 4:3 TV [3:2] [Aspect Ratio] of a 35 mm film camera [16:9] [Aspect Ratio] of a high-definition TV, etc.
- Page 48 Menu [Quality] Applicable modes: Set the compression rate at which the pictures are to be stored. > [Rec] > [Quality] MENU Settings File format Description of settings A JPEG image in which image quality was given priority. A standard image quality JPEG image. JPEG [›] This is useful for increasing the number of shots without...
- Page 49 Menu Press [MENU/SET] and set. Press [MENU/SET]. • This operation returns you to the screen in step . To set other items, repeat steps through Select [Begin Processing] with 3/4, and then press [MENU/SET]. ∫ How to set each item Button Touch Description of operation...
- Page 50 Menu [Setup] setting When you select an item, the screen that asks you to select [Reinstate Adjustments], [Color Space], or [Picture Size] will be displayed. 1 Press 3/4 to select an item, and press [MENU/SET]. • If you select [Reinstate Adjustments], a confirmation screen will be displayed. Selecting [Yes] will execute the operation and return you to the item selection screen.
- Page 51 Menu [Composite Merging] setting Select the frames you want to combine to superimpose brighter parts. 1 Select the frames. 2 Press [MENU/SET]. The selected frames are remembered, and the display goes to the preview screen. Press 3/4 to select items and press [MENU/SET] to perform the following operations.
-
Page 52: Wi-Fi
Wi-Fi What you can do with the Wi-Fi function • The camera cannot be used to connect to a public wireless LAN connection. Controlling with a Smartphone/Tablet (P53) • Recording with a smartphone (P55) • Playing back images in the camera (P55) •... -
Page 53: Controlling With A Smartphone/Tablet
Wi-Fi Controlling with a Smartphone/Tablet Installing the smartphone/tablet app “Image App” The “Panasonic Image App” (hereafter “Image App”) is an application provided by Panasonic. • App for Android Android 4.0 or higher App for iOS: iOS 7.0 or higher Connect the smartphone to a network. - Page 54 Wi-Fi Connecting to a smartphone/tablet Connecting without using the password You can easily set up a direct connection to your smartphone without entering a password. On the camera Select the menu. (P24) > [Setup] > [Wi-Fi] > [Wi-Fi Function] > MENU [New Connection] >...
- Page 55 Wi-Fi Taking images via a smartphone/tablet (remote recording) Connect to a smartphone. (P54) Operate the smartphone. 1 Select [ 2 Record an image. • The recorded images are saved in the camera. • Some settings are not available. Playing back images in the camera Connect to a smartphone.
- Page 56 Wi-Fi Adding location information to images stored in the camera from a smartphone/tablet You can send location information acquired with a smartphone to the camera. After sending the information, you can also write it on images stored in the camera. 1 Start recording location ...
-
Page 57: Others
DVD, processing and correcting images, and editing motion pictures. Check the site below to download and install the software. Download the software while it is available for download. http://panasonic.jp/support/global/cs/soft/download/d_pfs99pe.html (This Site is English only.) • Download expiration: September 2021 •... -
Page 58: Monitor Display/Viewfinder Display
Others Monitor Display/Viewfinder Display • The following images are examples of when the display screen is set to [ ] (monitor style) in the monitor. In recording 60 p × × MINI MINI MINI MINI SNAP SNAP SNAP ... - Page 59 Others Quality (P48) AF area A › Focus Mode AFS AFF AFC MF Spot metering target Focus Bracket (P36) Center marker display Self-timer Post Focus (P32) AF Mode š Mic level display Ø Mic Level Limiter (OFF) Pull Focus Silent Mode Face Recognition External Microphone AF Lock...
- Page 60 Others Touch tab Touch zoom Touch Shutter × Touch AE Peaking Function button (P25) Fn10 SNAP Color (P27) Defocus control function (P27) Brightness (P27) Type of defocus ([Miniature Effect]) One point color Position of the light source Image effect (filter) adjustment Image effect ON/OFF Image effect (filter) MINI...
- Page 61 Others In recording On-monitor recording information 1/60 Single Burst AUTO 4K Photo (P30) Self-timer Wi-Fi Focus Mode AFS AFF AFC MF AF Mode š Ø Quality (P48) › Recording Mode (P22) Picture size/Aspect Ratio (P47) EXPS EXPS Wi-Fi Wi-Fi (P52)
-
Page 62: Troubleshooting
Others Troubleshooting First, try out the following procedures. If the problem is not resolved, it may be improved by selecting [Reset] on the [Setup] menu. • Please also refer to the “Owner’s Manual for advanced features (PDF format)”, which describes more detailed information. - Page 63 Others Striping or flicker may appear under lighting such as fluorescent lighting and LED lighting fixture. • This is characteristic of MOS sensors which serve as the camera’s pickup sensors. This is not a malfunction. • When using the electronic shutter, lowering the shutter speed may reduce the effect of the horizontal stripes.
- Page 64 Others The flash is not activated. • When the electronic shutter is used, the flash is not activated. • When [Silent Mode] is set to [ON], the flash is not activated. The picture is not played back. There are no recorded pictures. •...
- Page 65 Others When I try to set up a Wi-Fi connection with a Windows 8 PC, my user name and password are not recognized, so I cannot connect to the PC. • Some OS versions, including Windows 8, use two types of accounts: a local account and a Microsoft account.
-
Page 66: Specifications
Others Specifications Specifications are subject to change without notice. Digital Camera Body (DMC-G85): Information for your safety Power Source: DC 8.4 V ( 8.4 V) Power Consumption: 2.8 W (When recording with Monitor) [When the Interchangeable lens (H-FS12060) is used] 2.3 W (When playing back with Monitor) [When the Interchangeable lens (H-FS12060) is used] Camera effective pixels... - Page 67 Number of recordable When there are RAW files: 45 or higher pictures pictures When there are no RAW files: 300 or higher pictures ¢ When recording is performed under the test conditions specified by Panasonic ¢ ISO sensitivity AUTO/ /100...
- Page 68 Others Light metering system, 1728-zone multi-pattern sensing system, Light metering mode Multiple/Center weighted/Spot Monitor 3.0q TFT LCD (3:2) (Approx. 1,040,000 dots) (field of view ratio about 100%) Touch screen Viewfinder OLED Live Viewfinder (4:3) (Approx. 2,360,000 dots) (field of view ratio about 100%) [Magnification approx.
- Page 69 Others Recording quality Motion pictures [AVCHD] 1920k1080 (FHD/60p: 28 Mbps), 60p recording/ 1920k1080 (FHD/60i: 17 Mbps), 60i recording/ ¢ 1920k1080 (FHD/30p: 24 Mbps), 60i recording 1920k1080 (FHD/24p: 24 Mbps), 24p recording ¢ Sensor output is 30 frames/sec. [MP4] 3840k2160 (4K/30p: 100 Mbps)/ 3840k2160 (4K/24p: 100 Mbps)/ 1920k1080 (FHD/60p: 28 Mbps)/ 1920k1080 (FHD/30p: 20 Mbps)/...
- Page 70 110 V–240 V 50/60 Hz 0.2 A Output: 8.4 V 0.65 A Equipment mobility: Movable Battery Pack (lithium-ion) (Panasonic DMW-BLC12PP): Information for your safety Voltage/capacity: 7.2 V/1200 mAh The symbols on this product (including the accessories) represent the following: Class II equipment (The construction of the product is double-insulated.)
- Page 71 Others Interchangeable Lens H-FS12060 “LUMIX G VARIO 12 – 60 mm/F3.5 –5.6 ASPH./POWER O.I.S.” Focal length f=12 mm to 60 mm (35 mm film camera equivalent: 24 mm to 120 mm) Aperture type 7 diaphragm blades/circular aperture diaphragm Maximum aperture F3.5 (Wide) to F5.6 (Tele) Minimum aperture value F22 Lens construction...
-
Page 72: Digital Camera Accessory System
DMW-TA1 Mount Adaptor DMW-MA1, DMW-MA2M, DMW-MA3R ¢1 The AC Adaptor (optional) can only be used with the designated Panasonic DC Coupler (optional). The AC adaptor (optional) cannot be used by itself. ¢2 Supplied with a battery pack (DMW-BLC12). ¢3 Use if the attached lens is in contact with the tripod pedestal. -
Page 73: Reading The Owner's Manual (Pdf Format)
Reading the Owner’s Manual (PDF format) More detailed owner’s manual is available in “Owner’s Manual for advanced features (PDF format)”. To read it, download it from the website. http://panasonic.jp/support/dsc/oi/index.html?model=DMC-G85&dest=P • Click the desired language. ∫ To check the URL and QR code on the camera Select the menu. -
Page 74: Limited Warranty (Only For U.s.a.)
If your product does not work properly because of a defect in materials or workmanship, Panasonic Corporation of North America (referred to as “the warrantor”) will, for the length of the period indicated on the chart below, which starts with the date of original purchase (“warranty period”), at its option either (a) repair your product with new or refurbished... - Page 75 If a problem with this product develops during or after the warranty period, you may contact your dealer or Service Center. If the problem is not handled to your satisfaction, then write to: Consumer Affairs Department Panasonic Corporation of North America 661 Independence Pkwy Chesapeake, VA 23320...
- Page 76 Others PARTS AND SERVICE, WHICH ARE NOT COVERED BY THIS LIMITED WARRANTY, ARE YOUR RESPONSIBILITY. As of July 2015 DVQX1003 (ENG)
-
Page 77: Limited Warranty (Only For Canada)
This warranty is given only to the original purchaser, or the person for whom it was purchased as a gift, of a Panasonic brand product mentioned above sold by an authorized Panasonic dealer in Canada and purchased and used in Canada, which product was not sold “as is”, and which product was delivered to you in new condition in the original... - Page 78 DOES NOT COVER normal wear and tear or cosmetic damage. The warranty ALSO DOES NOT COVER damages which occurred in shipment, or failures which are caused by products not supplied by Panasonic Canada Inc., or failures which result from accidents, misuse, abuse, neglect, mishandling, misapplication, alteration, faulty...
- Page 79 This product incorporates the following software: (1) the software developed independently by or for Panasonic Corporation, (2) the software owned by third party and licensed to Panasonic Corporation, and/or (3) open source software The software categorized as (3) is distributed in the hope that it will be useful, but WITHOUT ANY WARRANTY, without even the implied warranty of MERCHANTABILITY or FITNESS FOR A PARTICULAR PURPOSE.
- Page 80 AVC Video. No license is granted or shall be implied for any other use. Additional information may be obtained from MPEG LA, L.L.C. See http://www.mpegla.com Panasonic Corporation of North America Two Riverfront Plaza, Newark, NJ 07102-5490 http://shop.panasonic.com Panasonic Canada Inc.
Need help?
Do you have a question about the DMC-G85M and is the answer not in the manual?
Questions and answers