
Related Manuals for nilan VP 18 EK


Summary of Contents for nilan VP 18 EK
- Page 1 Installation instruction CTS 602 by Nilan VP 18 EK Version: 10.00, 13-04-2015 Software-version: 2.30...
-
Page 2: Table Of Contents
Accessories/spare parts ....................... 30 Figure table Figure 1: CTS 602 control ....................... 4 Figure 2: Sketch of VP 18 EK ......................6 Figure 5: Connection ........................8 Figure 6: Insulation of ducting ......................9 Figure 4: CTS 602 control ......................10 Figure 5: Headlines in the service menu .................. -
Page 3: Introduction
VP 18 EK is a ventilation unit with heat recovery. The unit can yield up to 325m /h at 100Pa exter- nal back pressure. The energy in the exhaust air is being transferred to a 180L hot-water tank via a heat pump. -
Page 4: Power Supply
Power supply including safety switch must be installed by an authorized electrician. The VP 18 EK -unit must be connected according to the attached electrical chart. The unit is delivered with 1m test cable for the CTS 602 panel. The panel should be connected to the CTS 602 control in the unit with cable type 2x2x0.25mm... -
Page 5: Assembly Of Vp 18 Ek
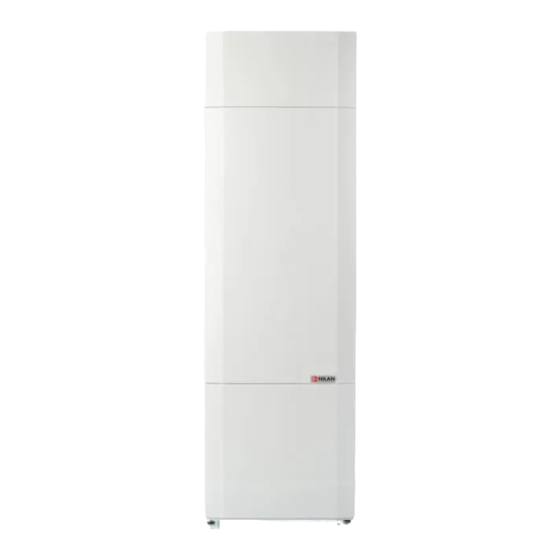
Assembly of VP 18 EK When mounting the VP 18 EK -unit future service and maintenance should be consid- ered. There is required a minimum of open space in front of the unit of 600mm measured from the front of the unit. - Page 6 Figure 2: Sketch of VP 18 EK Side 6 af 30 Ret til ændringer forbeholdes...
-
Page 7: Condensation Drain / Water Seal
Condensation drain / water seal The VP 18 EK unit is delivered with a 20mm condensation drain. (PVC, GF-fittings). The unit in- cludes a water seal. The condensation drain should be carried with an even inclination of at least 1cm per metre, frost-proof to the nearest outlet. -
Page 8: Hws
In order to prevent icing-up, it may be necessary to supply the condense outlet inside the building envelope with a heating cable. It is the installation contractor’s responsibility to frost protect the condense outlet. The hot-water tank is enamelled inside and equipped with a magnesium sacrificial anode. All branches have a ¾”... -
Page 9: Ducting
Ducting We recommend that there are used ducts and fittings with rubber packing that meet sealing class B and that the connections between the unit and the ducting are made with 1 metre sound absorb- ing flexible transitions as regards sound reduction. The ducts should be shortened with a hacksaw or an angle grinder and laid out according to the working drawing. -
Page 10: Starting And Set Up Of The Cts 602 Control
Starting and set up of the CTS 602 control Starting Before starting the VP 18 EK please check all connections. Also check that the hot-water tank is filled with water. This is done by opening the hot-water tap. Set up of the CTS 602 control In this passage we will go through the service menu of the CTS 602 control. -
Page 11: Activating The Service Menu
Activating the service menu Press q and ENTER at the same time for 10 seconds. The service menu is now available. Press q multiple times until the panel shows SERVICE. Press ENTER to enter the service menu. It is now possible to move around in the menu by using pq. ENTER CENTRAL SERVICE... -
Page 12: Central Heating
Central heating ” ” indicates that the menu point flashes and can be set to another value ENTER SERVICE ENTER CENTRAL ENTER SELECT SELECT ”ON” HEATING SELECT HOTWATER ENTER INTEGRAL ”OFF” TIME 10 The time can be ENTER SELECT adjusted from 0-25 RELAY 3 QUALITY minutes... -
Page 13: Hotwater
Hotwater The ”Hotwater” menu enables you to select the electrical heating element in the main menu. When the heating element is set on ”on” there will appear a ”w” in the upper right corner of the panel in the main menu when the heating element is in use. ”... -
Page 14: Air Quality
Air quality In the ”Air quality” menu it is possible to choose between 3 types of regulation: Humidity, Humidity + CO or OFF. On the CTS602 control panel, press: - ESC to return to the previous menu - qp to scroll upwards or downwards through the menus or to adjust the setting of an activated menu option - ENTER to activate a menu option - ENTER to confirm a menu option setting... -
Page 15: Air Exchange
Air exchange In the ”Air exchange” menu it is possible to adjust 4 steps of ventilation speed (air volume). Inlet and exhaust is to be adjusted individually at each level. The inlet speed can be adjusted to a minimum and the exhaust can be adjusted to both a maxi- mum and a minimum. -
Page 16: Defrost
Defrost In the ”Defrost” menu it is possible to chose how the unit should perform during defrosting of the evaporator in the exhaust. ” ” indicates that the menu point flashes and can be set to another value Use of the CTS602 panel: - press ESC to go one step back in the menu - press qp... -
Page 17: Temp. Control
Temp. control In the ”Temp. control” menu it is possible to chose a room temperature where the unit stops in order to avoid further cooling of the building if the primary heating shuts down. ” ” indicates that the menu point flashes and can be set to another value Use of the CTS602 panel: - press ESC to go one step back in the menu... -
Page 18: Inlet Control
Inlet control In the ”Inlet control” menu it is possible to adjust the period of time before restart of the compres- sor. ” ” indicates that the menu point flashes and can be set to another value The ”Inlet control” menu should only be adjusted by persons with knowledge of control engineering. -
Page 19: Room Control
Room control In the ”Room control” menu it is possible to adjust the regulator for controlling the room tempera- ture. ” ” indicates that the menu point flashes and can be set to another value The ”Room control” menu should only be adjusted by persons with knowledge of control engineering. -
Page 20: Restart
Restart The ”Restart” menu enables you to set the unit to automatically restart in connection with high- pressure/low-pressure alarms. Fire alarms can be acknowledged automatically in connection with fire drills/testing. A condition for acknowledgement is that the fire thermostat input has returned to normal state. ”... -
Page 21: Preset
Preset ” ” indicates that the menu point flashes and can be set to another value Use of the CTS602 panel: - press ESC to go one step back in the menu - press qp to move up or down in a menu or to adjust an activated menu - press ENTER to activate a menu... -
Page 22: Manual
Manual In the ”Manual” menu it is possible to test the functions of the unit manually. ” ” indicates that the menu point flashes and can be set to another value Use of the CTS602 panel: - press ESC to go one step back in the menu - press qp to move up or down in a menu or to adjust an activated menu... -
Page 23: Modbus
Modbus ENTER SERVICE CENTRAL HEATING HOTWATER QUALITY EXCHANGE DEFROST TEMP. CONTROL INLET CONTROL ROOM CONTROL RESTART PRESET MANUAL Modbus Communication MODBUS [1..247] DATALOG INTV Figure 17: The "Modbus" menu Side 23 af 30 Ret til ændringer forbeholdes... -
Page 24: Datalog
Datalog The datalog interval is set via the menu SERVICE - DATALOG INTV at between 1 and 120 minutes. If 0 / OFF is selected, logging is not periodical, but only on events and alarms. Temperatures are logged in Celsius, in whole degrees, in order to minimise the log file size. ... -
Page 25: Faultfinding
The ventilators can be set on a higher speed if necessary. Any draught controls to the outside should be closed at outside temperatures below 6°C. VP 18 EK is functioning but there is no hot water. Please check if the hot water tank is emptied. If the unit is supplied with hot-water circula- tion and the pipes are not insulated there can be a significant heat-loss which can cause a reduced output of the VP 18 EK. -
Page 26: Maintenance
The filter guard in the CTS 602 control can be used in order to make sure that the filters are checked. Please see user manual CTS 602 directions for further information. (delivered to- gether with the VP 18 EK). Figure 19: Filtershift Changing filters: 1. - Page 27 Once a year: The sacrificial anode should be inspected and renewed if it is much corroded. The hot- water tank can corrode if the anode is left unchanged. (No. 24) The intake should be inspected and any uncleanness should be removed. The evaporator should be inspected and cleaned.
- Page 28 Replacing the fan: Side 28 af 30 Ret til ændringer forbeholdes...
-
Page 29: Energy Saving
Please see CTS 602 directions The ventilation speed should not be set higher than necessary. Avoid hot-water circulation. Spread out the bathing times as the VP 18 EK Combi needs 6-7 hours to heat the 180L wa- ter. Insulate the ducting as prescribed. -
Page 30: Accessories/Spare Parts
Accessories/spare parts Plumbing-security group inclusive a mixing valve with a scald protector. Item number: 3690. This is statutory safety equipment that needs to be attached to the hot-water tank. It is re- quired that the user tests the function at least once a year. To do this, the user has to pull the handle which should lead to the outflow of water from the Overflow pipe.
Need help?
Do you have a question about the VP 18 EK and is the answer not in the manual?
Questions and answers