Table of Contents
Advertisement
Quick Links
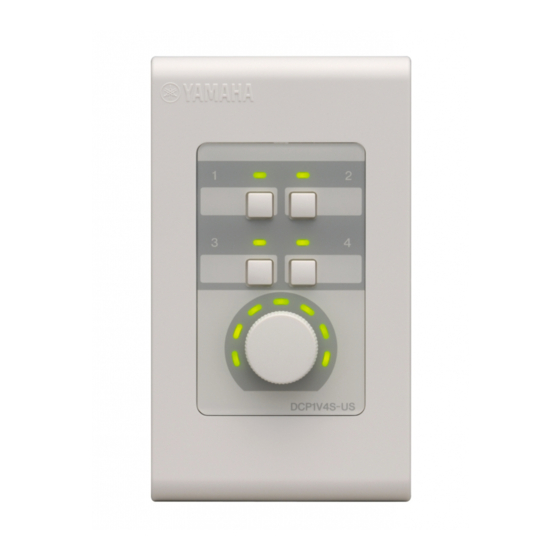
DIGITAL CONTROL PANEL
DCP1V4S-US/DCP1V4S-EU
Owner's Manual
Thank you for choosing the Yamaha DCP1V4S-US/EU Digital Control Panel. Refer to
the Owner's Manual for the host device for operational details.
Bedienungsanleitung
Vielen Dank, dass Sie sich für das Digitales Bedienfeld DCP1V4S-EU entschieden
haben. Einzelheiten zur Bedienung entnehmen Sie bitte der Bedienungsanleitung des
Host-Geräts.
Mode d'emploi
Merci d'avoir choisi le Télécommande numérique DCP1V4S-US/EU. Reportez-vous au
mode d'emploi de l'appareil hôte pour en savoir plus.
Manual de instrucciones
Muchas gracias por la adquisición del Panel de Control Digital DCP1V4S-US/EU
Yamaha. Para ver los detalles sobre el funcionamiento, consulte el manual de
instrucciones del equipo principal.
Manuale dell'utente
Grazie per aver scelto il Pannello di controllo digitale Yamaha DCP1V4S-EU. Per i
dettagli sull'impiego, fare riferimento al manuale dell'utente del dispositivo ospitante.
Руководство пользователя
Благодарим Вас за выбор Цифровая панель управления Yamaha DCP1V4S-US/
EU. См. руководство пользователя хост-устройства для получения подробной
информации об управлении.
使用说明书
感谢您选购Yamaha DCP1V4S-US/EU数字控制面板。如需了解具体的操作细则,请参阅
主设备的用户手册。
取扱説明書
このたびはデジタルコントロールパネルDCP1V4S-USをお買い上げいただきまして、まこと
にありがとうございます。お買い上げいただいた製品について設定方法や操作方法などの詳細
は、接続するホスト機器の取扱説明書をご覧ください。取り付けやご使用の前には、下記の「安
全上のご注意」を必ずお読みください。
保 証 書
持込修理
品
名
DIGITAL CONTROL PANEL
品
番
DCP1V4S-US
※シリアル番号
保 証 期 間
本 体
お買上げの日から1ケ年間
※ お 買 上 げ 日
年 月 日
ご住所
お 客 様
お名前 様
電 話 ( )
ご販売店様へ ※印欄は必ずご記入ください。
店 名
本書は、 本書記載内容で無償修理を行なう事をお約束するも
※
のです。
販
所在地
お買上げの日から左記期間中に故障が発生した場合は、 本書
をご提示の上お買上げの販売店に修理をご依頼ください。
売
ご依頼の際は、購入を証明する書類(レシート、売買契約書、
納品書など)をあわせてご提示ください。
店
電 話 ( )
(詳細は下項をご覧ください)
株式会社ヤマハミュージックジャパン
PA営業部
〒103-0015 東京都中央区日本橋箱崎町41番12号 KDX箱崎ビル1F
TEL. 03-5652-3850
保証規定
1.
6.
保証期間中、正常な使用状態(取扱説明書、本体貼付ラ
この保証書は再発行致しかねますので大切に保管して
ベルなどの注意書に従った使用状態)で故障した場合に
ください。
は、無償修理を致します。
* この保証書は本書に示した期間、条件のもとにおいて無
2.
保証期間内に故障して無償修理をお受けになる場合は、
償修理をお約束するものです。したがってこの保証書に
商品と本書をご持参ご提示のうえ、お買上げ販売店に
よってお客様の法律上の権利を制限するものではありま
ご依頼ください。
せんので、保証期間経過後の修理などについてご不明の
3.
ご贈答品、ご転居後の修理についてお買上げの販売店
場合は、お買上げの販売店、※ヤマハ修理ご相談セン
にご依頼できない場合には、※ヤマハ修理ご相談セン
ターにお問合わせください。
ターにお問合わせください。
* ご記入いただきましたお客様のお名前、ご住所などの個
4.
保証期間内でも次の場合は有料となります。
人情報は、本保証規定に基づく無料修理に関する場合の
(1) 本書のご提示がない場合。
み使用致します。取得した個人情報は適切に管理し、法
(2) 本書にお買上げの年月日、お客様、お買上げの販
令に定める場合を除き、お客様の同意なく第三者に提供
売店の記入がない場合、及び本書の字句を書き替
することはありません。
えられた場合。
※ その他の連絡窓口につきましては、本取扱説明書をご参
(3) 使用上の誤り、他の機器から受けた障害または不
照ください。
当な修理や改造による故障及び損傷。
(4) お買上げ後の移動、輸送、落下などによる故障及
び損傷。
C.S.G., PA Development Division
(5) 火災、地震、風水害、落雷、その他の天災地変、
© 2013 Yamaha Corporation
公害、塩害、異常電圧などによる故障及び損傷。
(6) お客様のご要望により出張修理を行なう場合の出
張料金。
5.
この保証書は日本国内においてのみ有効です。
This warranty is valid only in Japan.
安全上のご注意
ご使用の前に、必ずこの「安全上のご注意」をよくお読みください。
ここに示した注意事項は、製品を安全に正しくご使用いただき、お客様やほかの方々への危害や財産への損
害を未然に防止するためのものです。必ずお守りください。
お読みになったあとは、使用される方がいつでも見られる所に必ず保管してください。
■ 記号表示について
この製品や取扱説明書に表示されている記号には、次のような意味があります。
「ご注意ください」 という注意喚起を示します。
∼しないでくださいという 「禁止」 を示します。
「必ず実行」 してくださいという強制を示します。
■「警告」と「注意」について
以下、誤った取り扱いをすると生じることが想定される内容を、危害や損害の大きさと切迫の程度を明示するために、 「警
告」と「注意」に区分して掲載しています。
この表示の欄は、 「 死亡す
この表示の欄は、 「 傷害を
る可能性または重傷を負
負う可能性または物的損
警告
注意
害が発生する可能性が想
う可 能 性が想 定される」
内容です。
定される」 内容です。
警告
分解禁止
この機器の内部を開けたり、内部の部品を分解したり改造したりしない。
感電や火災、けが、または故障の原因になります。異常を感じた場合など、点検や修理は、必ずお買い上げの販売
店または巻末のヤマハ修理ご相談センターにご依頼ください。
禁止
注意
設置
塩害や腐食性ガスが発生する場所に設置しない。
故障の原因になります。
禁止
この機器を移動するときは、必ず接続ケーブルをすべて外した上で行なう。
ケーブルをいためたり、お客様やほかの方々が転倒したりするおそれがあります。
必ず実行
取り付け工事は、 必ずお買い上げの販売店に依頼する。 また、 取り付ける場合は、 以下の点に注意する。
• 継続して振動があるような場所は避ける
必ず実行
• 必ず指定された取り付け工具を使用する
• 定期的に保守点検を行なう
取り扱い
この機器のパネルのすき間から金属や紙片などの異物を入れない。
感電、ショート、火災や故障の原因になることがあります。入った場合は、お買い上げの販売店または巻末のヤマ
ハ修理ご相談センターに点検をご依頼ください。
禁止
この機器の上にのったり重いものをのせたりしない。また、ボタンやスイッチ、入出力端子などに無
理な力を加えない。
禁止
この機器が破損したり、お客様やほかの方々がけがをしたりする原因になります。
● データが破損したり失われたりした場合の補償はいたしかねますので、 ご了承ください。
● 不適切な使用や改造により故障した場合の保証はいたしかねます。
注記(ご使用上の注意)
製品の故障、損傷や誤動作、データの損失を防ぐため、以下の内容をお守りください。
製品の取り扱い/お手入れに関する注意
• テレビやラジオ、ステレオ、携帯電話など他の電気製品の近くで使用しないでください。この機器またはテレビや
ラジオなどに雑音が生じる原因になります。
• 直射日光のあたる場所やストーブの近くなど極端に温度が高くなるところ、逆に温度が極端に低いところ、また、
ほこりや振動の多いところで使用しないでください。この機器のパネルが変形したり、内部の部品が故障したり、
動作が不安定になったりする原因になります。
• この機器上にビニール製品やプラスチック製品、ゴム製品などを置かないでください。この機器のパネルが変色/
変質する原因になります。
• 手入れするときは、乾いた柔らかい布をご使用ください。ベンジンやシンナー、洗剤、化学ぞうきんなどを使用す
ると、変色/変質する原因になりますので、使用しないでください。
取扱説明書の記載内容に関するお知らせ
• この取扱説明書に掲載されているイラストは、すべて操作説明のためのものです。したがって、実際の仕様と異な
る場合があります。
• 本書に記載されている会社名および商品名等は、各社の登録商標または商標です。
エラーメッセージ
LED表示
不具合の内容
対策
すべてのLEDが高速に
ハードウェアに問題が発生する
コントロールパネルが故障している可能性があります。販売
点滅している
など、正常に起動できませんで
店またはヤマハ修理ご相談センターにご相談ください。
した。
LEDが2個ずつ交互に
接続するホスト機器から供給さ
8ピンすべてが接続されているCAT5e以上のEthernetスト
点滅している
れる電源電圧が降下して十分な
レートケーブルを使用し、接続するホスト機器から終端のコ
電圧が供給されていません。
ントロールパネルまでの合計が200m以内になるように接続
してください。
LEDが1個ずつ順番に
接続するホスト機器との通信に
• 接続している機器がMTXの場合、パネルIDが重複している
点灯している
障害がありました。
可能性があります。同一のMTXに接続されているコント
ロールパネルのIDが重複していないかを確認してください。
• デイジーチェーン接続の終端となるコントロールパネルの
ターミネーションスイッチがONに設定されているか確認し
てください。
• ケーブルの断線や接触不良の可能性があります。適切な
ケーブルを使用してください。
ПРАВИЛА ТЕХНИКИ БЕЗОПАСНОСТИ
ВНИМАТЕЛЬНО ПРОЧТИТЕ, ПРЕЖДЕ ЧЕМ ПРИСТУПАТЬ К ЭКСПЛУАТАЦИИ
* Сохраните это руководство, чтобы можно было обращаться к нему в дальнейшем.
ПРЕДУПРЕЖДЕНИЕ
• Не облокачивайтесь на устройство, не ставьте на него тяжелые предметы и
не применяйте чрезмерного усилия к кнопкам, выключателям и разъемам.
Во избежание получения серьезных травм вплоть до наступления смерти
от удара электрическим током, а также во избежание короткого
Корпорация Yamaha не несет ответственности за ущерб, вызванный
замыкания, повреждения оборудования, пожара и других инцидентов,
неправильной эксплуатацией или модификацией устройства, а также за
всегда соблюдайте основные правила безопасности, перечисленные
потерю или повреждение данных.
далее. Они включают принятие следующих мер (не ограничиваясь ими):
Не открывать
УВЕДОМЛЕНИЕ
• В данном устройстве нет компонентов, которые должен обслуживать
Во избежание возможной неисправности / повреждения
пользователь. Не следует открывать устройство или пытаться разбирать его,
изделия, повреждения данных или повреждения другого
а также каким-либо образом модифицировать его внутренние компоненты.
имущества выполняйте требования следующих уведомлений.
При возникновении неисправности немедленно прекратите эксплуатацию
Уход и обслуживание
устройства и обратитесь за помощью к квалифицированным специалистам
центра технического обслуживания корпорации Yamaha.
• Не используйте данное устройство вблизи телевизора,
радио, стереооборудования, мобильного телефона или
других электрических устройств. В противном случае
ВНИМАНИЕ
устройство, телевизор или радиоприемник могут
создавать помехи.
Во избежание нанесения серьезных травм себе и окружающим, а также во
• Не подвергайте устройство воздействию чрезмерной
избежание повреждения устройства и другого имущества, всегда
запыленности или вибрации, либо сильного холода или
соблюдайте основные правила безопасности. Они включают принятие
высокой температуры (например, под прямым солнечным
следующих мер (не ограничиваясь ими):
светом, рядом с обогревателем, либо в автомобиле днем),
чтобы предотвратить возможность деформации панели,
Место установки
неустойчивой работы или повреждения внутренних
компонентов.
• Не размещайте устройство в месте, где на него могут воздействовать
• Не помещайте на устройство виниловые, пластиковые или
коррозионные газы или соленый воздух. Это может привести к сбоям в
резиновые предметы, поскольку это может привести к
работе устройства.
обесцвечиванию панели.
• Перед перемещением устройства отсоедините все кабели.
• Всегда консультируйтесь с квалифицированными специалистами центра
• Во время очистки инструмента используйте сухую и
технического обслуживания корпорации Yamaha, если для установки
мягкую ткань. Не используйте разбавители для краски,
устройства требуется дополнительная сборка, и соблюдайте следующие
растворители, очистители или химические очищающие
меры предосторожности.
салфетки.
- Избегайте мест установки, подверженных постоянной вибрации.
О данном руководстве
- Используйте подходящие инструменты для установки устройства.
• Иллюстрации, приведенные в данном руководстве,
- Периодически проверяйте состояние устройства.
предназначены для использования только в качестве
примера, и могут несколько отличаться от устройства.
Правила безопасности при эксплуатации
• Названия компаний и продуктов, приведенные в данном
• Никогда не засовывайте и не роняйте посторонние предметы (бумагу,
руководстве, являются товарными знаками или
пластиковые, металлические и прочие предметы) в отверстия на устройстве.
зарегистрированными товарными знаками
Если это произойдет, обратитесь за помощью к специалистам центра
соответствующих компаний.
технического обслуживания корпорации Yamaha.
Сообщения об ошибках
Состояние светодиода
Значение
EN
Все светодиоды быстро
Надлежащий запуск невозможен
Возможна неисправность панели управления. Обратитесь
мигают.
из-за проблем с оборудованием.
к дилеру Yamaha.
DE
Два светодиода мигают
Недостаточное напряжение из-за
Используйте прямой кабель Ethernet CAT5e или выше с
поочередно.
слабого электропитания от
подсоединением всех восьми штырьков. Также
подключенного хост-устройства.
обязательно выполните соединение таким образом, чтобы
FR
общая длина кабелей между подключенным хост-
устройством и панелью управления с оконечной нагрузкой
не превышала 200 метров.
ES
Каждый из светодиодов
Возникло нарушение связи с хост-
• Если устройство подключено к MTX, идентификаторы
загорается в
устройством.
определенных панелей могут быть идентичными.
определенной
Убедитесь, что каждая из панелей управления,
IT
последовательности.
подсоединенных к одному MTX, имеет уникальный
идентификатор панели.
• Убедитесь, что выключатель оконечной нагрузки
RU
установлен в положение ВКЛ для оконечной нагрузки
последней панели управления в цепи.
• Возможно повреждение кабелей или другое нарушение
ZH
соединения кабелей. Используйте надлежащие кабели.
Европейские модели
JA
Информация для покупателя/пользователя приведена в документах EN55103-1 и EN55103-2.
Соответствует стандартам условий эксплуатации: E1, E2, E3 и E4
Содержимое упаковки (проверьте перед использованием)
• Блок панели управления
• Пластиковые прокладки (2; только DCP1V4S-EU)
• Пластиковая крышка
• Руководство пользователя DCP1V4S-US/EU (данный документ)
Процедура установки
Установки и подсоединение
ВНИМАНИЕ
Не подсоединяйте панели управления к какому-либо другом разъему, помимо разъема [DCP]. Это
может привести к повреждению устройств или даже пожару, поскольку они не являются
электрически совместимыми.
ПРИМЕЧАНИЕ
• Перед подсоединением убедитесь, что ВЫКЛЮЧЕНЫ все хост-устройства, поскольку хост-устройства
подают питание на все панели управления.
• К каждому MTX можно подсоединить до восьми панелей управления. При подключении устройства,
отличного от MTX, обращайтесь к руководству пользователя устройства.
• Убедитесь, что каждая из панелей управления, подсоединенных к одному MTX, имеет уникальный
идентификатор панели.
q Установите идентификатор панели.
w Установите оконечную нагрузку.
印
Установите идентификатор каждой панели в
Для выполнения оконечной нагрузки последней
положение 0–7 с помощью двухпозиционных
панели управления в цепи установите
переключателей 1–3 следующим образом.
двухпозиционный переключатель 4 (выключатель
оконечной нагрузки) в положение ВКЛ. Убедитесь,
что двухпозиционный переключатель 4 установлен
ON
в положение ВЫКЛ для других панелей управления.
1
2
3
4
0
1
2
3
e Соедините разъемы RJ-45 панели управления и
1 2 3
1 2 3
1 2 3
1 2 3
разъемы [DCP] хост-устройства с помощью
кабелей Ethernet.
4
5
6
7
Кабели Ethernet можно подсоединить к любому из
разъемов RJ-45. Используйте прямой кабель
Ethernet CAT5e или выше с подсоединением всех
1 2 3
1 2 3
1 2 3
1 2 3
восьми штырьков.
Подсоединение нескольких панелей управления (MTX)
При подсоединении нескольких панелей управления выполните соединение в последовательно-приоритетную цепочку
с разъемом [DCP] MTX. Можно подсоединить до восьми панелей управления. Помните, что общая максимальная длина
кабелей между MTX и панелью управления с оконечной нагрузкой не должна превышать 200 метров.
Разъем [DCP]
RJ-45
(RJ-45)
Общая максимальная длина кабеля составляет 200 метров.
Выполните оконечную нагрузку последней панели управления.
309POHD-C0
Printed in China
ZC01770
Установка блока панели управления
q Прикрепите панель управления к настенной
DCP1V4S-EU
коробке.
ПРИМЕЧАНИЕ
• Используйте соответствующую настенную
коробку: 1 блок типа US глубиной 44
миллиметра или больше для DCP1V4S-US и 1
блок типа UK глубиной 44 миллиметра или
больше для DCP1V4S-EU.
• Используйте надлежащие винты,
соответствующие размеру настенной коробки.
• Затяните винты с крутящим моментом менее
Пластиковая
1,5 Нм. Убедитесь также, что головки винтов
крышка
выступают из панели управления не более чем
на 3 миллиметра.
* Винты для установки панели управления и
настенной коробки не включены.
w Установите пластиковую крышку на панель
управления.
Нажмите пластиковую крышку до упора, чтобы она
ПРИМЕЧАНИЕ (только DCP1V4S-EU)
Во время установки коробки для поверхностной
защелкнулась на месте.
установки вставьте прилагаемые пластиковые
DCP1V4S-US
прокладки для заполнения зазора между краем
q
коробки и лицевой поверхностью отверстий
w
коробки. При необходимости отрегулируйте
высоту прокладок.
ПРИМЕЧАНИЕ
При отсоединении пластиковой крышки вставьте
плоскую отвертку в небольшой паз для
отсоединения в нижней части крышки, а затем
осторожно потяните ее вверх для снятия. Будьте
Настенная коробка
осторожны, чтобы не повредить пластиковую
(тип для США)
крышку.
Пластиковая
Панель
крышка
управления
Другие установки (MTX)
При использовании MTX Editor доступны следующие функции. См. руководство MTX Editor для получения
подробной информации.
• Яркость панели управления можно устанавливать в соответствии с яркостью помещения.
• Панель управления можно запереть во избежание ее использования посторонними лицами.
• Сообщения об ошибках отображаются на панели управления с помощью комбинации включенных,
выключенных и мигающих светодиодов.
■ パッケージの内容(最初にお確かめください)
• コントロールパネル本体
• DCP1V4S-US取扱説明書(本書)
• プラスチックカバー
• 保証書(本書に掲載されています)
■ 取り付け手順
設定および配線
コントロールパネルを[DCP]端子以外の端子には接続しないでください。電気的に互換性がないため、火災
や故障の原因になることがあります。
禁止
NOTE
• 接続するホスト機器から電源を供給しているため、配線する前に接続するホスト機器の電源を必ずオフにしてくだ
さい。
• コントロールパネルは、MTX1台につき同時に8台まで接続できます。MTX以外の機器の場合は、接続している機
器の取扱説明書を参照してください。
• 同一のMTXに接続されているコントロールパネルのIDは重複しないように設定してください。
q
w
パネルIDを設定します。
ターミネーション(終端)を設定します。
ディップスイッチ1∼3を以下のように組み合わせて、
デイジーチェーン接続の終端となるコントロールパネル
0∼7のパネルIDを設定します。
のディップスイッチ4(ターミネーションスイッチ)を
ONに設定します。その他のコントロールパネルの
ON
ディップスイッチ4はOFFに設定します。
1
2
3
4
0
1
2
3
e
コントロールパネルのRJ-45端子と接続するホスト機
1 2 3
1 2 3
1 2 3
1 2 3
器の[DCP]端子をEthernetケーブルで接続します。
2つあるRJ-45端子のどちらに接続しても構いません。
4
5
6
7
8ピンすべてが接続されているCAT5e以上の
Ethernetストレートケーブルを使用してください。
1 2 3
1 2 3
1 2 3
1 2 3
■ コントロールパネルを2台以上接続する(MTXの場合)
複数のコントロールパネルを接続するときは、MTXの[DCP]端子とデイジーチェーン接続します。
コントロールパネルは8台まで接続できます。また、MTXから終端のコントロールパネルまでの合計ケーブル長は最
長200mです。
MTX3
[DCP]端子
RJ-45
(RJ-45)
合計ケーブル長 最長200m
コントロールパネル本体の取り付け
q
コントロールパネル本体をスイッチボックスにネジで
止めます。
NOTE
• スイッチボックスは、JIS C8340の1個用に準拠
した、深さ44mm以上のものをお使いください。
• ネジは、ボックスに合ったサイズのものをお使い
ください。
• ネジを取り付ける際は、1.5Nm以下のトルクで締
め付けてください。また、コントロールパネル本
プラスチックカバー
体を取り付けるネジの出っ張りは、3mm以下にな
るようにしてください。
※ コントロールパネル本体を取り付けるためのネジおよび
スイッチボックスは付属していませんので別途ご用意く
w
プラスチックカバーをコントロールパネル本体にかぶ
ださい。
せます。
NOTE
パチンという音がするまで押し込みます。
プラスチックカバーを外すときは、カバー下部にあ
る切り欠けにマイナスドライバーなどをかけて持ち
上げると取り外せます。このとき、プラスチックカ
バーが破損しないようにご注意ください。
■ そのほかの設定(MTX)
DCP1V4S-USは、MTX Editorを使って以下のような設定ができます。詳しくは「MTX Editor取扱説明書」をお読みく
ださい。
• 部屋の明るさに応じてコントロールパネルのLEDの輝度を調整できます。
• 想定外の人がコントロールパネルに触れても設定が変わらないように、パネルをロックできます。
• コントロールパネルのLEDの点灯/消灯/点滅の組み合わせにより、エラーメッセージを表示します。
FCC INFORMATION (U.S.A.)
1. IMPORTANT NOTICE: DO NOT MODIFY
THIS UNIT!
This product, when installed as indicated in the
instructions contained in this manual, meets
FCC requirements. Modifications not expressly
approved by Yamaha may void your authority,
granted by the FCC, to use the product.
2. IMPORTANT:
When connecting this product
to accessories and/or another product use only
high quality shielded cables. Cable/s supplied
with this product MUST be used. Follow all
installation instructions. Failure to follow instruc-
tions could void your FCC authorization to use
this product in the USA.
3. NOTE:
This product has been tested and found
to comply with the requirements listed in FCC
Regulations, Part 15 for Class "B" digital
devices. Compliance with these requirements
provides a reasonable level of assurance that
your use of this product in a residential environ-
ment will not result in harmful interference with
other electronic devices. This equipment gener-
ates/uses radio frequencies and, if not installed
and used according to the instructions found in
the users manual, may cause interference harm-
ful to the operation of other electronic devices.
* This applies only to products distributed by YAMAHA CORPORATION OF AMERICA.
This device complies with Part 15 of the FCC Rules. Operation is subject to the following two conditions:
(1) this device may not cause harmful interference, and (2) this device must accept any interference
received, including interference that may cause undesired operation.
CAN ICES-3 (B)/NMB-3(B)
Действие
• This applies only to products distributed by Yamaha Canada Music Ltd.
• Ceci ne s'applique qu'aux produits distribués par Yamaha Canada Musique Ltée.
이 기기는 가정용(B급) 전자파적합기기로서 주로 가정에서 사용하는 것을 목적으로 하며, 모든 지역에
서 사용할 수 있습니다.
PRECAUTIONS
PLEASE READ CAREFULLY BEFORE PROCEEDING
* Please keep this manual in a safe place for future reference.
WARNING
Always follow the ba+sic precautions listed below to avoid the
possibility of serious injury or even death from electrical shock,
short-circuiting, damages, fire or other hazards. These
precautions include, but are not limited to, the following:
Do not open
• This device contains no user-serviceable parts. Do not open the device or
attempt to disassemble the internal parts or modify them in any way. If it
should appear to be malfunctioning, discontinue use immediately and
have it inspected by qualified Yamaha service personnel.
CAUTION
Always follow the basic precautions listed below to avoid the
possibility of physical injury to you or others, or damage to the
device or other property. These precautions include, but are not
limited to, the following:
Location
• Do not place the device in a location where it may come into contact with
corrosive gases or salt air. Doing so may result in malfunction.
• Before moving the device, remove all connected cables.
ON
• Always consult qualified Yamaha service personnel if the device
installation requires construction work, and make sure to observe the
1
2
3
4
following precautions.
- Avoid locations that are exposed to constant vibration.
- Use the required tools to install the device.
- Inspect the device periodically.
Handling caution
• Avoid inserting or dropping foreign objects (paper, plastic, metal, etc.)
into any gaps or openings on the device. If this happens, have the device
inspected by qualified Yamaha service personnel.
• Do not rest your weight on the device or place heavy objects on it, and
avoid use excessive force on the buttons, switches or connectors.
Yamaha cannot be held responsible for damage caused by improper use
or modifications to the device, or data that is lost or destroyed.
Error Messages
LED Status
Meaning
Можно подсоединить
All LEDs are flashing
Cannot start up properly
до восьми блоков.
quickly.
because of some problem with
the hardware.
The two LEDs are
The voltage supply is
flashing alternately.
insufficient due to low power
supply from the connected
host device.
RJ-45 RJ-45
RJ-45
RJ-45
Each LED lights in
A malfunction has occurred
sequence.
with communication with the
host device.
w
q
Information for Users on Collection and Disposal of Old Equipment
This symbol on the products, packaging, and/or accompanying documents means that used
electrical and electronic products should not be mixed with general household waste.
For proper treatment, recovery and recycling of old products, please take them to applicable
collection points, in accordance with your national legislation and the Directives 2002/96/EC.
Настенная коробка (тип
для Великобритании)
By disposing of these products correctly, you will help to save valuable resources and prevent any
Панель
potential negative effects on human health and the environment which could otherwise arise from
управления
inappropriate waste handling.
For more information about collection and recycling of old products, please contact your local
municipality, your waste disposal service or the point of sale where you purchased the items.
[For business users in the European Union]
If you wish to discard electrical and electronic equipment, please contact your dealer or supplier for
further information.
[Information on Disposal in other Countries outside the European Union]
This symbol is only valid in the European Union. If you wish to discard these items, please contact
your local authorities or dealer and ask for the correct method of disposal.
European models
Purchaser/User Information specified in EN55103-1 and EN55103-2.
Conforms to Environments: E1, E2, E3 and E4
Package Contents (Please check before using)
• Control panel unit
• Plastic spacers (2; DCP1V4S-EU only)
• Plastic cover
• DCP1V4S-US/EU Owner's Manual (this document)
Installation Procedure
Settings and Connection
CAUTION
Do not connect control panels to any connector other than the [DCP] connector. Doing so can result in damage
to the devices or even fire since they are not electrically compatible.
NOTE
• Be sure to switch OFF the power on all host devices before connecting, since the host devices supply power to all
control panels.
• Up to eight control panels can be connected to each MTX. Refer to the device's Owner's Manual when connecting a
device other than an MTX.
• Make sure that each control panel connected to the same MTX has a unique Panel ID.
q Set the Panel ID.
Set each Panel ID number to 0–7, using DIP
switches 1–3 as follows.
ON
1
2
3
4
0
1
2
1 2 3
1 2 3
1 2 3
1 2 3
4
5
6
1 2 3
1 2 3
1 2 3
1 2 3
ON
1
2
3
4
Connecting multiple control panels (MTX)
Make a daisy-chain connection to the [DCP] connector of the MTX when multiple control panels are
connected. Up to eight control panels can be connected. Keep in mind that the total maximum length of
cables between the MTX and the terminated control panel is 200 meters.
8台まで接続可
[DCP] connector
RJ-45
RJ-45
RJ-45
RJ-45
Attaching the Control Panel unit
q Fix the control panel to the wall box.
終端となるコントロールパネルは、
ターミネーションをオンに設定する
NOTE
• Use a suitable wall box: 1-gang of US-type with a
depth of 44 millimeters or more for the DCP1V4S-
US, and 1-gang of UK-type with a depth of 44
millimeters or more for the DCP1V4S-EU.
• Use proper screws that fit the size of wall box.
q
• Tighten the screws with a torque of less than 1.5
w
Nm. Also, make sure that the screw heads extend
from the control panel by no more than 3
millimeters.
w Put the plastic cover on the control panel.
Push the plastic cover all the way, until it clicks in
place.
スイッチボックス
DCP1V4S-US
コントロールパネル本体
q
w
Wall box (US-type)
Plastic cover
Control panel
Other Settings (MTX)
Using the MTX Editor, the following functions are available. Refer to the MTX Editor User's Manual for details.
• The brightness of the control panel can be set according to the brightness of the room.
• The control panel can be locked to avoid it being utilized by unauthorized persons.
• Error messages are shown on the control panel by a combination of the LEDs turning on, off and blinking.
Compliance with FCC regulations does not
guarantee that interference will not occur in all
installations. If this product is found to be the
source of interference, which can be determined
警告
by turning the unit "OFF" and "ON" , please try to
eliminate the problem by using one of the follow-
为了避免因触电、短路、损伤、火灾或其它危险可能导致的
ing measures:
严重受伤甚至死亡,请务必遵守下列基本注意事项。这些注
意事项包括但不限于下列情况:
Relocate either this product or the device that is
being affected by the interference.
请勿打开
Utilize power outlets that are on different branch
• 本乐器不含任何用户可自行修理的零件。请勿打开本设备
(circuit breaker or fuse) circuits or install AC line
或试图拆卸其内部零件或进行任何方式的改造。若出现异
filter/s.
常,请立即停止使用,并请有资质的Yamaha 维修人员进
行检修。
In the case of radio or TV interference, relocate/
reorient the antenna. If the antenna lead-in is
小心
300 ohm ribbon lead, change the lead-in to co-
axial type cable.
为了避免您或周围他人可能发生的人身伤害、设备或财产损
If these corrective measures do not produce sat-
失,请务必遵守下列基本注意事项。这些注意事项包括但不
isfactory results, please contact the local retailer
限于下列情况:
authorized to distribute this type of product. If
安放位置
you can not locate the appropriate retailer,
please contact Yamaha Corporation of America,
• 请勿将本设备放置在可能会接触到腐蚀性气体或含有盐份
Electronic Service Division, 6600 Orangethorpe
的空气。否则可能会导致故障。
Ave, Buena Park, CA90620
• 搬动设备之前,请务必拔出所有已连接的连接线。
The above statements apply ONLY to those
• 如果设备安装时需要施工,请务必咨询有资质的Yamaha维
products distributed by Yamaha Corporation of
修人员,并务必遵守以下注意事项。
America or its subsidiaries.
- 避免安放在经常振动的场所。
- 使用需要的工具安装设备。
(class B)
- 定期检查本设备。
小心操作
• 请勿插入或使异物(纸张、塑料、金属等)掉入本设备的
任何缝隙或开口。如果发生这种情况,请有资质的
Yamaha维修人员对设备进行检修。
• 请勿将身体压在本设备上或在其上放置重物,操作按钮、
开关或插口时要避免过分用力。
对由于不正当使用或擅自改造本设备所造成的损失、数据
丢失或破坏,Yamaha不负任何责任。
(can_b_01)
错误信息
LED指示灯状态
所有LED指示灯快速
闪烁。
(class b korea)
两个LED指示灯交替
快速闪烁。
各个LED指示灯依次
点亮。
部件名称
外壳、框架
NOTICE
To avoid the possibility of malfunction/ damage to the
印刷线路板
product, damage to data, or damage to other property,
follow the notices below.
○ : 表示该有毒有害物质在该部件所有均质材料中的含量均在SJ/T 11363-2006标准规定的限量要求以下。
Handling and Maintenance
×
• Do not use the device in the vicinity of a TV, radio,
: 表示该有毒有害物质至少在该部件的某一均质材料中的含量超出SJ/T 11363-2006标准规定的限量要求。
stereo equipment, mobile phone, or other electric
(此产品符合EU的RoHS指令。)
devices. Otherwise, the device, TV, or radio may
(この製品はEUのRoHS指令には適合しています。 )
generate noise.
(This product conforms to the RoHS regulations in the EU.)
• Do not expose the device to excessive dust or
vibration, or extreme cold or heat (such as in direct
(Dieses Produkt entspricht der RoHS-Richtlinie der EU.)
sunlight, near a heater, or in a car during the day), in
(Ce produit est conforme aux réglementations RoHS de l'UE.)
order to prevent the possibility of panel disfiguration,
(Este producto cumple con los requisitos de la directiva RoHS en la UE.)
unstable operation, or damage to the internal
components.
• Do not place vinyl, plastic or rubber objects on the
device, since this might discolor the panel.
• When cleaning the device, use a dry and soft cloth. Do
not use paint thinners, solvents, cleaning fluids, or
chemical-impregnated wiping cloths.
About this manual
• The illustrations as shown in this manual are for
instructional purposes only, and may appear
somewhat different from those on your device.
包装内容(请在使用前检查是否完整)
• The company names and product names in this
• 控制面板单元
manual are the trademarks or registered trademarks of
• 塑料外盖
their respective companies.
安装程序
设定及接线
小心
仅可将控制面板连接到[DCP]接头。否则,由于控制面板与其它接头之间电气不兼容,可能造成本装置损坏甚至引发火
灾。
注
•
接线前务请关闭所有主设备的电源,因为主设备向所有控制面板供电。
•
每个MTX最多可连接8个控制面板。连接MTX之外的其他设备时,请参阅相关设备的用户手册。
•
请确认同一MTX所连接的各个控制面板具有唯一的ID。
Action
q 设定面板ID。
The control panel may have malfunctioned. Contact your Yamaha
通过下述的DIP开关1-3,依次将各个面板的ID号
dealer.
设置为0-7。
Use CAT5e or higher Ethernet straight cable that has all eight pins
ON
connected. Also make sure to connect so that the total length of
cables between the connected host device and the terminated
control panel is no longer than 200 meters.
1
2
3
• If the device is connected to an MTX, certain Panel IDs may be
0
duplicated. Make sure that each control Panel connected to the
same MTX has a unique Panel ID.
• Make sure that the termination switch is set to ON to terminate the
1 2 3
last control panel in a daisy chain connection.
• The cables may have been broken or there is some other cable
4
connection failure. Use the proper cables.
1 2 3
连接多个控制面板 (MTX)
连接多个控制面板时,请为MTX的[DCP]接头建立一组菊链接线。最多可连接八个控制面板。务请注意,
MTX和终端控制面板之间的最大线缆长度为200米。
(weee_eu_en_01)
连接控制面板单元
q 将控制面板固定在墙式盒体上。
注
• 请采用合适的墙式盒体:DCP1V4S-US采用美国单孔
型,孔深44毫米或以上;DCP1V4S-EU采用英国单
孔型,孔深44毫米或以上。
• 请采用与墙式盒体尺寸规格匹配的适当螺钉。
• 使用1.5 Nm以下的扭矩上进螺钉。同时,还须确认
螺钉头超出控制面板的长度不超过3毫米。
w 将塑料外盖装在控制面板上。
一直向前推动塑料外盖,直至其咔嚓一声固定就
位。
DCP1V4S-US
w
w Set the termination.
To terminate the last control panel in a daisy-
chain connection, turn DIP switch 4 (termination
塑料外盖
switch) ON. Make sure to turn DIP switch 4 OFF
for the other control panels.
ON
其他设定(MTX)
3
1
2
3
4
采用MTX Editor时,可使用以下功能。具体细则请参阅MTX Editor手册。
e Connect RJ-45 connectors of the control
• 控制面板的亮度可根据室内的亮度设置。
panel and [DCP] connectors of the host
7
• 控制面板可锁定以防止未经授权的人员使用。
device using Ethernet cables.
• 错误消息通过LED指示灯的亮、灭、闪烁组合显示在控制面板上。
Ethernet cables can be connected to either RJ-45
connector. Use CAT5e or higher Ethernet straight
cable that has all eight pins connected.
サービスのご依頼、お問い合わせの必要がございましたら、お買い上げ店またはヤマハ修理ご相談センターまでご連絡ください。
● 保証書
本書に保証書が掲載されています。販売店印、お買い上
げ日などの記入をお確かめのうえ、大切に保管してくだ
さい。
● 保証期間
保証書をご覧ください。
● 保証期間中の修理
保証書記載内容に基づいて修理させていただきます。お
客様に製品を持ち込んでいただくか、サービスマンが出
Up to eight units can be connected.
張修理にお伺いするのかは、製品ごとに定められていま
す。詳しくは保証書をご覧ください。
● 保証期間経過後の修理
ご要望により有料にて修理させていただきます。
下記の部品などについては、使用時間や使用環境などに
より劣化しやすいため、消耗劣化に応じて部品の交換が
RJ-45
RJ-45 RJ-45
RJ-45
RJ-45
(RJ-45)
必要となります。有寿命部品の交換は、お買い上げ店ま
たはヤマハ修理ご相談センターまでご連絡ください。
Total maximum cable length is 200 meters.
有寿命部品の例
Terminate the last control panel.
スイッチ、ダイアル、接続端子など
お客様ご相談窓口: ヤマハプロオーディオ製品に対するお問合せ窓口
ヤマハ・プロオーディオ・インフォメーションセンター
DCP1V4S-EU
ナビダイヤル
w
q
FAX
オンラインサポート http://jp.yamaha.com/support
Wall box (UK-type)
Plastic cover
Control panel
◆営業窓口
(株)ヤマハミュージックジャパン PA営業部
* Screws for attaching the control panel and wall box
〒103-0015 東京都中央区日本橋箱崎町41-12 KDX箱崎ビル 1F
are not included.
◆修理に関するお問い合わせ
NOTE
(DCP1V4S-EU only)
When attaching to a surface mount box, insert the
ヤマハ修理ご相談センター
included plastic spacers to fill the gap between the
box's edge and the face of screw holes of the box.
ナビダイヤル
Adjust the height of spacers if needed.
(全国共通番号)
NOTE
When detaching the plastic cover, insert a slotted
受付時間
screwdriver into the small release slot at the bottom of
FAX
the cover, then pull up gently to remove it. Be careful
not to damage the plastic cover.
◆修理品お持込み窓口
受付時間
* お電話は、ヤマハ修理ご相談センターでお受けします。
東日本サービスセンター
〒143-0006 東京都大田区平和島2丁目1-1 京浜トラックターミナル内14号棟A-5F
西日本サービスセンター
〒554-0024 大阪市此花区島屋6丁目2-82 ユニバーサル・シティ和幸ビル9F
注意事项
请在操作使用前,首先仔细阅读下述内容
* 请将本说明书存放在安全的地方,以便将来随时参阅。
注意
为避免发生产品故障/损坏、数据损坏或其他形式的资产损
失,务请遵守以下注意事项。
处理及保养
• 切勿在临近电视机、收音机、音响设备、手机或其它电
子设备的位置使用本装置。否则,本装置及电视机、收
音机等设备均可能产生杂音。
• 为防止本控制面板出现损毁、运行不稳定,或内部组件
损坏状况,切勿将本装置暴露在过多灰尘或振动,或者
过热或过冷的环境下(如直射阳光下、临近热源的位
置,或者行驶的汽车内) 。
• 切勿在本装置上放置聚乙烯、塑料或橡胶材质的物体,
因为此类物质可能导致控制面板表面褪色。
• 清洁本装置时,请采用干燥、柔软的布料。请勿采用油
漆稀释剂、溶剂、清洁剂体或化学品浸湿的布料进行清
洁。
关于本说明书
• 本说明书所用的图例仅出于讲解演示需要,与您所选购
装置上实际显示的内容可能存在不同程度的出入。
• 本说明书中提及的公司名称为产品名称为我司商标或相
应公司已注册的商标。
含义
动作
由于硬件发生故障,故无法正
控制面板可能存在故障。请联系本地的Yamaha经销商。
确启动。
所连接主设备的供电电压过低,
请采用八个引脚均已连接的CAT5e或更高规格的以太网直线电缆。
导致供电电压不足。
接线时,还须确认所连接主设备和终端控制面板之间的电缆总长度
未超过200米。
与主设备之间的通信出现一个
• 如果将本设备连接到MTX,某些面板的ID可能与其他控制面板重
故障。
复。请确认同一MTX所连接的各个控制面板具有唯一的ID。
• 确认终止开关已拨至ON档位,从而终止最后一个菊链连接的控制
面板。
• 电缆可能发生损坏或存在其他电缆接线故障。请采用正确的电缆。
有毒有害物质或元素
多溴联苯
多溴二苯醚
铅(Pb)
汞(Hg)
镉(Cd)
六价铬(Cr (VI))
(PBB)
(PBDE)
×
○
○
○
○
○
×
○
○
○
○
○
此标识适用于在中华人民共和国销售的电子信息产品。
标识中间的数字为环保使用期限的年数。
PS 08
• 塑料垫片(2;仅限于DCP1V4S-EU)
• DCP1V4S-US/EU使用说明书(即本文件)
w 设定终止。
为终止菊链接线的最后一个控制面板,需将
DIP开关4(终止开关)拨至ON档位。务必确认已
将其它控制面板的DIP开关4拨至OFF档位。
ON
4
1
2
3
4
1
2
3
e 通过以太网电缆连接控制面板的RJ-45接头,以及
1 2 3
1 2 3
1 2 3
主设备的[DCP]接头。
5
6
7
可将以太网电缆连接至任一RJ-45接头。请采用连
接有八个引脚的CAT5e或更高规格的以太网直
线电缆。
1 2 3
1 2 3
1 2 3
最多可连接八个单元。
[DCP]接头
RJ-45
RJ-45 RJ-45
RJ-45
RJ-45
(RJ-45)
最大电缆总长度为200米。
终止最后一个控制面板。
DCP1V4S-EU
w
q
墙式盒体
(英国型)
塑料外盖
控制面板
* 固定控制面板和墙式盒体的螺钉并不包含在供货范
围内。
q
注
(仅限于DCP1V4S-EU)
安装到表面安装盒时,请插入附带的塑料垫片以填补
盒体边缘与盒体螺钉孔表面之间的间隙。如有必要可
调整垫片的高度。
注
拆除塑料外盖时,将一个一字槽螺丝刀插到外盖底部
的小空隙槽中,然后轻轻地向上撬起,将其拆除。在
墙式盒体
此过程中,请勿损坏塑料外盖。
(美国型)
控制面板
保証とアフターサービス
● 補修用性能部品の最低保有期間
製品の機能を維持するために必要な部品の最低保有期間
は、製造終了後8年です。
● 修理のご依頼
本書をもう一度お読みいただき、接続や設定などをご確
認のうえ、お買い上げの販売店またはヤマハ修理ご相談
センターまでご連絡ください。修理をご依頼いただくと
きは、製品名、モデル名などとあわせて、製品の状態を
できるだけ詳しくお知らせください。
● 損害に対する責任
この製品(搭載プログラムを含む)のご使用により、お客
様に生じた損害(事業利益の損失、事業の中断、事業情
報の損失、そのほかの特別損失や逸失利益)については、
当社は一切その責任を負わないものとします。また、い
かなる場合でも、当社が負担する損害賠償額は、お客様
がお支払になったこの商品の代価相当額をもって、その
上限とします。
● お客様ご相談窓口
アフターサービス以外で、製品に関するご質問・ご相談
は、お客様ご相談窓口までお問い合わせください。
0570-050-808
※全国どこからでも市内通話料金でおかけいただけます。
PHS、IP電話は 03-5652-3618
電話受付=祝祭日を除く月∼金/11:00∼19:00
03-5652-3634
Tel: 03-5652-3851
0570-012-808
※全国どこからでも市内通話料金でおかけいただけます。
上記番号でつながらない場合は TEL 053-460-4830
月曜日∼金曜日 9:00∼18:00、 土曜日 9:00∼17:00 (祝日およびセンター指定休日を除く)
東日本(北海道/東北/関東/甲信越/東海)
03-5762-2125
西日本(沖縄/九州/中国/四国/近畿/北陸) 06-6465-0367
月曜日∼金曜日 9:00∼17:45 (祝日および弊社休業日を除く)
FAX 03-5762-2125
FAX 06-6465-0374
*名称、住所、電話番号、営業時間、URLなどは変更になる場合があります。
Advertisement
Table of Contents

Subscribe to Our Youtube Channel
Related Manuals for Yamaha DCP1V4S-US


Summary of Contents for Yamaha DCP1V4S-US
- Page 1 не применяйте чрезмерного усилия к кнопкам, выключателям и разъемам. by turning the unit “OFF” and “ON” , please try to FCC requirements. Modifications not expressly Thank you for choosing the Yamaha DCP1V4S-US/EU Digital Control Panel. Refer to Во избежание получения серьезных травм вплоть до наступления смерти 为避免发生产品故障/损坏、数据损坏或其他形式的资产损...
- Page 2 Tel: 04101-3030 Nakazawa-cho 10-1, Naka-ku, Hamamatsu, Japan 430-8650 * Le specifiche e le descrizioni presenti in questo manuale sono fornite a fini puramente informativi. Yamaha Corp. si riserva il diritto di modificare Tel: 67 16 78 00 prodotti o specifiche in qualsiasi momento senza preavviso. Dato che le specifiche, le apparecchiature o le opzioni possono essere diverse da...
Need help?
Do you have a question about the DCP1V4S-US and is the answer not in the manual?
Questions and answers