
Related Manuals for Panasonic Lumix DMC-LC50GN


Summary of Contents for Panasonic Lumix DMC-LC50GN
-
Page 1: Operating Instructions
Operating Instructions Digital Camera DMC-LC80GN Model No. DMC-LC70GN DMC-LC50GN Before use, please read these instructions completely. VQT0M82... -
Page 2: Safety
Safety Dear Customer, We would like to take this opportunity to thank you for purchasing this Panasonic Digital Camera. Please read these Operating Instructions carefully and keep them handy for future reference. Information for Your Safety WARNING TO REDUCE THE RISK OF FIRE... - Page 3 Safety Extremely high precision technology is employed to produce the LCD monitor screen. The result is more than 99.99% effective pixels with a mere 0.01% of the pixels inactive or always lit. However, this is not a malfunction and does not affect the recorded pictures.
-
Page 4: Table Of Contents
Contents Safety Information for Your Safety ... 2 Preparation Standard Accessories ... 6 Names of the Components ... 7 Quick Guide ... 9 Charging the Batteries ... 10 About the Battery ... 11 Inserting/Removing the Batteries ... 16 About the Card ... 17 Inserting/Removing the Card ... - Page 5 Playback (advanced) Playing Back Pictures with Audio (DMC-LC80/DMC-LC70) ... 62 Playing Back Motion Images... 63 Rotating the Picture... 64 Setting the Picture to be Printed and the Number of Prints (DPOF Print Setting)... 65 Preventing Accidental Erasure of the Picture ... 69 Playing Back with Slide Show ...
-
Page 6: Preparation
Preparation Standard Accessories Before using your camera, check the contents. ∫ SD Memory Card (16 MB) RP-SD016B (In the text, it is indicated as “Card”) ∫ Batteries AA Ni-MH (nickel-metal hydride) ∫ Battery Charger DE-894A ∫ AC Cable K2CJ2DA00002 or K2CJ2DA00011 Preparation ∫... -
Page 7: Names Of The Components
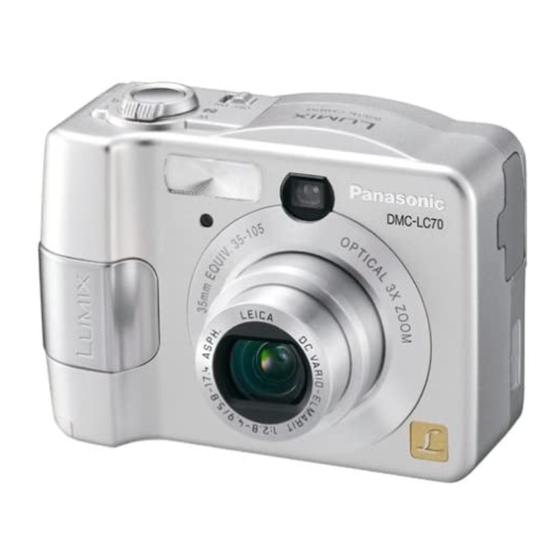
Preparation Names of the Components 8 910 11 15 14 13 12 17 18 Preparation 1 Strap Eyelet 2 Self-timer Indicator (P38) 3 Flash 4 Lens 5 Lens Cover 6 LCD Monitor (P23, 88) 7 Optical Finder 8 Power Indicator (P26) 9 Status Indicator (P17, 26, 35) 10 Mode Dial (refer to next page) - Page 8 ª The Mode Dial Select the desired recording mode for the scene, then turn the mode dial to set to the mark of the mode. Preparation 21 Terminal Cover (DMC-LC50) (DMC-LC70) (DMC-LC50) (DMC-LC50) 22 [DC IN] Socket * 23 [DIGITAL] (P82, 84) / [AV OUT] (P79) Socket (DMC-LC80/ DMC-LC70) [DIGITAL] (P82, 84) / [V.OUT] (P79)
-
Page 9: Quick Guide
Quick Guide • This is the summary of operations for recording on the camera. • Refer to the corresponding pages for each operation in detail. Check the batteries and the card. • Insert the supplied batteries or new batteries. (P16) (When using the Ni-MH (nickel-metal hydride) batteries, insert the batteries after charge.) -
Page 10: Charging The Batteries
• Disconnect the charger from the electrical outlet after the charging is completed. • Use Panasonic AA Ni-MH batteries (nickel-metal hydride) (supplied). ª Environment/charge error • Charge in a place with a surrounding temperature of 0 – 40oC (also temperature of the battery). -
Page 11: About The Battery
About the Battery ª Recommended batteries Use Panasonic AA Ni-MH batteries (nickel-metal hydride) (supplied) or AA Alkaline batteries. (We recommend that you use Panasonic batteries.) • The performance of the batteries may vary depending on brand or storage terms/condition of the battery. It may cause malfunction or the available recording time may become shorter. - Page 12 ª Batteries that cannot be used The following batteries cannot be used. • Batteries where part or their entire outer covering jacket has been removed or partially peeled away. • Batteries that have “flattened” ends that would prevent a proper connection from being made with internal battery contacts.
-
Page 13: Battery Indicator
If any leakage from the battery is noted, avoid direct skin contact. Remove the battery and clean as much of the foreign substance as possible. Contact your local service centre for assistance if necessary. ª Ni-MH Battery (Nickel Metal Hydride) The battery charger should only be used with the Ni-MH batteries. - Page 14 However, they will not be usable, so replace them with new ones once the battery power depletes. ª About the Battery Consumption Recordable number under CIPA Standards Batteries Fully charged Panasonic Ni-MH (nickel-metal hydride) batteries (supplied) Panasonic Alkaline batteries Measured under the following conditions: •...
- Page 15 Recordable number when the LCD monitor is turned off (The LCD monitor is off / Other recording conditions are the same as specified in CIPA Standards) Batteries Fully charged Panasonic Ni-MH (nickel-metal hydride) batteries (supplied) Panasonic Alkaline batteries • The remaining battery life lasts longer when you use the camera with the LCD monitor turned off.
-
Page 16: Inserting/Removing The Batteries
Inserting/Removing the Batteries Preparation • Check that the camera is turned off and that the lens is retracted. • Use AA Ni-MH batteries (nickel-metal hydride) or AA Alkaline batteries. Slide the door in the direction of the arrow to open the battery door. Insert the batteries observing the direction of the + and - polarities. -
Page 17: About The Card
About the Card ª Access to the card While the card is being accessed, the status indicator 1 and card access indication 2 light. 1600 When the status indicator 1 and card access indication 2 light, do not: • turn the camera off. •... -
Page 18: Inserting/Removing The Card
• The card may be damaged if it is removed while the camera is on. • We recommend using Panasonic’s SD Memory Card. (Use only the genuine card.) Insert the card all the way in until it clicks. -
Page 19: Setting The Date/Time (Clock Set)
Setting the Date/Time (Clock Set) ª Initial setting The clock is not set when the camera is shipped. When you turn the camera on, the clock setting screen appears. PLEASE SET THE CLOCK CLOCK SET MENU When pressing the [MENU] button, the screen shown in step 2 appears. -
Page 20: Setup Menu
Setup Menu Turn the camera on. • The power indicator 1 lights. Press the [MENU] button. W.BALANCE SENSITIVITY PICT.SIZE QUALITY SELECT Select the [SETUP] Menu. MONITOR AUTO REVIEW BEEP POWER SAVE SELECT Preparation Select the desired item. • When rotating the zoom lever 2 toward T, the page of the menu screen can be forwarded. - Page 21 You can control the following items on [SETUP] Menu. Menu MONITOR Adjust the brightness of the LCD monitor in 7 steps. AUTO REVIEW • [OFF]: (Recording mode only) • [1SEC.]: The recorded picture automatically appears • [3SEC.]: The recorded picture automatically appears •...
- Page 22 Menu ECONOMY The remaining battery life is extended by turning the LCD (Economy monitor off automatically while camera is not used. mode only) You can set the condition to turn the LCD monitor off when the Economy mode is selected. (P45) NO.RESET Set this when you want to start the file number of the picture (Recording...
-
Page 23: Using The Lcd Monitor
Using the LCD Monitor ª Selecting the screen to be used Press the [DISPLAY] button to switch to the screen to be used. • The [DISPLAY] button is not activated when the menu screen appears. When you press the [DISPLAY] button in playback zoom or in multi playback, you can switch whether you use the LCD monitor or not. - Page 24 ª Recording guide line You can achieve balanced pictures by aligning the subject on the cross point of the horizontal and vertical guide lines. You can also take pictures easily by adjusting the horizon to the guide line. You can take pictures with well-designed composition by viewing the size and the balance of subjects.
-
Page 25: Recording Pictures (Basic)
Recording pictures (basic) Taking Pictures Preparation • Insert the batteries. (P16) • Insert the card. (P18) 1 Turn the camera on. 2 Select Normal Picture mode Aim the AF area 1 to the point you want to focus. 1600 Recording pictures (basic) Focus on the subject to take the picture. - Page 26 ª Correct posture for taking good pictures To take pictures without blurring: • Hold the camera gently with both hands, keep arms stationary at your side and stand with your feet slightly apart. • Check that the camera shake does not occur when pressing the shutter button halfway.
- Page 27 ª Focusing • You can focus on the subject up to a distance of 50 cm. • If you press the shutter button fully without prefocusing, pictures may be blurry or unfocused. • When the subject is focused, the camera beeps 2 times. If not, it beeps 4 times.
- Page 28 • When using the camera in a sandy or dusty place, be careful not to let dirt, grit or seawater come into the camera. ª AF/AE Lock (AF: Auto focus/ AE: Auto exposure) 1600 When recording a picture of people with a composition such as in the above picture, you cannot focus on the subject because it is out of AF area in usual...
-
Page 29: Taking Pictures In Simple Mode
Taking Pictures in Simple Mode We recommend you use this mode when you ask someone to take a picture. • Offering simplified menu for ease of use. • The picture size is easy to select. • The icons on the display are larger. Preparation •... - Page 30 Burst speed (P39): • Fixed to low speed. Number of recordable pictures in Burst mode (P39): Number of recordable pictures max. 3 pictures (DMC-LC70)/ ENLARGE max. 5 pictures (DMC-LC80/ DMC-LC50) 4qa6q/10a15cm max. 5 pictures max. 9 pictures (DMC-LC80) E-MAIL max. 10 pictures (DMC-LC70/ DMC-LC50) White balance setting (P51):...
- Page 31 ¬ Suggestions/Tips ¬ • The recordable range is 50 cm – ¶ (Tele), 10 cm – ¶ (Wide). • If the distance between the camera and the object is beyond the recordable range, the focus may not be adjusted properly even the focus indication is lit.
-
Page 32: Checking The Recorded Picture (Review)
Checking the Recorded Picture (Review) Preparation • In Motion image mode [ Press 4. REVIEW1X EXIT DELETE • The last recorded picture appears for about 10 seconds. • Press the shutter button halfway or 4 to cancel the review. • You can check the previous or following picture with 2/1. -
Page 33: Using The Optical Zoom
Using the Optical Zoom With this feature, you can make people and subjects appear closer with the 3 times optical zoom, and landscapes can be recorded in wide angle. Preparation • Set the mode dial except for [ ª To make subjects appear further away (Wide) 1600 Recording pictures (basic) -
Page 34: Taking Pictures Using The Built-In Flash
Taking Pictures using the Built-in Flash Preparation • Set the mode dial except for [ ª Switching the flash setting : AUTO The flash is automatically activated according to the recording condition. : AUTO/Red-eye reduction The flash is automatically activated according to the recording condition. - Page 35 ª The available flash range to take pictures Available flash range sensitivity ISO50 Wide 30 cm – 1.6 m (DMC-LC70/ Tele 50 cm – 1 m DMC-LC50) Wide 30 cm – 2.1 m ISO80 (DMC-LC80) Tele 50 cm – 1.2 m Wide 30 cm –...
-
Page 36: Compensating The Exposure
Compensating the Exposure Use this function when you cannot achieve appropriate exposure due to the difference of brightness between the subject and the background. Preparation • Set the mode dial except for [ Select [ EXPOSURE] and compensate the exposure. EXPOSURE SELECT EXIT... -
Page 37: Taking Pictures Using Auto Bracket
Taking Pictures using Auto Bracket In this mode, 3 pictures are automatically recorded by each press of the shutter button according to the compensation range of the exposure. You can select the desired exposure among the 3 types of pictures. Preparation •... -
Page 38: Taking Pictures With The Self-Timer
Taking Pictures with the Self-timer Preparation • Set the mode dial except for [ Switch the self-timer setting. 1600 : Self-timer set to 10 seconds : Self-timer set to 2 seconds No display (cancelled) Focus on the subject to take the picture. -
Page 39: Taking Pictures Using Burst Mode
Taking Pictures using Burst Mode Preparation • Set the mode dial except for [ Switch the burst mode setting. 1600 : High speed : Low speed No display (cancelled) Take pictures. • Keep pressing the shutter button fully to activate the burst mode. ¬... -
Page 40: Playback (Basic)
Playback (basic) Playing Back Pictures Preparation • Set the mode dial to [ Select the picture. 1600 100 _ 0001 10:00 1.MAR.2004 • Press 2 to play back the previous picture. • Press 1 to play back the next picture. •... -
Page 41: Pictures Multi Playback
9 Pictures Multi Playback Preparation • Set the mode dial to [ Switch to multi screen. 1600 100 _ 0001 10:00 1.MAR.2004 SELECT CANCEL Playback (basic) ]. (P8) Select the pictures. 1/19 SELECT SELECT ª To return to the normal playback Rotate the zoom lever towards [ •... -
Page 42: Using The Playback Zoom
Using the Playback Zoom Preparation • Set the mode dial to [ Enlarge the picture. CANCEL DELETE • : 1k>2k>4k>8k>16k • : 16k>8k>4k>2k>1k • The magnification reverts to [1k], when you press the [MENU] button. • When you change the magnification, the zoom position indication A appears for about 1 second to check where is enlarged. -
Page 43: Deleting Pictures
Deleting Pictures Preparation • Set the mode dial to [ ª To delete a single picture Select the picture to be deleted. 1600 100 _ 0001 10:00 1.MAR.2004 • Press 2 to play back the previous picture. • Press 1 to play back the next picture. - Page 44 Delete the pictures. MULTI DELETE DELETE THE PICTURES YOU MARKED? SELECT • It is possible to delete up to 50 pictures all at once. ª To delete all pictures Select [ALL DELETE]. MULTI/ALL DELETE MULTI DELETE ALL DELETE SELECT CANCEL 2 times (The button illustrated is from the DMC-LC80/DMC-LC70.)
-
Page 45: Recording Pictures (Advanced)
Recording pictures (advanced) Using the Mode Dial Select the desired mode turning the mode dial. ª Taking Pictures using Economy Mode In Economy mode, the camera reduces the brightness of the LCD monitor and works as follows to reduce the battery power consumption. Preparation •... -
Page 46: Taking Pictures Using Macro Mode
¬ Suggestions/Tips ¬ • The LCD monitor is also turned off when you charge the flash. • The Economy mode is not activated while the menu screen is displayed or the self-timer is set. ª Taking Pictures using Macro Mode This mode allows you to take pictures closely focusing on the subject. -
Page 47: Taking Pictures Using Portrait Mode
ª Taking Pictures using Portrait Mode This mode allows you to make a subject stand out from an unfocused background and adjust the exposure and the hue. Preparation • Set the mode dial to [ Technique for Portrait mode To make this mode more effective: 1 Rotate the zoom lever to Tele as far as possible. -
Page 48: Taking Pictures Using Night Portrait Mode
ª Taking Pictures using Night Portrait Mode Night portrait mode allows you to take pictures against a nighttime landscape. By using the flash and a slow shutter speed, the picture will show the subject and the background brighter than they appear in real life. -
Page 49: Recording Motion Images
ª Recording Motion Images You can record motion images. Preparation • Set the mode dial to [ Select [MOTION RATE]. SETUP W.BALANCE MOTION RATE 30fps 10fps D.ZOOM SELECT • [30fps]: The motion of recorded image is smooth, but the file size is large. •... - Page 50 Available recording time (seconds) Motion rate SD Memory Card 10fps Capacity 16 MB 32 MB 64 MB 128 MB 256 MB 1450 512 MB 2950 1 GB 5700 • The remaining recording time appears on the screen. (It is an approximation.) •...
-
Page 51: Using [Rec] Mode Menu
Using [REC] mode menu Setting the hue, picture quality adjustment, etc. allows you to create wide variations on taking pictures. Menu Setting items items SETUP W.BALANCE AUTO SENSITIVITY PICT.SIZE QUALITY SELECT EXIT ª Setting the White Balance In certain situations, the colour white may appear slightly reddish or bluish. - Page 52 Setting the White Balance manually (White set) If you want to set the white balance manually, select [ ] (White set) and press 1. Aim the camera at a sheet of white paper 1 or similar object so that it completely fills the frame to white on the screen and press 4.
-
Page 53: Setting Iso Sensitivity
ª Setting ISO Sensitivity The ISO setting sets the cameras sensitivity to light. The ISO setting can be increased when you need to take pictures in places where a flash may not be allowed. The overall picture quality will decrease slightly as the ISO setting is increased. -
Page 54: Changing The Quality
ª Changing the Quality “Quality” refers to the amount each image is compressed. Lower compression results in superior picture quality. Higher compression allows you to store more images on your SD Memory card. Preparation Set the mode dial except for [ ]. -
Page 55: (Dmc-Lc80/Dmc-Lc70)
ª Taking Pictures with Audio (DMC-LC80/DMC-LC70) You can take a picture with audio. Preparation Set the mode dial except for [ ]. (P8) Setting items • When selecting [AUDIO REC.] and setting it to [ON], appear. • 5 seconds after, the audio recording is stopped automatically. - Page 56 Procedure for recording with prefocus using [FOCUS] button Aim the AF area to the point where you want to focus. (P25) Press the [FOCUS] button. 1600 • When the subject is focused, the AF area turns from white to green and the focus indication 1 lights up for 1 second.
-
Page 57: Using The Digital Zoom
ª Using the Digital Zoom It is possible to further magnify a subject already magnified 3 times with the optical zoom by 3 more times with the digital zoom, thereby reaching a maximum of 9 times. Preparation Set the mode dial except for [ ]. -
Page 58: Using The Colour Effect
ª Using the Colour Effect You can use 3 types of colour effects depending on the image of the picture. Preparation Set the mode dial except for [ ]. (P8) Setting items • [COOL]: The picture becomes bluish. • [WARM]: The picture becomes reddish. - Page 59 Capturing images Select [FLIP ANIM.]. SETUP COL.EFFECT PICT.ADJ. FLIP ANIM. SELECT EXIT Select [IMAGE CAPTURE]. FLIP ANIM. IMAGE CAPTURE CREATE MOTION IMAGE DELETE STILL IMAGES SELECT EXIT Recording pictures (advanced) Capture images for flip animation. STANDARD MENU • You can take up to 100 pictures. Check the image.
- Page 60 Creating motion images Select [CREATE MOTION IMAGE]. FLIP ANIM. IMAGE CAPTURE CREATE MOTION IMAGE DELETE STILL IMAGES SELECT Select [FRAME RATE] and set the number of frames. CREATE MOTION IMAGE FRAME RATE 5fps 10fps CREATE MOTION IMAGE SELECT • [5fps]: 5 frames/sec.
- Page 61 ¬ Suggestions/Tips ¬ • Flip animations are created as motion image files. • The number of pixel is 320k240. • You cannot use pictures with audio, burst mode and auto bracket. • The images in each frame do not appear in normal review. (P32) •...
-
Page 62: Playback (Advanced)
Playback (advanced) Playing Back Pictures with Audio (DMC-LC80/DMC-LC70) Preparation • Set the mode dial to [ Select the picture with audio icon 1600 PLAY AUDIO 10:00 1.MAR.2004 Play back the audio. 1600 10:00 1.MAR.2004 Playback (advanced) ]. (P8) ¬ Suggestions/Tips ¬ •... -
Page 63: Playing Back Motion Images
Playing Back Motion Images Preparation • Set the mode dial to [ Select the picture with the motion image icon [ 100 _ 0001 PLAY MOTION IMAGE 10:00 1.MAR.2004 Play back the motion images. 10S REMAIN • Motion image playback stops and the normal playback is restored by pressing 4. -
Page 64: Rotating The Picture
Rotating the Picture You can rotate the recorded pictures in increments of 90°. This is a convenient function to play back pictures on TV. Preparation • Set the mode dial to [ Select [ROTATE]. PLAY SETUP ROTATE PROTECT DPOF PRINT SLIDE SHOW AUDIO DUB. -
Page 65: Setting The Picture To Be Printed And The Number Of Prints (Dpof Print Setting)
Setting the Picture to be Printed and the Number of Prints (DPOF Print Setting) DPOF (Digital Print Order Format) is a system that allows the user to select which pictures are to be printed on compatible photo printers. DPOF also allows the user to set how many copies of each picture will be printed. - Page 66 ª Multi setting Select [DPOF PRINT]. PLAY SETUP ROTATE PROTECT DPOF PRINT SLIDE SHOW AUDIO DUB. SELECT EXIT Select [MULTI]. PLAY SETUP ROTATE PROTECT SINGLE DPOF PRINT MULTI SLIDE SHOW CANCEL AUDIO DUB. INDEX SELECT EXIT Playback (advanced) Select the pictures and set the number of prints.
- Page 67 Select [CANCEL]. PLAY SETUP ROTATE PROTECT SINGLE DPOF PRINT MULTI SLIDE SHOW CANCEL AUDIO DUB. INDEX SELECT EXIT Select [YES] to cancel all settings. CANCEL ALL DPOF CANCEL ALL DPOF PRINT SETTINGS? SELECT • Close the menu by pressing the [MENU] button after cancelling the setting.
- Page 68 Select [YES] to index setting. DPOF INDEX SET INDEX PRINT? SELECT • Close the menu by pressing the [MENU] button after finishing the setting. ª When the index is already set DPOF INDEX SET/CANCEL INDEX PRINT? CANCEL SELECT • Close the menu by pressing the [MENU] button after finishing the setting.
-
Page 69: Preventing Accidental Erasure Of The Picture
Preventing Accidental Erasure of the Picture Preparation • Set the mode dial to [ ª Single setting Select [PROTECT]. PLAY SETUP ROTATE PROTECT DPOF PRINT SLIDE SHOW AUDIO DUB. SELECT EXIT Select [SINGLE]. PLAY SETUP ROTATE PROTECT SINGLE DPOF PRINT MULTI SLIDE SHOW CANCEL... - Page 70 ª Multi setting/To cancel all settings Perform the same operation as in [Setting the Picture to be Printed and the Number of Prints (DPOF Print Setting)]. (P65– 66) ¬ Suggestions/Tips ¬ • While this feature protects the pictures from accidental erasure, formatting the card will permanently delete all data.
-
Page 71: Playing Back With Slide Show
Playing Back with Slide Show Preparation • Set the mode dial to [ Select [SLIDE SHOW]. PLAY SETUP ROTATE PROTECT DPOF PRINT SLIDE SHOW AUDIO DUB. SELECT EXIT Select the type of pictures to play back. PLAY SETUP ROTATE PROTECT DPOF PRINT SLIDE SHOW AUDIO DUB. - Page 72 Select [START]. START DURATION AUDIO SELECT EXIT By pressing the [MENU] button, the Slide Show stops. ª SD Slide Show If setting the SD Slide Show with the [SD Viewer for DSC] which is in the supplied CD-ROM, when playing back, the confirmation screen appears.
-
Page 73: Adding Audio To Recorded Pictures (Audio Dubbing) (Dmc-Lc80/Dmc-Lc70)
Adding Audio to Recorded Pictures (Audio Dubbing) (DMC-LC80/DMC-LC70) Preparation • Set the mode dial to [ Select [AUDIO DUB.]. PLAY SETUP ROTATE PROTECT DPOF PRINT SLIDE SHOW AUDIO DUB. SELECT EXIT Select the picture and start audio recording. AUDIO 1600 DUB. -
Page 74: Resizing The Pictures
Resizing the Pictures This function is useful if you want to reduce the file size of the picture in those cases when it needs to be attached to an e-mail or uploaded to a website. Preparation • Set the mode dial to [ Select [RESIZE]. - Page 75 Select [YES] or [NO] and set it. RESIZE DELETE ORIGINAL PICTURE? SELECT CANCEL • When you select [YES], the picture is overwritten. • When the original picture is protected, you cannot overwrite the resized picture. • Close the menu by pressing the [MENU] button 2 times after finishing the resizing.
-
Page 76: Trimming The Pictures
Trimming the Pictures Preparation • Set the mode dial to [ Select [TRIMMING]. PLAY SETUP RESIZE TRIMMING FORMAT SELECT EXIT Playback (advanced) ]. (P8) Select the picture to trim. TRIMMING SELECT Enlarge or decrease the picture. TRIMMING ZOOM MENU 1600 0001 1/19 EXIT... - Page 77 Shift the picture and press the shutter button fully to set. TRIMMING 1600 100 _ 0001 ZOOM TRIM:SHUTTER EXIT Select [YES] or [NO] and set it. TRIMMING DELETE ORIGINAL PICTURE? SELECT CANCEL • When you select [YES], the picture is overwritten. •...
-
Page 78: Formatting The Card
Formatting the Card Preparation • Set the mode dial to [ Select [FORMAT]. PLAY SETUP RESIZE TRIMMING FORMAT SELECT EXIT Select [YES] to format. FORMAT DELETE ALL DATA ON THE MEMORY CARD? SELECT Playback (advanced) ]. (P8) ¬ Suggestions/Tips ¬ •... -
Page 79: Playing Back Pictures With A Tv Screen
Playing Back Pictures with a TV Screen ª Playing back pictures with AV cable (supplied with DMC-LC80/DMC-LC70) or video cable (supplied with DMC-LC50). • Turn the camera and the TV off. • DMC-LC80/DMC-LC70 is illustrated below as an example. 1 AV cable (DMC-LC80/DMC-LC70) Video cable (DMC-LC50) Connect the AV cable (supplied with DMC-LC80/DMC-LC70) to the... -
Page 80: Before Connecting With Usb Connection Cable
Before Connecting with USB Connection Cable Select the USB communication system according to the OS of your PC or your printer before connecting them to the camera with the USB connection cable (supplied). Set the items on [USB MODE] in the [SETUP] menu. (P22) Select [USB MODE]. - Page 81 ª When using Windows 98/98 SE When using Windows 98/98 SE, install the USB driver before connecting. (When using Windows Me/2000/XP, Mac OS 9.x and Mac OS X, you do not have to install the USB driver.) ª When using Windows 2000 Professional, Windows Me, Windows 98/98 SE or Mac OS 9.x The [PTP] (PictBridge) setting is not supported on the following OS’s: Windows 2000 Professional, Windows Me, Windows 98/98 SE or Mac OS 9.x.
-
Page 82: Connecting To A Pc
Connecting to a PC • If you use Windows 98/98SE, install the USB driver and then connect it to the computer. • When using Windows Me/2000/XP, Mac OS 9.x and Mac OS X, you do not have to install the USB driver. •... -
Page 83: Mass Storage
ª Mass Storage [Windows] The drive appears on the [My Computer] folder. • If it is the first time you are connecting the camera to a PC, the required driver is installed automatically so that the camera can be recognized by the Windows Plug and Play, then it appears on the [My Computer] folder. -
Page 84: Connecting To A Printer
Connecting to a Printer By connecting the camera directly to a printer supporting PictBridge or USB DIRECT-PRINT via the USB connection cable (supplied), you can select the pictures to be printed or start printing. • DMC-LC80/DMC-LC70 is illustrated below as an example. A AC adaptor (optional, DMW-AC2) B USB connection cable Turn the camera on, and the set... -
Page 85: Single Picture
Preparation • Set the paper size and print quality with the printer in advance. (Read the printer operating instructions.) • Connect the camera to a printer. (P84) ª Single picture Select [SINGLE PICTURE]. PictBridge SINGLE DPOF PICTURE PICTURE SELECT • The screen shown in step 2 appears when DPOF print is not set or the printer does not support DPOF print. - Page 86 Preparation • Set the DPOF print with this camera in advance. (P65) • Set the paper size and print quality with the printer. (Read the printer operating instructions.) • Connect the camera to a printer. (P84) ª DPOF picture Select [DPOF PICTURE]. PictBridge SINGLE DPOF...
- Page 87 ª To print the date connecting to the printer There are two ways. 1 The one is to connect to the printer and then set the date printing. 2 The other is to set the date printing with the DPOF print in advance. 1 Setting the date printing after connecting to the printer •...
-
Page 88: Screen Display
Others Screen Display 10:00 1.MAR.2004 ª In recording 1 Recording mode (P8, 51) 2 Flash (P34) 3 White balance (P51) 4 ISO sensitivity (P53) 5 Picture size (P53) 6 Quality (data compression ratio) (P54) (Motion rate): 10 fps 30 fps In Motion image mode (P49) 7 Battery indication (P13) 8 Picture/Time remain... - Page 89 ª Recording in Simple mode 1 Flash (P34) 2 Focus indication (P25) 3 Jitter alert indication (P27) 4 Picture mode (P29) 5 Battery indication (P13) 6 Picture remain 7 Zoom (P33) 8 Recording indication 9 Self-timer (P38) 10 Card access indication (P17) 11 AF area (P25) 12 Backlight compensation indication (P30)
- Page 90 PLAY AUDIO ª In playback 1 Playback mode 2 DPOF (P65, 71) (White): DPOF setting for printing (Green): DPOF setting for Slide Show (Green with number of prints): DPOF setting for printing and Slide Show 3 Protected picture (P69) 4 Picture with audio (DMC-LC80/ DMC-LC70) (P62) 5 Picture size (P53) : In Motion image mode (P63)
-
Page 91: Cautions For Use
In the event of abnormal operation (e.g. if the unit emits smoke or an unusual smell), immediately stop operating the unit and consult the Panasonic Customer Care Centre on 132600. ª Optimal Use of the Camera Keep the camera away from... - Page 92 If you will not be using the camera for a long time, • Do not keep the camera in a place where it will be subjected to high temperatures, high humidity or soot. Fungus may be attached to the lens or condensation may occur.
- Page 93 • Store the batteries in a completely discharged state. To store the rechargeable batteries for a long period of time, we recommend charging them once every year and storing them again after you completely use up the charged capacity. Card •...
-
Page 94: Pictures And The Size
Approximate number of recordable pictures and the size Picture 2560k1920 size (DMC-LC80) Quality 16 MB 32 MB 64 MB 128 MB 256 MB 512 MB 1 GB Picture 1280k960 size Quality 16 MB 32 MB 64 MB 128 MB 256 MB 512 MB 1497 1 GB... -
Page 95: Message Display
Message Display [NO MEMORY CARD] Insert the card. [THIS MEMORY CARD IS PROTECTED] Cancel the card lock. [NO VALID IMAGE TO PLAY] Play back after recording or after inserting a card with a recorded picture. [MEMORY CARD FULL] / [NOT ENOUGH MEMORY IN THE CARD] Insert a new card or delete the unnecessary data. -
Page 96: Troubleshooting
Troubleshooting Operational difficulties may be improved by restoring the initial settings on the [SETUP] menu. Select [RESET] on the SETUP menu and reset the Setup parameters. The camera is not turned on. 1-1: Are the batteries inserted or the AC adaptor (optional, DMW-AC2) correctly connected? Check the connection. - Page 97 10: The picture does not appear on the television. The display may be distorted or may look colourless if you select the incorrect video out setting. 10-1: Is the camera connected to the TV correctly? Check it. 10-2: Set the TV to video input mode. 10-3: Check and confirm that the video out setting is selected on the set up menu as below depending on...
-
Page 98: Specifications
Specifications Digital Camera Power Source: Power Consumption: Camera Effective pixels Image sensor Lens Digital zoom Focus Focus range Shutter system Burst recording Motion image recording ISO sensitivity Shutter speed White balance Exposure (AE) Metering mode LCD monitor Optical finder Others... - Page 99 DC IN (DMC-LC50) Dimensions Weight Operating Temperature Operating Humidity Power source Charger (Panasonic DE-894) Input Output Others Flash range: ISO400/AUTO Approx. 30 cm – 4.8 m (Wide)/ Approx. 50 cm – 2.8 m (Tele) AUTO, AUTO/Red-eye reduction, Forced ON, Slow sync./Red-eye reduction, Forced OFF...
- Page 100 Matsushita Electric Industrial Co., Ltd. VQT0M82 Web Site: http://www.panasonic.co.jp/global/...