Table of Contents
Advertisement
Advertisement
Table of Contents

Related Manuals for Sunit fd

Summary of Contents for Sunit fd
- Page 1 ® ® USER’S GUIDE...
- Page 2 © Sunit Oy 2011. v.18032011...
-
Page 5: Table Of Contents
Start-up and shut-down ................Installing and removing the SIM card ............Resetting the computer................Maintenance ......................Startup signals ...................... APPENDIX A Sunit Telematics quick start guide................ APPENDIX B Sunit touch screen calibration …................Special requirements for taxi installation ……………………………………... -
Page 6: Declaration Of Conformity
DECLARATION OF CONFORMITY Sunit Oy declares under our sole responsibility that the products Sunit c and Sunit d to which this declaration relates are in conformity with the Commission Directives 72/245/EEC and as amended by 2004/104/EC, includiing latest 2006/28/EC. Declaration of conformity is available at our site www.sunit.fi... -
Page 7: Identification Data
Only authorized service is allowed to install, repair or open the device. Unauthorized repair or open- ing of the device may cause faulty operation and revoke the warranty. Incorrect wiring may disturb insufficiently protected electronic systems. For further information, please contact support@sunit.fi Turning off the computer Turning the computer off otherwise than using operating system’s Shut down –command may cause... -
Page 8: Hardware Configuration
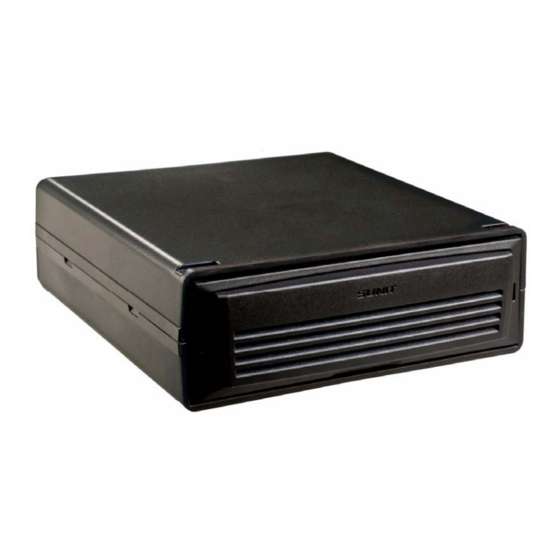
GPS/GPRS antenna. Depending on the application requirements, configuration can in- clude also integrated GSM/GPRS/EDGE phone, 802.11b/g WLAN adapter and CAN-interface. Sunit CPU. Guidance for removing the front panel is on page 10. ... -
Page 9: Connections
CONNECTIONS 10 11 1. WLAN antenna cable connection (brown) 2. WLAN auxiliary antenna connection 3. BUS 3USB+LAN connection (page 11) 4. Video input 5. Main display connection 6. -
Page 10: Display
DISPLAY f7”, f10” and f12” display buttons and indicators 2 1 3 Power button and brightness adjustment - start computer by pressing the power button - when computer is running, pressing the power button shortly turns backlight off/on - minimum brightness adjustment of the display is available by two short press of the power button. - Page 11 8” and 12” display buttons and indicators 1 2 3 Three indicator leds shows the status of the computer: 1. Green continuous: Computer on Green blinking: Computer is starting. 2. Yellow continuous: Preheating mode Yellow blinking (1 sec./1 sec.): CPU only heating mode Yellow blinking (0,2 sec./2 sec.): Display only heating mode 3.
-
Page 12: Using The Computer
- off: Use the operating system’s Shut-down feature only. Automatic starting - you can set the automatic starting adjustments in Sunit Telematics (at Windows Control Panel) Automatic shut-down - you can adjust the mode of shut-down, delay and standby time in Sunit Telematics Cold start - the unit starts only after the pre-heating, when the temperature inside of the unit has reached +5°C. - Page 13 Remove SIM card by pressing it firmly and then pulling it out NOTE! Disable PIN code query of the SIM card using mobile phone before installing the SIM card. 3. Attach the front panel. Placed in the front panel there is a filter to protect the CPU from dust. Therefore the front panel has been equipped with a detector that indicates is the front panel attached.
-
Page 14: Resetting The Computer
RESETTING THE COMPUTER To solve telecommunication or location problems the telematics card may have to reset. In that case the computer should be turned off by pressing on/off button for about 4 seconds. When the computer has shut down, reset the telematics card by pressing the reset button using a pen, paper clip etc Reset MAINTENANCE Do not scratch or press the cover of the device with sharp objects. - Page 15 The filter is located inside the panel. Remove the filter and clean it. If the filter is very dirty, washing is recommended. Place the filter in and attach front panel. Alkaline or other solvent, alcohol and other similar chemicals must not be used! Software maintenance The computer runs with either a Microsoft Windows or a Linux operating system.
-
Page 16: Startup Signals
START-UP SIGNALS The PC has internal control system which controls the status of the device. If the device states a faulty function during start-up, it indicates it with audible signal; one long and one or more short “beeps” according to the following list. Error Beep Error Action... -
Page 17: Sunit Telematics Quick Start Guide
APPENDIX A Sunit Telematics quick start guide Sunit Telematics –application is used for setting the properties of the Sunit vehicle PC. You can find the complete user’s guide from the Support folder. Start the application by clicking the icon in the Windows Control panel... - Page 18 Not selected: The PC won’t start automatically if the ignition is turned on. It has to be activated via the main power button on the front side of the OBU. Black-Panel after IGN-OFF Selected: The display turns off when the ignition is turned off. You can setup a timer to delay the turn off.
- Page 19 PURPOSE OF DIGITAL INPUT 6 ALARM Digital Input Only Selected: The Digital Input will act as a standard “Low-Active” Digital Input. Digital Input + continuous preheating Selected: Similar to Black panel after IGN-OFF the OBU will start to monitor the temperature when this Digital Input becomes active.
-
Page 20: Sunit Touch Screen Calibration
APPENDIX B CALIBRATING THE SUNIT TOUCHSCREEN - start Windows Control panel - open Sunit DTS touchscreen application by doubleclicking it’s icon in control panel 1. Start calibration: - Press “Align Display 1” Button. 2. Calibrate touch-screen: Touch calibration cross with your finger. -
Page 21: Special Requirements For Taxi Installation
Installation and service of device is allowed only for educated and authorized service accepted by device manufacturer. Opening device, braking the sealing or disconnecting cables is allowed only for authorized service. Instructions for installation and sealing can be found in enclosed document “Sunit Taximeter SFDIN1-311121 installation, calibration and sealing instructions”. Permissible adjustments:... - Page 24 Sunit Oy Taitoraitti 1 FI-87400 Kajaani Finland Tel. +358 (8) 632 600 Fax. +358 (8) 632 6030 www.sunit.fi...
Need help?
Do you have a question about the fd and is the answer not in the manual?
Questions and answers