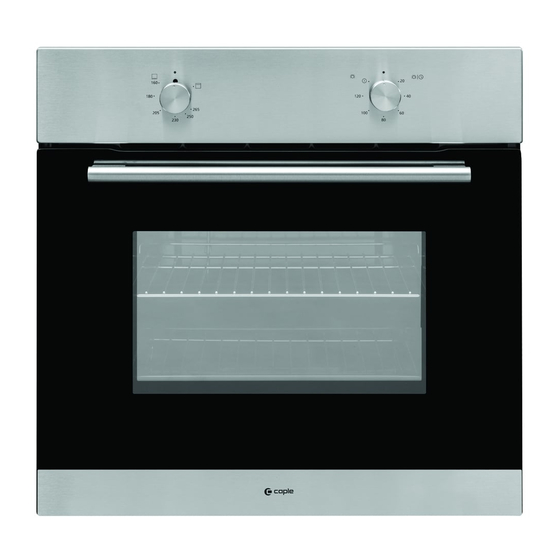
Summary of Contents for Caple C2512
- Page 1 Instruction manual for gas single oven Mode code: C2512 Contact Caple on 0117 938 7420 or for spare parts www.caple.co.uk...
- Page 2 ACKNOWLEDGMENT Thank you for purchasing our product. We hope you enjoy using the many features and benefits it provides. Before using this product please study this entire Instruction Manual carefully. Keep this manual in a safe place for future reference. Ensure that other people using the product are familiar with these instructions as well.
- Page 3 Do not use harsh abrasive cleaners or sharp metal scrapers to clean the glass of the oven. This can scratch the surface and may result in permanent damage to the glass. During use, the appliance becomes very hot. Care should be taken to avoid touching heating elements inside the oven.
- Page 4 All installation work and adjustments, and any conversion to a different type of gas, must be carried out by an authorised expert in accordance with the applicable rules and regulations enforced by the local gas suppliers. Always disconnect the gas supply before carrying out any work on the appliance.
-
Page 5: Safety Hints
SAFETY HINTS Do not use the oven unless you are wearing something on your feet. Do not touch the oven with wet or damp hands or feet. For oven: Oven door should not be opened often during the cooking period. The appliance must be installed by an authorized technician and put into use. -
Page 6: Declaration Of Compliance
temperatures will melt and deform the unit, once the oven has been lodged inside the units, electrical parts must be completely insulated. This is a legal safety requirement. All guards must be firmly fixed into place so that it is impossible to remove them without using special tools. Remove the back of the kitchen unit to ensure an adequate current of air circulates around the oven. -
Page 7: Gas Connection
GAS CONNECTION Gas oven installation 1. Leave at least 80 to 85cm between the top of the gas oven and any cabinet installed above 2. Leave at least 2cm in the back and each side of the gas range to allow the heat to get out. 3. -
Page 8: Converting The Gas Type
• Gas hoses designed for natural gas MUST NOT be used for supplying LPG gas (LPG gas hoses can be identified by a either a red band or stripe on the rubber outer coating of the hose). • The hose should not be crushed or trapped or be in contact with sharp or abrasive edges. -
Page 9: Important Note
• Unscrew the nozzle and replace it with a nozzle which is suitable for use with the new type of gas. • To reassemble, follow the instructions in reverse order. IMPORTANT NOTE This appliance is supplied for use on NATURAL GAS or LPG (check the gas regulation label attached on the appliance). -
Page 10: Electric Connection
ELECTRIC CONNECTION Only a licensed expert may connect the appliance. The appliance must be installed in accordance with the latest IEE guidelines (Institution of Electrical Engineers). The appliance could be damaged if incorrectly connected. Make sure that the voltage value of the electical supply corresponds with the value specified on the rating plate. -
Page 11: How To Use
HOW TO USE Gas heating and grill (K1) Timer and oven light (K2) Gas heating and grill Gas heating: A concealed element in the base of the oven provides a more concentrative heat to the base of food without burning. Push and turn K1 counterclockwise. - Page 12 Timer and oven light K2 knob 1. To set the time, turn the clockwise to the desired time.The time can be set up to 120 minutes. At the same time, the light is always on . At the end turn off of the set duration, it will beep and oven light will Which...
-
Page 13: Shelf Placement Warning
ACCESSORIES Wire shelf : For grilling, pots and dishes, cake pans and with items for roasting and grilling. Universal pan: For cooking large quantities of food such as moist cakes, pastries, frozen food etc,or for collecting fat/ spillage and meat juices. A small wire rack is also supplied to use in this tray for grilling and catcing cooking juices. - Page 14 BULB REPLACEMENT The bulb in the light is a special bulb, and has high temperature resistance (240V~25W). For replacement, proceed as follows: 1>.Disconnect power from the mains outlet or switch off the circuit breaker of the unit's mains outlet. 2>.Unscrew the covering glass and replace the bulb with a new one of the same type.
-
Page 15: Cleaning And Maintenance
CLEANING AND MAINTENANCE To maintain the good appearance and reliability, keep the unit clean. The modern design of the unitfacilitates maintenance to a minimum. The parts of the unit which come into contact with food have to be cleaned regularly. Before any maintenance and cleaning, disconnect the power. - Page 16 Caple Fourth Way Avonmouth Bristol BS11 8DW www.caple.co.uk...


Need help?
Do you have a question about the C2512 and is the answer not in the manual?
Questions and answers