Advertisement
Available languages
Available languages
Quick Links
Advertisement

Related Manuals for Panacom T-i7yUP


Summary of Contents for Panacom T-i7yUP
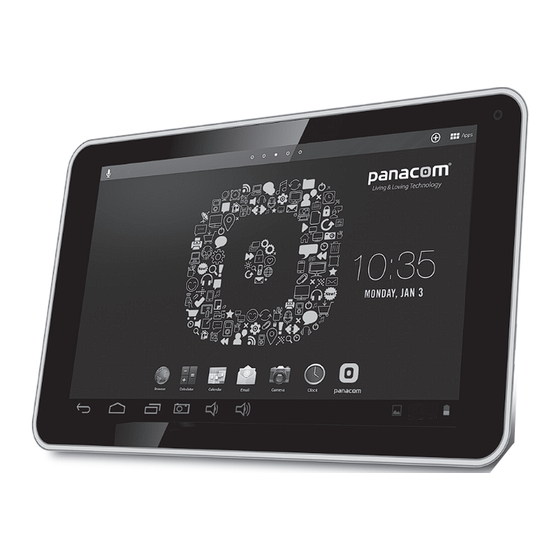
- Page 1 T-i7yUP User Manual T-i7yUP Manual del Usuario...
- Page 2 Thanks for purchasing 7” TABLET T-i7yUP PANACOM. Please read this manual carefully before using this Tablet. DO NOT ALLOw wATEr Or fOrEigN OBjECTs TO ENTEr ThE UNiT. i. NOTE: 1. Avoid the unit being dropped. Avoid the display been shake seriously, or the display will be damaged or unusual.
- Page 3 ii. iNTrODUCTiON Of COvEr: 1. Power on/off 2. Earphone Jack 3. Micro USB interface 4. DC charger interface 5. Volume+, Volume – 6. TF-CARD interface 7. Reset 8. Back Camera 9. Loudspeaker 10. Front Camera Pg. 3...
- Page 4 iii. OPErATiON iNsTrUCTiON 1. Basic Operation 1.1. Power on/Power off Power on: Press and hold the power switch for 5 seconds; the unit displays the start-up logo and enters the working mode. Power off: Press and hold the power switch for 3 seconds to turn the unit off. sleep: While the device is at working status, press the power switch, it enters the sleeping mode, and the screen will be off then.
- Page 5 2.1. Date and Time setting Click “Date & Time” in the setting interface to set the date and time. You may set the date, time zone, time, time format and date format etc. in the menu. Pg. 5...
- Page 6 2.2. Brightness Select “Display” in the setting interface. Click “Brightness” to enter, and slide the bar to adjust the brightness. 3. wi-fi connection Click “Settings” in the main interface and click “Wireless & network” to enter the wireless and network setting interface. Click Wi-Fi to turn on the WIFI.
- Page 7 Click “Network Notification”, it lists the open network it searched. Click the name of the network; it pops up the setting window. You may connect it to WIFI according to the prompts. You need to input the user name and password if networks are encrypted. 4.
- Page 8 6. Audio and video playback 6.1. Audio playback Click the “Music” in the main menu to enter the audio playback interface. It lists the audio files in the device, and you may click the file name to play it. in the audio playing interface, click the icons to play/pause/ increase volume/ decrease voluem/ FF/ REW….
- Page 9 6.2. video Playback Click the “Gallery or Video” in the main menu to enter the video playback interface. It lists the video files in the device, and you may click the file name to play it. in the video playing interface, touch the screen to pop-up the operation icons and click the icons to play/pause/ increase volume/ decrease volume/ skip to next file/skip to previous file….
- Page 10 7. Picture viewing Click “2160P(Gallery)” in the main menu to enter the picture folder list. Select and click the folder you want to enter, it displays the . click the thumbnail of the picture to view it. Touch the screen to pop-up the operation icons while viewing the picture, you may zoom in/zoom out/ skip to next picture/skip to previous picture/ rotate/ delete the picture…...
- Page 11 8. 3g DONgLE The device supports external BT Dongle, connect the BT dongle to the device via the external transfer cable, after the dongle indicator lights, you may use the BT network normally. 9. Camera Click “Camera” in the main interface. Pg.
- Page 12 9.1 Camera If the cursur is at postion, the device is at Camera mode. Click to take picture. Click to enter the setting interface Click to set the scene mode, Picture size, Picture quality, and color effect. Click to select back or front camera. 9.2 Dv Click to enter the mode select...
- Page 13 Pg. 13...
-
Page 14: Troubleshooting
10.2. Use of OTg and UsB host It supports the movable device with FAT32 format, such as U disk and MP3. Connect the movable device to the MID. (Note: only OTG could support USB mouse and keyboard, USB HOST only support USB2.0 High speed device) 10.3. -
Page 15: Specifications
It is suggest using the device in normal temperature. The using time is also affected by increased volume and frequently operation. v. sPECifiCATiONs Item T-i7yUP Dimension 190x108x10.5mm Display 7” 1024 x 600 TFT touch panel Android 4.4... -
Page 17: International Warranty
Terms and Conditions 1. PANACOM warrants the operation of this product to be free from any manufacturing and/or material defect for a pe- riod of 6 months from the date of purchase by the user. 2. This warranty is limited to the repair and/or replacement of... - Page 18 Gracias por la compra de su 7” TABLET T-i7yUP PANACOM. Por favor lea este manual cuidadosamente antes de utilizar esta Tablet para seguir las mejores pautas tendientes a ofrecer el mejor servicio No permita que agua o materias extraños entren en el equipo.
- Page 19 ii . iNTrODUCCióN DE LA CUBiErTA: 1. Encendido / apagado 2. Toma de auriculares 3. Puerto USB Micro 4. Puerto del cargador DC 5. Volumen + , Volumen - 6. Puerto TF -CARD 7. Resetear 8. Cámara trasera 9. Altavoz 10.
- Page 20 iii . iNsTrUCCióN DE LA OPErACióN 1 . funcionamiento básico 1.1 . Encendido / apagado de alimentación Encendido: Pulse y mantenga pulsado el interruptor de encendido durante 5 se- gundos; la unidad muestra el logotipo de la puesta en marcha y entra en el modo de trabajo.
- Page 21 2.1. fecha y hora Haga clic en “ Fecha y hora” en la interfaz de configuración para es- tablecer la fecha y la hora. Usted puede configurar la fecha, la zona horaria, la hora , el formato de fecha y hora , etc. Pg.
- Page 22 2.2 . Brillo Seleccione “Ver” en la interfaz de configuración. Haga clic en “ Brillo” para entrar, y deslice la barra para ajustar el brillo. 3 . Conexión wi-fi Haga clic en “Configuración” en la interfaz principal y haga clic en “Conexiones inalámbricas y redes”...
- Page 23 Haga clic en “Notificación de red”, enumera la red abierta. Haga clic en el nombre de la red. Es posible conectarlo a WIFI de acuerdo con las instrucciones. Tendrá que introducir el nombre de usuario y con- traseña. 4 . Explorer para instalar la aplicación 4.1 instalar Hay muchas formas de instalar aplicaciones bajo Android, a través de USB, por el programa de terceros.
- Page 24 Seleccione “Ajustes / Aplicaciones / Administrar aplicaciones” para seleccionar las aplicaciones instaladas y compruebe el atributo de la misma o desinstalarla. 5 . Conectar a internet 5.1. Después de conectar con WIFI, abra el navegador e introduzca la dirección web. 5.2.
- Page 25 6.2 . reproducción de vídeo Haga clic en la “Galería y Video” en el menú principal para entrar en la interfaz de reproducción de video. En él se enumeran los archivos de video en el dispositivo. Haga clic en el nombre del archivo para repro- ducirlo.
- Page 26 Pg. 26...
- Page 27 8. 3g DONgLE El dispositivo es compatible con BT Dongle externo. Conecte el don- gle BT con el dispositivo a través del cable de transferencia externa, después de que las luces indicadoras del dongle se enciendan, es posible utilizar la red BT con normalidad. 9.
- Page 28 9.1 Cámara Si el cursor está en posición, el dispositivo está en modo de cá- mara. Haga clic aquí para tomar la foto . Haga clic para entrar en la interfaz de configuración Haga clic para establecer el modo de escena, el tamaño de ima- gen, calidad de imagen y efecto de color.
- Page 29 Pg. 29...
-
Page 30: Solución De Problemas
10.2 . El uso de OTg y UsB anfitrión Es compatible con el dispositivo móvil con formato FAT32, como el disco U y MP3. Conecte el dispositivo móvil a la MID. (Nota: sólo OTG podría soportar mouse y un teclado USB. USB HOST sólo soporta USB 2.0 de alta velocidad) 10.3 . -
Page 31: Especificaciones
El tiempo de uso también se ve afectada por el aumento de volumen y frecuencia de las operaciones. vi . EsPECifiCACiONEs rtículo T-i7yUP Dimensión 190x108x10.5mm Pantalla 7” 1024 x 600 TFT touch panel Android 4.4... - Page 32 Pg. 32...
-
Page 33: Garantia Internacional
GARANTIA INTERNACIONAL Términos y Condiciones 1. PANACOM garantiza el funcionamiento de este producto ante cualquier defecto de fabricación y/o vicio de material por el término de 6 meses contado a partir de la fecha de compra por parte del usuario. - Page 34 Pg. 34...
- Page 35 Pg. 35...
- Page 36 www.panacom.com...
Need help?
Do you have a question about the T-i7yUP and is the answer not in the manual?
Questions and answers