
Summary of Contents for Blackmagicdesigngi Videohub Master Control
- Page 1 Installation and Operation Manual Videohub Control Mac OS X ™ Windows ™ November 2012...
-
Page 2: Table Of Contents
Contents Videohub Operation Manual Planning Your Videohub Installation Using Hardware Control Panels Videohub Master Control Using Videohub Master Control Videohub Smart Control Using Videohub Smart Control Hardware Installation Help Connecting Videohub Control Panels with Ethernet Warranty Information Connecting Videohub Control Panels with USB... - Page 3 Welcome Welcome to Videohub Control! Videohub Master Control and Videohub Smart Control are simple to install. We've extracted the relevant pages from the Videohub manual so you don't need to read too much. All the information in this mini manual can also be found in the Videohub manual.
- Page 4 Here is what you'll learn in each section. Planning First, go to the "Planning your Videohub Installation" section for your Videohub Master Control or Videohub Smart Control. This section provides you with all the information you need to know before buying or installing a Videohub control panel.
-
Page 5: Planning Your Videohub Installation
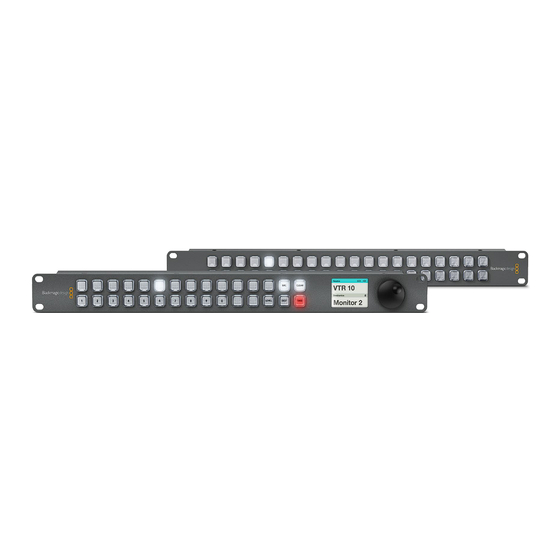
Planning Your Videohub Installation Videohub Master Control Source/Destination LCD for Source and Buttons Destination Labels Configurable buttons provide Button Caps can Clear Scroll Wheel for fast selection of common Illuminated buttons with be removed for Selection scrolling through sources equipment types, e.g. cameras... - Page 6 You will need to provide a mains power socket for the universal power supply. Videohub Master Control is 1 rack unit high and less than an inch thick. You will need to leave enough space in your equipment rack to install the Videohub Master Control hardware. You can rack-mount Videohub...
- Page 7 Planning Your Videohub Installation Videohub Smart Control +12 volt Illuminated Single or multiple Button caps can Buttons can be power supply buttons for router destinations be removed for customized as Take button connection source selection supported custom labelling macros can be enabled USB 2.0 for adjusting Cable tie point Power over...
- Page 8 Planning Your Videohub Installation Planning your Videohub Smart Control Installation Videohub Smart Control is a rack-mountable control panel, with 40 backlit pushbuttons and Ethernet connectivity, which works with all models of Videohub. It can be configured to work with one or many SDI destination devices, using the included software utility for Mac OS X and Windows.
-
Page 9: Hardware Installation
Hardware Installation Connecting Videohub Control Panels with Ethernet Videohub Master Control and Videohub Smart Control connect to any Videohub via standard Ethernet networking and can be powered over Ethernet or with an external power supply. Videohub control panels have two 10/100Base-T Ethernet ports. The In port usually connects directly to the Ethernet network switch and then to any Videohub router on your local area IP based network. - Page 10 Hardware Installation In most facilities, Videohub is usually shared via an Ethernet network switch so it can be controlled by computers on the network as well as by Videohub control panels. See "Connection method 1". Videohub control panel connected via Ethernet networking Network Switch Ethernet Videohub connected via Ethernet...
- Page 11 Hardware Installation When power is first connected to a Videohub control panel, a self-test will be conducted and all the buttons will display their test lights in the following sequence: red, green, blue and white. The top left button of a Videohub control panel indicates its network status, using the following diagnostic display, as long as the panel is not selected in the Videohub Control Utility software: Pink flashing light - unit is attempting to acquire an IP address.
-
Page 12: Connecting Videohub Control Panels With Usb
Connecting Videohub Master Control with USB A USB 2.0 connection to a computer is used to configure the network settings of Videohub Master Control. When viewed from the rear of the unit, the type B USB port is easily found just to the right of the power connector. -
Page 13: Labelling Control Panels
Step 4. Now gently lift the face plate off the rest of the unit. If you have a Videohub Master Control, take care not to pull on the data cable that connects the scroll wheel to the rest of the unit. The cable is long enough to allow the face plate to lie down next to the rest of the unit. -
Page 14: Software Installation
Software Installation Installing the Videohub Control Utility Software The Blackmagic Videohub Control Utility software is used to configure settings in Videohub Master Control and Videohub Smart Control. Videohub Control Utility runs on the latest Lion and Mountain Lion versions of Mac OS X. -
Page 15: Updating The Software In Your Videohub Control Panel
Software Installation Updating the Software in Your Videohub Control Panel Once the software installation has been completed and your Videohub control panel is powered on, it is a good idea to check that the internal software is up to date. Step 1. -
Page 16: Configuring The Videohub Control Utility Software
Software Installation Configuring the Videohub Control Utility Software After installing the Videohub Control Utility software, launch Blackmagic Videohub Control Utility and it should immediately search your network for any Videohub control panels. Any panels discovered on the network will be listed in the Videohub Control Panels pane with an Ethernet network icon next to their names. - Page 17 Software Installation If a Videohub control panel is selected in the Videohub Control Utility software, all of the panel's buttons will illuminate with the same colors and intensity as shown in the software interface. While the panel is selected in the software, the top left button will not indicate the status of the unit. After configuring the network and control settings in the Blackmagic Videohub Control Utility, quit the software or unplug its USB connection.
-
Page 18: Videohub Master Control Settings
If you prefer to use intuitive names of equipment to select crosspoint routes, you'll need to standardize port labels before labelling any Videohub Master Control buttons. To standardize port labels, open the Blackmagic Videohub application, go to the Blackmagic Videohub menu and choose Customize Labels. - Page 19 Once you have finished standardizing port labels in Blackmagic Videohub software, click the OK button. You are now ready to label the Videohub Master Control buttons. Open the Videohub Control Utility and select your Videohub Master Control from the Videohub Control Panels pane.
-
Page 20: Videohub Smart Control Settings
Software Installation Videohub Smart Control Settings The right hand pane of the Videohub Control Utility software lets you customize the hardware features of each Videohub control panel. Number of Destinations Videohub Smart Control can be configured as a Cut-Bus controller or as an XY controller. Blackmagic Videohub Smart Control configured with When configured as a Cut-Bus controller, every button represents an SDI source and there is only one multiple destinations. - Page 21 Software Installation Number of Macros If you want to make multiple crosspoint routing changes simultaneously, you can enable macro buttons so that a single button press will change up to 16 crosspoint routes. Slide the "Number of Macros" slider to enable up to 10 macro buttons.
-
Page 22: Videohub Master Control 5 Using Videohub Master Control
Using Hardware Control Panels Using Videohub Master Control When initially powered on, Videohub Master Control will be in an idle state with no buttons selected. With Front panel showing a new source has been selected. the exception of the SRC and DEST buttons, pressing buttons will not cause anything to change. Similarly, scrolling the wheel will not cause anything to change. - Page 23 Videohub Master Control works in the same conceptual way as any other router control. Start by pressing the DEST button to display a destination on the LCD. There are several ways to find the desired destination using buttons and/or the scroll wheel.
- Page 24 Using Hardware Control Panels How to select devices by using the scroll wheel Regardless of whether or not you've customized the Videohub port labels, you can always use the scroll wheel to scroll through a list of sources and destinations. This is the slowest method but is useful if you want to browse through a list of all available equipment and ports.
- Page 25 • Press a button you have customized for a type of destination equipment, e.g. VTR. The button should light gold. If the button flashes but does not stay lit, Videohub Master Control is preventing you from selecting the button because the equipment type has not been labelled as a destination device or In this example, a customized "Cam"...
- Page 26 Using Hardware Control Panels How to select devices using the numeric buttons and scroll wheel together If you have customized the Videohub port labels with numbers, you can use the numeric buttons and scroll wheel together to find a short list of sources and destinations. This method is fast and intuitive because you only have to scroll through a short list of equipment and you don't have to remember any port numbers.
- Page 27 • Press a button you have customized for a type of destination equipment, e.g. VTR. The button should light gold. If the button flashes but does not stay lit, Videohub Master Control is preventing you from selecting the button because the equipment type has not been labelled as a destination device or does not match the current routing level.
- Page 28 Using Hardware Control Panels Locking and Unlocking Routes Videohub Master Control can lock and unlock any route on your Videohub. In contrast to Videohub Smart Control, Videohub Master Control can unlock any destinations locked by other people using their computer, iPad or Videohub Smart Control.
-
Page 29: Videohub Smart Control 7 Using Videohub Smart Control
Using Hardware Control Panels Using Videohub Smart Control After configuring the Videohub Smart Control hardware with the Blackmagic Videohub Control Utility Videohub Smart Control configured as a Cut-Bus controller and software, there is nothing more to do other than change video routes as desired. with a Take button Using Videohub Smart Control as a Cut-Bus Controller If Videohub Smart Control has been configured as a Cut-Bus controller, the destination device has already... - Page 30 If you encounter a locked destination, and do not know who locked the video device, you can override the lock using the Videohub software on a Mac OS X or Windows computer or by using a Videohub Master Control. Using Macros If you press a green macro button, it will simultaneously make the crosspoint changes you have previously configured in the Videohub Control Utility software.
- Page 31 Help There are four steps to getting help. Step 1. Check out the Blackmagic Design web site www.blackmagicdesign.com and click on the Support page for the latest support information. Step 2. Call your dealer. Your dealer will have the latest technical updates from Blackmagic Design and should be able to give you immediate assistance.
-
Page 32: Limited Warranty
Warranty Limited Warranty Blackmagic Design warrants that Videohub routers will be free from defects in materials and workmanship for a period of 36 months from the date of purchase excluding connectors, cables, cooling fans, fiber optic modules, fuses, keyboards and batteries which will be free from defects in materials and workmanship for a period of 12 months from the date of purchase.
Need help?
Do you have a question about the Videohub Master Control and is the answer not in the manual?
Questions and answers