
Summary of Contents for Rad Power Bike RADMINI
- Page 1 RADMINI OWNER’S MANUAL 2016 WWW.RADPOWERBIKES.COM We are here to help! Please contact us at INFO@RADPOWERBIKES.COM or 1-800-939-0310 if you have questions. REV050916...
-
Page 2: Welcome
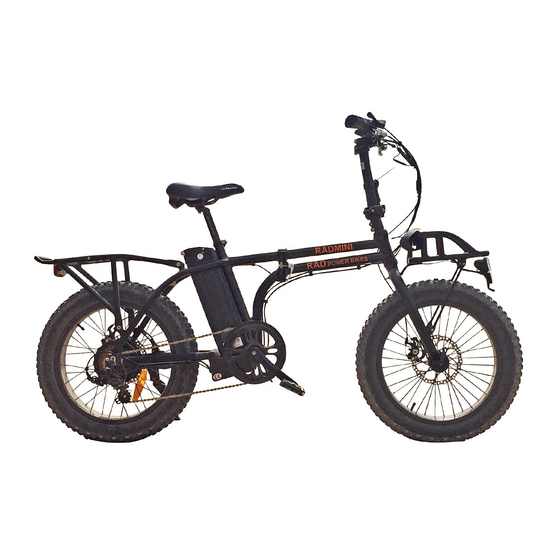
. We take pride in bringing you a quality product that will offer years of enjoyment. The RadMini is the only silent, zero emission, battery powered, electric folding fat tire bike with 750 watts of power and a 48 volt battery pack. Thanks for... -
Page 3: Table Of Contents
Table of Contents Welcome ......................................2 Using This Manual ..................................... 2 Assembly Instructions ..................................4 Battery Charging ....................................7 Operation ......................................10 Maintenance ....................................16 Troubleshooting ....................................18 Warnings and Safety ..................................20 Link to Assembly Video and Online Resources ..........................25 Limited Warranty .................................... -
Page 4: Assembly Instructions
Assembly Instructions NOTICE: The following assembly steps are only a general guide to assist in the assembly of your Rad Power Bike and is not a complete or comprehensive manual of all aspects of assembly, maintenance and repair. We recommend you consult a bicycle repair specialist to assist in the assembly, repair and maintenance of your bicycle. - Page 5 Step 3: Rotate the handlebar stem upwards and clamp the folding stem securely as shown in the assembly video at www.radpowerbikes.com Step 4: Assemble the front wheel onto the front fork if not installed as shown in the assembly video at www.radpowerbikes.com.
- Page 6 Recommended Torque Values Hardware Location Torque Required (Nm) Handlebar 18-20 Stem 18-20 Saddle 18-20 Seat 18-20 Front Wheel (For Bikes With Bolt On Front Wheel) 16-25 Rear Wheel 30-35 Bottom Bracket Parts 35-55 Pedals Disk mounting Bolts Disk Caliber Mount Crank Bolts Rear Derailleur Cable Pinch Front Derailleur Clamp...
-
Page 7: Battery Charging
Charge in a clear area away from potential to trip on the charging cords, or damage to occur to the bike, battery or charging equipment while parked. Charging Procedure Follow these steps for charging your Rad Power Bike: W W W . R A D P O W E R B I K E S . C O M... - Page 8 1. Turn the battery pack off using the switch on the side of the battery. 2. Remove the rubber cover on the charging socket. 3. With the battery on or off the bike, place the charger in a flat, secure place, and connect the DC output plug from the charger (round barrel connector) to the charging port on the side of the battery pack.
- Page 9 Do not charge the battery with any other chargers then what was originally supplied with your Rad Power Bike or a charger purchased directly from Rad Power Bikes for use with your specific bike serial number, as approved by Rad Power Bikes.
-
Page 10: Operation
Please take special care in charging of your Rad Power Bike in accordance with the above procedures and safety information. Failure to follow proper charging procedures can result in damage to your Rad Power Bike, charger, personal property and/or serious injury or death. - Page 11 Users must follow the instructions and warning contained in this manual for their safety. Do not attempt to operate your Rad Power Bike until you have attained adequate knowledge of its control and operation. Damage caused by failing to follow instructions is not covered under warranty and could result in personal injury to you or others as well as damage to property and/or your Rad Power Bike.
- Page 12 Tire pressure and terrain are also important variables to consider. We suggest that you ride conservatively when you first get your Rad Power Bike to get to know your bike and travel routes.
- Page 13 Battery Capacity Display The LCD readout on the handlebar of your Rad Power Bike features a battery capacity guage (much like the fuel guage on an automobile). It is recommended that users stop operating the bike once one bar is left on the display. Once the battery is fully depleted, the last remaining bar will begin to flash, communicating to the user that they should cease operation immediately.
- Page 14 Do not park, store, or transport your Rad Power Bike on a rack that is not designed for the size and weight of the bike. o Wide tires, as used on Rad Power Bikes, cannot fit into all bike racks, please select an appropriate rack for the width of tires used on your bike.
- Page 15 MAXIMUM PAYLOAD FOR RADMINI The total maximum weight limit of the RadMini (275 Lbs.) includes the weight of the rider as well as clothing, riding gear, cargo, etc. The kickstand is not designed to be used for loading cargo. You MUST hold onto the bike whenever loading cargo. Do not assume the bike is stable and balanced when using the kickstand, always hold onto the bike when cargo is being loaded or in place.
-
Page 16: Maintenance
Plan your route accordingly as your hill climbing ability, steering and braking are all impacted when cargo is loaded on the RadMini. Hills that are normally easy to climb and descend without cargo can become challenging and dangerous once cargo is loaded. - Page 17 o Riding on the beach or in coastal areas exposes your bicycle to salt which is very corrosive. Wash your bicycle frequently and wipe or spray all unpainted parts with anti-rust treatment. Damage from corrosion is not covered under warranty so special care should be given to extend the life of your bike when used in coast areas or areas with salty air or water.
-
Page 18: Battery Pack
Ensure the handlebars are set correctly in relation to the forks and the direction of travel. Ensure the chain is oiled, clean and runs smoothly. 4. Chain Extra care is required in wet or dusty conditions 5. Bearings Ensure all bearings are lubricated, run freely and display no excess movement, grinding or rattling. - Page 19 Error Detection Your Rad Power Bike is equipped with an error detection system integrated into the LCD display and motor controller. In the case of an electronic control system fault an error code should display. The following error codes are the most common and can aid in troubleshooting.
-
Page 20: Warnings And Safety
Wiring Diagram The basic wiring diagram of the complete electronic system (left) and display (right) are meant for use in basic diagnostics or troubleshooting with the help of a Rad Power Bike technical support agent. Warnings and Safety General Warnings Like any sport bicycling involves risk of injury and damage. - Page 21 It is recommended that users pay special attention to all of the general operating rules below before operating their Rad Power Bike. o When riding obey the same road laws as all other road vehicles. Including giving way to pedestrians and stopping at red lights and stop signs.
- Page 22 It is recommended to not ride at night. Ride at night only if necessary. o Ensure your Rad Power Bike is equipped with a full set of correctly positioned and clean reflectors. W W W . R A D P O W E R B I K E S . C O M...
- Page 23 A Note for Parents and Guardians As a parent or guardian, you are responsible for the activities and safety of your child. The RadMini is not designed for use by children. If you are carrying a passenger in a child safety seat, they must also be wearing a helmet. Additional safety information regarding helmets follows in the Helmet section of this manual.
- Page 24 Always use the lowest assist level until you are comfortable with the bike and feel confident in controlling the power. Any aftermarket changes to your Rad Power Bike not expressly approved by Rad Power Bikes could void the warranty and create an unsafe riding experience.
-
Page 25: Link To Assembly Video And Online Resources
Have your dealer replace damaged reflectors and straighten or tighten any that are bent or loose. Link to Assembly Video and Online Resources Assembly Video Please visit the Rad Power Bikes YouTube Channel to view the official RadMini Assembly Video. Online Resources Please visit the Rad Power Bikes website at http://www.radpowerbikes.com/... - Page 26 Wear and tear is not covered under warranty. Rad Power Bikes’ lithium ion batteries are warranted to be free from manufacturing defects in materials and/or workmanship for a 1 year period from the date of original purchase. The battery warranty does not include damage from power surges, use of improper charger, improper maintenance or other such misuse, normal wear or water damage.
Need help?
Do you have a question about the RADMINI and is the answer not in the manual?
Questions and answers