Table of Contents
Advertisement
Quick Links
Advertisement
Table of Contents

Subscribe to Our Youtube Channel
Related Manuals for MOTA GIGA-6000


Summary of Contents for MOTA GIGA-6000
- Page 1 O w n e r ’ s M a n u a l For Owner’s Manual updates, warranty information, and support, visit: www.mota.com/giga-6000 Please read the Owner’s Manual before your first flight. It has information critical to safe and efficient...
- Page 2 FlySafely! Drones are sophisticated precision devices capable of complex aerial maneuvers. Please read these safety instructions before using your drone. Failure to operate your drone safely could degrade its perfomance and cause harm to people, animals, or property. Please do not fly: - Near or around obstacles such as birds or pets, aircraft, helicopters, other drones, antennas or overhead lines, or airborne toys like kites.
-
Page 3: Table Of Contents
Table of Contents In the Box Before First Flight Propeller Attachment LED Status Lights GIGA-6000 Controller Overview Linking the GIGA-6000 with Its Controller GIGA-6000 GPS Signal Calibration Motor Unlocking and Locking Flight Modes Manual Flight Auto Hover Flight Direction Assist... -
Page 4: In The Box
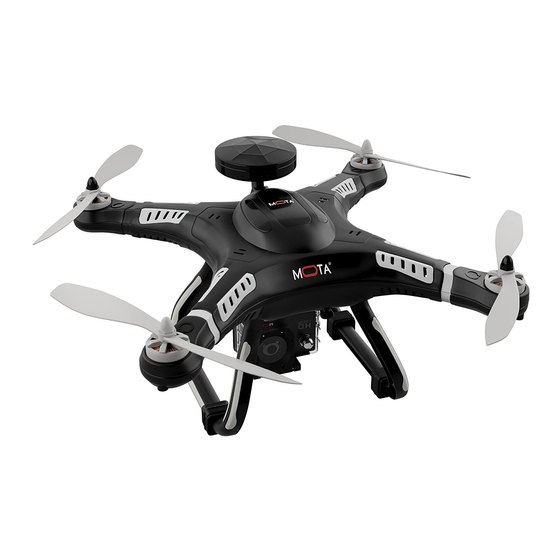
IN THE BOX GIGA-6000 Controller Landing Skid Camera One Screwdriver Propellers Wrench Screws Battery Monitor Monitor Holder Battery AC Adapter... -
Page 5: Before First Flight
BEFORE FIRST FLIGHT PROPELLER ATTACHMENT NOTE: Propeller rotation direction matches that of its corresponding motor. (1) Install clockwise propellers (recognizable by their silver cap) on the clockwise motors (recognizable by the clockwise symbol) by rotating in a counter-clockwise direction. (2) Install counter-clockwise propellers (black cap) on to the counter- clockwise motors (recognizable by the counter-clockwise symbol) by rotating in a clockwise direction. - Page 6 (1) Front indicator light: a. The red indicator light illuminates steadily when the motor starts. b. The red indicator light blinks and an alarm will sound if battery voltage and / or frequency are outside of specifications. Should either of these conditions occur do not attempt flight.
-
Page 7: Giga-6000 Controller
(right hand) (left hand) (right hand) LINKING THE GIGA-6000 AND ITS CONTROLLER (1) Place the drone on a stable level surface. Insert the battery into the battery compartment. The red and green indicator lights will rapidly illuminate alternately. Please do not touch the drone. -
Page 8: Gps Signal Calibration
GIGA-6000 GPS SIGNAL CALIBRATION (1) Before first flight please allow about 2 minutes for the LED light to illuminate steady, indicating the GPS signal is within specification. MOTOR UNLOCKING AND LOCKING (1) Motor Locking: Once the drone and controller are linked, pull down Throttle Flight Stick to the bottom left position. - Page 9 GIGA-6000 Take-off requires the drone be in Manual Flight mode. We recommend novice pilots use only the Manual Flight, Auto Hover, and Return Home modes until they have gained experience. Do not use GPS-dependent flight modes (Auto Hover and Return Home) indoors.
- Page 10 GIGA-6000 are behind it, pushing the Directional Flight Stick forward will send it south. Flight Direction Assist can be used to bring your drone closer should it be too far away to determine direction of flight. Caution: Flight Direction Assist is not recommended for novice pilots. Please do not use this mode if you are not yet an experienced pilot.
-
Page 11: Battery Alarms
(6) Auto Return Home: If the drone is flown beyond controller signal range, it will automatically switch into the Auto Return Home mode return to the point of take-off and autoland. While in Auto Return Home mode, if the drone reaches a point where it can piloted in Manual Flight mode, you may cancel Auto Return Home. -
Page 12: Hd Camera
HD CAMERA Enter Indicator ON/OFF / Mode MICRO SD Lens HDMI Back Display Next Status Light Speaker Charging Indicator Battery Cover Battery Cover Release WATERPROOF CAMERA CASE Waterproof Cover Switch Enter ON/OFF / Mode Button Lens Back Next... -
Page 13: Monitor
MONITOR 1. Connect the Monitor to the Controller if necessary and insert the Monitor’s battery (DC 12V1 or DC 12V2). 2. Turn on the HD camera and set the camera to the “TV out” to on. Now you should be able to see the live feed on the screen. -
Page 14: Calibration
Make sure propellers are correctly attached. Bad GPS signal. Move to a flight location with greater open Return Home mode not accurate. space and / or calibrate the compass. Recalibrate your drone. Drone cannot hover. Copyright (©) 2016 Mota Group, Inc. All rights reserved.
Need help?
Do you have a question about the GIGA-6000 and is the answer not in the manual?
Questions and answers