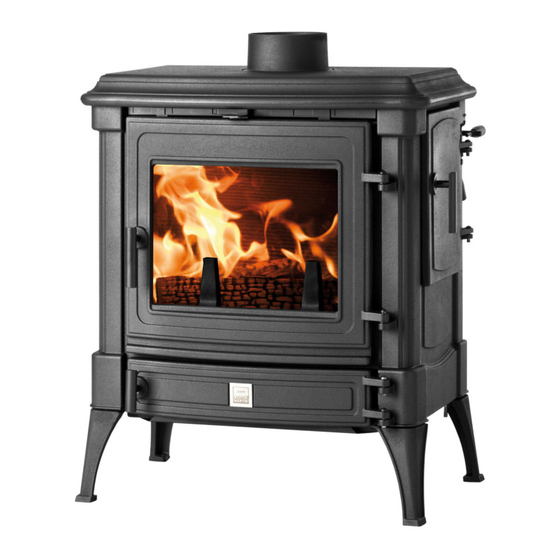
Do you have a question about the STANFORD 80 and is the answer not in the manual?
Questions and answers
Subscribe to Our Youtube Channel
Summary of Contents for Efel STANFORD 80
Page 1
STANFORD 80 STANFORD 140 HARMONY I HARMONY III WOOD STOVES INSTALLATION, OPERATING AND MAINTENANCE INSTRUCTIONS Manufactured by: Thermic Distribution Europe SA 5 Rue du Lion B-5660 Couvin, Belgium SAVE THESE INSTRUCTIONS FOR FUTURE USE AND REFERENCE Please read this entire manual before you install and use your new room heater.
If your Efel Stove is not properly installed, a house fire may result. For your safety, follow the installation directions. Contact local building or fire officials about restrictions and installation requirements in your area.
Loading: front and side Weight: 303 lbs. Weight: 386 lbs. Testing / Listing Your Efel wood stove has been tested to UL Standard 1482 by OMNI-Test Laboratories, Inc., Beaverton, Oregon. EPA Certification The Efel wood stoves have been tested to rigorous emissions standards, and have been certified by the Environmental Protection Agency.
Page 4
Dimensions Model Stanford 80 24" 28½" 16½" 6½" Stanford 140 29" 31" 20½" 7½" Harmony I 23¾" 26½" 15½" 6½" Harmony III 29" 29½" 18½" 7½"...
Page 5
Combustion System – Stanford 80 and Harmony I 395823110a...
Page 6
Combustion System – Stanford 140 and Harmony III 395823110a...
INSTALLATION Clearances to Combustibles - Stanford 80 & Harmony I The following clearances may only be reduced by means approved by the regulatory authority. Refer to chart for single or double wall pipe Back and Side Wall Clearances Connector pipe Single wall 27.5’’...
Page 8
Clearances to Combustibles - Stanford 140 & Harmony III The following clearances may only be reduced by means approved by the regulatory authority. Refer to chart for single or double wall pipe Back and Side Wall Clearances Connector pipe Single wall 18’’...
Page 9
Standard Installation 1. Position the unit no closer than the minimum clearances to combustible materials. Check that no overhead cross members in the ceiling or roof will be cut. Reposition unit if necessary, being careful not to move closer than the minimum clearances.
Page 10
7. Check that all clearances are still within the allowable tolerances. 8. Secure adjoining sections of chimney connector to each other using three equally spaced sheet metal screws. Secure the connector pipe to flue collar using three equally spaced sheet metal screws. DO NOT secure chimney connector to chimney with screws.
Page 12
Freestanding Installations If the chimney connector must pass through a combustible wall to reach the chimney, follow the recommendations in the Wall Pass-Through section that follows. The opening through the chimney wall to the flue (the “breach”) must be lined with either a ceramic or metal cylinder, called a “thimble”, which is securely cemented in place.
Page 13
Many building code inspectors follow these guidelines when approving installations. The methods approved by the NFPA are: • Cutting away all combustible material in the wall a sufficient distance from the single wall connector, to provide the required 12” (300 mm) clearance for the connector.
GUIDELINES FOR SAFE OPERATION Due to high temperatures, the appliance should be located out of traffic and away from furniture and draperies. Advise all adults and especially children to be alert to the hazard of high temperatures and that they should stay away to avoid burns. Supervise young children when they are in the same room as the appliance and/or use a fire guard.
Page 15
NOTES ON FIREWOOD Logs up to 18 inches in length (for Stanford 80 & Harmony I) or 22 inches in length (for Stanford 140 & Harmony III) allow for better stacking, filling and operation of your stove. Use dry wood which by definition must be wood which has been dried under cover for more than 18 months, in which case the logs contain less than 20% moisture.
Page 16
appliance full of damp wood on a low fire is certain to cause poor combustion efficiency, resulting in tar and dirty glass. It is recommended that you heat your stove to at least 400°F before reducing the air controls. This procedure should always be carried out after reloading. Storage time for wood Wood supplied in ready-cut lengths stored immediately under a ventilated shelter dries quicker than wood stocked in high piles.
OPERATING INSTRUCTIONS Air intake controls Primary Air Control The Primary Air Control allows you to adjust the rate of burn. Sliding the lever to the left decreases air intake, thus increasing the burn time. Sliding the lever to the right increases air intake, resulting in higher flames and a cleaner burn. Adjustable Primary Air Control (All Models) Start-up Air Control...
Page 18
In order to maintain an attractively burning fire, logs should be up to 18" long (Stanford 80 and Harmony I) or 22” long (Stanford 140 and Harmony III) and well seasoned. High combustion temperatures are the secret to clean glass operation.
Page 19
Loading the appliance full of damp wood on a low setting, is certain to cause poor combustion efficiency resulting in tar and dirty glass. Always allow the stove to recover before closing for long burning. Overnight burning If you fill your appliance with wood and close all air supplies, it is possible to achieve overnight burning, though it is probable that the glass door will become dirty.
MAINTENANCE WARNING: DO NOT CLEAN STOVE WHILE HOT. 1. Always keep the area around the unit clean and clear of furniture and other objects. Keep all furniture and drapery a minimum 36 inches (914 mm) from the heater. 2. Clean the heater surface with a dry or slightly damp cloth. In case of condensation, clean the affected areas before they dry.
Page 21
Creosote Formation and Need for Removal. When wood is burned slowly, it produces tar and other organic vapors, which combine with expelled moisture to form creosote. The creosote vapors condense in the relatively cool chimney flue of a slow burning fire. As a result, creosote residue accumulates on the flue lining.
Page 22
Maintenance of the glass Properly operated, your glass door will not get coated with thick tar like conventional stoves. If this does occur you may have to resort to using a glass cleaner. However by using dry wood, much of the tar on the glass will burn clean, when the appliance is run at high temperature.
Page 23
REPLACEMENT PARTS Models: Stanford 80 EPA & Stanford 140 EPA - Harmony I EPA & Harmony III EPA Left Lower Firebrick (Stanford 140 & Harmony III) order code: 41201 7.87” / 200 mm .79” / 20 mm thick Bottom Center Firebrick (Stanford 140 &...
Page 24
REPLACEMENT PARTS - Models: Stanford 80 EPA & Stanford 140 EPA - Harmony I EPA & Harmony III EPA Right Lower Firebrick Right Firebrick Fuel Grate Frame (Stanford 140 & Harmony III) (Stanford 80 & Harmony I) (Stanford 80 & Harmony I)
Page 25
REPLACEMENT PARTS Models: Stanford 80 EPA & Stanford 140 EPA - Harmony I EPA & Harmony III EPA ♦ 29) Log Guard ♦ ♦ 20) Fuel Grate Support Bar (Stanford 80 & Harmony I) (Stanford 80 & Harmony I) order code: 20220...
Page 26
REPLACEMENT PARTS Models: Stanford 80 EPA & Stanford 140 EPA - Harmony I EPA & Harmony III EPA Left Air Column Assembly (Stanford 140 & Harmony III) Flue Outlet Collar order code: 40706 (Stanford 80 & Harmony I) order code: 39443...
Page 27
REPLACEMENT PARTS - Models: Stanford 80 EPA & Stanford 140 EPA - Harmony I EPA & Harmony III EPA AirControl/AshPanRemovalTool Secondary Air Tube Assembly Draft Module (Air Intake Slide) (St 80, Harm I, St140, Harm III) (Stanford 80 & Harmony I) (Stanford 140 &...
Need help?
Do you have a question about the STANFORD 80 and is the answer not in the manual?
Questions and answers