Table of Contents
Advertisement
Quick Links
ACCESSORIES (cont'd)
2" Nails
Cat. No. 42623
(Sold Separately)
Porta-Nail - 10 Boxes of 1000
1-1/2" Nails
Cat. No. 42640
(Sold Separately)
Porta-Nail - 1 Box of 1000
1-3/16" Nails
Cat. No. 42646
(Sold Separately)
Porta-Nail - 1 Box of 1000
2" Stainless Steel
Cat. No. 42660
(Sold Separately)
Porta-Nail - 1 Box of 1000
PO Box 1257, Wilmington, NC 28402
910-283-9791 • 800-634-9281 • Fax 910-283-6264
Home Page: www.porta-nails.com E-mail: www.info@porta-nails.com
NAILS
Porta-Nail Application Chart
FASTENER
APPLICATION
THICKNESS
Angle nail onto 5/8"-3/4"
underlayment over joist
Porta-Nail
construction.
2"
Surface (face) nail onto
5/8"-3/4" underlayment
over joist construction
Angle nail onto 5/8"-
3/4" underlayment over
concrete slab or dydronic
Porta-Nail
heating systems.
1-1/2"
Surface (face) nail onto
5/8"-3/4" underlayment
over concrete slab or
hydronic heating systems
Angle nail onto 5/8"-
3/4" underlayment over
concrete slab or hydronic
Porta-Nail
heating system.
1-3/16"
Surface (face) nail onto
5/8"-3/4" underlayment
over concrete slab or
hydronic heating system.
Cat. No. 40253
Molded Carrying Case
24
T&G
FLOORING
3/8", 9/16",
1/2",
5/8", 3/4",
33/32"
3/4", 33/32"
For Tongue and Groove Solid Wood & Hardwood Flooring
33/32"
1/2", 9/16",
5/8"
3/4"
CAUTION - Read important safety instructions AND operation
instructions for proper operation of your Nailer.
Your new PORTA-NAILER is a quality-built machine, capable of
dependable performance throughout its lifetime. To take full advantage
of these capabilities you should thoroughly understand the proper method
and technique of its operation. Therefore, we suggest you read this manual
before operating and that you save it for future reference.
OWNERS MANUAL
MODEL 402
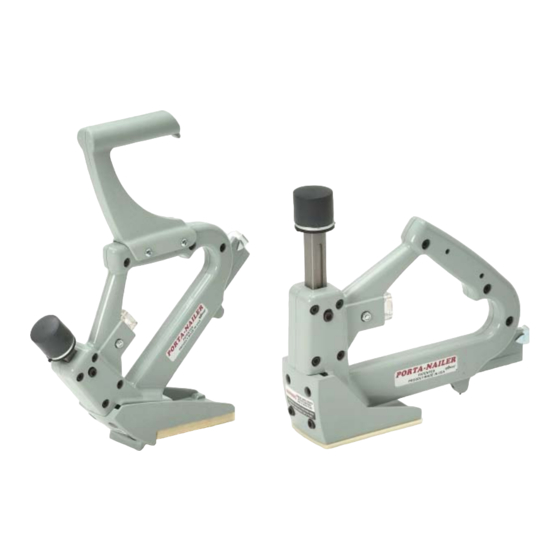
PORTA-NAILER
FORM P/N 840256 (5/3/2008)
Advertisement
Table of Contents

Summary of Contents for Porta-Nails 402
- Page 1 Therefore, we suggest you read this manual before operating and that you save it for future reference. PO Box 1257, Wilmington, NC 28402 910-283-9791 • 800-634-9281 • Fax 910-283-6264 FORM P/N 840256 (5/3/2008) Home Page: www.porta-nails.com E-mail: www.info@porta-nails.com...
- Page 2 WARNING – Since accessories other than those listed have not been tested with this product, use of such accessories could be hazardous. Cat. No. 40221 (Included w/402 Package) Tongue Nailing Shoe for 3/4” - 33/32” Flooring. Cat. Cat. # Cat.
- Page 3 BARRIER BARRIER APPLICATIONS SUBFLOOR SUBFLOOR • Your Model 402 Porta-Nailer is designed for Angle Nailing 5/8”, 3/4”-33/32” Hardwood Tongue and Groove Flooring. CONCRETE JOIST • An Accessory Shoe is available (Sold Separately) for Face Nailing. (See Shoe Accessory Applications section) The Porta-Nail is 2”...
- Page 4 (Sold Separately) Standard Shoe nail every 8” to 10”. A minimum of 2 Nails per strip. (Included on 402) Note: Always follow the Flooring Manufacturer’s Instructions regarding installation requirements. At the opposite wall, Face Nail the remaining strips that measure less than 13-1/2”...
-
Page 5: Assembling The Extension Handle
Ref. Part Description 40037 Pawl 40115 Ram Stop Springs (2 ea) 40048 Ram Stop Block 40243 Nailer Body Screws (4 ea) 40244 Body Handle Screws (3 ea) 1165 Extension Handle Fasteners FIGURE 5 FIGURE 6 40229 Thin Flooring Shoe Tongue Nailing Angled Shoe Base 40152 Thin Flooring Shoe Base... -
Page 6: Loading Nails
LOADING NAILS Ref. Part Description 40272 Body – R.H. 40273 Body – L.H. 40061 Extension Handle (Includes #38) 40220 Tongue Nailing Shoe 40153 Tongue Nailing Shoe Base (2 ea) 2598 Tongue Nailing Shoe Base Screws (4 ea) 40223 Face Shoe 40224 Face Shoe Base 40226... - Page 7 Insert a stack of Nails into the Nail Rail with the Heads “up”. Place the Pusher (Ref. No. 20) in the Nail Rail and hook the Connector (Ref. No. 17) to the Pusher (Ref. No. 20). WARNING: For proper operation never use Nailer with less than a 2 inch stack of nails remaining in the Nail Rail.
-
Page 8: Troubleshooting
SHOE CHANGING TROUBLESHOOTING PROBLEM CONVERSION TO AND FROM FACE NAILING QUESTION CAUSE CORRECTIVE ACTION APARENTE Remove the Shoulder Screw Nut (Ref. No.30) and the Shoulder Screw (Ref. Ram(Ref. No. 22) or No.29). Pull out Pawl Housing Assembly Ram comes Pawl (Ref. No. 33) (Ref. - Page 9 fi rst row of Flooring towards the wall on the side of the room from which you are starting. Face Nail in place by hand or by using the Model 402 Nailer with the Face Shoe (Sold Separately) installed. (See Shoe Changing Section Pg. 8).
-
Page 10: Routine Maintenance / Inspection
REPLACING THE RAM WASHER Be careful not to drive one Nail on top of another. Damage to the Nailer might result if this should occur. Slide the Nailer along the tongue of the board to the location at which you desire to drive the next nail. (8-10 inches is the general rule of thumb.) Try to get a nail in each Joist. -
Page 11: Disassembly Of Unit
REPLACING THE PUSHER SPRING DISASSEMBLY OF UNIT Check the Nailer for faulty operation. It can probably be noted at this time if there are any broken springs or assemblies which do not work properly or if the machine is jammed. Unhook the Connector (Ref. - Page 12 ASSEMBLY OF UNIT Push the Ram down so the Driver Blade (Ref. No. 23) will slide down between the Wear Plate (Ref. No. 12) and Shear Plate (Ref. Clean and inspect all parts and check springs for breakage or weak No.

Need help?
Do you have a question about the 402 and is the answer not in the manual?
Questions and answers
Will it take L nails
No, the Porta-Nails part number 402 uses T-headed 16-gauge nails, not L nails.
This answer is automatically generated