Table of Contents
Advertisement
Quick Links
Advertisement
Table of Contents

Summary of Contents for NAD C 368
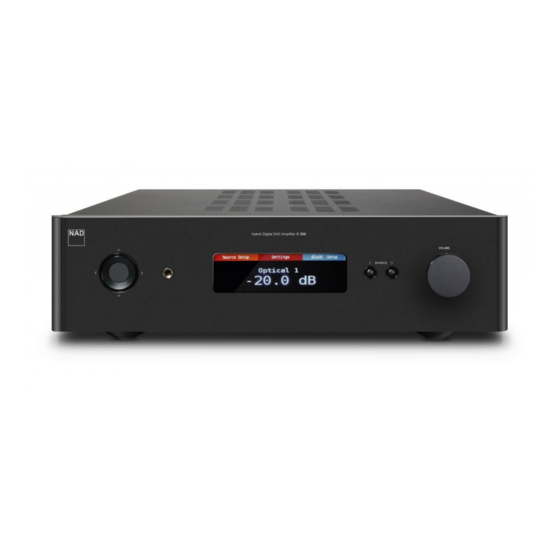
- Page 1 C 368 ® Hybrid Digital DAC Amplifier Owner’s Manual...
-
Page 2: Important Safety Instructions
IMPORTANT SAFETY INSTRUCTIONS 1. Read instructions - All the safety and operating instructions should NOTE TO CATV SYSTEM INSTALLER be read before the product is operated. This reminder is provided to call the CATV system installer’ s attention to Section 820-40 2. - Page 3 Reorient or relocate the receiving antenna. • Increase the separation between the equipment and receiver. The model and serial number of your new C 368 are located on the back of • Connect the equipment into an outlet on a circuit different from that to the cabinet.
-
Page 4: Table Of Contents
USING THE C 368 ........ -
Page 5: Identification Of Controls
For the Standby button to activate, the following must occur: not be able to operate the C 368 with the remote control. a The supplied power cord from the C 368 must be plugged in to a power source. Distance: About 23ft (7m) from the front of the remote sensor. -
Page 6: Rear Panel
ATTENTION! Please ensure that the C 368 is powered off or unplugged from the main power source before making any connections. It is also advisable to power down or unplug all associated components while making or breaking any signal or AC power connections. - Page 7 Press the front panel Standby button or SR 9’s remote control’s [ON] button to switch ON the C 368 from standby mode. • If you do not intend to use the C 368 for long periods of time (such as when on vacation), switch off the POWER switch. •...
-
Page 8: Mdc Classic Upgrade Slots
C PHONO GROUND CONNECTOR: The DD HDM-1 offers three HDMI input terminals and one HDMI output with video pass through. With DD HDM-1 installed, the C 368 can be the Turntables normally include a single heart of a “Video 2.0” system using the mandatory 2 channel linear PCM wire earth lead. -
Page 9: Remote Control And Buttons
SR 9 REMOTE CONTROL USING THE SR 9 REMOTE CONTROL The SR 9 remote control handset handles the key functions of the C 368 as well as other NAD Stereo Receivers, Integrated Amplifiers and Preamplifiers. It has additional controls to remotely operate NAD CD Players, AM/FM Tuners and dedicated AM/FM/DAB Tuners. - Page 10 For NAD Receivers, the VFD will also show “Volume Up” or “Volume Down” while pressing SR 9’s VOL [5/6]. For C 368, when VOL [5/6] is pressed, the dB level shown in the display will correspondingly increase or decrease.
-
Page 11: Using The Sr 9 Remote Control Library
RANDOM: Play songs/playlist in random order USING THE SR 9 REMOTE CONTROL LIBRARY The SR 9 can store a different library of default NAD codes for each of its DEVICE SELECTOR “pages. ” If SR 9 the original default library does not control your NAD CD player, DVD player or other components, follow the procedure below to change the library code. -
Page 12: Operation
OPERATION USING THE C 368 ACCESS MAIN MENU NAME Source Setup Settings Source Setup Source Setup Settings Optical 1 Optical 1 -20.0 dB Name Press [d] once or repeatedly until “Source Setup” is highlighted. Press a or A new Name maybe assigned to a Source label. For example, if your BD player s to select other Main menu options - Settings and BluOS Setup (available is attached to “Optical 1”, it is possible to rename “Optical 1”... -
Page 13: Bass, Treble, Balance
High Pass: Low pass signal from frequencies 40Hz to 200Hz can be selected and sent to Subwoofer Out, with the high pass signal sent to the C 368 amplifier section. Full Range: Refers to the whole frequency spectrum capability of your C 368 and speaker system. -
Page 14: Auto Standby
AMP device selector will flash once to indicate that the library input is connected App or active source input. successful. With both C 368 and SR 9 set to “Channel 1”, the C 368 can now be remotely controlled independent of the C 390DD. NOTE Performing a Factory Reset for C368 or SR 9 will restore their respective IR channel setting to “IR Channel 0”. -
Page 15: Other Features
Settings VOLUME UP Learning... 4 Direct or point the non-NAD remote control to the IR sensor in the front panel. Then, press desired button on the non-NAD remote control where VOLUME UP will be learned. Upon pressing the designated button, display will turn to “Learned”. -
Page 16: Other Features
IMPORTANT NOTE The BluOS Setup menu options can be configured only at BluOS source At “Discoverable” mode, the unique device ID of your C 368 is listed or mode. With other sources, the BluOS Setup menu options can be viewed only but not configurable. -
Page 17: Reference
REFERENCE SPECIFICATIONS All specs are measured according to IHF 202 CEA 490-AR-2008 standard. THD is measured using AP AUX 0025 passive filter and AES 17 active filter. PREAMPLIFIER SECTION GENERAL SPECIFICATIONS LINE INPUT, PRE OUT LINE IN, SPEAKER OUT THD (20 Hz – 20 kHz) <0.005 % at 2 V out Continuous output power into 8 ohms 80W (ref. - Page 18 All rights reserved. NAD and the NAD logo are trademarks of NAD Electronics International, a division of Lenbrook Industries Limited. No part of this publication may be reproduced, stored or transmitted in any form without the written permission of NAD Electronics International.


