Advertisement
Quick Links
Download this manual
See also:
User Manual
Advertisement

Summary of Contents for TRENDnet TEW-817DTR
- Page 1 TREflDnET -00/,er T E W -8 1 7 D T R • Quick Installation Guide (1) TEW -817DTR (V 1 ) / 0 2 . 2 6 . 2 0 1 5...
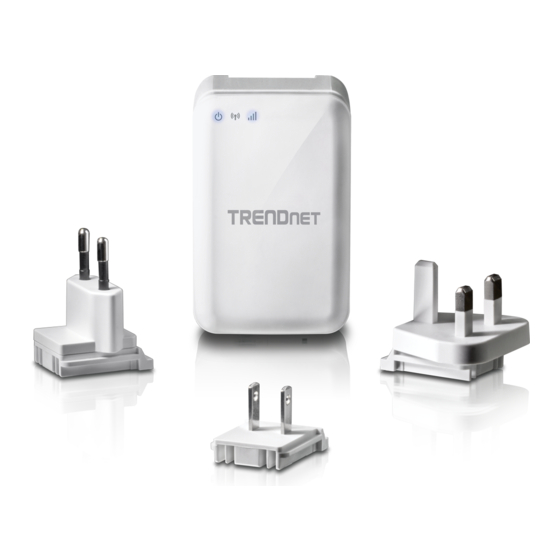
- Page 2 1. Before You Start Package Contents • TEW-817DTR • Quick Installation Guide • Interchangeable USA, European, and UK power plugs • Network cable Minimum requirements • Computer with a network adapter or WiFi • Broadband internet...
- Page 3 2. For wired Internet connection (Router Mode) 1. Verify that you have an internet connection. 2. Attach the appropriate power plug for your region. 4. Connect the TEW-817DTR to an available Ethernet jack with internet.
- Page 4 XXXXXX 8. Open your web browser, and verify that you can access the internet. Congratulations! You are now connected to the TEW-817DTR wireless network. Note: You can also access the device using http://tew-817dtr or the default IP address: http://192.168.10.1.
- Page 5 3. For WISP compatible WiFi connections (WISP Mode) Note: The TEW-817DTR only supports non captive portal WISP connections. 1. Verify that you have a working internet connection. 2. Attach the appropriate power plug for your region. 3. Make sure the switch on the unit is set to AP/WISP mode.
- Page 6 5. Using your computer, connect to the TEW-817DTR's wireless network. 6. When prompted, enter the WiFi password from the sticker on the device. 7. Open your web browser, and type http://tew-817dtr or http://192.168.10.1 into the address bar. 8. Enter the login password from the sticker on the device.
- Page 7 9. The Wizard will automatically begin. If not select Wizard from the menu on the left. 10. Select WISP Mode from the menu. ^ T R E m n E T 11. Select the wireless network you would like to connect to, and click Next.
- Page 8 12. Enter the wireless password of the network. A C 7 5 0 W ir e le s s T r a v e H * o u t e r | (S)TREnOnF "! Setup W izard b a s ic a d v a n c e d W ir e le s s S e t t in g s n a n...
-
Page 9: Declaration Of Conformity
Declaration of Conformity TREflDriET M a n u fa ctu re r's N a m e an d A d d re ss T R E N D n e t, Inc. C €<D 2 0 6 7 5 M an h attan Place T o rran ce, C A 9 0 5 0 1 USA P ro d u ct Inform ation M o d e l N u m b er:... - Page 10 GPL/LGPL General Information T his T R E N D n e t p ro d u c t in c lu d e s fre e s o ftw a re w ritte n b y th ird pa rty d e v e lo p e rs . T h e s e c od es a re s u b je c t to th e G N U G e ne ra l P ublic L ic e n s e ("G P L ") o r G N U L e s s e r G e n e ra l P u blic L ic e n s e ("L G P L '').
- Page 11 Informacion general sobre la GPL/LGPL Este p ro d u c to de T R E N D n e t in c lu y e u n p ro g ra m a g ra tu ito d e s a n o lla d o p o r te rc e ro s . E stos c o d ig o s e s ta n su je to s a la L ic e n c ia p u b lica g e ne ral d e G N U (“G P L ”) o la L ice n cia p u b lic a g e n e ra l lim ita d a d e G N U (“L G P L ”).
-
Page 12: Limited Warranty
TREflDflET Limited Warranty T R E N D n e t w a rra n ts its p ro d u c ts a g a in s t d e fe cts in m a te ria l a n d w o rk m a n s h ip , u n d e r no rm a l u s e an d s e rv ice , fo r th e fo llo w in g len gth o f tim e fro m th e d a te o f p u rc h a s e . -
Page 13: Technical Support
.tren dn e t.co m /sup p ort TRENDnet 2 06 75 Manhattan Place, Torrance, CA 90501. USA Copyright © 2015. All Rights Reserved. TRENDnet. TEW-817DTR (V1) / 0 2 .2 6 .2 0 1 5 T R E flD n ef...


Need help?
Do you have a question about the TEW-817DTR and is the answer not in the manual?
Questions and answers