Indesit IWC 7105 Instructions For Use Manual
Hide thumbs
Also See for IWC 7105:
- Manual (84 pages) ,
- Instructions for use manual (84 pages) ,
- Instructions for use manual (72 pages)
Table of Contents
Advertisement
Available languages
Available languages
Quick Links
Instructions for use
GB
FR
English,1
Français, 15
IWC 7105
Contents
Installation, 2-3-4-5
AR
Unpacking and levelling
Connecting the electricity and water supplies
, 29
The first wash cycle
Technical data
Description of the washing machine
and starting a wash cycle, 6-7
Control panel
Indicator lights
Starting a wash cycle
Wash cycles, 8
Table of wash cycles
Personalisation, 9
Setting the temperature
Setting the spin speed
Functions
Detergents and laundry, 10
Detergent dispenser drawer
Preparing the laundry
Garments requiring special care
Load balancing system
Precautions and tips, 11
General safety
Disposal
Care and maintenance, 12
Cutting off the water or electricity supply
Cleaning the washing machine
Cleaning the detergent dispenser drawer
Caring for the door and drum of your appliance
Cleaning the pump
Checking the water inlet hose
Troubleshooting, 13
Service, 14
WASHING MACHINE
GB
1
Advertisement
Table of Contents
Troubleshooting

Related Manuals for Indesit IWC 7105


Summary of Contents for Indesit IWC 7105
-
Page 1: Instructions For Use
Wash cycles, 8 Table of wash cycles Personalisation, 9 Setting the temperature Setting the spin speed Functions Detergents and laundry, 10 IWC 7105 Detergent dispenser drawer Preparing the laundry Garments requiring special care Load balancing system Precautions and tips, 11 General safety... -
Page 2: Unpacking And Levelling
Installation Levelling the machine correctly will provide it with stability, This instruction manual should be kept in a safe place for help to avoid vibrations and excessive noise and prevent it future reference. If the washing machine is sold, transferred from shifting while it is operating. - Page 3 Connecting the drain hose WARNING - THIS APPLIANCE MUST BE EARTHED. THE FOLLOWING OPERATIONS SHOULD BE CARRIED Connect the drain hose, OUT BY A QUALIFIED ELECTRICIAN. without bending it, to a drai- nage duct or a wall drain Replacing the fuse: located at a height between When replacing a faulty fuse, a 13 amp ASTA approved 65 and 100 cm from the...
- Page 4 The first wash cycle As the colours of the wires in the lead may not correspond with the coloured markings identifying the terminals in your plug, proceed as follows: Once the appliance has been installed, and before you use Connect Green & Yellow wire to terminal marked E or it for the first time, run a wash cycle with detergent and no or coloured Green or Green &...
-
Page 5: Technical Data
Technical data Model IWC 7105 width 59,5 cm Dimensions height 85 cm depth 53,5 cm Capacity from 1 to 7 kg Electrical please refer to the technical data plate fixed to the machine connections maximum pressure 1 MPa (10 bar) Water connection minimum pressure 0.05 MPa (0.5 bar) -
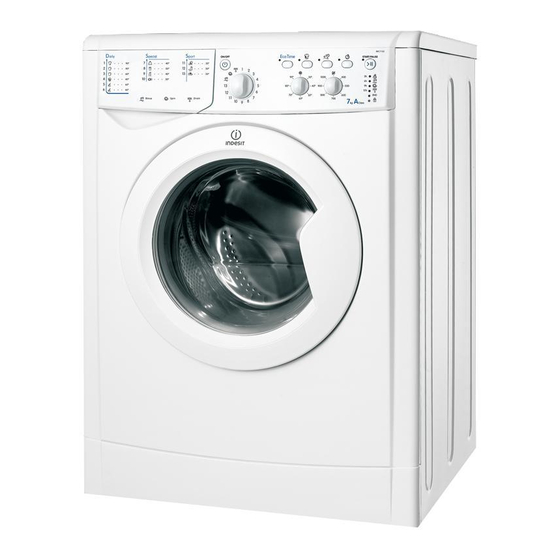
Page 6: Description Of The Washing Machine And Starting A Wash Cycle
Description of the washing machine and starting a wash cycle Control panel WASH CYCLE PROGRESS/ DELAY TIMER indicator lights START/ FUNCTION PAUSE ON/OFF button buttons with button with indicator lights indicator light TEMPERATURE DOOR LOCKED knob Detergent dispenser drawer indicator light WASH CYCLE SPIN SPEED knob... -
Page 7: Indicator Lights
Indicator lights Wash cycle phase indicator lights Once the desired wash cycle has been selected and has be- gun, the indicator lights switch on one by one to indicate which The indicator lights provide important information. phase of the cycle is currently in progress. This is what they can tell you: Wash Delayed start... -
Page 8: Wash Cycles
Wash cycles Table of wash cycles Detergents Max. Max. Max. Cycle Description of the wash cycle temp. speed load duration (°C) (rpm) (kg) Pre- Fabric Wash wash softener Daily Cotton with prewash: extremely soiled whites. 90° 1000 170’ ... -
Page 9: Personalisation
Personalisation Setting the temperature Turn the TEMPERATURE knob to set the wash temperature (see Table of wash cycles). The temperature may be lowered, or even set to a cold wash The washing machine will automatically prevent you from selecting a temperature which is higher than the maximum value set for each wash cycle. -
Page 10: Preparing The Laundry
Detergents and laundry Detergent dispenser drawer Load balancing system Good washing results also depend on the correct dose of Before every spin cycle, to avoid excessive vibrations and detergent: adding too much detergent will not necessa- to distribute the load in a uniform manner, the drum rotates rily result in a more efficient wash, and may in fact cause continuously at a speed which is slightly greater than the build up on the inside of your appliance and contribute to... -
Page 11: Precautions And Tips
Precautions and tips Consumers should contact their local authority or retailer This washing machine was designed and constructed in for information concerning the correct disposal of their accordance with international safety regulations. The fol- old appliance. lowing information is provided for safety reasons and must therefore be read carefully. -
Page 12: Care And Maintenance
Care and maintenance Cutting off the water and electricity Cleaning the pump supplies The washing machine is fitted with a self-cleaning pump • Turn off the water tap after every wash cycle. This will which does not require any maintenance. Sometimes, limit wear on the hydraulic system inside the washing small items (such as coins or buttons) may fall into the pre- machine and help to prevent leaks. -
Page 13: Troubleshooting
Troubleshooting Your washing machine could fail to work. Before contacting the Technical Assistance Centre (see “Assistance”), make sure that the problem cannot be not solved easily using the following list. Problem: Possible causes / Solutions: The washing machine does not •... -
Page 14: Service
Service Before calling for Assistance: • Check whether you can solve the problem alone (see “Troubleshooting”); • Restart the programme to check whether the problem has been solved; • If this is not the case, contact an authorised Technical Assistance Centre using the telephone number provided on the guarantee certificate. -
Page 15: Table Of Contents
Bandeau de commandes Voyants Démarrage d’un programme Programmes, 22 Tableau des programmes Personnalisations, 23 Sélection de la température IWC 7105 Sélection de l’essorage Fonctions Produits lessiviels et linge, 24 Tiroir à produits lessiviels Triage du linge Linge ou vêtements particuliers Système d’équilibrage de la charge... -
Page 16: Déballage Et Mise À Niveau
Installation Une bonne mise à niveau garantit la stabilité de l’appareil Conserver ce mode d’emploi pour pouvoir le consulter à et évite qu’il y ait des vibrations, du bruit et des dépla- tout moment. En cas de vente, de cession ou de déména- cements en cours de fonctionnement. - Page 17 ATTENTION - L’ELECTROMENAGER DOIT ETRE RAC- Raccordement du tuyau de vidange CORDE A LA MASSE. LES OPERATIONS DECRITES Raccorder le tuyau d’éva- CI-APRES DOIVENT ETRE EFFECTUEES PAR UN ELEC- cuation, sans le plier, à un TRICIEN QUALIFIE. conduit d’évacuation ou à...
-
Page 18: Premier Cycle De Lavage
Les couleurs des fils du câble pourraient ne pas cor- Premier cycle de lavage respondre aux indications de couleur qui identifient les broches de la fiche, procédez comme suit: Avant la première mise en service de l’appareil, effectuer raccordez le fil jaune/vert à la borne repérée par la lettre E un cycle de lavage avec un produit lessiviel mais sans linge ou de couleur verte ou jaune/vert et sélectionner le programme 2. -
Page 19: Caractéristiques Techniques
Caractéristiques techniques Modèle IWC 7105 largeur 59,5 cm Dimensions hauteur 85 cm profondeur 53,5 cm Capacité de 1 à 7 kg Raccordements Voir la plaque signalétique appliquée sur la machine électriques pression maximale 1 MPa (10 bar) pres- Raccordements sion minimale 0,05 MPa (0,5 bar) capacité... -
Page 20: Description Du Lave-Linge Et Démarrage D'un Programme
Description du lave-linge et démarrage d’un programme Bandeau de commandes DÉROULEMENT Voyants CYCLE/DÉPART DIFFÉRÉ Touche avec START/ voyant ON/OFF Touche Touches avec voyants PAUSE FONCTION Voyant Bouton HUBLOT TEMPÉRATURE VERROUILLÉ Tiroir à produits lessiviels Bouton Bouton PROGRAMMES ESSORAGE Tiroir à produits lessiviels: pour charger les produits Touche avec voyant START/PAUSE: pour démarrer les lessiviels et les additifs (voir “Produits lessiviels et linge”). - Page 21 Voyants Lavage Rinçage Les voyants fournissent des informations importantes. Voilà ce qu’ils signalent: Essorage Vidange Départ différé Si la fonction “Départ différé” a été activée (voir “Personnali- Fin de Lavage sations”), le voyant correspondant au temps sélectionné se Touches fonction et voyants correspondants mettra à...
-
Page 22: Programmes
Programmes Tableau des programmes Lessive Vitesse Charge Temp. maxi Durée Description du Programme maxi. maxi (tours cycle Pré- Assou- (°C) (Kg) Lavage minute) lavage plissant Programmes Quotidiens 1 Coton avec prélavage: blancs extrêmement sales. 90° 1000 170’ 60°... -
Page 23: Personnalisations
Personnalisations Sélection de la température Tourner le bouton TEMPÉRATURE pour sélectionner la température de lavage (voir Tableau des programmes). La température peut être abaissée jusqu’au lavage à froid ( ). La machine interdira automatiquement toute sélection d’une température supérieure à la température maximale prévue pour chaque programme. ! Exception: lors de la sélection du programme 2 la température peut être augmentée jusqu’à... -
Page 24: Produits Lessiviels Et Linge
Produits lessiviels et linge Tiroir à produits lessiviels Système d’équilibrage de la charge Un bon résultat de lavage dépend aussi d’un bon dosage Avant tout essorage, pour éviter toute vibration exces- de produit lessiviel: un excès de lessive ne lave pas mieux, sive et répartir le linge de façon uniforme, le lave-linge fait il incruste l’intérieur du lave-linge et pollue l’environnement. -
Page 25: Précautions Et Conseils
Précautions et conseils Les appareils usagés doivent être collectés séparément Ce lave-linge a été conçu et fabriqué conformément aux afin d’optimiser le taux de récupération et le recyclage normes internationales de sécurité. Ces consignes sont des matériaux qui les composent et réduire l’impact sur fournies pour des raisons de sécurité, il faut les lire attenti- la santé... -
Page 26: Entretien Et Soin
Entretien et soin Coupure de l’arrivée d’eau et du courant 2. dévisser le couvercle en le tournant dans le sens inverse des aiguilles d’une • Fermer le robinet de l’eau après chaque lavage. Cela montre (voir figure): il est réduit l’usure de l’installation hydraulique du lave-linge et normal qu’un peu d’eau évite tout danger de fuites. -
Page 27: Anomalies Et Remèdes
Anomalies et remèdes Il peut arriver que le lave-linge ne fonctionne pas bien. Avant d’appeler le Service de dépannage (voir “Assistance”), contrôler s’il ne s’agit pas par hasard d’un problème facile à résoudre à l’aide de la liste suivante. Anomalies: Causes / Solutions possibles: Le lave-linge ne s’allume pas. -
Page 28: Assistance
Assistance Avant d’appeler le service après-vente: • Vérifier si on ne peut pas résoudre l’anomalie par ses propres moyens (voir “Anomalies et Remèdes”); • Remettre le programme en marche pour contrôler si l’inconvénient a disparu; • Autrement, contacter le Centre d’Assistance technique agréé au numéro de téléphone indiqué sur le certificat de garantie. Ne jamais s’adresser à... - Page 29 تعليمات االستخدام ماكينة غسيل المحتويات 30-31-32-33 ،التركيب إفراغ المحتويات وتحديد المستوى وصل إمدادات الكهرباء والماء دورة الغسيل األولى عربي البيانات التقنية وصف ماكينة الغسيل وتشغيل دورة الغسيل، 53-43 لوحة التحكم المصابيح المؤشرة تشغيل دورة الغسيل 36 ،دورات الغسل جدول دورات الغسيل 37 ،التخصيصات...
- Page 30 التركيب تحديد مستوى الماكينة بشكل صحيح سيمنحها الثبات، سيساعد على تحاشي يجب االحتفاظ بدليل التعليمات هذا في مكان آمن لمراجعته في المستقبل. إذا تم االرتجاجات والضجيج الزائد وسيمنعها من االنحراف أثناء العمل. إذا تم وضعها بيع الجهاز، إرساله أو نقله، تأكد من أن دليل التعليمات قد أرفق بالماكينة بحيث في...
- Page 31 ض ﻮ ﺣ ﻦ ﻣ ء ﺎ ﻤ ﻟ ا ﻎ ﻳ ﺮ ﻔ ﺗ م ﻮ ﻃ ﺮ ﺧ ا ﻮ ﻠ ﺻ و ا ز ﻮ ﻴ ﻔ ﻟ ا ) ة ﺮ ﻬ ﺼ ﻨ ﻤ ﻟ ا ﺮ...
- Page 32 دورة الغسيل األولى ﻞ ـ ﺒ ـ ﻗ ﺺ ـ ﺘ ـ ﺨ ـ ﻣ ﻲ ـ ﺋ ﺎ ـ ﺑ ﺮ ـ ﻬ ـ آ ﻲ ـ ﻨ ـ ﻓ ا ﻮ ـ ﻋ ﺪ ـ ﺘ ـ ﺳ ا...
- Page 33 البيانات التقنية IWC 7105 الطراز العرض 5.95 سم االرتفاع 58 سم األبعاد العمق 5.35 سم من 1 وحتى 7 كغم السعة الرجاء راجع لوحة البيانات التقنية الملصقة على التوصيالت الكهربائية الماكينة ) (01 بارMPa 1 الضغط األقصى ) (5.0 بارMPa 0.05 لضغط األدنى...
- Page 34 وصف ماكينة الغسيل وتشغيل دورة الغسيل لوحة التحكم /برنامج دورة الغسيل المصابيح المؤشرة عداد الوقت المؤجل زر مع مصباح أزرار مع مصابيح مؤشر تشغيل/إيقاف تشغيل مؤشرة زر بدء/إيقاف الوظيفة مؤقت درحة مفتاح مصباح مؤشر الحرارة درج وعاء مواد التنظيف إقفال...
- Page 35 المصابيح المؤشرة المصابيح المؤشرة لمرحلة دورة الغسيل .توفر المصابيح المؤشرة معلومات هامة فور اختيار دورة الغسيل المرغوب بها وبدءها، تضيئ المصابيح المؤشرة، الواحد تلو :هذا ما يمكنها أن تخبرك به .الآخر للإشارة إلى الدورة التي تعمل حاليا تشغيل مؤجل الوقت غسيل...
- Page 36 دورات الغسيل جدول دورات الغسيل مدة الدورة الحد األقصى الحد األقصى المنظفات الحد األقصى للسرعة لدرجة الحرارة للحمولة (دورة في )(درجة مئوية وصف دورة الغسيل )(كيلوجرام منعم الغسيل الغسيل )الدقيقة األقمشة المبدئي يوم ي ً ا .قطن بمرحلة الغسيل المبدئي: األقمشة البيضاء شديدة االتساخ 170’...
- Page 37 التخصيصات ضبط درجة الحرارة .)أدر مفتاح درجة الحرارة لضبط درجة حرارة الغسيل (انظر جدول دورات الغسيل يمكن خفض درجة الحرارة أو حتى إعدادها للغسيل البارد .ستمنعك ماكينة الغسيل أوتوماتيكيا من اختيار درجة حرارة أعلى من القيمة القصوى المحددة لكل دورة غسيل .االستثناء: إذا...
- Page 38 مواد التنظيف والغسيل درج وعاء مواد التنظيف مالبس تتطلب عناية خاصة تعتمد نتائج الغسيل الجيدة أيضا على كمية مواد التنظيف: إن إضافة مواد تنظيف الصوف: يمكن غسل جميع األقمشة الصوفية باستخدام البرنامج 01، وحتى تلك أكثر مما يجب ال يزيد فاعلية الغسيل بالضرورة، يمكن أن يؤدي إلى انسداد في .
- Page 39 وسائل حذر ونصائح تم تصميم ماكينة الغسيل وتصنيعه طبقا لمواصفات األمان العالمية. يتم تزويد .التحذيرات التالية ألسباب وقائية ويجب قراءتها بعناية الوقاية العامة .• تم تصميم هذا الجهاز لالستخدام المنزلي فقط • يجب استخدام ماكينة الغسيل من قبل البالغين فقط، بموجب التعليمات المزودة في هذا .الدليل...
- Page 40 العناية والصيانة تنظيف المضخ ّ ة قطع إمداد الماء والكهرباء ماكينة الغسيل مزودة بمضخة للتنظيف الذاتي، حيث ال تحتاج إلى أية عناية • قم بإقفال حنفية الماء بعد كل دورة غسيل. سيحد هذا من تآكل النظام في أي وقت. في بعض األحيان، يمكن للقطع الصغيرة (مثل القطع النقدية أو .الهيدروليكي...
- Page 41 استكشاف المشاكل وحلها شل في العمل فجأة. قبل االتصال بمركز المساعدة التقنية (أنظر "الخدمة") تأكد من أن المشكلة ال يمكن حلها بسهولة باستخدام الجدول التالي :األسباب المحتملة/ الحلول :المشكلة .• الجهاز غير موصل بالمقبس الكهربائي بشكل كامل، أو أنه لا يحدث تماس .ال...
- Page 42 الخدمة :قبل استدعاء المساعدة • افحص فيما إذا كان بإمكانك حل المشكلة بنفسك (أنظر "استكشاف المشاكل وحلها")؛ • أعد تشغيل البرنامج للفحص فيما إذا تم حل المشكلة؛ • إذا لم يكن األمر كذلك، اتصل بمركز مساعدة تقني معتمد بواسطة رقم الهاتف .! اطلب...
- Page 44 195102738.00 05/2012 - Xerox Fabriano...
Need help?
Do you have a question about the IWC 7105 and is the answer not in the manual?
Questions and answers