Advertisement
Quick Links
Advertisement

Summary of Contents for Jaycar Electronics QP2303
- Page 1 LCD Portable Metal Detector With In Built Speaker User Manual...
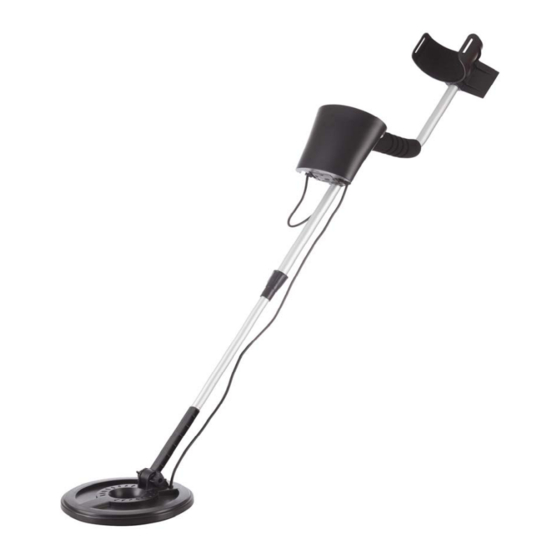
- Page 2 Assembly Relax the end of the bend-shape tube sleeve clockwise, and insert the aluminum tube which connects the search coil into the tube sleeve, adjusting the length so that you can stand comfortably and straighten your arms,when the search coil is from the ground about 1/2 inches,then lock the tube sleeve anti-clockwise.( Fig.1 and Fig.2) Fig.
- Page 3 control box.(Fig.4) Fig. 4 4. The arm support has two positions,t he initial position is that the arm support is in longer location, if your arms are shorter then you can adjust the arm support position. Please release the left and right screw under the arm support when regulation to loosen the left and right arm support, and remove the arm support forward to another position,then tighten the two screws.(Fig.5) Fig.
- Page 4 Fig. 6 2. Insert the 6 x AA batteries into the compartment as indicated by the polarity symbols marked inside the compartment. (Fig 6) Fig. 7 3. Close the battery cover. Please notice the “UP” direction indication on the battery cover.
- Page 5 On the top of LCD screen is the TARGET ID,namely target identification cursor. On the bottom is the DEPTH-SENS, namely the depth and sensitivity shared cursor. The central left is the low-voltage indication cursor. When searching,the target identification cursor divide the metal targets into three categories : Silver Higher conductivity metals,such as silver, aluminum and copper.
-
Page 6: Quick Start
Target categories Indication sound TARGET ID indication IRON is illumined and flickered Iron nail Low tone about 5 seconds MID RANGE is illumined and Nickel,coins Medium tone flickered about 5 seconds SILVER is illumined and flickered 25 cents High tone about 5 seconds 3,... - Page 7 Fig. 9 Please take off any watches, rings or other metal objects on your hand or arm. Keep the detector away from any walls, floors and other metal objects. Be sure to keep the detector away from the light, TV, computer or mobile phones, which can cause electro-magnetic interference.
- Page 8 When turning on the unit, the detector is at the ALL METAL state,sweep the metal sample above the center of the search coil (5cm) Operate Indicatio TARGET DEPTH- Chart Note n tone SENS SENS-3 Turn on Nothing is illuminated Turn on indicatio displayed The IRON...
- Page 9 SENS-3 IRON Sweep flicker sonce iron nail Silent flickers once DEPTH-2 RANGE is is illuminated Nickel, illuminated medium coins and flickers and flicker tone SILVER DEPTH-2 is illuminated A high illuminated Silver tone and flickers and flicker 6. Eliminate the medium conductivity metals Indication TARGET Operate...
- Page 10 7. Eliminate the iron and the medium conductivity metals at the same time Indicatio TARGET DEPTH- Operate Chart Note n tone SENS IRON、 responds with low, Press RANGE SENS-3 medium MODE is illuminated tone button illuminated alternate at the same ly,and time repeats...
- Page 11 Note: If you detect with your more than one metal detector, please keep at least 5m apart. 3.Choose the discrimination modes Press the Mode button, you can choose from the four discrimination modes,if you are not interested in iron targets, you can choose to reject the iron,if the pull-tabs off cans disturb your detection, you can choose to reject the pull-tabs.
- Page 12 quickly,to help you get the more steady signal. 5.Pinpoint the target When there is a clear signal to show you the location of the buried target objects,you can “X” the target at different angles to zero on the exact spot on the ground where the “beep”...
Need help?
Do you have a question about the QP2303 and is the answer not in the manual?
Questions and answers