Table of Contents
Advertisement
Quick Links
JINGHANG TECHNOLOGY (HK) CO.,LTD.
Welcome to
JINGHANG TECHNOLOGY (HK) CO.,LTD
We are professional producer and exporter
located in shenzhen city. we supply all kinds of
Car key
programmer,
scanner,
airbag reset
adapters,
auto dashboard repair
fuel injector cleaner and tester
Now the below is the details of product instructions,
Hope you have a good reading.
Regards
Jinghang Technology Company
MSN:kathy-tool@hotmail.com Email: sales@hkjinghang.com
Skype:kathy-tool
www.hkjinghang.com
ABOUT
ABOUT
ABOUT
ABOUT US
auto diagnostic
kit,
odometer correction
parts,
and other
yahoo:hkjinghang@yahoo.com
US
US
US
auto diagnostic tools
Launch x431
tools,
ECU tuning
kit,
Eprom programmer and
motocycle
scanner,
auto
tools.
!
in China,
scanners,
tool,
code
obd ii
cables,
Advertisement
Table of Contents

Summary of Contents for Autosnap GD860
- Page 1 www.hkjinghang.com JINGHANG TECHNOLOGY (HK) CO.,LTD. ABOUT ABOUT ABOUT ABOUT US Welcome to JINGHANG TECHNOLOGY (HK) CO.,LTD We are professional producer and exporter auto diagnostic tools in China, located in shenzhen city. we supply all kinds of Launch x431 scanners, Car key programmer, auto diagnostic tools,...
-
Page 2: Table Of Contents
……………………………………………….…..……1 1.1Product feature ………………………………………………………………………….……1 1.1.1 Generality ……………………………………………..…………………….….………1 1.1.2 Advancement ……………………………………..……..…………………..…….……1 1.1.3 Durability ……………………………………………………………………...….……1 1.2 Using the GD860 ……………….………………………..…………………...………………1 1.2.1 Main unit and accessories …………………………………………….………….……1 1.2.2 Interface introduction ………………………………………………….………………3 1.3 Technical parameters ……………………………….………………………………..………3 1.4 Power switch ………………………………………………………………………….………3 1.5 Touch screen calibration ……………………………………………………………….……4 1.6 Button instruction ……………………………………….……………………………...……4... -
Page 3: General Introduction
The industrialization design ensure the product work stably even under adverse environment such as high-temperature environment, low- temperature, etc. High-voltage class protection design which supports vehicleswith 12V and 24V. 1.2 Using the GD860 1.2.1 Tool Description MSN:kathy-tool@hotmail.com Email: sales@hkjinghang.com Skype:kathy-tool yahoo:hkjinghang@yahoo.com... - Page 4 GD860 User’s Manual Autosnap Name Description Indicating operation button, testing Touch screen information and help information. Power light Storing diagnostic program and data. Communication Internal communication indicator of main unit (HOST) light Communication Communication indicator between main unit light and ECU.
-
Page 5: Interface Introduction
GD860 User’s Manual Autosnap 1.2.2 Interface Introduction (as below figure) Name Description To connect the testing cable Diagnostic port Host USB port To connect the data cable TF card port To insert the TF card Slave USB port To connect the data cable 1.3 Technical Parameters... -
Page 6: Touch Screen Calibration
GD860 User’s Manual Autosnap Switch off: Selection 1: Click the Power button on device, then click Yes to switch off the device when pop up the message “Do you want to shutdown this device?” Selection 2: Click the Close on touch screen, then click Yes to switch off the device when pop up the message “Do you want to shutdown this... - Page 7 GD860 User’s Manual Autosnap To catch the picture for information what indicated on the display. Help information To Start the diagnostic software and enter the diagnosticts interface. To print the current contents of the display. Exit from current interface and back to previous interface.
- Page 8 GD860 User’s Manual Autosnap Records the current live data, save it as trip records for later playback and analysis. The minimal recording time is 5 seconds. After 5 seconds by clicking the [Record] button, the [Stop Record] button will be available and showed. Click [Stop Record] button, the data will be saved.
-
Page 9: System Setting
GD860 User’s Manual Autosnap Diagnose the same vehicle brand as previous time. It’s convenience to diagnose the same brand vehicle without selecting the relevant vehicle information. Turn off the power. 1.7 System Setting 1.7.1 Parameter setting Click on the button [System Setting] of home page to set various parameters and information. -
Page 10: Software Version Information
GD860 User’s Manual Autosnap [Sort in using freq]: The vehicles logo will be arranged in order according to using frequence. The more frequence you use the vehicle logo, the forward display in [Diagnostic software] will be. [Sort in using alphabetic order]: The vehicles logo will be arranged in alphabetical order in [Diagnostic software] g) Diag COM: To select the communication serial port. -
Page 11: Operation
GD860 User’s Manual Autosnap 2. Operation 2.1 Preparation and cable connection 2.1.1 Preparation The connector selection There are various connector was packed with main unit. Every connector is with connector name, please check the connector name carefully and select correct connector when you diagnose the vehicle. -
Page 12: Available Vehicle Makes Selection
Autosnap keep updating to enhance the software. Please focus on Autosnap website’s trends to download the updated software. All of GD860 diagnostic program take vehicle logo as button, click on corresponding vehicle logo to start diagnosis. It’s very useful and fast enter into diagnose system if you are familiar with more vehicle logo. -
Page 13: Diagnose Program
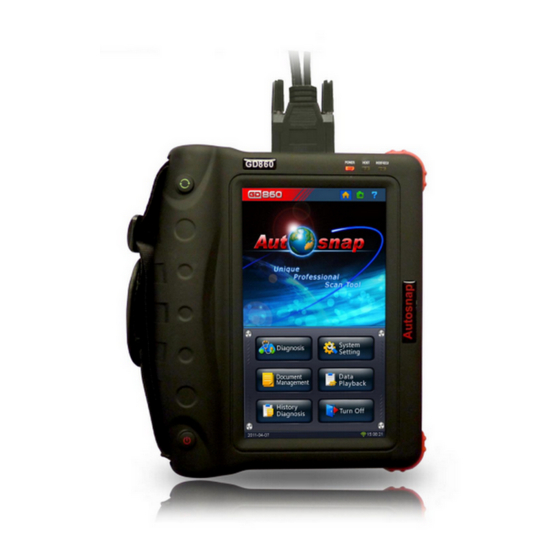
2.2.2 Enter diagnose program After connecting successful, press [power] button for 2-3 seconds to start GD860, the figure as shown below: After click on [Diagnosis] button, you will enter the diagnostic screen where you can select the region of vehicle manufacturer required:Asia, Europe,America and OBDⅡ/EOBD. -
Page 14: Control Module
GD860 User’s Manual Autosnap 2.3 Control Module 2.3.1 Read DTCs Select “Read DTCs” as so to restrive stored defult trouble codes. 2.3.2 Choose “Clear DTCs” to delete setteled defult trouble codes. 2.3.3 Review Data Stream Click “Current powertrain diagnostic data” in menu and then select the item preferred to review data.As showed in right:... -
Page 15: Data Stream Text
GD860 User’s Manual Autosnap Select the desired datastream and click [OK] button to read: There will be four ways available to display datastreams: text, graph, graphs comparison and dashboard. 2.3.4 Text Display: The default display is in text. 2.3.5 Graphic Display Click [Graph], the data stream would be graphicly showed as the right picture. -
Page 16: Data Stream Dashboard
GD860 User’s Manual Autosnap 2.3.7 Dashboard Dislay Click [Dashboard], the datastreams displays as the ways of analog, and datastream differs each other can make comparison on the same page. 2.3.8 Datastream Memory Modes. There are three memory modes available for recording datastream. -
Page 17: Normal Mode
GD860 User’s Manual Autosnap 2.3.9 Normal Mode Normal mode: normal mode is the defult mode in system. Under this mode, users can dignose or retrives data from sensors of all kinds of vehicles subsystems such as engine, auto transimission, and brake sytems. The mode is suitable for general use. - Page 18 GD860 User’s Manual Autosnap MSN:kathy-tool@hotmail.com Email: sales@hkjinghang.com Skype:kathy-tool yahoo:hkjinghang@yahoo.com...
-
Page 19: Comparison Mode
GD860 User’s Manual Autosnap 2.3.11 Comparions mode Comparison mode is used on the diagnosed vechiles to make data comparison analysis, which is based on datastream comparison with the normal datastreams recorded under self-learning mode. When select comparison mode, user need to choose the working mode of vehicles used for comparison. -
Page 20: Data Management
GD860 User’s Manual Autosnap 2.4 Data Management Select [Data Management] in main interface so as to conduct management on various data, including reviewing or deleting trip log, vehicle diagnostic software, screenshots etc. 2.5 Data Playback Select [Data Playback] in main interface to review the historic trip record, analyze the data and search the information in need.
Need help?
Do you have a question about the GD860 and is the answer not in the manual?
Questions and answers