
Related Manuals for Tripy 2

Summary of Contents for Tripy 2
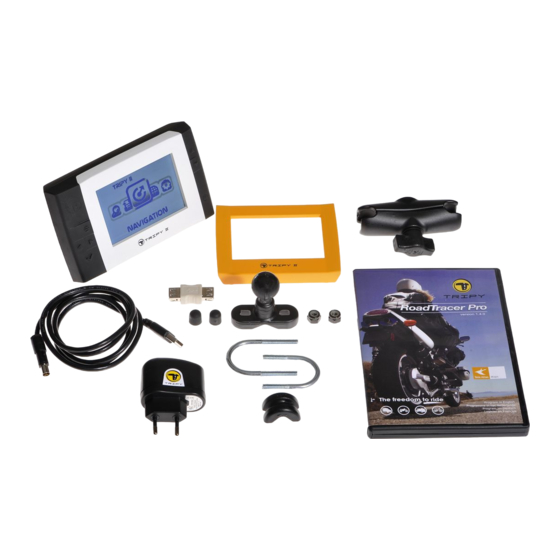
- Page 1 User’s manual 14/06/2010 This manual pertains to the revision 1.3.x of the Tripy II firmware...
-
Page 2: Table Of Contents
Compass mode ......... . . 19 b. If you leave the itinerary while Tripy II displays the map ......19 c. - Page 3 Connecting to another Tripy II ........
- Page 4 5.5. Map navigation and displaying the itinerary computed by Tripy II a. “Riding direction” orientation ........71 b.
- Page 5 9. How to use the Trip Master ? 9.1. Preliminary 9.2. Reset 9.3. Quick reset of the partial trip counter 9.4. Adjusting the total 10. How to set the parameters ? 10.1. Preliminary 10.2. Screen settings 10.3. Statut de la réception GPS 10.4. Time zone setting...
- Page 6 Keyboard ..........90 11. How to update the speed trap warning file ? 11.1. Preliminary 11.2. Updating the speed traps files...
-
Page 7: Tripy Ii, Much More Than A Gps
? You dreamed about it. Tripy did it ! Tripy II is a unique combination of a GPS and digital road book player/recorder designed to enjoy unfor- gettable rides and create exclusive itineraries. -
Page 8: Preliminary
Indeed, Tripy offers a unique type of display we call « electronic road book ». The « road book » type of display is the most relevant for usage on bike, quad, as well as in cars and off road vehicles as it requi- res far less attention and glancing time. - Page 9 The Tripy II GPS allows you to: • ride itineraries directly computed by the device (introduce your destination location as well as the preferred route profile : Fast by highways – without highways – leisure trip, and Tripy II is ready to bring you there), • record a scouting trip prior to preparing a professional quality road book, • re-run a previously recorded track, • discover one of the many itineraries created by other nice rides fans and already available in its memory (more than 500 itineraries Tripy II presents to you by order of proximity or provider), • find out the latest itineraries from the Tripy community on the www.tripy.eu website,...
-
Page 10: Paper Road Book & Electronic Road Book
Tripy has combined the advantages of the paper road book with the GPS technology to offer a unique system: the digital road book. -
Page 11: Description Of A Digital Road Book
Tripy GPS models without the need for interpretation or itinerary modification as commonly encountered with traditional GPS’es re-computing an itinerary based on a list of waypoints. In such a way, three friends riding the same road book with Tripy are sure to meet at the same place for the lunch pause ! -
Page 12: How Does Tripy Ii Navigate
Map display Like other GPS’es Tripy offers a « map » type of display. In this mode, it represents a proximity map directed in the riding direction. The zoom factor is adjustable from 100 m to 3 km. In the bottom left corner of the screen one finds the reminder of the following road book waypoint. -
Page 13: Road Book Display
In the « road book » type of display, Tripy II indicates in a very efficient manner the partial distance to the next waypoint and updates that distance continuously. The more you get approach the next waypoint, the lesser the distance. - Page 14 Finally, on the display right hand side, in an area called « info border », Tripy II displays different infor- mation panels. You may easily toggle between panels by means of a knob. The various information displayed are: • remaining distance to destination, •...
-
Page 15: The Best Of Both Worlds
It allows you to visualize the itinerary to figure out its main directions. You shall then be able to review the itinerary of a « road book » providing either from the Tripy library, or computed by the Tripy II GPS itself. -
Page 16: Compass Display (Beacon Road Book)
Outside of known paths, when one does not have accurate data to produce an actual « road book », if one has not had the time for site scouting before starting, Tripy II offers the possibility to create « beacon »... -
Page 17: What Happens As One Leaves The Itinerary
What happens as one leaves the itinerary? When you leave the itinerary while Tripy II displays the road book, the display changes to the « ribbon » mode, then the « compass » mode. Under the « ribbon » mode, you see the track you should have fol- lowed versus your current position. - Page 18 If you carry on further away, Tripy changes to the « compass » display (2) yet may at any time toggle to the « map » display (3) by means of a short pres- sure on the OK knob.
-
Page 19: Compass Mode
Re-computing the itinerary At any time, you may ask the Tripy II GPS to re-compute an itinerary. Contrary to most traditional GPS’es, Tripy does not automatically re-compute an itinerary from where you stand towards the final destination. -
Page 20: What You Need To Know Prior To Using Tripy
To ensure a great sturdiness and perfect readability, the display is protected by a non-glare, scratch proof glass. The interchangeable screen rim is available in two colours, allowing you to taint your Tripy II at your taste (Tripy II comes with both a white and yellow covers). - Page 21 When Tripy II is On, a long pressure on this knob switches the device Off. When Tripy II is On, each short pressure on this knob allows alternatively the switching On of the back lighting or leaving the device in the automatic back lighting.
-
Page 22: Switching On, Switching Off & Satellites Synchronization
Switching ON, switching OFF & satellites synchronization Starting Tripy II When Tripy II is Off, press shortly on the ON/OFF knob to switch the device On. The Tripy II logo is dis- played for about 40 seconds, the dashboard is displayed. -
Page 23: Satellites Synchronization Before Departing
(woods, a.s.o..). However, in order for the receiver to operate properly, one should leave it the time to recognize its satellites constellation. It is therefore recommended to leave Tripy II On – vehicle stopped – at a location offering a broad sky view at least 3 minutes prior to departing. -
Page 24: Switching Tripy Ii Off
Switching Tripy II OFF When Tripy II is operating, press the ON/OFF knob and maintain it pressed until it displays a screen similar to the one below (press approx. 2 seconds). The device then runs the switching off procedure and continues displaying this screen for about 10 se- conds. -
Page 25: Language Selection
OK knob. Tripy II indicates to you that the application should restart for the new language selection to become active. Press the OK knob to acknowledge this message. Tripy II restarts in the new chosen langua-... -
Page 26: Connecting Tripy Ii To The Outside World
USB connection or connect Tripy II to the vehicle power cable Ref. 9020. The USB cable delivered with your Tripy II is used both to connect Tripy II to your PC and connect Tripy II to its battery charger. To connect the cable, unscrew the Tripy II connector’s cover and connect the cable round male connector to the female connector at the back of Tripy II. -
Page 27: Connecting To The Battery Charger
Before riding with Tripy II connected to the cable Ref. 9020, it is compulsory to screw the male connector of Ref. 9020 in the connector at the rear of Tripy II to ensure the connection remains watertight. The other end of cable Ref. 9020 must be connected... -
Page 28: Connecting To The Computer
Connecting to the computer When connecting Tripy II to a PC, the computer shall recognize Tripy II as a « removable drive » simi- larly to a USB memory stick. Once connected to the PC, you may copy files from the PC towards the Tripy II and from Tripy II towards the PC using the common procedures of your computer used for USB sticks. -
Page 29: Connecting A Usb Memory Stick
Tripy II cable. Once the assembly connected you may consult the data (road books, a.s.o..) of one Tripy by means of the other one and copy data from one to the other. See paragraph « 3.11 Data transfer between two Tripy II’s »... -
Page 30: Handling The Batteries
(one direction fits – never force), • Connect the charger to a power plug (110V or 220V /50Hz or 60Hz), • Unscrew the metallic cover of the connector at the rear of the Tripy II, • Switch Tripy II ON (See paragraph « 3.2 Switching ON, switching OFF & satellites synchronization »), • Connect the round male connector at the end of the cable into the connector located at the rear of Tripy II. The male connector is keyed. It should fit the corresponding key located on the female connector of Tripy II (introduction should be easy – never force). - Page 31 « Advanced settings »). As long as Tripy II is connected to the charger, its own power consumption is taken care of by the latter. In this configuration, if the batteries are already fully loaded, they will remain as such.
-
Page 32: Tips About How To Handle The Batteries
Before starting a long period of storage of the Tripy II, it is advised to recharge Tripy II at 75% of its total capacity (3 black bars in the battery level indicator). During that period, it is recommended to check the status of the battery every month and occasionally set the Tripy II in charge to ensure a level of 75% (3 black bars in the battery level indicator). -
Page 33: Connecting To The Vehicle Power Cable
Tripy II. When the cable is connected to the Tripy II, the batteries are re-charged until full and Tripy II drains the current from the cable without unloading the Tripy II batteries. -
Page 34: Screen Contrast And Back Lighting Settings
Screen contrast and back lighting settings Contrast setting To ensure a perfect readability, the Tripy II screen must be tuned to the optimal contrast level. Once the contrast level set, Tripy will adapt your setting according to the external temperature to maintain the set contrast level at all temperature levels. -
Page 35: Back Lighting Setting
ON/OFF knob, you set the Tripy II in the permanent back lighting mode. If you switch the back lighting Off by means of a short pressure of the ON/OFF knob, you set the Tripy II in the automatic back lighting mode. -
Page 36: Mounting Tripy Ii On The Vehicle
Tripy II is supplied with a base set of fixtures allowing the mounting on a tube (bike or quad steering, safety bar in a car, a.s.o..). -
Page 37: Data Transfer Between Tripy Ii And Pc
To transfer data between your computer and Tripy II, you shall start by switching Tripy II On and then connect it to a PC USB port by means of the USB cable supplied with your Tripy II (See paragraph « 3.4 Connecting Tripy II to the outside world »). - Page 38 The « user » directory is aimed to your usage. It is where you may store your road books, or recover road book recordings, automatic tracks, favorites, a.s.o.. Under the « user » directory you shall find the following tree structure:...
-
Page 39: Favorites
« Destination » - « Favorites/Preferred » menu. When you select that favorite from the list (up/down arrow knobs to move into the list and OK knob to select one), Tripy II computes an itinerary to reach it. An even more simple solution: by means of the Windows™ « notepad » text editor, open the « userpoi. -
Page 40: Poi's
II from the PC after having run the procedure allowing to «safely remove peripherals ». You shall then recover your POI lists on Tripy II by going to the « Destination » - « Points of Interest » - « User » menu. -
Page 41: Itineraries Or Road Books
» directory in sub-directories. e.g. « user/roadbooks/France » for all your road books of Fran- On the Tripy II, you shall go to « Road books » - « User » to find the sub-directories tree structure you have created and the personal road books you copied. -
Page 42: Monitored Poi's (E.g. Speed Traps)
As soon as you place one or several « .nvo » files (Tripy POI’s) or « .asc » files (POI’s at the PoiEdit™ format), Tripy shall use all the POI’s contained in these files as points to be monitored. -
Page 43: Data Transfer Between Tripy Ii And Usb Memory Stick
To perform a data transfer between your Tripy II and a USB stick, you shall start by switching the Tripy II On and connect it then to the USB stick (See paragraph « 3.4 Connecting Tripy II to the outside world », topic «... -
Page 44: Data Transfer Between Two Tripy Ii's
Master. No operation shall be conducted on the Slave. On the Master Tripy, go to the « Road books » - « USB » menu. After a few seconds, the Master Tripy displays the list of all the Slave Tripy « /user » sub-direc- tories. -
Page 45: Firmware Version And Tripy Ii Update
(« TripyUpdate.exe ») onto your computer and automatically run. This update program will ask you to connect your Tripy II to the computer. Switch your Tripy II On and connect the USB cable between the Tripy and the PC. (See paragraph « 3.4 Connecting Tripy II to the outside world », topic «... -
Page 46: Safe Copy And Tripy Ii Restoration
3.13. Safe copy and Tripy II restoration As indicated in paragraph « 3.9 Data transfer between Tripy II and PC », Tripy II stores its data in a kind of hard disk containing two partitions in its root: • « .system » directory •... -
Page 47: Restoration Of A Back-Up Copy
« .system » back-up directory created upon the back-up procedure. Copy this « .system » directory from your computer into the root directory of your Tripy II. Your computer will probably indicate that the directory already exists, you must continue and accept replacing it. The res- toration shall continue for about 30 minutes to an hour according to your computer performance. -
Page 48: Access To The General Reset Knob And Memory Card
Access to the general RESET knob and memory card The small slot located on the Tripy II lower side hosts a 4 Gbytes Micro SD memory card, acting as your Tripy hard disk. This slot also hosts a micro switch to reset the device. -
Page 49: Tripy Ii General Reset
Tripy II general RESET It is possible to execute a Tripy II general RESET by pressing the micro switch located in the slot to the left of the Micro SD. This operation is normally never to be used except in some extreme circumstances when Tripy II is not reacting to any knob. -
Page 50: How To Head For Destination
In this operation sequence you may at all times press the « Menu » knob to step back in the selection. In addition to all the functions dedicated to leisure riding, Tripy II offers a traditional GPS function. For the optimal use of this function, it is however recommended to avoid introducing very remote locations, especially if you choose the leisure type of routing. -
Page 51: Town Introduction And Use Of The Virtual Keyboard
If you select France as destination country and introduce the three letters « THI », Tripy will indicate having found 125 towns containing the « THI » letters. As soon as you shall have in- troduced enough letters for Tripy II to find less than 10 results, it will automatically present the results list. - Page 52 In the above example, if you wanted to find « Châ- teau-Thierry » and introduced the letters « Chateau », the search would have pro- duced 171 results. If you introduce « Thierry », Tripy II will only find four locations and you shall faster narrow your search down.
-
Page 53: Street Introduction
At the moment Tripy II displays the destination « street » introduction screen, it proposes by default to head for the town centre. The « Validate » key is already selected on the virtual keyboard. If you do not want to head for a specific street in the selected town, you may just press the «... -
Page 54: Routing Profile
At this stage, you have already selected the country, the town and street you wish to head for. Remains to choose the routing profile Tripy II shall use to compute the routing. You have the choice between four profiles: « Fast by highways », « Fast without highways », « Leisure trip » and « Straight line com- pass ». - Page 55 If you have chosen the « Straight line compass » profile, the indicated distance is not the driven dis- tance but the straight line distance. At this stage, Tripy II is ready to navigate towards destination. Press the « OK » knob to close this sum- mary window and proceed to the navigation screen.
-
Page 56: How To Head For A Destination Recently Selected
« Destination » menu. You will then find a list of the 21 last destinations introduced in the Tripy II. After selecting a destination from the list, Tripy II offers you to choose the routing profile. To know the details about the routing profile, see paragraph « 4.2 How to head for an address? ». -
Page 57: How To Store A « Favorite » Location To Return To It Later On
Store the current position as a « favorite ». Tripy II allows you to store the GPS position you are at in order to be guided to it later on or to display this position on the PC by means of the RoadTracer software. -
Page 58: Compute An Itinerary Towards A « Favorite » Location
« Destination » menu. You will then find a list of all your « favorites ». by means of the up/down (or right/left) arrow keys select a « favorite » from the list and press « OK ». Tripy II offers you then to choose the routing profile. -
Page 59: How To Head For A Point Of Interest (Hotel, Gas Station, A.s.o
« user/roadbook/poi » directory. See also paragraph « 3.9 Data transfer between Tripy II and PC » - « c. POI’s ». You find then the most common categories: •... - Page 60 Airport.eu Airports Amusement Park.eu Amusement parks Beach.eu Beaches Camping Ground.eu Camping grounds Cash Dispenser.eu Cash dispensers Cinema.eu Movie theatres Concert Hall.eu Concert halls Doctor.eu Medical doctors Exhibition Center.eu Exhibition centers Ferry Terminal.eu Ferry terminals Golf Course.eu Golf courses Hospital Polyclinic.eu Hospitals Hotel or Motel.eu Hotels...
- Page 61 POI. Tripy II offers you then to choose the routing profile. To know the details about the routing profile, see paragraph « 4.2 How to head for an address? » - « c. Routing profile » and starts the...
-
Page 62: How To Head For A Gps Coordinate (Longitude - Latitude)
« OK » knob to compute the itinerary towards that position. Tripy II offers you then to choose the routing profile. To know the details about the routing profile, see paragraph « 4.2 How to head for an address? » - « c. Routing profile » and starts the navigation. - Page 63 • in degrees, minutes, seconds. Tripy II handles all three formats and you may tune this setting in the « Advanced Settings » - « Coor- dinates » (See paragraph « 10.7 Advanced Settings » - « f. GPS coordinates »). Depending on the se- lected setting, the introduction of longitude and latitude will be done in two or three fields.
-
Page 64: How To Navigate An Itinerary
You may leave the « Navigation » mode at any time by means of the « Menu » knob and so return to the main menu. By this way, you may review all the Tripy II functions without interfering with the active itinerary. -
Page 65: Toggle The Road Book And Map Displays
5.3. Toggle the road book and map displays Tripy II may display the navigation information in two different ways: • road book display • map display To toggle between the two types, press the « OK » knob. -
Page 66: Navigate Under The Road Book Display
5.4. Navigate under the road book display The way Tripy II navigates in the road book display is explained in paragraph « 2.3 How does Tripy II navigate ? » - « b. Road book display ». Standard « pictogram » display If you ride normally the programmed itinerary, Tripy II displays a pictogram of the next road book way- point. -
Page 67: Ribbon Display
The ribbon display also occurs if you leave the itinerary. In this instance, it allows you to see where you are versus the trace you should have followed. See also paragraph « 2.4 What happens as one leaves the itinerary? ». -
Page 68: Compass » Display
If you ride a « beacon » type road book, the compass display is permanent. This special road book type is used in « off-road » applications (see paragraph « 2.3 How does Tripy II navigate ? » - « e. Compass display (beacon itinerary) »). -
Page 69: Simplified Pictograms
In this instance, as Tripy II has no pictogram to display, it will display a « simplified pictogram ». The « simplified pictogram » is a pictogram showing the general directions of the track at the location... -
Page 70: Various « Info Borders
Various « info borders » The « info border » pane may display various different information. These data are gathered on five panes explained here below. Estimated arrival time This time is computed according to the average of the last 15 minutes driven. Distance remaining to the next gas station. -
Page 71: Map Navigation And Displaying The Itinerary Computed By Tripy Ii
5.5. Map navigation and displaying the itinerary computed by Tripy II The way Tripy II navigates in the map mode is explained in paragraph “2.3 How does Tripy II navigate ? » - «a. Map display”. “Riding direction” orientation When the map is displayed, the right/left arrow knobs allows the change of the zoom factor. At the 100m, 250m, 500m, 1km, 2km and 3 km zoom factors, the map is displayed in the actual riding direction up. -
Page 72: North" Orientation
North oriented map at a 60 km zoom factor The North oriented map gives you an idea of the path of the itinerary (the loaded road book or the Tripy II computed itinerary). The North oriented map is normally centered on your current position. You may however use the up/ down arrow knobs to move the map along the active itinerary and scroll through it. - Page 73 After a few seconds, the small “eye” disappears and the map is repositioned to the current position.
-
Page 74: Additional Navigation Functions
This option runs an itinerary computation from the current location to the final destination of the navi- gated road book. You may use this option if you have left the itinerary and wish that Tripy computes a new itinerary from where you are to the final destination. -
Page 75: Re-Compute Towards A Given Waypoint
This options runs an itinerary computation as from the current location to a given waypoint number of the navigated road book. You may use this option if you have left the itinerary and wish that Tripy com- putes a new itinerary from where you are to a given note that you may select in the original road book. -
Page 76: Reseting The Odometers
Reseting the odometers The function “Reset Trip” allows the resetting of the road book, partial and total odometers displayed in the various panes of the “border info”. Leaving the road book and switch back to the dashboard The function “Quit road book” allows leaving the active road book. The navigation mode will thereafter display the dashboard as illustrated below. -
Page 77: How To Look For A Road Book?
How to look for a road book? 6.1. Preliminary Starting from the Main menu (always accessible by pressing the “Menu” knob), you may select the “Road books” function by means of the right/left arrow knobs. Validate thereafter by means of the “OK” knob to enter the “Road books”... -
Page 78: Find A Road Book In The Library
Select the supplier and press the “OK” knob to see the list of road books of that supplier. Once you will have found the road book you are interested in, press the “OK” knob to select it. Tripy II offers to compute an itinerary between your current location and the starting point of the road book. -
Page 79: Search For One Of Your Own Road Books
6.3. Search for one of your own road books After selecting the “User” icon in the “Road books” menu, Tripy II displays the list of road books and road book directories you have stored in your Tripy II GPS. To start a road book, select the road book from the list and press the “OK” knob. Like with the library road books, Tripy will offer you to compute or not an itinerary between your current location and the starting point of the road book (See above paragraph). -
Page 80: How To Record A Road Book Scouting Trip
7.1. Preliminary Your Tripy II is fitted with a “RECO” function allowing you to record a scouting trip prior to precisely editing this itinerary. Once the “RECO” recorder started, you may ride the itinerary to record. Tripy II will automatically store the track of the itinerary that you ride and you may mark each waypoint position by pressing the “OK”... - Page 81 After starting the recorder, the partial and total are set to zero. The last stored waypoint is set to 1 as Tripy II automatically marks a first waypoint at the start of the recording. By pressing the “OK” knob, you may mark a waypoint at the current location you are at. The number in the “last stored waypoint”...
- Page 82 A second file with the same name yet with a “R” suffix (in the above example “TEST_20100516_1022_R. trb”) is also available. This file is identical to the recorded one but Tripy II has simply reverse the itine- rary’s direction. One of the uses of such reversed itinerary is the possibility to immediately ride the recorded track backward as we will see it in paragraph “8.
-
Page 83: How To Immediately Ride A Scouting Track
How to immediately ride a scouting track ? When you have made a record, you may immediately use it on Tripy II by going to the “Road books” - “User” menu. On top of the list of road books you will find a directory called “#reco”. -
Page 84: How To Use The Trip Master
How to use the Trip Master ? 9.1. Preliminary The “Trip Master” offers mainly two odometers as well as an average speed computation. The ‘Trip Master” is a function mainly used to ride “paper” road books still regularly used in the classic rally world. -
Page 85: Reset
9.2. Reset You may access the reset menu by means of a long pressure on the “MENU” knob. Press the “MENU” knob until a menu like the following is displayed: To perform the Total trip reset, select this entry from the list and press the “OK” knob. -
Page 86: How To Set The Parameters
10.1. Preliminary In the main menu, you will find the “Parameters” icon leading to the parameters menu shown below: 10.2. Screen settings Tuning the screen contrast as well as the back lighting are explained in paragraph “3.7 Screen contrast and back lighting settings”. -
Page 87: Language Setting
You will easily perform the time zone setting by indicating Tripy II what is the town nearest to your cur- rent position. When you access the time zone setting function, Tripy II offers to display the “Nearest locations first”. -
Page 88: Information Screen
• its capacity: you may read the quantity of available energy in the battery in mAh (as measured by the gauge) as well as the battery voltage, • the charging status as well as the current injected into the battery (upon charging). A negative current value means that Tripy II is draining current from the battery. A positive value means that the charger is currently charging the battery. -
Page 89: Advanced Settings
Key sound If this parameter is active, Tripy II produces a sound each time you press a knob. The “beep” will be produced if the “Sound” parameter is set to “Low sound” or “Loud sound”. To activate or de-activate this parameter, simply press the “OK”... -
Page 90: Gps Coordinates
GPS Coordinates Tripy II may handle display and introduction of GPS coordinates in three different formats: • in degrees and decimals of degrees (two fields – D.ddd°), • in degrees, minutes and decimals of minutes (three fields – D°MM.mm’), •... -
Page 91: How To Update The Speed Trap Warning File
Updating the speed traps files When you receive your new Tripy II, the “spots” directory contains a number of files containing the dan- ger and speed control zones. These files are offered by AlterteGPS™ upon the purchase of your Tripy.
Need help?
Do you have a question about the 2 and is the answer not in the manual?
Questions and answers