
Subscribe to Our Youtube Channel
Summary of Contents for DELTA P VR3
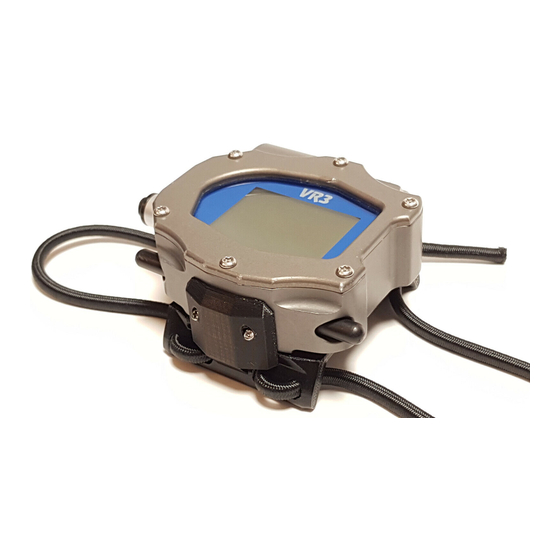
- Page 1 OperatorsManual Multi gas, multi mode decompression computer Warning! Failure to read and understand this instruction manual in full may result in mis-use of the equipment, injury or even death.
- Page 2 Software Upgrades Visit www.vr3.co.uk for information on recent software upgrades which may supersede certain sections of this manual Want to know how to install your PIN (s)? See Page 33, (Pin Num screen) It is highly recommended that you take the time to read this manual cover to cover.
-
Page 3: Table Of Contents
VPM based optional deco algorithm............09 user interaction...................10 pc link...................10 battery compartment................10 control switches...................11 power up....................12 time change screen...................13 home screen..................14-15 the menus....................16-41 dive modes menu................16-18 XFunc.......................16 XDec......................17 big graphics (bg) mode................17 light......................18 stops......................18 options menu..................19-33 profile.......................20 Copyright Delta P Technology Ltd.2006 V5.0... - Page 4 Copyright Delta P Technology Ltd.2006 V5.0...
- Page 5 VR3 and VR2..........66 specifications....................67 registration and warranty form..............67 Copyright Delta P Technology Ltd.2006 V5.0...
-
Page 6: Introduction
The VR3 is designed as an air / nitrox / trimix, multi-mode decompression computer. It can be purchased in four configurations. Open Circuit Air/Nitrox Open and Closed Circuit Air/Nitrox Open Circuit Air/Nitrox/Trimix Open and Closed Circuit Air/Nitrox/Trimix In Open Circuit mode with the I/O connector activated and the cable linked to an external oxygen cell located within a semi-closed circuit rebreather, a VR computer will read semi-closed circuit decompression. -
Page 7: Changing The Battery
When changing the battery, if the VR3 appears to “lock” in a screen, simply leave it for three minutes (with the battery in) and it will reset. -
Page 8: Basic Functions
The VR3 has the following basic functions: Time and date. Light mode (various light functions). Programmable safety factor. Metric or imperial use. PC Link for uploading and downloading of setup and dive data. On screen logbook of 100 dives. -
Page 9: Decompression Algorithm
The VR3 uses a derivative of the Buhlmann ZHL 16 algorithm. Exactly the same adaptation is used in the Proplanner decompression software. The new versions of both systems employ some of the latest thinking in practical microbubble avoidance. This may seem to modify the dive profile compared with standard parallel compartment models. -
Page 10: User Interaction
VR3 from the bottom right hand corner of the front of the screen. (On older models, pre-June 2003, the signal beams from the top of the screen under the VR3 logo). -
Page 11: Control Switches
- often used for critical functions such as switching from open to closed circuit. On the surface, if no switch is pushed the VR3 will turn itself off after 30 seconds to save power. To avoid this, a short push on both switches in the home screen will activate the legend “dive now”... -
Page 12: Power Up
If the batteries have just been changed the time change screen may be displayed, (page 13). It is not necessary to power up the VR3 before you dive. The screen will automatically power up within a minute of exposure to an absolute pressure of 1.3 Bar or greater. -
Page 13: Time Change Screen
Options Menu under the SETUP sub menu. The VR3 is not a precision chronograph, but it does meet the European PREN standard for digital dive timing devices. You may need to adjust it occasionally in order to display the correct time. -
Page 14: Home Screen
VR3 with Prolog. On the surface in any screen, without activating “Dive Now”, the VR3 will turn off after 30 seconds if no switch is pushed. A push of either switch at any time resets the timer. Unless diving at less than 1.3m absolute of water pressure (3m at sea level), it is not... - Page 15 HP link is activated and XFunc (see page 16) is set to HP. Once a function is shown a long push will activate it. Copyright Delta P Technology Ltd.2006 V5.0...
-
Page 16: The Menus
The features of the VR3 are contained in 3 major menus: Dive modes menu Options menu Gas list dive modes D i v e M o d e s X F u n c X D e c... -
Page 17: Xdec
Big Graphics Mode is ON. Your No Stop Time (NST) remains visible, as do your decompression ceiling and time at stop, if you are carrying out a decompression dive. 21.0m 21 . 0m 13 dive screen big graphics dive screen regular graphics Copyright Delta P Technology Ltd.2006 V5.0... -
Page 18: Light
Practically, you will find that you use the DVo menu more as this screen is accessible during a dive. stops Switch between 3 optional final decompression stop depths, 3m, 4.5m and Copyright Delta P Technology Ltd.2006 V5.0... -
Page 19: Options Menu
Home screen. N S T S I M P I N ? ? ? options menu screen The following pages take you through each of these options in turn. Copyright Delta P Technology Ltd.2006 V5.0... -
Page 20: Profile
PROFILE menu and use + to bring up the profile you want (A,B.C). A short push of both switches programs the set of gases in the selected profile into your VR3. You will see the word RESTORED. Then a short push on the left switch... -
Page 21: Log Screen
PC and can be displayed in much more detail. The VR3 can store 22 hours of diving for downloading, stored at 10-second intervals. When the memory in the VR3 is full, it simply overwrites and starts again. If long, detailed dives are logged, they should be downloaded as soon as possible to avoid losing them. -
Page 22: Markers
The VR3 has a second log screen in which a graphic profile of the dive is shown. Once this function is activated, it is accessible by (long push both switches). While in the graphic profile screen, a short push of both switches will bring up a screen showing a graph of ambient temperature throughout the dive. -
Page 23: Calendar
In the activity screen, moves between fields. + sets the activity in the calendar, (e.g. F=FLY DAY), - removes an activity. activity screen 1 Copyright Delta P Technology Ltd.2006 V5.0... -
Page 24: Calendar
3 Copyright Delta P Technology Ltd.2006 V5.0... -
Page 25: Setup Screen (Including Color Screen Adjustment)
10%, up to a maximum of 50%. Every 10% increase adds 2% to the inert gas content of the gas selected. This option allows the user to set the CNS % level at which the VR3 will display an Air Break warning. By pressing + the CNS warning % will increment. - Page 26 90 minute oxygen half time will be assumed – in other words, every 90 minutes the CNS load will halve. Whichever gas is selected on the VR3 will be the gas which the decompression algorithm will follow. A small extension may therefore be made to the stop time during an Air Break.
- Page 27 If you access this accidentally, enter NO. If the unit freezes simply remove the battery for ten minutes to reset it. Usage - Is an indication of total dive hours carried out on your VR3. no stop In this screen you can see No Stop Times (NST) for depths to 41m, taking into account your previous dives and surface interval.
-
Page 28: No Stop Screen
For instance:- VR3 18m dive No Stop Time = 39 mins VR3 18m with 3 min stop at 4.5m = 54 mins This means that if you were to do a dive to 18m on air with 54 minutes bottom time, you would see a required 3 minute stop at 4.5 m on your look... -
Page 29: Pc Link Screen
7 pin I/O connector on the VR with a 9 pin PC serial port, (the hardwire link will not work with older VR3 computers that have a 2 pin I/O connector). For the VR computer to function with an infra red link, the pc link screen on the VR should read Full = 0, IR = 1. -
Page 30: Dive Plan Screen
In dive plan mode it may take a few seconds for TTS to update and show accurate decompression. dive plan screen dive plan screen 2 dive plan screen 3 Copyright Delta P Technology Ltd.2006 V5.0... -
Page 31: Language
Anything you set in the altitude screen has no bearing on this. If you go to altitude to dive you should switch on your VR3 in the dry before you go diving and allow it to switch itself off again. This will enable the VR3 to read and record the new ambient pressure so that dive depth readings will be accurate. -
Page 32: Games
While you are firing you will see Tide appear. This is a random setting; the strength and direction of the tide will change from game to game just so that it does not all become too easy! Copyright Delta P Technology Ltd.2006 V5.0... -
Page 33: Pin Number Screen
If you should ever sell on your computer, you will need to give the new owner the PINs so that the personal information can be changed. Once a PIN has been installed in a VR3 it does not “fall out”, even if the unit powers down and resets itself. -
Page 34: Gas List Menu
Only turn ON the gases you intend to breathe on the dive. In closed circuit mode, only turn on the gas to be used in closed circuit. Bailout gases should be in the list but turned OFF until needed. Copyright Delta P Technology Ltd.2006 V5.0... -
Page 35: Adjusting Gases
Change the gas number until the one you want to use, or modify, is displayed. If you turn all gases OFF you will not be able to exit this screen. Copyright Delta P Technology Ltd.2006 V5.0... -
Page 36: Activating Gases
When the ON/OFF area is highlighted, by using the +/- keys you can turn a gas ON for the dive. The VR3 is able to advise you of the total decompression profile, as well as which gas you should be breathing at which depth. This is based on the MOD setting of the ON gases. -
Page 37: Changing Gases
MOD.The PO will change as the MOD is altered. Do not exceed a maximum PO of 1.6 bar for decompression gases. N X 3 2 G A S 1 gas adjust screen Copyright Delta P Technology Ltd.2006 V5.0... - Page 38 The MOD setting is important as this is the depth at which the VR3 will prompt you to switch to that gas. If you mistakenly set the MOD shallower than the depth you want to switch at, you can still switch but the VR3 will not prompt you to switch until the MOD you set has been reached.
-
Page 39: Selecting Closed Circuit Gases
If you have purchased the closed circuit upgrade for your VR3, in the GAS SELECT screen you have a closed circuit option Press and hold both switches. This allows the selection of a closed circuit decompression algorithm. -
Page 40: Moving From Closed To Open Circuit
Open Circuit gases but must be turned ON to obtain an accurate prediction. Setting the MODs correctly will automatically trigger prompts for the correct gas switches as the diver ascends. Copyright Delta P Technology Ltd.2006 V5.0... -
Page 41: Changing Diluent
While diving, the current depth is displayed at the top of the gas select screen. The diluent select screen is also used to choose the calibration gas. Press to make the selected gas C A L the calibration gas for the oxygen sensor Copyright Delta P Technology Ltd.2006 V5.0... -
Page 42: Dive Mode And Simulate Mode
Or at the surface go to the home screen where a short push of both switches will bring up “dive now” and the VR3 will stay on for 5 minutes between switch pushes. If a VR does not turn on as expected, check to see if the rear pinhole may be blocked/covered. - Page 43 However if you do leave them on but you do not switch to them you will just be held at each stop longer than the prediction. The 4th line shows the current gas being used. Copyright Delta P Technology Ltd.2006 V5.0...
- Page 44 T h e m i n u t e s w i l l j u s t t a k e l o n g e r t o e l a p s e i n r e a l t i m e . Copyright Delta P Technology Ltd.2006 V5.0...
-
Page 45: Diver On The Line
Stop duration - Lines of pixels representing length of time at each stop. Ceiling depth - Bottom of block shows depth at which deco starts. Current depth - Line representing current depth. Copyright Delta P Technology Ltd.2006 V5.0... -
Page 46: Command Area
(following page) showing: Current depth and bottom time. Maximum dive depth. Maximum P0 OTU’s accumulated. Current temperature. Copyright Delta P Technology Ltd.2006 V5.0... - Page 47 If at any point you change to a different gas, in a few moments the VR3 will modify the decompression list and re-calculate all decompression. The decompression screen stays inactive for 20 seconds.
-
Page 48: Closed Circuit Dive Screens
1 . 0 5 screen In closed circuit rebreather mode a long push on the right switch when is displayed takes you into a P O screen where current depth and time are also displayed. Copyright Delta P Technology Ltd.2006 V5.0... -
Page 49: Warnings
The VR3 displays warnings in the form of on-screen messages and the backlight flashing. Warning messages appear in the top right section of the dive screen. Warning Meaning Descend, you have violated a decompression ceiling. Ascend, your PO is at a dangerously high level and you have no alternative active gas to switch to. -
Page 50: Decompression Stop Violation
MISSED STOPS warnings will be stored on the logbook and the warning will be displayed for 24 hours on the home screen. The VR3 will not lock you out. If you re-enter the water, best-guess decompression will still be shown but should not be relied upon. -
Page 51: Rebreather And Analyser Links
That is the correct flow rate to use in future. Switch on your VR3 Select Dive Now (short push on both switches) to keep the VR3 active for 5 minutes Analyser calibration is normally carried out in air and on Open Circuit VR3s air is automatically set as the only CAL gas. - Page 52 2.0. The small arrow to the left of the bar represents the VR3’s internal set point. This graph is also available in DIVE and SIM modes.
-
Page 53: Calibration With Analyser (Closed Circuit Vr3)
(cc VR3) Special Procedure for Closed Circuit VR3s To select the calibration gas you will use (usually air or oxygen), o a long push on the left switch will take you into your Gas Select screen o make sure you are in Closed Circuit Mode and you see CLOSED... - Page 54 When the reading is stable a short push of both switches saves the calibration in the centre of the screen. o Your VR3 is now calibrated. A short push on the left switch returns you to the Dive Now screen.
-
Page 55: Analysing A Gas
Switch on your VR3 Select Dive Now (short push on both switches) to keep the VR3 active for 5 minutes Cycle to the O... -
Page 56: Semi Closed Rebreather Link
VR3 in open circuit mode with the external cell set to on w i l l g i v e y o u a s e m i - c l o s e d d e c o m p r e s s i o n b a s e d o n t h e external cell readings. -
Page 57: Closed Circuit Rebreather Link
Install the sensor cell in your rebreather. Switch on your VR3 Select Dive Now (short push of both switches) to keep the VR3 active for 5 minutes A long push on the left switch will take you into Gas Select screen... - Page 58 Once the reading is again stable a short push on the right switch accepts it and takes you into a SENSOR screen where you will see the reading and a measurement of the oxygen sensor cell output (measured in millivolts mV). Copyright Delta P Technology Ltd.2006 V5.0...
- Page 59 If so, you may need to add a breath of air to the loop to allow auto calibration to take place. Fill and evacuate the rebreather one more time with oxygen and the displays should read 1.0 Bar Now try calibrating the VR3 again Copyright Delta P Technology Ltd.2006 V5.0...
- Page 60 If an error occurs with the cell or cable XP FAIL will show on the bottom line. 21.0m -109 1.30 1.25 closed circuit dive screen with XDec on Copyright Delta P Technology Ltd.2006 V5.0...
-
Page 61: Calibration At Altitude
Because the rebreather works on absolute pressure the calibration gas in the VR3 must be adjusted to allow for altitude pressure. Example: If you are at an altitude pressure of 850mb. go to the GAS menu and adjust one of the gases for the following;... -
Page 62: Oxygen Sensors
Many oxygen cells, if unused for a period, appear to benefit from a flow of an oxygen enriched gas prior to calibration and use. To use the VR3 in analyser mode the Delta P ‘cylinder connection kit’ and I/O cable must also be purchased. Cylinder connection systems such as the Vandagraph unit are also applicable. -
Page 63: Gas Calculator Mode
VR3 owners can purchase Gas Calculator Mode, which is activated by installing a new PIN. When this mode is enabled, you can gain access to it via a new icon in the bottom right corner of the Home Screen. To find the new icon, do short pushes of the right switch until the icon is displayed. -
Page 64: Key To Icons
ASCEND HIGH PO HOME / DIVE P O 2 NEXT GAS CALCULATOR POWER ON MINUS DOWN STOP GRAPH AIR BREAK CALENDAR PLUS PARTIAL FRACTION OF O2 F O 2 P O 2 PRESSURE OF 02 Copyright Delta P Technology Ltd.2006 V5.0... -
Page 65: Warranty And Service
Service All digital depth monitoring devices need a calibration check from time to time. Due to the potential depth of operation of the VR3 it is recommended that you return it to the factory for this check periodically, (a service after every 100 hours of diving is recommended.) -
Page 66: Maintenance Tips For Your Vr3 And Vr2
The bulkhead I/O connector port is watertight and any water that gets in to the port cannot harm your VR3. However, should sea water get inside the port or the ends of your linking cable, flush them with fresh water as soon as possible afterwards then leave them to dry completely BEFORE refitting the cap. -
Page 67: Specifications
This also allows programming of security information. (see page 32) registration and warranty form Name Address Email Serial Number (line 4 Pin Num screen) Date Purchased Registration details can also be sent to us by email to: support@vr3.co.uk Copyright Delta P Technology Ltd.2006 V5.0...
Need help?
Do you have a question about the VR3 and is the answer not in the manual?
Questions and answers