Advertisement
Available languages
Available languages
Quick Links
Advertisement

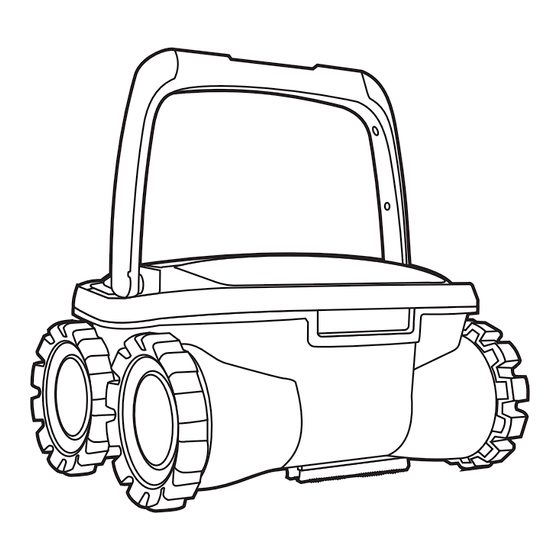
Summary of Contents for Aquatron Max 3
- Page 2 ENGLISH Dear Customer, IMPORTANT SAFETY INSTRUCTIONS Thank you for choosing our product to clean your pool. We hope that you will enjoy using your new robot to maintain your swimming pool for years to come. READ AND FOLLOW ALL THE INSTRUCTIONS Before you begin to use your robot, please take a few minutes to carefully read these CAUTION: Do not plug the power supply into a grounded outlet or do not switch the operating instructions.
- Page 3 Operating the pool cleaner - Quick start guide 1. Place the power supply (transformer) at least 3.6 meters / 11.8 feet from the pool and at 4. Plug the cable into the power supply. Depending on your model (Type I or Type II), least 12 cm / 4 Inch above the surface (fig.1).
- Page 4 Operating the pool cleaner - Plugging the cable Plugs Type I Plugs Type II To plug the cable (Fig A) into the socket on the power supply (Fig. B), please do the To plug the cable (Fig A) into the socket on the power supply (Fig. B), please do the following: following: 1.Prepare the plug as seen in (Fig.
- Page 5 Operating the pool cleaner - Power button a. Power LED The blue LED flashes when the power supply is in standby mode and lights continuously when the pool cleaner is operating. b. "POWER" button The button switches between "ON" and "STANDBY". IMPORTANT- After every cycle the pool cleaner will automatically go to "standby".
- Page 6 Maintenance and adjustment - Changing the rolling brush CLICK new brush Maintenance and adjustment - Accessing and cleaning the propeller DISCONNECT THE ROBOT FROM THE POWER-SUPPLY BEFORE PERFORMING THIS ACTION propeller pump motor...
- Page 7 Maintenance and adjustment - Replacing the wheel DISCONNECT THE ROBOT FROM THE POWER-SUPPLY BEFORE PERFORMING THIS ACTION old wheel cogwheel new wheel...
-
Page 8: Important Tips
Important Tips Shut off and unplug the power supply every time you remove the cleaner from the water. Do not leave your cleaner in direct sunlight when not in use. Clean the filter bag after every cycle. Never leave the power supply in direct sunlight and avoid leaving it in the Periodically straighten out the floating cable. - Page 9 FRANÇAIS Chers clients, CONSIGNES DE SÉCURITÉ IMPORTANTES Nous vous remercions d'avoir choisi notre produit pour nettoyer votre piscine. Nous LIRE ET SUIVRE TOUTES LES INSTRUCTIONS espérons que vous utiliserez votre nouveau nettoyeur pour maintenir votre piscine durant plusieurs années. ATTENTION : Ne pas brancher le bloc d'alimentation à une prise de terre ou ne pas Avant de commencer à...
- Page 10 Utilisation de l'aspirateur - guide de démarrage rapide 1. Placez l’alimentation électrique (transformateur) à une distance d’au moins 3,6mètres 4. Branchez le câble sur l'alimentation. En fonction du modèle, (Type I ou Type II), assurez-vous que la fiche correspond exactement au logement de clavette de la prise /11,8 pieds de la piscine et au moins 12cm/4 pouces au dessus de la surface (figure 1).
- Page 11 Utilisation du nettoyeur de piscine – brancher le câble Fiches de Type I Fiches de Type II Veuillez suivre les étapes suivantes pour brancher le câble (Figure A) dans la prise secteur (Fig. Veuillez suivre les étapes suivantes pour brancher le câble (Figure A) dans la prise secteur B) : (Fig.
- Page 12 Utilisation du nettoyeur de piscine - bouton d'alimentation a. Témoin de mise sous tension Le témoin de mise sous tension de couleur bleue clignote lorsque l'alimentation est en mode veille et s'allume en permanence lorsque le nettoyeur de piscine fonctionne. b.
- Page 13 Entretien et ajustement - remplacer la brosse cylindrique CLICK new brush Entretien et ajustement - accès et nettoyage de l'hélice DÉBRANCHEZ LE ROBOT DE LA SOURCE D'ALIMENTATION ÉLECTRIQUE AVANT D'EXECUTER CETTE TÂCHE Hélice Pompe...
- Page 14 Entretien et ajustement - remplacer les roues DÉBRANCHEZ LE ROBOT DE LA SOURCE D'ALIMENTATION ÉLECTRIQUE AVANT D'EXECUTER CETTE TÂCHE Vieille roue pignon nouvelle roue...
-
Page 15: Conseils Importants
Conseils Importants: Fermez et débranchez la source d'alimentation chaque fois que vous retirez l'appareil de Protégez votre appareil d'une exposition directe aux rayons du soleil lorsque vous l'eau. ne l'utilisez pas. Nettoyez le filtre après chaque cycle Protégez l'alimentation d'une exposition directe aux rayons du soleil et à la pluie. Réajustez le câble flottant de manière périodique Effectuez occasionnellement un rinçage de l'appareil dans de l'eau douce propre. - Page 16 DEUTSCH Sehr geehrter Kunde, WICHTIGE SICHERHEITSHINWEISE Herzlichen Glückwunsch zum Kauf unseres Produkt. Wir hoffen, dass Ihnen Ihr neuer BITTE LESEN UND BEFOLGEN SIE ALLE ANWEISUNGEN Reiniger über Jahre hinaus die Reinigung Ihres Schwimmbeckens erleichtern wird. Bitte nehmen Sie sich ein paar Minuten Zeit um diese Bedienungsanleitung aufmerksam ACHTUNG: Schließen Sie die Stromversorgung nicht an eine geerdete Steckdose an oder und vollständig zu lesen, bevor Sie Ihren Reiniger benutzen.
- Page 17 Bedienung des Schwimmbeckenreinigers - Kurzanleitung 1. Stellen Sie die Stromversorgung (Transformator) mindestens 3,6 Meter vom 4. Stecken Sie das Kabel in die Stromversorgung. Achten Sie je nach Modell (Typ I oder Schwimmbecken auf und mindestens 12 cm über der Oberfläche (Abb.1). Die Typ II) darauf, dass der Keil auf dem Stecker genau mit der Keilnut auf der Stromversorgung versorgt den Reiniger mit Niederspannung.
- Page 18 Bedienung des Schwimmbeckenreinigers - Kabelanschluss Stecker Typ II Stecker Typ I Zum Anschließen des Kabels (Abb. A) an die Anschlussbuchse der Stromversorgung (Abb. B) gehen Sie Zum Anschließen des Kabels (Abb. A) an die Anschlussbuchse der Stromversorgung (Abb. bitte folgendermaßen vor: B) gehen Sie bitte folgendermaßen vor: 1.
- Page 19 Bedienung des Schwimmbeckenreinigers - Power (Einschalt)-Taste a. Die Betriebs-LED Die blaue LED-Anzeige blinkt, wenn die Stromversorgung im Standby-Modus ist und leuchtet ständig auf, wenn der Schwimmbeckenreiniger in Betrieb ist. b. "POWER (Einschalt)"-Taste Die Taste schaltet zwischen "ON (AN)" und "STANDBY (Bereitschaftsmodus)" WICHTIG - Nach jedem Zyklus schaltet der Schwimmbeckenreiniger automatisch in den "Standby"-Modus.
- Page 20 Wartung und Einstellung - Auswechseln der Rollenbürste CLICK new brush Wartung und Einstellung - Zugang und Reinigung des Propellers TRENNEN SIE DAS GERÄT VOR DURCHFÜHRUNG DIESER MASSNAHME VON DER STROMVERSORGUNG propeller Pumpenmotor...
- Page 21 Wartung und Einstellung - Austausch der Räder TRENNEN SIE DAS GERÄT VOR DURCHFÜHRUNG DIESER MASSNAHME VON DER STROMVERSORGUNG Altes Rad Zahnrad Neues Rad...
-
Page 22: Wichtige Hinweise
Wichtige Hinweise Unterbrechen Sie die Stromversorgung und ziehen Sie jedes Mal den Stecker heraus, Setzen Sie Ihren Reiniger keinem direkten Sonnenlicht aus, wenn Sie ihn nicht wenn Sie den Reiniger aus dem Wasser entfernen. benutzen. Reinigen Sie den Filterbeutel nach jedem Reinigungszyklus. Setzen Sie niemals die Stromversorgung direktem Sonnenlicht aus und Entwirren Sie regelmäßig das Schwimmkabel. - Page 23 ITALIANO Gentile Cliente, La ringraziamo per la scelta che ha fatto preferendo il nostro robot per la pulizia della DISPOSIZIONI IMPORTANTI DI SICUREZZA sua piscina. Vogliamo sperare che sarà un piacere per lei usare il nuovo robot di pulizia LEGGERE E SEGUIRE TUTTE LE DISPOSIZIONI per la manutenzione della piscina per gli anni a venire.
- Page 24 Messa in funzione del robot per la pulizia delle piscine - Guida di avvio rapido 1. Posizionare l'alimentatore (trasformatore) almeno a 3,6 metri dalla piscina e sollevato 4. Collegare il cavo all'alimentazione elettrica. Secondo il modello (di Tipo I o di Tipo II), di almeno 12 cm dalla superficie (fig.1).
- Page 25 Messa in funzione del robot per la pulizia delle piscine - Inserzione del cavo Spina di Tipo II Spina di Tipo I Per inserire il cavo (Fig. A) nella presa dell'alimentatore elettrico (Fig. B), procedure come segue: Per inserire il cavo (Fig. A) nella presa dell'alimentatore elettrico (Fig. B), procedure 1.
- Page 26 Messa in funzione del robot per la pulizia delle piscine - Pulsante di accensione a. LED alimentazione Il LED blu si accende ad intermittenza quando l'alimentatore elettrico si trova in modalità standby e si accende permanentemente quando il robot per la pulizia della piscine è...
- Page 27 Manutenzione e regolazione - Cambio della spazzola rotante CLICK new brush Manutenzione e regolazione - Accesso alla ventola e sua pulizia STACCARE IL ROBOT DALL'ALIMENTATORE ELETTRICO PRIMA DI ESEGUIRE QUEST'AZIONE ventola Motore della pompa...
- Page 28 Manutenzione e regolazione - Sostituzione della ruota STACCARE IL ROBOT DALL'ALIMENTATORE ELETTRICO PRIMA DI ESEGUIRE QUEST'AZIONE Ruota vecchia Ruota dentata Ruota nuova...
-
Page 29: Guida Alla Risoluzione Dei Problemi
Consigli Importanti Spegnere e scollegare l'alimentatore ogni qualvolta il robot viene estratto dall'acqua. Non lasciare il robot esposto al sole quando non è in uso. Pulire il sacchetto filtro dopo ogni ciclo di pulizia Non lasciare l'alimentatore esposto direttamente al sole ed evitare di lasciarlo Stendere periodicamente il cavo galleggiante. - Page 30 ESPAÑOL Estimado Cliente: Gracias por seleccionar nuestro producto para realizar la limpieza de su piscina. INSTRUCCIONES IMPORTANTES SOBRE SEGURIDAD Estamos seguros que quedará satisfecho al utilizar su nuevo limpiafondos para LEA Y SIGA TODAS LAS INSTRUCCIONES mantener limpia su piscina durante años. Antes que Ud.
- Page 31 Utilización del limpiafondos de piscinas - Guía de inicio rápido 1. Coloque la fuente de alimentación (transformador) al menos a 3,6 metros de distancia 4. Conecte el cable a la fuente de alimentación. Según el modelo (de tipo I o de tipo II), de la piscina y como mínimo a 12 cm por encima de la superficie (fig.
- Page 32 Utilización del limpiador de piscinas – Conexión del cable Tomas Tipo II Tomas Tipo I Para conectar el cable (Figura A) en el enchufe de corriente (Figura B), debe realizar lo siguiente: Para conectar el cable (Figura A) en el enchufe de corriente (Figura B), debe 1.
- Page 33 Utilización del limpiador de piscinas – Botón de encendido a. Indicador LED de corriente El LED azul titila cuando la corriente está en modo de espera y se enciende continuamente cuando el aspirador se encuentra trabajando. b. Botón de potencia El botón de potencia cambia entre encendido (ON) y en espera (STANDBY).
- Page 34 Mantenimiento y ajustes – Limpieza del cepillo giratorio CLICK new brush Mantenimiento y ajustes – Acceso y limpieza del propulsor DESCONECTE EL ROBOT DE LA FUENTE DE ALIMENTACIÓN ANTES DE REALIZAR ESTA ACCIÓN propulsor Motor de la bomba...
- Page 35 Mantenimiento y ajustes – Sustitución de la rueda DESCONECTE EL ROBOT DE LA FUENTE DE ALIMENTACIÓN ANTES DE REALIZAR ESTA ACCIÓN Rueda anterior Engranaje Rueda nueva...
-
Page 36: Sugerencias Útiles
Sugerencias Útiles Apague y desconecte la fuente de alimentación cada vez que saque el limpiador del No deje el limpiafondos expuesto a la luz solar directa cuando no lo utilice. agua. Nunca deje la fuente de alimentación expuesta a la luz solar directa y evite dejarla Limpie el filtro después de cada ciclo. - Page 37 PORTUGUÊS Estimado cliente: IMPORTANTES INSTRUÇÕES DE SEGURANÇA Obrigado por ter escolhido o aspirador para a limpeza da sua piscina. Estamos seguros LEIA E SIGA TODAS AS INSTRUÇÕES de que ficará satisfeito ao utilizar o seu novo aspirador para manter a sua piscina limpa durante anos.
- Page 38 Operando o limpador de piscinas - Guia de início rápido 1. Coloque a alimentação eléctrica (transformador) a pelo menos 3,6 metros / 11,8 pés 4. Conecte o cabo à fonte de alimentação. Dependendo do seu modelo (Tipo I ou Tipo II), da piscina e pelo menos 12 cm / 4 polegadas acima da superfície (fig.
- Page 39 Operando o limpador de piscinas - Conectar o cabo Plugues Tipo II Plugues Tipo I Para conectar o cabo (Fig. A) na tomada da fonte de alimentação (Fig. B), por favor, faça o Para conectar o cabo (Fig. A) na tomada da fonte de alimentação (Fig. B), por favor, faça o seguinte: seguinte: 1.
- Page 40 Operando o limpador de piscinas - Botão de partida a. LED de energia O LED azul fica intermitente quando a fonte de alimentação está no modo standby e acende de modo contínuo quando o limpador da piscina está em operação. b.
- Page 41 Manutenção e ajuste - Trocar a escova rolante CLICK new brush Manutenção e ajuste - Accessar e limpar a hélice DESCONECTE O ROBÔ DA ALIMENTAÇÃO ELÉCTRICA ANTES DE EXECUTAR ESTA ACÇÃO hélice motor da bomba...
- Page 42 Manutenção e ajuste - Substituir a roda DESCONECTE O ROBÔ DA ALIMENTAÇÃO ELÉCTRICA ANTES DE EXECUTAR ESTA ACÇÃO Roda antiga Roda dentada Roda nova...
-
Page 43: Conselhos Importantes
Conselhos Importantes Desligue e retire o conector da fonte de alimentação toda vez que você retirar o limpador enviar a máquina ao seu revendedor caso seja necessário algum reparo. da água. Não deixe seu limpador na luz directa do sol quando não estiver em uso. Limpe o saco do filtro após cada ciclo. - Page 44 Grounding The power supply must be connected to a grounded 3 conductor socket. The mains power supply must be connected via a GFCI (ground fault circuit interrupter) or RCD (residual current device) having a rated residual operating current not greater than 30mA. Fuse The fuse must be changed by an authorized service agent or trained and qualified person only.
- Page 45 Timer Esterno Capacidad Capacidade External Timer Capacité de Externen Timer Capability Minuteur Externe Funktion Capacità Temporizador Externo Temporizador Externo This feature will enable Ce robot nettoyeur de D i e s e r r o b o t i s c h e Questo robot per la Este robot limpiador de O robô...
Need help?
Do you have a question about the Max 3 and is the answer not in the manual?
Questions and answers