Table of Contents
Advertisement
Quick Links
Advertisement
Table of Contents

Summary of Contents for Appliance 365 UMW1701SS
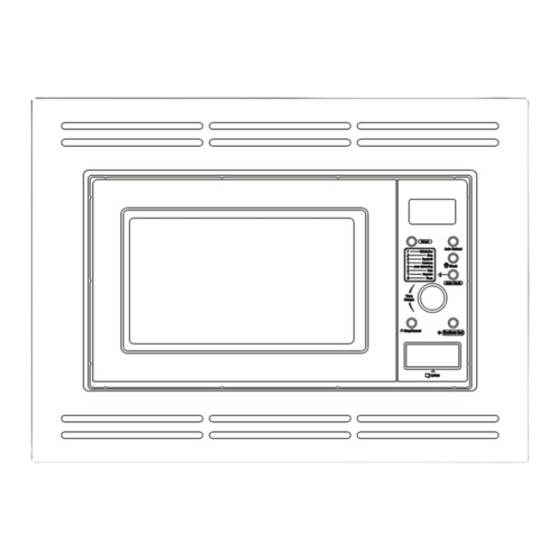
- Page 1 UMW1701SS with Trim Kit UTK1701SS...
-
Page 2: Important Safeguards
Important Safeguards • Do not fry food in the oven. Hot oil can damage oven parts and utensils, and even result in skin burns. When using electrical appliances basic safety precautions should be followed, • Eggs in their shell and whole hard-boiled including the following: eggs should not be heated in microwave ovens since they may explode even after... - Page 3 Note: To reduce the risk of burns, electric shock, fire, injury to persons or exposure to excessive microwave energy please read the following carefully: Warning Liquid or other food must not be heated in sealed containers since they are liable to explode. It is hazardous for anyone other than a trained person to carry out any service or repair operation which involves the removal of any cover which...
- Page 4 0844 800 7848...
-
Page 5: Precautions To Avoid Possible Exposure To Excessive Microwave Energy
Precautions to Avoid If None of the Above Possible Exposure to Rectify the Situation Excessive Microwave Then contact a qualified technician. Do not try to Energy adjust or repair the oven yourself. • Do not attempt to operate this oven with the Installation door open since this can result in harmful exposure to microwave energy. -
Page 6: Connection To The Mains Supply
Connection to the BROWN LIVE wire is the wire and must be connected to the terminal which is marked with Mains Supply the Letter ‘ ’ or coloured Always ensure that the plug cord grip is fastened Check that the voltage marked on the product correctly. -
Page 7: Features Of Your Microwave Oven
Features of Your Microwave Oven 1. Door Safety Lock System 2. Oven Window 3. Oven Air Vent 4. Turntable Roller 5. Glass Tray 6. Control Panel 7. Door Release Button Radio Interference Operation of the microwave oven can cause interference to your radio, TV, or similar equipment. -
Page 8: Microwave Cooking Principles
Microwave Cooking Utensils Guide Principles • A transparent utensil is best for microwave cooking as it allows energy to pass through the container and heat the food. • Arrange food carefully. Place thickest areas • Only use a temperature probe recommended towards outside of dish. -
Page 9: Microwave Control Panel
Microwave Control Panel MENU ACTION SCREEN Cooking time, power, action indicators, and clock time are displayed. POWER Press this button a number of times to select the required microwave cooking power level. TIME/WEIGHT Turn the dial to set the oven clock time, input cooking time or specify weight. -
Page 10: Using The Oven Controls
Using the Oven Controls MICROWAVE COOKING Press the POWER button a number of times to select a cooking power level, and then use the BEEP DURING OVEN SETTINGS TIME/WEIGHT dial to set a desired cooking time. The longest cooking time is 60 minutes. Each time a button is touched, a beep will sound to acknowledge the touch. -
Page 11: Special Feature
AUTO COOK MENU Code Food/cooking mode 1. Turn TIME/WEIGHT dial to indicate weight of food. Milk/Coffee (unit) 2. The result of auto cooking depends on factors such as the shape and size of food, your personal preference Rice (g) as to how well cooked you want the foods and even Spaghetti (g) how well you happen to place food in the oven. -
Page 12: Care And Cleaning
Care and Cleaning • Turn off the oven and remove the power plug from the wall socket before cleaning. • Keep the inside of the oven clean. When food splatters or spilled liquids adhere to oven walls, wipe with a damp cloth. Mild detergent may be used if the oven gets very dirty. - Page 14 A 4 x 8 m m B 4 x 1 2 m m C 4 x 1 6 m m Sequence Name Quantity Cabinet Upper Exhaust Guide Trim Kit Brackets Trim Kit Microwave Oven Bracket...
- Page 15 Cut out in back panel 5 6 8 m m 70mm 70mm 350mm 1 6 m m 1 6 m m Make a cabinet to the dimension. 4 - 4 x 8 m m C e n t e r l i n e o f t h e c a b i n e t 2 8 4 2 8 4...
- Page 16 Fasten 2 trim kit brackets to the right Fasten 2 trim kit brackets to the left side side of oven with screws. of oven with screws. Place the oven in the middle of the cabinet. Place the oven into the cabinet.
- Page 17 4 - 4 x 1 6 m m Fasten the oven into the cabinet with 4 screws. Fasten the trim kit onto the oven Completion Note the position of identifier.
- Page 18 Rear upper shelf position Lower shelf positions Fitting the shelves. Securing the shelves.
-
Page 19: Technical Specification
Technical Specification Operation Frequency: 2450MHz Power Consumption: 230~240V ~50Hz, 1200W(Microwave) Rated Microwave Power Output: 700W Product Dimensions: 263mm(H) × 452mm(W) × 310mm(D) Oven Cavity Dimensions: 193mm(H) × 315mm(W) × 279mm(D) Oven Capacity: 17 Litres Cooking Uniformity: Turntable System { 245mm} Net Weight (Microwave and Trim Kit): Approx.13.6kg... - Page 20 September 2009 Appliance 365 Ltd. www.appliance365.co.uk...
Need help?
Do you have a question about the UMW1701SS and is the answer not in the manual?
Questions and answers
What is the diameter of the glass dish in the microwave
The diameter of the glass dish (turntable) for the Appliance 365 UMW1701SS microwave is 245mm.
This answer is automatically generated