Table of Contents
Advertisement
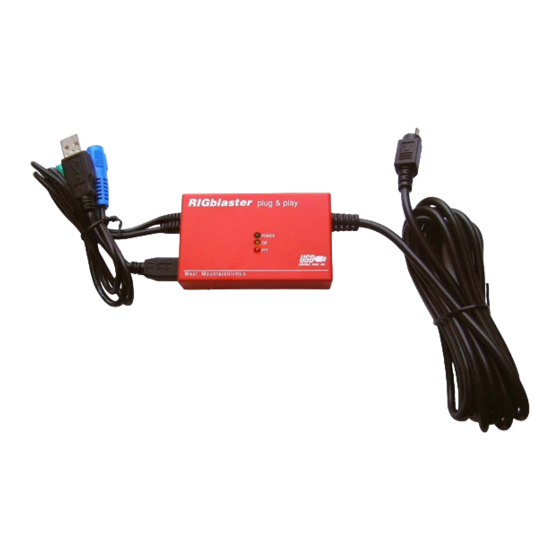
RIGblaster
plug & play Owners Manual
Revision 1.4
Oct 2008
Thank for purchasing a RIGblaster plug & play. The plug & play is designed to be
absolutely as easy as possible to set up while still providing full compatibility with each
and every ham radio sound card software program.
Unlike the other RIGblasters, the plug & play is designed to work only through a radio's
rear panel data jack or auxiliary connector. This it makes it easy to plug in but there are
trade offs due to the design of various radio manufacturer's data and auxiliary jacks.
If your data jack was designed to work the way you might want, you will be pleased with
the operation of the RIGblaster plug & play. West Mountain Radio did not design the
data jack on your radio, therefore we do not control how that system operates. We only
take sound in and out of the jack and control PTT through the jack.
Some jacks support operation on all modes and on all the bands that the radio may
provide, some do not. Some jacks may mute the microphone whenever PTT is
activated through the jack or they may leave the mic hot when using the jack. Your jack
may not function at all unless you turn it on from the radio's menus or controls. Other
RIGblasters connect through the mic jack so we can control switching between the mic
and a computer. The RIGblaster plug & play cannot. If your radio's data jack does not
function the way you wish a RIGblaster plus or pro is the solution.
We are sure that if your radio's rear panel jack works the way you wish, the RIGblaster
plug & play will provide many hours of amateur radio enjoyment.
1
Advertisement
Table of Contents

Related Manuals for West Mountain Radio RIGblaster Plug & Play

Summary of Contents for West Mountain Radio RIGblaster Plug & Play
- Page 1 If your data jack was designed to work the way you might want, you will be pleased with the operation of the RIGblaster plug & play. West Mountain Radio did not design the data jack on your radio, therefore we do not control how that system operates. We only take sound in and out of the jack and control PTT through the jack.
-
Page 2: Table Of Contents
TABLE OF CONTENTS SOUND CARD OPERATION, INSTALLATION AND SETUP Page 3 ® Step 1: Windows plug and play installation Page 3 Step 2: Connect the computer audio cables and radio data/aux jack Page 4 Step 3: Receiving Page 5 Step 4: Check transmit audio tones Page 5 Step 5: PTT Setup Page 6... -
Page 3: Sound Card Operation, Installation And Setup
Windows® will ask you what you want to do. The ONLY option that will work is to “tell it” you have an installation disk and to put the West Mountain Radio CD in your computer, if you do not already have it in. -
Page 4: Step 2: Connect The Computer Audio Cables And Radio Data/Aux Jack
Step 2: Connect the computer audio cables and radio data/aux jack Plug the RIGblaster’s mini plug stereo sound card audio input and output cables into your computer’s sound connectors. Usually the sound card jacks on the back of a desktop computer will be color coded correctly, so just match the colors. If you have a desktop computer with rear panel jacks that are not color coded, plug the green RIGblaster plug into the sound card line output . -
Page 5: Step 3: Receiving
If you do not know how to access your “Recording Control Panel” read your Windows help and/or the Oct 2003 QST article entitled “The In’s and Out’s of a Sound Card”. The article is available on the West Mountain Radio web page and is linked from the RIGblaster CD ROM. -
Page 6: Step 5: Ptt Setup
This is an important test of the computer and software operation. Weak or no transmit sound will make it impossible to transmit! Tip: If you do not know how to access your “Volume Control” panel read your Windows help and/or the article in the Oct 2003 QST, entitled “The In’s and Out’s of a Sound Card”. -
Page 7: Step 6: Set The Transmit Audio To Your Radio
Step 6: Set the transmit audio to your radio Check the manual for your radio to see if the microphone is disabled when the rear panel data/aux jack is used. If your mic is NOT disabled you should disconnect the mic or turn down the mic gain. -
Page 8: Cw Operation, Installation And Setup
(READ CAREFULLY; PROCEED IN ORDER, STEP BY STEP!) Step 1a: Connect CW keying cable You may have purchased a CW cable from West Mountain radio or you may use any shielded stereo and/or mono 1/8” mini phone plug to 1/8” or 1/4” phone plug (depending on your radio’s CW jack) cable,... -
Page 9: Rig Control Cat/Civ, Installation And Setup
RS232 control jack on the back, you DO NOT need nor can you use the RIG CONTROL interface inside the RIGblaster plug & play. You may order a pre-wired cable from West Mountain Radio for rig control via the RIGblaster plug & play’s interface. If you wish to make your own cable you may look on our support page for instructions. - Page 10 Regardless of which rig control program you have installed, you will have to “tell” the program the COM port number for the RIGblaster, and you will have to make an exact match for the communications settings. Any one item set incorrectly will totally prevent rig control from working! You must have every communication setting in the software exactly match the settings for the radio and in the radio.
-
Page 11: Troubleshooting
TROUBLESHOOTING If you have installed the RIGblaster step by step from this manual you need not go back to a previous step. The problem is isolated to the step that you found a problem on. If you contact us for support please be sure you know which step of this manual you are stuck on before calling or writing. - Page 12 It is best to call us while you are at your station rather than try to communicate with us by email. Our support desk is available 10 AM to 5 PM Eastern Time Zone, Monday through Friday. West Mountain Radio westmountainradio.com 34 Smith Street, Norwalk, CT 06851 tel 203-853-8080 fax 203-299-0232...
-
Page 13: Warranty
RIGblaster plug & play is warranted against failure due to defects in workmanship or materials for one year after the date of purchase from West Mountain Radio. Warranty does not cover damage caused by abuse, accident, misuse, improper or abnormal usage, failure to follow instructions, improper installation, alteration, lightning, or other incidence of excessive voltage or current.
Need help?
Do you have a question about the RIGblaster Plug & Play and is the answer not in the manual?
Questions and answers