Table of Contents
Advertisement
Quick Links
Advertisement
Table of Contents

Related Manuals for Sylvania SDVD8741


Summary of Contents for Sylvania SDVD8741
- Page 1 SDVD8741...
-
Page 2: Table Of Contents
Table Of Contents Safety Precaution Package Main Features Main Unit Controls System Connection Basic operation System Setup Specification Troubleshooting... -
Page 3: Safety Precaution
Safety Precaution Warning: To reduce the risk of fire or electric shock, do not expose this apparatus to rain or moisture. 1) Please read the instruction manual carefully and follow all the requirements of safe operation to operate the device. 2) Do not use this unit near water. - Page 4 This device complies with Part 15 of the FCC Rules. Operation is subject to the following two conditions: (1) This device may not cause harmful interference, and (2) This device must accept any interference received, including interference that may cause undesired operation. Warning: Changes or modifications to this unit not expressly approved by the party responsible for compliance could void the user's authority to operate the equipment.
-
Page 5: Package
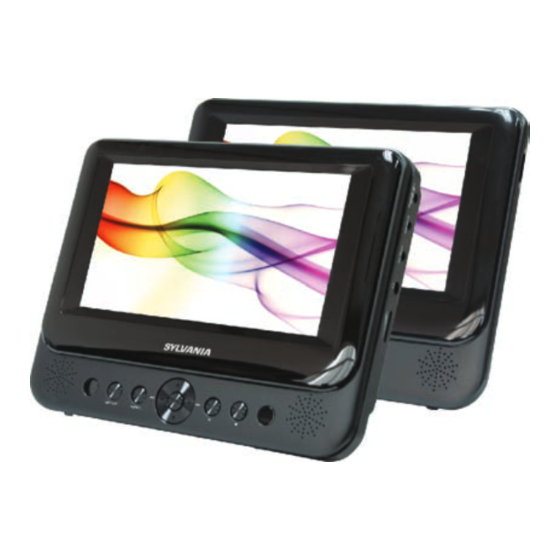
Package DVD player DC+Audio/Video cable AC/DC Power Adapter Cigarette Lighter Adapter User Manual Mounting Straps Main Features High brightness color 7" LCD screen Compatible with disc of DVD, MP3, CD, JPEG etc. Built-in stereo speaker Support PAL/NTSC system Support Multi-language OSD, speed forward/backward,repeat function... -
Page 6: Main Unit Controls
Main Unit Controls 5 6 7 8 1. Open knob 9. DC IN 9-12V 2. Power ON/OFF switch 10. DC OUT 3. SETUP button 11. AV OUT 4. Functron button 12. Earphone jack 13. Volume knob 6.OK button (Function same as 14. - Page 7 Monitor View CLOSE 1. Power ON/OFF 5. DC IN 9-12V 2. Volume knob 6. Brightness Knob 3. Earphone jack 7. Bracket 4. AV IN 8. Rating Label Position...
-
Page 8: System Connection
System Connection Powering And Installation Plug one end of the AC/DC power adaptor into the DC IN9-12V jack on the right of the machine, then plug the other end into the AC power receptacle. Please refer to the following illustration. AV OUT DC OUT If using car cigarette lighter adaptor to connect to the power: Plug one end of... - Page 9 Connecting To The Monitor The unit can also be connected to the external LCD monitor. Connect the unit to power by AC/DC adapter or cigarette lighter adapter. Then connect the unit DC OUT jack to DC IN 9-12V Jack of the LCD Monitor by a DC/AV cable.
- Page 10 In Car Installation 1. Fit the straps to the DVD Player / Monitor as required. Please install the units with strap A (long) and strap B (short) together. Turn the player around so the backs are facing you. Strap A through the unit from right clip first, then across the loop in Strap B, last Strap A through the unit left clip.
- Page 11 NOTE: Be sure to complete the installation then use SDVD8741 in the car. For SDVD8741 installation is recommended that the DVD Player is on the LEFT headrest, to ensure a neat cable run to the monitor, as shown below:...
- Page 12 Connecting With External Speaker AV OUT DC OUT AV CABLE Not supplied VIDEO IN AUDIO IN AMPLIFIER Left front Center speaker Right front speaker speaker SUBWOOFER Right rear speaker Left rear speaker Note: There is no 5.1 channel in the unit, however, after connecting to APM it is available to output audio in 5.1 channel.
-
Page 13: Basic Operation
Basic Operation Playing disc of DVD, CD, MP3 1. Connect the unit to the power; 2. Open the unit and adjust the monitor to the best position for viewing. 3. Turn on the unit by sliding the ON/OFF switch to ON. 4. - Page 14 5. You can also press "FUNCTION" button to close virtual remote menu without any operation. The player will resume playing after the menu exit. Note: 1. When the disc is in the submenu, press the function key can go back the title menu.
-
Page 15: Function Operation
9. Slow: You can press slow key to change the playing speed slowly during playing DVD. Then press OK repeatedly to change the playback speed according the following sequence: 1/2 1/4 1/8 1/16. (Return): to return to the main menu. (MUTE): to turn mute. - Page 16 Play MP3 File 1. Place a MP3 disc into the disc door. 2. Press " " to select the file; Press OK button to play the file selected. 00 36 03 43 Dir 001 \Ctyy\ ..TRACK01 TRACK02 TRACK03 TRACK04 TRACK05 Function operation: Press "FUNCTION"...
-
Page 17: System Setup
System Setup Press Setup button,the main menu will be displayed on the screen Setup Menu Main Page In the General Setup Page, Press General Setup button to highlight this item. Press OK button to access. Video Setup Press button to select the setting. Preference Setup Press OK button to confirm your selection. -
Page 18: Video Setup Page
General Setup Screen Saver: TV Display Wide Enter this option to set whether to activate Angle Mark OSD Lang the screen saver function. Screen Saver The default is ON. :Move :Return :Entry Video Setup Page Video Setup TV Type NTSC TV Type: NTSC Panel Quality... - Page 19 Preference Setup Subtitle: Select your preferred language to show the Audio English subtitles on the screen. Subtitle French The default is OFF. Disc Menu German The subtitle languages depend on the Parental Italian information available on each disc,You can Default also change the subtitle language during playback by press the SUBTITLE button.
-
Page 20: Specification
Specification Compatible disc: DVD+R/RW, DVD-R/RW, CD-DA, CD-R/RW, MP3, JPEG Signal system: PAL/NTSC Panel size: 7 inch Picture resolution: 480x234 (RGB) Frequency response: 20 Hz to 20 kHz Video output: 1 Vp-p/75 Ohm, unbalanced Audio output: 1.4 Vrms/10kOhm Audio S/N: Better than 80 dB Dynamic range: Better than 85 dB Laser: Semiconductor Laser, Wave Length: 650 nm/795 nm Power source: DC 9-12V... -
Page 21: Troubleshooting
Troubleshooting PROBLEM SOLUTION Make sure the machine is connected properly. No sound or Make sure all cables are securely inserted into distorted sound the appropriate jacks. You can't advance through the opening credits Can't advance and warning information that appears at the through a movie beginning of movies because the disc is programmed to prohibit that action.
Need help?
Do you have a question about the SDVD8741 and is the answer not in the manual?
Questions and answers