Table of Contents
Advertisement
Advertisement
Table of Contents

Related Manuals for Zareba G752

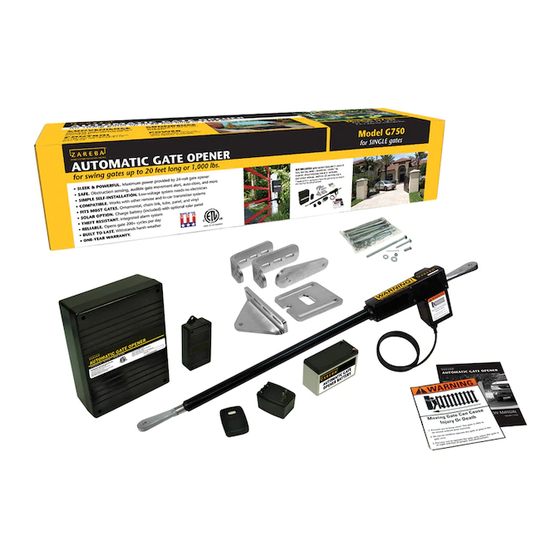
Summary of Contents for Zareba G752
- Page 1 AUTOMATIC GATE OPENER INSTALLATION MANUAL Model G752 For Double Gates...
- Page 2 AUTOMATIC GATE OPENER • Installation Manual GATE OPENER CLASS CATEGORIES* The Zareba Automatic Gate Opener is intended for use with vehicular swing gates. The opener can be used in Class I, Class II, Class III and Class IV applications. Residential Vehicular Gate Opener–Class I: A vehicular gate opener (or system) intended for use in a home of one-to-four single family dwelling, or a garage or parking area associated therewith.
- Page 3 Product. The effectiveness of the Zareba Automatic Gate Opener depends on proper installation and the manner of use or application, all of which are beyond the control of Zareba Systems or the seller. All such risks are assumed by the purchaser by the purchaser’s installation and use of the Product.
-
Page 4: Table Of Contents
AUTOMATIC GATE OPENER • Installation Manual Table of Contents An Introduction to Automatic Gate Openers ......page 5 Important Safety Information General Safety Information . -
Page 5: An Introduction To Automatic Gate Openers
AN INTRODUCTION TO You may obtain additional copies of this manual from our web site at www.zarebasystems.com, or contact AUTOMATIC GATE Zareba Systems at: 906 5th Ave. E, Ellendale, MN 56026, 1-800-272-9877. OPENERS IMPORTANT SAFETY INFORMATION Thank you for purchasing the Zareba Automatic Gate Opener. -
Page 6: Protection Against Entrapment
AUTOMATIC GATE OPENER • Installation Manual Protection Against Entrapment • Ensure that the gate and gate opener installation com- ply with applicable local codes. Important! Study Figures 1 and 2, and keep safety fore- • Contact local fire and law enforcement to arrange most at all times. -
Page 7: Warning Signs And Labels
Protection Against Entrapment Entrapment Alarm (UL 325; 30.1) The Zareba Automatic Gate Opener is designed to com- ply with UL 325, the safety standard covering automatic In compliance with UL 325 the Zareba Automatic Gate gate opening systems. UL 325 requires that gate open-... -
Page 8: Additional Safety Devices
Zareba Systems recommends using additional safety devices. Be sure to use products that are certified and that comply with applicable UL standards and national and regional safety codes. Call Zareba Systems at 1-800- 272-9877 for information on compatible products for your application. -
Page 9: Pre-Installation Information
Non-Contact Sensors (photoelectric beams) Figure 8 Non-contact sensors, also called photoelectric beams, enhance safety by monitoring the path of the safety beam when the gate is closing. Obstructing the safety beam path activates the non-contact sensor, which reverses the gate to the fully open position. Non-Contact Sensor Connection (fig. - Page 10 AUTOMATIC GATE OPENER • Installation Manual HOW TO READ PART LABELS: Figure 9 Post bracket (2) (7001217.001) part description included order item part quantity number 3/8” Nut (20)(7001229.001) 5/16” Nut (2) (7001230.001) 3/8” Washer (20) (7001226.001) Warning signs (4) (7001181.001) 5/16”...
-
Page 12: Technical Specifications
Operational Capacity style fuse. • The Gate Capacity Chart shows the approximate • Optional Zareba Solar Panel for charging battery. The cycles per day you can expect when the battery is solar panel provides voltage, current, and power of being charged with transformer and AC power. -
Page 13: Installation
INSTALLATION Overview Gate Reinforcement Methods (fig. 11) This section begins with installation instructions for IMPORTANT: Use wood or metal reinforcement plates gates that open into the property or “pull-to-open” or pipes (not included) when mounting the gate brack- gates. et to thin-walled tube gates or panel gates. To mount the opener on a brick, masonry, or rock col- Identify the Correct Mounting Positions of umn, refer to page 24. - Page 14 AUTOMATIC GATE OPENER • Installation Manual Figure 11 Figure 12 Method One 3/8” x 2” bolt gate bracket Thin-walled tube gate Pivot Bracket steel pipe cut in half (inside Post brackets diameter of pipe should equal outside diameter of gate) Method Two 3/8”...
- Page 15 Step 3 (fig. 14) Figure 14 With the gates in their desired open posi- tions (from 0° to 130° from the gate’s Note: gate in closed position) and with the gate open- open position ers (actuators) in their retracted (closed) positions, place the gate opener (actua- tor) with the gate bracket and post mount bracket assembly on to the gate...
- Page 16 AUTOMATIC GATE OPENER • Installation Manual Secure the Gate Bracket and the Post Step 7 (fig. 17) Attach the post mount bracket assemblies to the gate Mount Bracket Assembly to the Gate and posts by inserting six 3/8” x 8” carriage bolts though the Gate Post each post mount bracket assembly and the drilled holes in the gate post.
- Page 17 Step 8 (fig. 18) Attach the gate brackets to each gate by Figure 18 inserting four 3/8” x 3” carriage bolts through the gate brackets and the drilled holes in the gates. Fasten each carriage bolt with one 3/8” washer, one 3/8” lock wash- er, and one 3/8”...
-
Page 18: Installation Of Gate Openers (Actuators)
AUTOMATIC GATE OPENER • Installation Manual Installation of the Gate Opener (Actuator) Figure 20 Step 10 (fig. 20) Attach the gate opener (actuator) to the securely fas- tened gate bracket and post mount bracket assembly by using the two clevis pins. Insert one clevis pin through the gate opener (actuator) and the gate bracket. -
Page 19: Power Connection Between Control Box And Openers (Actuators)
Power Connection Between Control Box and Correct Gate Openers (Actuators) Battery Installation Cable from NOTE: The battery that accompanies the Zareba receiver Automatic Gate Opener will already be installed in either the left or right battery compartment. The extra Wrong battery compartment accommodates an optional sec- ond battery. - Page 20 AUTOMATIC GATE OPENER • Installation Manual Figure 26 Figure 25 ON/OFF switch BLACK (-) terminal RED (-) terminal Space for optional second battery Battery wires Battery (included) Connect the Gate Openers (Actuators) to Strain relief the Control Box Step 17 (fig. 28) CAUTION! Ensure that the control box power switch is Connect the color-coded gate opener (actuator) wires in the OFF position before connecting the control box.
- Page 21 Step 18 Figure 30 Insert the second gate opener (actuator) cable through the second strain relief housing and into the control box. Feed the gate opener (actuator) cable into the con- trol box (fig. 29). Note: Protect the second gate opener cable (40’ foot cable) in a PVC conduit pipe that is buried under ground.
-
Page 22: Push-To-Open Installation
AUTOMATIC GATE OPENER • Installation Manual Push-to-Open Installation Step 2 (fig. 33a and 33b) NOTE: Gate opener (actuator) should be in the retracted or closed position before attaching the gate bracket and CAUTION! Ensure the gate does not open into public the post mount bracket assembly. - Page 23 Step 3 (fig. 34) Figure 34 Start with the gate in the closed position and with the gate opener (actuator) in its retract- Note: gate in ed (closed) position. Then place the gate open position opener (actuator) with the gate bracket and post mount bracket assembly onto the gate post and the gate.
-
Page 24: Brick, Masonry Or Rock Column Installation
AUTOMATIC GATE OPENER • Installation Manual Brick, Masonry, or Rock Column Pivot bracket Figure 36 Installation Point A Spacing requirements may prevent mounting the gate opener (actuator) on a column (see fig. 36). If this is the case, the gate may have to be professionally re-hung on a post next to the column. -
Page 25: Dual Dip Switch Settings And Descriptions
(Note: DIP switch 6 and 7 settings are only in effect when DIP switch 3 in in ON position.) To Set Open/Close Sequence and Times: 1 OFF; 2 OFF NOTE: Your Zareba Autmatic Gate Opener receiver is Factory setting for single compatible with built-in vehicle transmitter systems, opener (actuator) operation. -
Page 26: Transmitter Set Up
AUTOMATIC GATE OPENER • Installation Manual Setting the Transmitter Code NOTE: All Zareba Automatic Gate Opener transmitters 1 ON; 2 OFF; 3 ON and receivers use a standard code set at the factory. It First gate begins to open is recommended that you set your own personal code two seconds before second for safety and security. -
Page 27: Closed Position Set Up
Step 5 Step 4 Replace the battery access cover. Press the button of the transmitter and the gates should move to the fully open position. The first gate opener’s Step 6 (actuator) closed position is now set for the opener that Check to see that the DIP switch settings match by closed first. -
Page 28: Automatic Close Time Adjustment
IMPORTANT: For safety reasons the obstruction setting Step 5 or stall force on the Zareba Automatic Gate Opener Now press the transmitter button again. Your gates control board comes from the factory set at minimum, should begin to open. -
Page 29: Hook Up Of Accessories
DO NOT splice wire. transformer Follow local electrical codes. • If AC power is unavailable, use a Zareba Solar Powered Battery Charger. See List of Accessories on page 34. Step 1 Turn off power switch and unplug transformer. -
Page 30: Manual Operation Of Gate
Gate bracket mount Figure 47 Theft Deterrence Your Zareba Automatic Gate Opener comes with a built- in theft deterrence feature. If the gate opener (actuator) is disconnected from the control box, your unit will automatically sound an alarm, notifying you of unau- thorized removal of the actuator. -
Page 31: Maintenance & Troubleshooting Guide
The gate stops without reaching the fully closed MAINTENANCE AND position. 1. Verify the gate frame is not experiencing an obstruc- TROUBLESHOOTING tion, and the gate hinges are not binding. GUIDE 2. The stall force may be too sensitive. Increase the force by turning the potentiometer about five degrees in a clockwise direction. - Page 32 Customer Service 8:00am to 5:00pm, Central time, Monday – Friday d) If steps a – c did not solve the problem, please call Zareba Systems customer service. 906 Fifth Avenue E Ellendale, MN 56026-2193 The gate will not open using the handheld Phone: 800-272-9877 or 507-684-3721 transmitter.
-
Page 33: Warranty And Repair Information
Maintenance and Troubleshooting Guide in this Manual. may not apply to you. 2) If you are still unable to solve the problem, contact Zareba Systems customer service at 1-800-272-9877. Please have Some States do not allow limitations on how long an implied the model and serial number of the Product available to warranty lasts, so the above limitation may not apply to you. -
Page 34: List Of Accessories
When your gate swings shut, the gate lock closes, securing your gate in the closed position. Please check with your local Zareba retailer for products. If the products you need are not avail- able, you may purchase them directly from Zareba Systems. -
Page 35: Ordering Information
Over $300: Contact factory **Residents in CA, MN, NJ, and NY, add appropriate state tax. Mail order form and payment to: Zareba Systems 906 Fifth Avenue E Ellendale, MN 56026-2193 Pay via credit card by calling 800-272-9877, or fax order to 507-684-3722.
Need help?
Do you have a question about the G752 and is the answer not in the manual?
Questions and answers