Advertisement
SPYTEC A119 DASH
CAMERA USER GUIDE
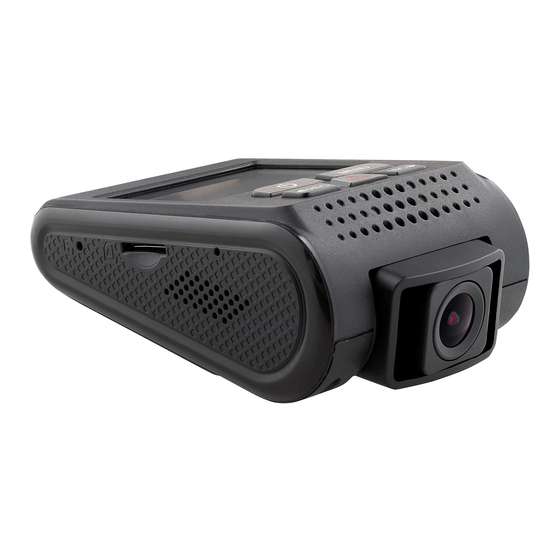
Thank you for purchasing the SpyTec A119 Dash Camera, a discreet camcorder that
mounts to the inside of a windshield for capturing the driver's view at a resolution
exceeding Full HD. The pocket-size video camera features a F1.8 lens with a 160°
field of view and the ability to record video with nearly twice the resolution of a 1080p
camera and four times the resolution of a 720p dash cam. Equipped with a G-sensor,
the camera detects when your vehicle is bumped and automatically write-protects
video recorded during the incident. A color screen lets you review video and photos
in the camera even before transferring them to a computer, while loop recording
ensures that the camera never runs out of memory. An optional GPS receiver in
the form of a mount that replaces the included non-GPS mount is available for this
camera.
Advertisement
Table of Contents

Summary of Contents for Spytec A119
- Page 1 SPYTEC A119 DASH CAMERA USER GUIDE Thank you for purchasing the SpyTec A119 Dash Camera, a discreet camcorder that mounts to the inside of a windshield for capturing the driver’s view at a resolution exceeding Full HD. The pocket-size video camera features a F1.8 lens with a 160°...
-
Page 2: What's Included
64GB.) Format the MicroSD card in the camera prior to your first recording to ensure stable read and write. Damage caused by incorrect use of the product is not covered by the warranty. SPYTEC A119 DASH CAMERA USER GUIDE... -
Page 3: Installation
Installation Make sure the car engine is shut off before installing the A119. With the camera off and its darkened display screen facing up, insert a microSD card, gold contacts pointed up, into the memory card slot. For a quick start, use a memory card with a capacity of 32GB or less. - Page 4 Once either the non-GPS module or the GPS module is slid into the camera, peel off the paper backing and press the camera against the windshield so that the LCD faces you and the lens points down and out. The camera should stick in place. SPYTEC A119 DASH CAMERA USER GUIDE...
- Page 5 Note: The second USB power port can be used to charge your phone, for example. Look at the live view on the LCD. You can further adjust the angle of the lens up/ down and right/left if necessary. SPYTEC A119 DASH CAMERA USER GUIDE...
-
Page 6: Installation Tips
• When you’re satisfied that the cable is snag-free and reaches the cigarette lighter adapter, use a twisty tie to bunch together any extra length of cable. Note: The included string is meant for removing a mount by flossing through the adhesive. SPYTEC A119 DASH CAMERA USER GUIDE... - Page 7 (1) Power (6) USB Port (2) Rec/Left (7) AV Out (3) Menu (8) Reset (4) Emergency/Confirm (9) Card Slot (5) Mic/Right (10) USB Port (optional GPS mount SPYTEC A119 DASH CAMERA USER GUIDE...
-
Page 8: Led Indicators
Buttons and Icons Behavior Mode Buttons Stand-by Mode To turn on/off device One press enters setting menu Enter playlist One press starts recording One press disables audio recording; press again to enable audio recording SPYTEC A119 DASH CAMERA USER GUIDE... - Page 9 Back to previous menu 1. To select the last video 2. To delete the video 1. To select the next video 2. To lock/unlock the video 1. To enter the video selected 2. To play/pause the video SPYTEC A119 DASH CAMERA USER GUIDE...
-
Page 10: On-Screen Display
Setting Menu Mode One press turns off the screen; press again to turn on the screen One press returns to recording mode Selects the last feature Selects the next feature Enters the feature selected Onscreen Display SPYTEC A119 DASH CAMERA USER GUIDE... -
Page 11: Operation
Once the camera doesn’t detect further movement for 60 seconds, recording will stop and the device will switch back to detect mode. The camera will begin recording again when it detects new movement. SPYTEC A119 DASH CAMERA USER GUIDE... -
Page 12: Video Settings Menu
720, 30 fps. Press OK to make your selection and return to the options directory. All videos from that point on will be recorded at the chosen setting until you elect to change it. SPYTEC A119 DASH CAMERA USER GUIDE... - Page 13 If WDR is turned off while driving toward a rising or setting sun, for instance, objects that come between you and the horizon may appear very dark. WDR is turned on by default. SPYTEC A119 DASH CAMERA USER GUIDE...
- Page 14 When activated, recording will begin if there is movement in front of the camera. Once the camera does not detect movement for 60 seconds, recording will be stopped and the device will switch to detect mode. The camera will record again upon detecting new movement. SPYTEC A119 DASH CAMERA USER GUIDE...
- Page 15 2. For 1080p 60 fps mode, the camera will lock and save a 35-second file (15 seconds before the button was pressed and 20 seconds after) and saved under the movie\EMR subdirectory and as a copy in the MOVIE directory. SPYTEC A119 DASH CAMERA USER GUIDE...
- Page 16 The Forward Collision Warning System causes the camera to beep repetitively when detecting an obstacle ahead. The default is off. Date Stamp The data stamp is normally superimposed on a corner of the picture, but you can disable it on recordings going forward. SPYTEC A119 DASH CAMERA USER GUIDE...
- Page 17 The LCD goes dark by default after 3 minutes of inactivity. You can turn this off so that the screen stays on. You can turn the camera’s LEDs off, which are enabled by default. SPYTEC A119 DASH CAMERA USER GUIDE...
- Page 18 Press the OK button. The time zone must be manually adjusted for daylight savings. Language Sets the on-screen display to English, French, Spanish, German, Italian, Portuguese, Simplified Chinese, Traditional Chinese, Russian or Japanese. SPYTEC A119 DASH CAMERA USER GUIDE...
- Page 19 Set it to 60 Hz in North America. Format The operation will delete all data on the MicroSD card. Make sure to back up all files you want to keep before formatting. SPYTEC A119 DASH CAMERA USER GUIDE...
- Page 20 Note: While reformatting the card helps preserve the integrity of files to be recorded going forward, you can always cancel the prompt when it appears. Default Setting Restores the device to the factory settings. CarNo You have the option to enter your vehicle’s license plate number. SPYTEC A119 DASH CAMERA USER GUIDE...
-
Page 21: Taking Photographs
2X or 4X by pressing the Rec button once or twice. You can play the video in reverse at -2X by pressing the Rec button once. (Pressing it again will give you the option to delete the file.) SPYTEC A119 DASH CAMERA USER GUIDE... - Page 22 You can play files directly from the card, copy them to your computer or delete them. 64GB microSD Card Support If a 64GB card is not recognized by the A119, you’ll need to properly format it. If the card has not been used before, formatting it won’t wipe out any data. But if the card has been in use, keep in mind that any data stored on the card will be lost during formatting.
- Page 23 GPS Data Playback The optional GPS Module for the A119 Dash Cam enables GPS logging for video recordings and photographs. Besides latitude and longitude coordinates, the module enables a speed stamp on video footage as well as the LDWS and FCWS capabilities.
-
Page 24: Firmware Upgrade
To get Dashcam Viewer, go to: http://support.spytecinc.com/help/article/link/a118-c-1080p-hd-dash-camera-w- capacitor-dashcam-viewer-gps-track-viewing-software-e4a2926 Choose the Windows or Macintosh version. Firmware Upgrade An occasional firmware upgrade may be available for the A119. To check, visit: http://support.spytecinc.com/ SPECIFICATIONS Imaging sensor 4 MP CMOS Lens / Field of Vision 6-element, F1.8 160°... -
Page 25: Warranty
Help Thanks again for purchasing a SpyTec product! We appreciate your business and strive to make your experience the best possible. If you have any issues with your product, please contact us at support@spytecinc.com so that we can help you get things started.
Need help?
Do you have a question about the A119 and is the answer not in the manual?
Questions and answers