Table of Contents
Advertisement
Quick Links
Advertisement
Table of Contents

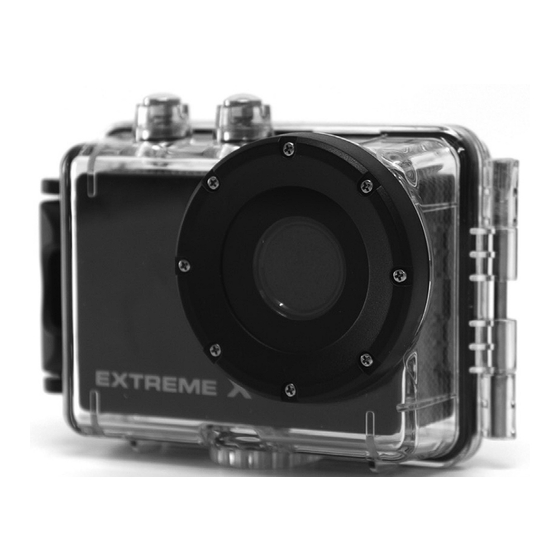
Related Manuals for Nikkei EXTREME X5


Summary of Contents for Nikkei EXTREME X5
-
Page 2: Table Of Contents
CONTENTS P A G E Contents Page Introduction Safety Instructions Important Safety Precautions Product Specification Contents Getting to know your Camera Using the Action Camera Action Camera Operation WIFI Mode Connections Using the Remote Control Using the Mounting Accessories Troubleshooting... -
Page 3: Introduction
INTRODU CTION Congratulations on the purchase of your new Action Camera. This manual contains important safety and operating information. Please read all the information carefully before you use the device to avoid accidents and keep it for future reference. Follow these important safety and operation instructions. - Page 4 Press the buttons gently. Pressing too hard can damage the product. Do not use the camera in an extremely dry environment. Do not put the camera in high temperature places (over 40ºC), especially not in a car with the windows closed in summer.
-
Page 5: Important Safety Precautions
user-serviceable parts inside. Refer servicing to qualified personnel. The USB cord for the device should be unplugged from the computer when the unit is left unused for a long period of time. IMPORTANT S A F E T Y P R E CAUTI ONS In order to prevent program failure, never disconnect the product suddenly from a PC while file transferring is in progress. -
Page 6: Product Specification
PRODUCT S P ECI FI CATION 5MP CMOS sensor Wi-Fi Module for wireless streaming to Smartphone Free App available from Google Play or iTunes Video Resolution: 1080P (1920x1080,30 fps), 720P (1280x720,30 fps), 720P (1280x720,60 fps) Still Image Resolution: 12MP, 8MP, 5MP, 3MP, 2MP, VGA ... -
Page 7: Contents
NOTE: As a result of continual improvements, the design and specifications of the product within may differ slightly from the unit illustrated on the packaging. CONTENTS Please make sure that the items shown below are included in the package. Should an item be missing, please contact the local retailer from which you purchased this product ... -
Page 8: Getting To Know Your Camera
GETTING TO KN O W YOUR CAMER A DEV I C E OVERV IEW Menu button OK button LCD screen Down button Up /Wifi button LED indicator light Shutter/Power button Mode button Microphone Micro SD card slot... - Page 9 HDMI socket USB socket Speaker Reset Tripod hole Lens...
-
Page 10: Using The Action Camera
USING T H E ACTI ON CAM ERA BATTERY O P E R A T I O N 1. Make sure the action camera is turned off. 2. To charge the internal battery, connect the action camera with the USB cable provided to a computer or a 1Amp wall charger. -
Page 11: Action Camera Operation
720P 60fps 120 minutes INSERTING M I C R O SD C ARD This action camera does not have internal memory. A Micro SD (TF) card (Class 10) and above must be inserted for this action camera to operate and record. 1. - Page 12 To Turn the action camera off Press and hold the “Power” button for 3 seconds, the screen will turn off. NOTE: The action camera has a power saving setting and will automatically turn itself off after 5mins of inactivity to save power.
- Page 13 ACTION C A M E R A SETTING S Before taking photos or recording videos, press the “Power” button to switch on the action camera first. Press the “Menu” button and the menu will appear on the LCD screen, and then press the “Mode”...
- Page 14 display while recording) : 【1min】/【 3min 】/【5min】/【ON】 Allows you turn the LED 【On】/【Off】 Power Save To save power, the video camera is turned off automatically after a period of time. After you select the "off " that means the power save function is switched off 【1min】/【...
- Page 15 should be 50Hz: 【50HZ】/ 【60HZ】 There are two functions when using USB 【MSDC】/【PCCAM】 WIFI Allows you to change the wifi password, Password standard password is set as 1234567890 Format Format your SD card including protected files, removing the SD card during formatting may damage the card.
- Page 16 2. Press “Shutter” button to start recording. 4. The LCD monitor will display how long it has been recording for. 5. While recording, to pause press the “Up” button, to turn the LCD screen off press the “Down” button 6. Press the “Shutter” button again to stop recording. 7.
- Page 17 When in Video mode, the below screen will show. 01:58:...
- Page 18 1.Video mode 5.Stabilizer 2.Movie Resolution 6.The Record Time 3.Loop Recording 7.Battery level 4.Audio SETTINGS I N V I D E O MO DE While in video mode, press the “Menu” button and the below settings will appear. MENU FUNCTION Size Changing the video resolution for the recording.
- Page 19 【Auto】 / 【 Daylight】 / 【 Cloudy】 / 【 Fluorescent】 /【Tungsten】 Video Adjust the quality of the recording 【Super Fine】/【Fine】 /【Normal】 Quality Stabilizer Helps to keep the recording stable 【On 】/【Off 】 Voice Rec Record voice when recording movie clips 【On 】/【Off 】...
- Page 20 【On 】/【Off 】 Slow Enables slow motion recording 【On 】/【Off 】 Motion Time-lapse Enables time-lapse recording 【Off】/【3sec】 / 【5sec】/ 【10sec】 / 【30sec】/【1min】/【3min】 Time-lapse Choose the duration of your time-lapse Duration recording 【Unlimited】/【3min】/ 【5min】/【10min】 【15min】/【20min】/【30min】/【60min】 Date This function can be used to add a date and Stamp time to your pictures.
- Page 21 “Mode” button to change to capture mode. 2. Take a still image by pressing the shutter button. 3. After the image has been taken the LCD will display black for a brief second. 4. The memory capacity in the top right of screen will decrease as each image is taken.
- Page 22 【Fluorescent】/【Tungsten】 Image Select a lower image quality to decrease the Quality image size in order to take more images. There are three options for choice: 【Super Fine】/【Fine】/【 Normal】 Metering Changes the metering method, which enables to change the brightness of the picture: 【Centre】/【Multi】/【Spot】...
- Page 23 the surrounding environment. 【Auto】/【50】/【100】/【200】/【400】 /【800】/【1600】 Exposure Set the exposure value manually to compensate for unusual lighting conditions : 【-2】/【-1.7】/【-1.3】/【-1】 /【-0.7】/【-0.3】/【0】/【+0.3】/【+0.7】 /【+1】/【+1.3】/【+1.7】【+2】 Stabilizer Helps to keep the recording stable 【On 】/【Off 】 Auto After taking photo the will be displayed on Review the LCD screen for the below amount of time.【Off】/【1sec】/【3sec】/【5sec】...
- Page 24 【Off】/【2sec】/【10sec】 Photo Each time you press the “Shutter” button it Burst will continuously take a few pictures: 【Off】/【3】/【5】/【10】 Time-lapse Enables time-lapse photography, it will take one photo per the below timing: 【Off】/【3sec】 / 【5sec】/ 【10sec】 / 【30sec】/【1min】/【3min】 Time-lapse Choose the duration of your time-lapse Duration photographing 【Unlimited】...
- Page 25 When in Photo mode, the below screen will show.
- Page 26 1.Photo mode 5.Stabilizer 2.Resolution 6.Memory capacity 3.Photo Burst 7.Battery level 4.Exposure CAR MODE Press the “Mode” button to bring up the car mode. When in car mode the screen will automatically rotate 180 degrees. This is for when your camera is connected to a windshield/windscreen mount (Not included), it will record the correct the way and not be upside down.
- Page 27 PLAYBACK MODE 1. Press the “Mode” button until your reach playback mode. Here you will be able to review all the files you have recorded. 2. When entering playback mode a menu will appear showing Video File, Car File, JPG File, and Protect File. 3.
- Page 28 1. Playback mode 4. Pause 2. The time 5. Video /car/protect File 6. Lock 3. Exit 0:300...
- Page 29 PLAYBACK JPG FILE 1. Playback mode 4. Image File 5. Lock 2. Sequence of File 3. Date and Time 2015/4/22 15:30...
- Page 30 SETTINGS I N P L A Y B A C K M O D E While in playback mode, press the “Menu” button to access the settings. MENU FUNCTION Lock Use this function to protect the files from being deleted by accident. 【Single】/【Lock All】/【Unlock All】...
-
Page 31: Wifi Mode
Slide Show* Change the slide show settings when using the slideshow function for reviewing photos 【Start】/ 【Interval 】/【Transition】/ 【Repeat】 Rotate* Use this function to rotate the images. 【Rotate】/【Save】/【Back】 Resize* Resize images to a smaller resolution. 【5M】/【3M】/【2M】/【VGA】 * Functions only available when viewing photos. WIFI MOD E The action camera comes with Wi-Fi function so you can wirelessly stream your video to your Smartphone or control... - Page 32 3. Now with your mobile phone, disconnect from any current wireless networks and search for a WIFI connection called EXTREME X5 and connect using password: 1234567890, the LCD screen on the camera will now say “WIFI Connection Ready” once connected. (In order to save...
- Page 33 5. You can control the action camera with the App to take photos, videos and change different settings. 6. To watch the recorded videos you will need to download these from the APP to your phone, then watch the video as per you normally would on your phone...
-
Page 34: Connections
CONNECTI ONS CONNECTING T O H DTV The action camera can be connected to a HDTV via a Mini... - Page 35 HDMI cable (not supplied). Note: Before connecting or removing the HDMI cable, please stop video recording, playback and disconnect Wi-Fi. Connect the action camera to a TV via a Mini HDMI cable (not supplied). 2. Turn on the TV and the action camera, and then set the TV to HDMI mode.
-
Page 36: Using The Remote Control
CONNECTING T O PC Turn on the action camera and connect it to the USB port of the PC via the supplied USB cable. The action camera will enter MSDC mode and will be displayed on your cameras screen. Once connected to the PC the driver will automatically install. Now you can view the photos or videos taken by action camera on the PC/Mac. -
Page 37: Using The Mounting Accessories
control is powered by 1 x AAA battery (not included), please remove the battery cover and install the battery. LED Indicator Use this button to record video on Video/Car Mode. When in Standby mode use this button to wake camera up and start recording. Use this button to stop recording. - Page 38 The bike and helmet mounts can be attached to either the action camera directly or waterproof case (with the camera inside) FIXING T H E ACTION C AM E R A T O A B I K E 1. Find the Bike Mount A 2.
- Page 39 Mounting Bracket (2) Connectors 3. Choose the connectors from the three given below depending on how you want to mount your camera, and then fix them to the part 1 of the main mount and part 2 the mounting bracket.
- Page 40 Make sure all the screws are done up tightly. FIXING T H E ACTION C AM E R A T O A H ELMET 1. Find the Helmet Mount B 2. This mount is separated into 3 parts. Main Section (3) Mounting Bracket (2) Connectors 3.
- Page 41 given below depending on how you want to mount your camera, and then fix them to the part 3 of the main section and part 2 the mounting bracket.
- Page 42 4. After fixing the action camera to the mount, use the strap provided or Sticker to attach to your helmet. MOUNTING ADAPTOR Supplied with the action camera is a Mounting Adaptor for GoPro Accessories, to use this adaptor connect to the action camera or the underwater case via the tripod Socket.
- Page 43 You can test by closing the case without inserting the camera. Submerse the case completely in water for about a minute. Remove the case from the water, dry off its exterior with a towel, and then open the case. If the entire interior is dry, the case is safe for use under water After every use in salt water you will need to rinse the outside of the housing with non-salt water and dry.
-
Page 44: Troubleshooting
TROUBLESH OOTI NG Problem Solution I cannot upload Check all cable connections are images to the PC secured. Set the camera to MSDC mode. I press the shutter Wait for data process to button but no complete and then take your response. - Page 45 resolutions when your media player, or try such playing on my programs as VLC media player, computer Windows media, QuickTime. My phone cannot Download the video to your play the recorded phone, Ensure your phone has video the latest video player, otherwise try to download another video player for your phone...
- Page 46 0:00 recording computer. Please also ensure time you are using a class10 or higher Micro SD Card. Also ensure there is spare memory inside the card There is no sound If recording while in the on my recording waterproof case, there will be no sound.
Need help?
Do you have a question about the EXTREME X5 and is the answer not in the manual?
Questions and answers