Table of Contents
Advertisement
Quick Links
Advertisement
Table of Contents

Related Manuals for MagicBox MBASTPY


Summary of Contents for MagicBox MBASTPY
- Page 1 DAB+/FM Radio Instruction manual...
-
Page 2: Table Of Contents
DAB+/FM Radio Thank you for purchasing this DAB+/FM Radio. Please read the instructions and warnings carefully before use to ensure safe and satisfactory operation of this product. Contents Important safety information . . . 3 Using your FM radio ..15 Your DAB+/FM Radio . -
Page 3: Important Safety Information
Important safety information product for future reference. These warnings have been provided in the interest of safety. You MUST read them carefully before using the appliance. This product is not In the event of a fault, return intended for use by persons the appliance. -
Page 4: Your Dab+/Fm Radio
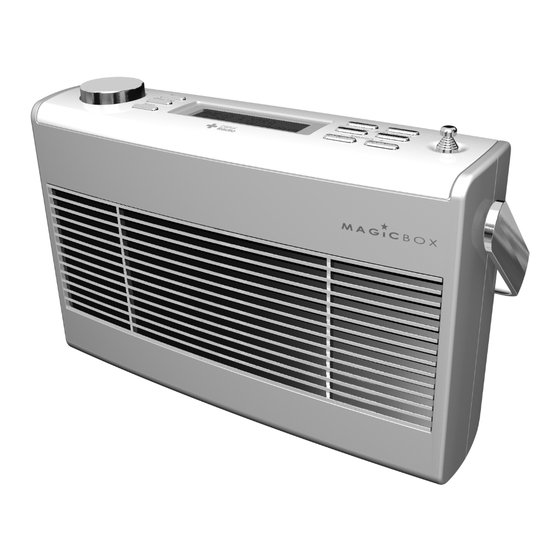
Your DAB+/FM Radio Top view: Preset Power Store up to 9 of each Press and hold to power on of your favourite Press and release to power off - Volume + Display DAB+/FM stations Select Telescopic aerial DAB/FM Press and release to switch between - Station Station +... -
Page 5: Instructions For Use
Instructions for use Check the package contents Setting up The package contains: 1.Connect the mains power lead into the socket on the back of the 1 x DAB+/FM Radio radio. 1 x mains adaptor 2. Fully extend the radio aerial in 1 x instruction manual a vertical position to obtain the Where to put your radio... - Page 6 5.Inserting the batteries Remove the batteries from (optional). Before installing the the radio if they will not be batteries (not included) please used for an extended period ensure that the radio is unplugged of time. from the mains power supply. Do not attempt to recharge On the back of the radio, push non-rechargeable batteries.
-
Page 7: Time And Date
Time and date Headphone socket 1. You can connect headphones radio, the time and date of your (not included) to your radio. product will be synchronised The headphone socket can be automatically to that broadcast found on the back of the radio by the DAB+ service in 24 and when you have headphones hour mode;... -
Page 8: Step Guide To Getting Started
5 Step guide to getting started Switch on/off 1. Press and hold the ‘Power’ 1. Press and release the ‘DAB/FM’ button on the top of the radio to button until you are in FM mode. switch on. 2. Press and release the ‘Scan’ 2. -
Page 9: Using Your Dab+ Radio
Using your DAB+ radio What is DAB+ Digital Radio? Telescopic aerial DAB+ means Digital Audio Please make sure that the aerial Broadcasting. The difference on the top of the radio is fully between a DAB+ radio and a extended and adjusted when you conventional AM/FM radio is scan for DAB+ stations and listen that broadcasts are transmitted... -
Page 10: Scanning For Dab+ Stations
Manual tune 3.Press and release the ‘Select’ button on the top of the radio Using the manual tune feature when the station you would like to listen to is displayed. radio channel frequency and then Alternatively, wait a few seconds manually adjust the aerial, or the and your radio will automatically location of the radio, to get the... -
Page 11: Prune Dab+ Stations
4.Press and hold the ‘Info/Menu’ Note: When you store DAB+ button and then release to step radio station presets, these do back through the menu to the not overwrite your FM station station display. presets. 1. Tune your radio to the station Prune DAB+ stations that you wish to preset You can remove the DAB+... -
Page 12: Tune To A Dab+ Preset Station
Tune to a DAB+ preset Tune to your ‘Favourite’ station DAB+ station In DAB+ mode: In DAB+ mode: 1.Press and release the ‘Preset’ 1.Press and release the ‘Favourite’ button on the top of the radio. button on the top of your radio. ‘Preset Recall 1’... -
Page 13: Dynamic Range Control
Signal strength Time and date The information provided gives Supplied by the broadcaster. details of the signal strength 1. Repeatedly press and release you are receiving. An empty the ‘Info/Menu’ button on the top will appear on the second line of the radio to cycle through the of the display to indicate the different information options. - Page 14 There are 3 levels of compression: DRC Off - no compression. This is the default setting. DRC Low - medium compression. DRC High - maximum compression. 1.Press and hold the ‘Info/Menu’ button on the top of the radio until <Full scan> is displayed. 2.Use ‘Station +’...
-
Page 15: Using Your Fm Radio
Using your FM radio FM mode Tuning to an FM station Press and release the ‘DAB/FM’ 1. Press and release the ‘Scan’ button on the top of your radio button on the top of your radio until ‘FM’ is displayed. to scan up the frequency band. -
Page 16: Tune To An Fm Preset Station
2.Press and hold the ‘Preset’ Note: If no FM station has been button on the top of your radio. stored under the preset, ‘Preset ‘Preset Store 1 (Empty)’ is Empty’ will be displayed and the displayed if no previous station radio will revert to the previously has been stored. -
Page 17: Fm Display Information
FM display information Time and date Supplied by the broadcaster. When listening to an FM station you can change the information 1. Repeatedly press and release that will appear on the second the ‘Info/Menu’ button on the top line of the display by pressing the of the radio to cycle through the ‘Info/Menu’... -
Page 18: System Settings
System settings Manually set the date and Your radio must be switched on time (not in Standby mode) when you change the system settings. 1. Press and hold the ‘Info/Menu’ Sleep timer button on the top of your radio. 2.Use the ‘Station +’ and ‘- You can set your radio to turn Station’... -
Page 19: Display Backlight
2.Use the ‘Station +’ and ‘- ‘Station +’ and ‘- Station’ buttons Station’ buttons to scroll to to display the month. Press and <System>. Press and release the release the ‘Select’ button. ‘Select’ button. 3.You can now use the ‘Station ‘Station +’... -
Page 20: Software Version
Factory reset 4.Use the ‘Station +’ and ‘- Station’ buttons to scroll to the You can reset your radio and display language you would like. restore all of the original factory Press and release the ‘Select’ settings. button. Note: If you reset your radio Note: As soon as you select a all of your DAB+ and FM station different display language, all of the... -
Page 21: Simple Solutions
Simple solutions If you are experiencing problems - You may have headphones with your radio, there are some connected. Either use the quick and easy checks that you headphones to listen to your can do, which may help to solve radio or unplug the headphones. - Page 22 - Turn off the radio and unplug the mains power. Leave for one minute and then reconnect your radio. - Try a factory reset. See page 20.
-
Page 23: Technical Information
Technical information Power adaptor: Output DC 6V/1A Input AC 100-240V/50-60Hz Batteries: 4 x AA batteries or equivalent (not supplied). DAB+ frequency range: Band III, 174 MHz - 240 MHz FM frequency range: 87.5 MHz to 108 MHz Headphone socket: Stereo socket 3.5mm diameter... -
Page 24: Consumer Product Warranty
Australia & New Zealand Standard Warranty For Magicbox Products Consumer Product Warranty (Warranty against Defects) The purchase of a Magicbox product (hereinafter referred to in this Standard Warranty as “good(s)”) includes coverage by the Magicbox Standard Warranty. The Magicbox Standard Warranty is provided by: Standard Radio Distributors trading as Canohm (ABN 57 004 817 949), 3/200 Turner Street, Port Melbourne, Victoria 3207 Australia. - Page 25 1.6 Transportation of the good to Canohm or its Service Centre is at your cost. Canohm will not be liable for any damage caused to the good whilst in transit. 1.7 The cost of repair or replacement of the good shall be at Canohm’s cost but Canohm and its Authorised Service Centres may seek reimbursement of any costs incurred by them when the good is found to be in proper working order.
- Page 26 Canohm Authorised Service Centre, Canohm will provide details of the centre to you. (c). Provide proof of purchase of the good(s) (e.g. invoice or purchase receipt) at the time of making your claim (unless not required by law). All Magicbox Products have a 1 year warranty.
- Page 27 Authorised Service Centre please contact: Australia Toll Free on 1800 636 026 Web: www.magicboxaudio.com.au or email service@canohm.com.au New Zealand Toll Free on 0800 486 435 Web: www.magicboxaudio.co.nz or email: info@mayogroup.co.nz...
- Page 28 Retain this information for future reference Oct13/Issue: Draft...
Need help?
Do you have a question about the MBASTPY and is the answer not in the manual?
Questions and answers