Table of Contents
Advertisement
Quick Links
Advertisement
Table of Contents

Summary of Contents for Econ HE
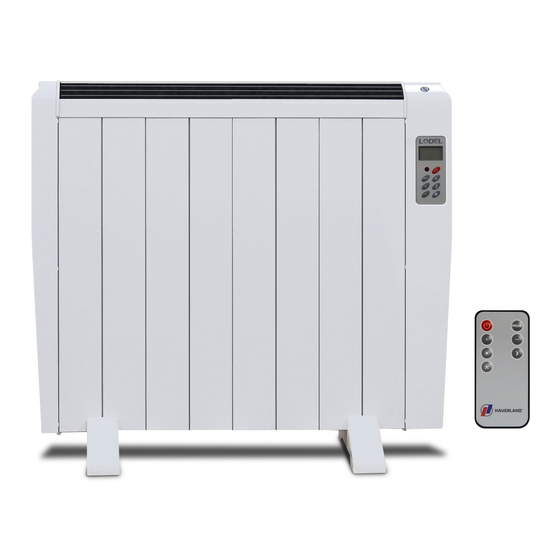
- Page 1 ... A quick way of heating ...
-
Page 2: General Instructions
t he h azards i nvolved. C hildren a ged f rom 3 y ears and l ess t han 8 y ears s hall n ot p lug i n, r egulate a nd c lean t he ... -
Page 3: Installation And Mounting
2.1 WALL INSTALLATION: 1. Select a suitable location on the wall, which should be firm and level. Check that there is a mains socket close by. 2. The distances marked, “a” and “e” vary depending on the heater model. Safety distances and installation Installation and mounting •... - Page 4 Fig. 8 4.5 Hang the heater on the two hooks (C) on the wall. Ensure that the heater is correctly secured on both hooks. Hanger Hook (C) 4. ASSEMBLY Fig. 9 4.1 While respecting the previously indicated safety measurements, make two marks on the wall according to measurement “e”...
-
Page 5: Control Panel
2.2 INSTALLING THE FEET: 1. Screw the two feet to the lower rear part of the heater with the four screws (F). G Operation • Your heater is fitted with a digital, daily- programmable timer-thermostat that controls and adjusts the heating. -
Page 6: Using The Heater
5.2 Locking / Unlocking The existing room temperature will be displayed again after a few seconds. Note: The comfort mode is recommended for a comfortable temperature when remaining in the The heater controls will automatically lock when no room. button has been pressed for sixty seconds. Recommended temperature: 21 ºC. - Page 7 5.7 Automatic Use (Programmed) Taking into account your personal needs, the heater provides the possibility to create an individual programme. Fig. 21 This programme is established according to the day, time and operating modes: comfort, economy, anti- icing or standby mode. 1) If the heater is in Standby (Fig.18), press the Single upper “Standby”...
-
Page 8: Power Cuts
IMPORTANT: If you wish to modify the previously assigned temperatures for each operating mode then follow the steps given in section 5.5 of these Power cuts instructions. EXAMPLE PROGRAMME: If there is a power cut, the heater will not work, but Fig. -
Page 9: Maintenance
Maintenance • This heater does not require any special maintenance. • It is recommended that when the heater is put into use for the first time each year, all dust and any other dirt on the outer surfaces should be cleaned off (ALWAYS COLD AND SWITCHED OFF), together with any accumulated dust inside.
Need help?
Do you have a question about the HE and is the answer not in the manual?
Questions and answers