
Subscribe to Our Youtube Channel
Related Manuals for switel WT119


Summary of Contents for switel WT119
- Page 1 WT119 Bedienungsanleitung Mode d’emploi Istruzioni per l'uso Operating Instructions...
- Page 2 WT119 Bedienungsanleitung __________ 1 Mode d’emploi ______________ 17 Istruzioni per l'uso __________ 31 Operating instructions ________ 45 Declaration of Conformity_____ 59...
-
Page 3: Table Of Contents
- Inhaltsverzeichnis - Bedienelemente ........ 4 Inbetriebnahme ........ 5 Verpackungsinhalt prüfen ......5 Akkupacks einsetzen ....... 5 Gürtelclip anbringen........ 6 Ladestation anschliessen ......6 Funkgeräte laden........6 Headset anschliessen ......6 Bedienung ........7 Einschalten der Funkgeräte ...... 7 Kanalwahl ..........7 3.2.1 Ändern des Rufcodes .... -
Page 4: Bedienelemente
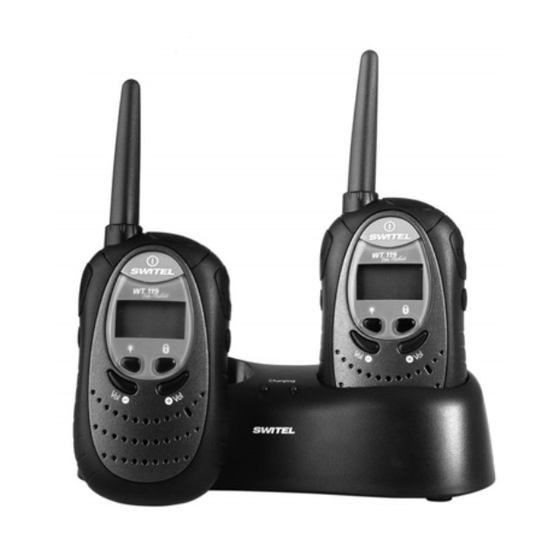
- Bedienelemente - Bedienelemente Mikro- Kopfhöreranschluss Lautstärke leiser Ein/Aus-Taste Displaybeleuchtung Kanalschalter CHANNEL Taste CALL Taste MODE 10. Taste TALK Kanalsperre 11. Headset Lautstärke lauter 12. Akkupack... -
Page 5: Inbetriebnahme
- Inbetriebnahme - Inbetriebnahme Verpackungsinhalt prüfen Zum Lieferumfang gehören: zwei Funkgeräte mit Gürtelclip eine Ladestation zwei Akkupacks ein Steckernetzteil eine Bedienungsanleitung zwei Headsets Akkupacks einsetzen Ihr Funkgerät wurde mit zwei wiederaufladbaren Ni-MH Akkupacks geliefert, die vor der Inbetriebnahme eingebaut werden müssen. Entriegeln Sie den Akkufachdeckel auf der Rückseite und öffnen Sie das Fach. -
Page 6: Gürtelclip Anbringen
- Inbetriebnahme - Gürtelclip anbringen Nachdem Sie die Akkupacks eingebaut haben, können Sie die mitgelieferten Gürtelclips befestigen. Schieben Sie den Gürtelclip von unten in die Führung bis er hörbar einrastet. Um den Gürtelclip wieder zu lösen, ziehen Sie die Befestigungslasche etwas nach oben und ziehen Sie den Gürtelclip nach unten. -
Page 7: Bedienung
- Bedienung - Bedienung Einschalten der Funkgeräte Um ein Funkgerät einzuschalten, halten Sie die Ein/Aus-Taste bis zu einem Signalton gedrückt. Für einige Sekunden wird das Display beleuchtet und alle Displaysymbole werden angezeigt. Danach zeigt das Display den aktuell eingestellten Kanal. Kanalwahl Die Funkgeräte verfügen über 8 verschiedene Übertragungskanäle, die von dem europäischen Komitee für Funkkommunikation als... -
Page 8: Anruf Bei Einem Anderen Teilnehmer
- Bedienung - Drücken Sie einmal kurz die Taste MODE. Im Display blinkt der aktuelle Rufcode. Mit den Tasten CHANNEL + und – kann nun ein neuer Code zwischen 00 und 38 gewählt werden. Wird der Code 00 gewählt, werden alle Gespräche auf dem eingestellten Kanal geführt. Funkgerät 1 Funkgerät 2 CTCSS... -
Page 9: Tastatursperre
- Bedienung - Hinweis: Während Sie die Taste TALK festhalten, können Sie keine ankommenden Anrufe hören. Von beiden Gesprächspartnern kann, wie bei Funkgeräten üblich, nur ein Gesprächspartner sprechen. Warten Sie also immer, bis Sie den Signalton (Roger Piep) hören, bevor Sie wieder die Taste TALK drücken. Während Sie die Taste TALK drücken, erscheint im Display das Symbol . -
Page 10: Erhöhung Der Maximalen Reichweite
- Bedienung - Erhöhung der maximalen Reichweite Die Funkgeräte sind mit einem so genannten AUTO-SQUELCH ausgestattet, mit dem automatisch schwache Übertragungen und unerwünschte Geräusche während der Benutzung ausgeblendet werden. Dieser AUTO-SQUELCH kann vorübergehend ausgeschaltet werden, um die Reichweite zu erhöhen. Halten Sie die Taste für mehr als fünf Sekunden bis zu einem Signalton gedrückt. -
Page 11: Tastentöne Ein-/Ausschalten
- Bedienung - VOX-Modus einschalten Drücken Sie mehrmals kurz die Taste MODE, bis die Anzeige UO erscheint. Mit den Tasten CHANNEL + und – kann der VOX-Modus aus- (of) oder eingeschaltet (on) werden. Bestätigen Sie Ihre Auswahl mit der Taste TALK. Ist der VOX-Modus eingeschaltet, erscheint im Display die Meldung VOX. -
Page 12: Rufton Auswählen
- Bedienung - 3.10 Rufton auswählen Sie können an die anderen Funkgeräte mit der Taste CALL einen Rufton senden, sobald Sie das Gespräch beginnen möchten. Es stehen dafür 5 unterschiedliche Melodien zur Verfügung. Drücken Sie mehrmals kurz die Taste MODE, bis die Anzeige CA erscheint. -
Page 13: Ukw-Radio
- Bedienung - 3.12 UKW-Radio Ihr Funkgerät ist mit einem integrierten UKW-Radio inklusive 10 Senderspeicherplätze ausgestattet. 3.12.1 Radio ein- oder ausschalten Halten Sie die Taste MODE für eine Sekunde gedrückt. Im Display erscheint die Anzeige Mit den Tasten CHANNEL + und –... -
Page 14: Anwählen Der Senderspeicherplätze14
Sie die Taste CALL für eine Sekunde zurück. Im Display erlischt die Anzeige CH. 3.12.4 Funkbetrieb während des Radioempfangs Das WT119 lässt sich auch während des Radioempfangs als Funkgerät benutzen. Sobald das Funkgerät ein Gespräch empfängt, wird der Radioempfang unterbrochen. Werkseinstellung aus. Während das Radio eingeschaltet ist, drücken Sie mehrmals kurz die... -
Page 15: Wichtige Informationen
- Wichtige Informationen - Wichtige Informationen Werkseinsstellungen Funkgerät Funkkanal Rufcode CTCSS Lautstärke VOX-Modus VOX-Empfindlichkeit Rufton Tastentöne Roger Beep Kanalsperre Radio Radiolautstärke Funkbetrieb während Radioempfang Belegung der Sendertasten keine Technische Daten PMR Kanal Frequenzen (MHz) : Kanal 1: 446,00625 Kanal 5: 446,05625 Kanal 2: 446,01875 Kanal 6: 446,06875 Kanal 3: 446,03125... -
Page 16: Pflegeanleitung
- Wichtige Informationen - Squelch Empfindlichkeit -121 dBm Ansprechzeit 150 ms Schliesszeit 250 ms Tonfrequenzverhalten bei 400 Hz -10 dB bei 2500 Hz -12 dB Signaldistanz Bandbreite +/- 5 kHz Kanaltrennung 12.5 kHz Intermodulationsunterdrückung 60 dB Störunterdrückung 60 dB Sender: Effektive Ausgangsleistung 500 mW Trägerfrequenzbeständigkeit... - Page 17 - Sommaire - Eléments de commande ....18 Mise en service ........19 Vérifier le contenu de l’emballage ....19 Mettre les blocs de batterie en place ...19 Fixer le clip-ceinture........20 Raccorder le chargeur .......20 Charger les émetteurs-récepteurs ....20 Raccorder le micro-casque ......20 Utilisation ........21 Mise en marche des émetteurs- récepteurs ..........21...
-
Page 18: Eléments De Commande
- Eléments de commande - Eléments de commande Raccordement micro-casque Volume plus faible Touche marche/arrêt Éclairage de l’écran Interrupteur de canal Touche CALL CHANNEL 10. Touche TALK Touche MODE 11. Micro-casque Verrouillage de canal 12. Blocs de batterie Volume plus fort... -
Page 19: Mise En Service
- Mise en service - Mise en service Vérifier le contenu de l’emballage Le contenu de l’emballage : Deux émetteurs-récepteurs Un chargeur avec clip-ceinture Deux blocs de batterie Un bloc d’alimentation Un mode d’emploi Deux micro-casques Mettre les blocs de batterie en place Votre émetteur-récepteur est fourni avec deux blocs de batterie NI-MH rechargeables que vous devez mettre en place avant la mise en service. -
Page 20: Fixer Le Clip-Ceinture
- Mise en service - Fixer le clip-ceinture Après avoir mis en place le bloc de batterie, vous pouvez fixer le clip- ceinture fourni. Enfoncez le clip-ceinture par le bas dans la coulisse jusqu'à ce qu'il s'enclenche de manière perceptible. Pour détacher à nouveau le clip-ceinture, tirez légèrement la languette de fixation vers le haut, puis tirez le clip-ceinture vers le bas. -
Page 21: Utilisation
- Utilisation - Utilisation Mise en marche des émetteurs- récepteurs Pour mettre en marche un émetteur-récepteur, maintenez la touche marche/arrêt enfoncée jusqu’au retentissement d’un signal sonore. L’écran s’éclaire pendant quelques secondes et toutes les icônes d’écran s’affichent. L’écran affiche ensuite le canal actuellement réglé. Sélection de canal Les émetteurs-récepteurs disposent de 8 canaux de transmission autorisés par le comité... -
Page 22: Appeler Un Autre Utilisateur
- Utilisation - Appuyez une fois brièvement sur la touche MODE. Le code d’appel actuel clignote à l’écran. Les touches CHANNEL + et – permettent alors de sélectionner un nouveau code de 00 à 38. Si le code 00 est sélectionné, toutes les tentatives d’appel sont signalées sur le canal réglé. -
Page 23: Verrouillage De Clavier
- Utilisation - Remarque : vous ne pouvez pas entendre les appels que vous recevez lorsque vous maintenez la touche TALK enfoncée. Un seul interlocuteur à la fois peut parler, comme c’est habituellement le cas pour les émetteurs-récepteurs. Attendez donc toujours le signal sonore (Roger Piep) avant d’appuyer à... -
Page 24: Portée Des Émetteurs-Récepteurs
- Utilisation - Portée des émetteurs-récepteurs Les émetteurs-récepteurs ont une portée pouvant atteindre 5 km. Cette portée maximale peut être réduite dans certaines conditions. Vous obtenez une portée maximale sur un terrain plat et dans un espace ouvert. La portée est réduite si la trajectoire des signaux est entravée par des bâtiments ou des arbres. -
Page 25: Mode Vox
- Utilisation - Mode VOX En mode VOX, l’émetteur-récepteur commence automatiquement à émettre dès que votre voix ou un autre bruit sont détectés. Il n’est pas nécessaire d’appuyer sur la touche de communication. Le temps d’émission dure toujours 2 secondes même si vous parlez pendant moins de 2 secondes. -
Page 26: Activer/Désactiver Les Sons Des Touches
- Utilisation - Activer/désactiver les sons des touches Normalement, un son de validation retentit à chaque pression de touche sur l’émetteur-récepteur. Ces sons de validation peuvent être désactivés de la manière suivante : Appuyez plusieurs fois brièvement sur la touche MODE jusqu’à ce que le message bP s’affiche. -
Page 27: Radio À Ondes Très Courtes
- Utilisation - Appuyez plusieurs fois brièvement sur la touche MODE jusqu’à ce que le message AG s’affiche. Les touches CHANNEL + et – permettent de désactiver (of) ou d’activer (on) le bip de message bien reçu. Validez votre sélection à l’aide de la touche TALK. 3.12 Radio à... -
Page 28: Sélection Des Plages De Mémoire D'émetteur
CH disparaît de l’écran. 3.12.4 Émission-réception durant la réception de radio Le WT119 peut également être utilisé comme émetteur-récepteur durant la réception de radio. Dès que l’émetteur-récepteur reçoit une communication, la réception de radio est interrompue. Réglage par défaut désactivé. -
Page 29: Informations Importantes
- Informations importantes - Informations importantes Réglages par défaut Canal radio Code d’appel CTCSS Volume Mode VOX désactivé Sensibilité VOX Sonnerie Sons des touches activé Bip de message bien reçu activé Verrouillage de canal désactivé Radio Volume de radio Émission-réception durant la réception de radio désactivé... -
Page 30: Instructions D'entretien
- Informations importantes - Squelch Sensibilité -121 dBm Temps de réponse 150 ms Temps de fermeture 250 ms Comportement de fréquence vocale à 400 Hz -10 dB à 2500 Hz -12 dB Distance de signal largeur de bande +/- 5 kHz Séparation des canaux 12.5 kHz Suppression de l’intermodulation... - Page 31 - Sommario - 1 Elementi di comando ........32 2 Messa in funzione .......... 33 2.1 Controllo del contenuto della confezione ..... 33 2.2 Inserimento degli accumulatori ......33 2.3 Applicazione del clip della cintura ....... 34 2.4 Collegamento della stazione di carica....34 2.5 Caricamento delle ricetrasmittenti ......
-
Page 32: Elementi Di Comando
- Elementi di comando - Elementi di comando micro-collegamento cuffia riduzione volume interruttore ON/OFF illuminazione del display selettore canale tasto CALL CHANNEL 10. tasto TALK tasto MODE 11. auricolare Blocco canale 12. accumulatori aumento volume... -
Page 33: Messa In Funzione
- Messa in funzione - Messa in funzione Controllo del contenuto della confezione La dotazione comprende: due ricetrasmittenti con clip a cintura una stazione di carica due accumulatori un alimentatore di rete istruzioni per l'uso due auricolari Inserimento degli accumulatori La Vostra ricetrasmittente è... -
Page 34: Applicazione Del Clip Della Cintura
- Messa in funzione - Applicazione del clip della cintura Dopo aver integrato gli accumulatori, potete fissare il clip della cintura fornito in dotazione. Spingere il clip della cintura dal basso nella guida, fino a farlo scattare in posizione . Per staccare nuovamente il clip, basta tirare la linguetta di fissaggio leggermente verso l'alto e staccare poi il clip verso il basso. -
Page 35: Impiego
- Impiego - Impiego Inserimento delle ricetrasmittenti Per inserire una ricetrasmittente, mantenere premuto il tasto ON/OFF, fino a sentire un segnale acustico. Per alcuni secondi si illumina il display con la visualizzazione di tutti i simboli d'indicazione. Dopodiché nel display viene visualizzato il canale attualmente selezionato. -
Page 36: Chiamata In Un Altro Utente
- Impiego - Premere brevemente una volta il tasto MODE. Nel display lampeggia ora l'attuale codice di chiamata. Tramite i tasti CHANNEL + e – potete ora selezionare un nuovo codice tra 00 e 38. Nella selezione del codice 00, verranno segnalati tutti i tentativi di chiamata sul canale selezionato. -
Page 37: Blocco Della Tasteria
- Impiego - Avvertenza: Mentre mantenete premuto il tasto TALK, non potete sentire le chiamate in arrivo. Come accade generalmente nei radiotrasmettitori, può sempre parlare un solo interlocutore alla volta. Perciò, dovete sempre attendere fino a sentire il segnale acustico di chiamata (Roger Piep), prima di premere nuovamente il tasto TALK. -
Page 38: Illuminazione Del Display
- Impiego - Mantenere premuto il tasto per oltre cinque secondi, fino a sentire un segnale acustico. La soppressione automatica è disattivata. Nel display viene visualizzata l'indicazione MON e a questo punto si possono ricevere anche i segnali radio più deboli. Per riattivare successivamente l'AUTO-SQUELCH, mantenere premuto di nuovo o il tasto oppure un tasto di selezione del canale... -
Page 39: Attivazione/Disattivazione Dei Segnali Acustici Dei Tasti
- Impiego - Dopo che avete attivato il modo VOX, nel display verrà visualizzata l'indicazione VOX. Regolazione della sensibilità per il modo VOX 1. Premere ripetutamente per breve il tasto MODE, fino a quando nel display non viene visualizzata l'indicazione L. 2. -
Page 40: Selezione Del Segnale Di Chiamata
- Impiego - 3.10 Selezione del segnale di chiamata Alle altre unità ricetrasmittenti potete anche trasmettere un segnale di chiamata tramite il tasto CALL, non appena volete iniziare una conversazione. A tal fine sono disponibili 5 melodie diverse. Premere ripetutamente per breve il tasto MODE, fino a quando nel display non viene visualizzata l'indicazione CA. -
Page 41: Radio Fm
- Impiego - 3.12 Radio FM La Vostra ricetrasmittente è equipaggiata con una radio FM; integrata e comprende 10 posti di memoria per le emittenti. 3.12.1 Accensione o spegnimento della radio Mantenere premuto per un secondo il tasto MODE. Dopodiché nel display viene visualizzata l'indicazione FM. -
Page 42: Selezione Dei Posti Di Memoria Delle Emittenti
Dopodiché nel display viene scompare l'indicazione 3.12.4 Funzionamento della ricetrasmittente durante la ricezione radiofonica Il WT119 può essere impiegato come ricetrasmittente anche durante la ricezione radiofonica. Non appena la ricetrasmittente riceve una chiamata, viene immediatamente soppressa la ricezione radiofonica. L'impostazione di fabbrica corrisponde a OFF. -
Page 43: Informazioni Importanti
- Informazioni importanti - Informazioni importanti Impostazioni di fabbrica canale radio codice chiamata CTCSS volume modo VOX sensibilità VOX segnale di chiamata segnali acustici del tasto Roger Beep blocco canale Radio FM volume radio funzionamento radio durante la ricezione occupazione dei tasti di trasmissione nessuna Dati tecnici PMR Canale Frequenze (MHz) :... -
Page 44: Istruzioni Per La Manutenzione
- Informazioni importanti - Squelch sensibilità -121 dBm tempo di reazione 150 ms tempo di chiusura 250 ms Comportamento di frequenza a 400 Hz -10 dB a 2500 Hz -12 dB ampiezza di banda distanza segnale +/- 5 kHz separazione canale 12.5 kHz soppressione d’intermodulazione 60 dB... - Page 45 - Contents - Operational Elements ......46 Commissioning ........47 Check contents of pack........ 47 Fitting the battery packs ......47 Fitting the belt clip ........48 Connecting the charging station ....48 Charging the walkie-talkies ......48 Connecting the headset ....... 48 Operation ...........
-
Page 46: Operational Elements
- Operational elements - Operational Elements Microphone and headphone Volume louder connection Volume softer On/Off button Display illumination CHANNEL switch CALL button MODE button 10. TALK button Channel lock 11. Headset... -
Page 47: Commissioning
- Commissioning - Commissioning Check contents of pack The following items are supplied two walkie-talkies with belt clip one charging station two battery packs one mains power supply one instruction manual two headsets Fitting the battery packs Your walkie-talkie is supplied with two rechargeable Ni-MH battery packs, which must be fitted before using the equipment. -
Page 48: Fitting The Belt Clip
- Commissioning - Fitting the belt clip After you have installed the batteries, you can fit the belt clip supplied with the unit. Slide the belt clip into the guide from below until it audibly engages. To remove the belt clip again, pull the fixing strap up slightly and pull the belt clip downwards. -
Page 49: Operation
- Operation - Operation Switching on the walkie-talkies To switch on the walkie-talkie, hold the On/Off button pressed until a signal tone sounds. The display will be illuminated for some seconds and all the symbols will be shown in the display. After this the display will show the currently selected channel. -
Page 50: Calling Another Subscriber
- Operation - Press the MODE button briefly once. The current call code will flash in the display. A new code between 00 and 38 can now be selected using the CHANNEL + and – buttons. If the code 00 is selected, all calls will be signalled on the selected channel. -
Page 51: Keypad Lock
- Operation - Note: While you are holding the TALK button, you will not be able to hear any incoming calls. As is usual with walkie- talkie units, only one of the two participants in the call can speak at any one time. Therefore, always wait until you hear the signal tone (Roger Piep) before pressing the TALK button again. -
Page 52: Increasing The Maximum Range
- Operation - Increasing the maximum range The walkie-talkies are equipped with a so-called AUTO-SQUELCH system, by means of which weak transmissions and undesirable noises are automatically filtered out during use. This AUTO- SQUELCH system can be temporarily switched off in order to increase the range. -
Page 53: Switching Key Tones On And Off
- Operation - Switching on VOX mode Press the MODE button repeatedly until UO appears in the display. The VOX mode can be switched on and off using the CHANNEL + and – buttons. Confirm your selection with the TALK button. When VOX mode is activated, the message VOX appears in the display. -
Page 54: Selecting A Call Tone
- Operation - 3.10 Selecting a call tone You can transmit a call tone to the other walkie-talkies using the CALL button when you want to begin a call. 5 different melodies are available for this purpose. Press the MODE button repeatedly until CA appears in the display. -
Page 55: Fm Radio
- Operation - 3.12 FM Radio Your walkie-talkie is equipped with an integral FM radio including 10 station memories. 3.12.1 Switching the radio on or off Press and hold the MODE button for one second. The message FM will appear in the display. -
Page 56: Selecting The Station Memories
3.12.4 Walkie-talkie operation while listening to the radio The WT119 can also be used as a walkie-talkie while listening to the radio. As soon as the walkie-talkie receives a call, radio reception will be interrupted. Factory setting off. -
Page 57: Important Information
- Important information - Important information Factory Settings Radio channel Call code CTCSS Volume VOX mode VOX sensitivity Call tone Key tones Roger beep Channel lock FM Radio Radio volume Walkie-talkie operation during radio reception Assignment of station buttons none Technical data PMR Channel Frequencies (MHz) : Channel 1: 446,00625... -
Page 58: Care Instructions
- Important information - Squelch Sensitivity -121 dBm Turn on time 150 ms Turn off time 250 ms Audio frequency response at 400 Hz -10 dB at 2500 Hz -12 dB Signal distance bandwidth +/- 5 kHz Channel separation 12.5kHz Intermodulation suppression 60 dB Interference suppression... -
Page 59: Declaration Of Conformity
Route d'Englisberg 17 CH-1763 Granges Paccot Declare under our own responsibility that the product Model: SWITEL WT119 Description: Private Mobile Radio, frequency 446 MHz Is in conformity with directives: 1999/5/EC R & TTE Directives Compliance is achieved by conformity to the following:...
Need help?
Do you have a question about the WT119 and is the answer not in the manual?
Questions and answers