Table of Contents
Advertisement
Advertisement
Table of Contents

Related Manuals for Tevion DR2501


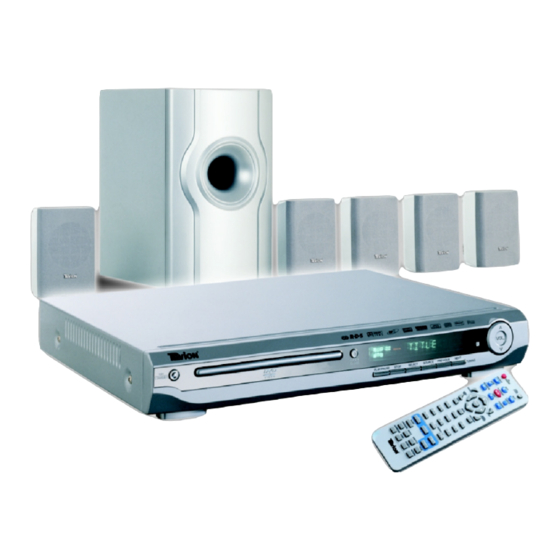
Summary of Contents for Tevion DR2501
-
Page 3: Safety Instructions
SAFETY INSTRUCTIONS WARNING NOTE This product incorporates copyright protection The exclamation mark within a triangle is a warning sign alerting the user to important instructions accompanying the product. technology that is protected by method claims o f U . S . pa t en t numbers 4,631,603; 4,577,216; The lightning flash with arrowhead symbol within a triangle is a 4 , 81 9 , 0 9 8 a nd 4 , 9 07 , 09 3 , a nd o t h er wa rn in g s ig n ale rt in g t he u ser t o da ng erous v oltage i nside t he... -
Page 4: Introduction
INTRODUCTION Thank you for pu rcha seing this DVD H o m e Theatre Sys tem. Th is Home Theatre sys tem i n c l udes everything you need to experience movie theatre quality d i g it a l v ideo and audio plus AM /F M r ad i o r e c e p ti on i n the c o mfo r t o f y ou r o w n home. The only thing you need t o ad d is y ou r o w n T V . -
Page 5: Table Of Contents
TABLE OF CONTENTS G ett ing Started: Playing Discs: Safety Instructions-------------------------------------------------------1 Basic Playback 1 -------------------------------------------------- 32 Introduction------------------------------------------------------------------2 Connections: Basic Playback 2 -------------------------------------------------- 33 Choose Your Connection----------------------------------------4 Speaker Volume -------------------------------------------------- 34 Cables Needed to Connect Components Special Functions: to Your TV -----------------------------------------------------------4 Search &... -
Page 6: Connections
CONNECTIONS Choose Your Connection The re are several ways to con nect y o u r DV D Home Theatre Sys tem. Plea se use the following cha rt to determine which connection is the best for you. Turn to the appropriate page and connect your DVD Home System. -
Page 7: Speaker System Connections
SPEAKER SYSTEM CONNECTIONS Speaker System Connections Connect the supplied speaker system by matching the colours The speaker wires and connectors are colour-coded for easier set of the terminals to those of the cords. IMPORTANT: Connect the Front Left speaker to the L terminals. Connect the Front Right speaker to the R terminals. -
Page 8: Speaker System Connections
SPEAKER SYSTEM CONNECTIONS Tips for connecting the speaker wires To avoid short-circuiting the speakers Unwind and stretch out the speaker wires attached with each Make sure the strippe d end of each spea ker wire do es not speakers, then push and hold down the set terminal tab on the tou ch an o the r spea ker termi na l or the stri pp ed end of back of the main set to insert each wire. -
Page 9: Speaker Positioning Information
SPEAKER POSITIONING INFORMATION Your sys tem is supp lied with 5 compact sized satellite spea kers and one large subwoofer. The satellite spea kers reprodu ce only the mid- range and highe r frequen cies. All o f t he lo w f requency (ba ss ) s ounds a re p ro d u c ed b y th e s u b w o o f e r . -
Page 10: Speaker Positioning Information
SPEAKER POSITIONING INFORMATION SATELLITE SPEAKERS · The centre speaker, as well as the other 4 satellites, can be positioned either vertically or horizontally. · The left front, right front, and centre speakers should be placed at roughly the same height. The centre speaker reproduces most of the dialogue spoken by the actors on the TV screen, therefore it should be placed either directly above or below the centre of the TV set. -
Page 11: Tv Connection - With Video Cable Connection
TV CONNECTION with Video Cable Connection DVD Home Theatre System+TV with a Video Input Jack NOTE: Your TV set must have a VIDEO INPUT connector (or COMPONENT connector) for you to be able to connect and enjoy this DVD HOME THEATRE SYSTEM. CON NEC T ALL SPE AKE RS AS SHO WN ON PAGE 5 YEL LOW VID EO CAB LE (INCLU DED ) -
Page 12: Tv Connection - With S-Video Cable Connection
with S-Video Cable Connection TV CONNECTION DVD Home Theatre System + TV with an S-Video Jack CONNECT ALL SPEAKERS AS SHOWN ON PAGE 5. S-Video cable (not included) provides a sharper picture than normal video. Use an S-Video cable if your TV has an S-Video jack (but not component jack). -
Page 13: Tv Connection - With Component
with YPbPr Cable Connection TV CONNECTION DVD Home Theatre System + TV with a Component Video Input Jack COMPONENT CABLE (NOT INCLUDED) NOTE 1: Wh en us in g the component c ab le , n o yel lo w vid eo ca bl e is needed . -
Page 14: Am/Fm Antennas
AM / FM ANTENNAS IMPORTANT! · Before connecting the AC power cord to the wall outlet, ensure that all other connections have been made. · Never make or change any connections with the power switched on. · The type plate is located at the rear of the system. Connecting antennas AM Indoor Loop Antenna Connect the supplied AM loop antenna to the A M antenna terminals. -
Page 15: Tv + Vcr Connections
TV + VCR CONNECTIONS Extra Video Cable (not included) Component YUV 1 . C o nne c t t h e 5 s a t e ll i te s pea k e rs and s u b w oo f e r as shown on Page 5 2. -
Page 16: Tv / Vcr Combination Connections
TV/VCR COMBINATION CONNECTION IF YOU OWN A TWO-IN-ONE COMBINATION TV/VCR NO T E: A Video RF Modu lator is n eed ed fo r a ny TV / VCR combined set which does no t ha ve VIDEO & AUD IO i npu t j a cks o r a component jack . -
Page 17: Tv+Vcr+Satellite Receiver Connections
TV+VCR+SATELLITE RECEIVER CONNECTIONS Audio Component YUV 1. Connect the 5 satellite speakers and subwoofer as shown on Page 5. 2. Use an antenna cable to connect the antenna output on the satellite receiver to the antenna input on the VCR the same as you have it connected now. -
Page 18: Aux In (Aux 1 / Aux 2) Connections
AUX IN (AUX 1 / AUX 2) CONNECTIONS Illu s t r a t i o n s h o w s s om e p os si ble c o n ne c t i on s . Yo u c an c on n e ct TWO of these to the AUX 1 and AUX 2 AUDIO IN jacks of your HOME THEATRE SYSTEM. -
Page 19: Location Of Controls
LOCATION OF CONTROLS FRONT PANEL 8 9 10 11 12 13 1. STANDBY button - Press to switch the set on or standby. PLAY/PAUSE button - Press to start playing the DVD/ CD disc or to pause playing. 2. STANDBY indicator - When the set is in STANDBY mode (ready to be turned ON by the REMOTE), the STANDBY indicator will 9. -
Page 20: Remote Control
LOCATION OF CONTROLS REMOTE CONTROL 1. STANDBY button - Switch the player from STANDBY to ON or STANDBY . 2. MUTE button - Instantly turn off the sound. Press again to restore sound. 3. PREVIOUS/PRESET button - Skip to the previous chapter or track or previous radio preset. -
Page 21: Remote Control Operation
REMOTE CONTROL OPERATION Battery Installation Remote Control Operating Range Remove the BATTERY COMPARTMENT DOOR of the REMOTE Point the REMOTE CONTROL unit within 20 feet (6m) from the CONTROL and insert 2 x LR 03 (size AAA) batteries (included) remote control sensor and within about 60 of the front of the DVD HOME THEATRE SYSTEM ( not your TV set). -
Page 22: Index To Parts And Controls (Front Panel Display)
INDEX TO PARTS AND CONTROLS Front Panel Display 9 10 1. Speaker Icons - Indicates which of the six speakers are 11. DTS indicator - Illuminates when the playing disc is recorded operating. with DTS format (DIGITAL THEATRE SYSTEM). 2. DVD indicator - Shows when a DVD is playing. 12. -
Page 23: Notes On Discs
NOTES ON DISCS The following types of discs can be played by this unit: RECORDED RECORDED DISC TYPE & LOGO MARK DI SC TYPE & LOGO MARK CONTENT CONTENT DVD Video Audio only Music CD (PAL & Region 4 Video + Audio only ) Audio only or Audio /... -
Page 24: Precautions
PRECAUTIONS On Safety On Handling DISCs • • As the laser beam used in the DVD player may be harmful to Do not touch the playback side (silver or gold side) of the the eyes, do not attempt to disassemble the cabinet. Refer disc. -
Page 25: General Setup
SETTING S & ADJUSTMENTS Basic System Setup General Setup NOTE FOR SELECTING YOUR TV'S VIDEO CHANNEL You will need to change your TV's video Input mode to see the HOME 's menu and movies. The video input mode on TV's varies for different brands and models. Many TV remote controls have a TV/VIDEO button which can be used to change to different video inputs and back to TV for normal broadcast viewing. -
Page 26: Setting The Video Output
SETTINGS & ADJUSTMENTS General Setup Setting the Video Output (S-Video or Component) The factory Video Output is VIDEO OUT (Yellow cable provided), If you want to use the S-Video or Component Settings, follow the steps below::::: CONNECT ALL SPEAKERS AS SHOWN ON PAGE 5 COMPONENT CABLE NOTE 1: When using the Component or S- (INCLUDED) -
Page 27: Setting The Tv Display
General Setup SETTINGS & ADJUSTMENTS Setting the TV DISPLAY This selects the size of the movie to match your TV set. There are 3 types of screen sizes you may select. (see below) – GENERAL PAGE – TV DISPLAY 4:3 PS OSD LANG 4:3 LB VIDEO OUTPUT... -
Page 28: Setting On Screen Display Language
General Setup SETTINGS & ADJUSTMENTS Setting On Screen Display Language NOTE: OSD stands for ON SCREEN DISPLAY , L A NG is short for language. Th is is the language which you r HOME THEATRE w ill use to give you direction s or instruction s du ring use. Th is is no t the language in which the movie actors will t alk. -
Page 29: Speaker Setup
SETTINGS & ADJUSTMENTS Speaker Setup This allows you to select and adjust the delay time of the speakers and test tones to see if all the speakers are connected properly. We recomend you do not change the delay time. Just use the test tone function if you are not sure if you connected all your speakers properly. -
Page 30: Audio Setup
Audio Setup SETTINGS & ADJUSTMENTS Setting Sound Level Compression We suggest you leave these settings alone unless you are very experienced with audio settings. In many listening situations, it is objectionable to allow the sound to become very loud, and thus the loudest sounds must be compressed downwards in level. -
Page 31: Preferences Setup
Preferences Setup SETTINGS & ADJUSTMENTS Getting Your System into the "Stop" Mode (Needed for some Adjustments) There are many choices under the PREFERENCES. To set up any of the PREFERENCES, you must first get your system into the STOP mode. You can get into stop mode by pressing STOP twice or by opening the DVD door. During play, press the STOP button once, the display will show "... -
Page 32: Setting Parental Ratings
Preferences Setup SETTINGS & ADJUSTMENTS Setting PARENTAL Rat i ngs (In Stop Mode) To prevent children form viewing movies not suitable for their ages, you can "lock " your DVD player to prevent children from viewing higher-rated movies even when you are not at home. A U D I O S U B T I T LE DivX(R) REGISTRATION... -
Page 33: Setting Password
Preferences Setup SETTINGS & ADJUSTMENTS Setting PASSWORD (In Stop Mode) This prevents others from changing the ratings limits you selected and also allows you to bypass the rating if you want to view adult DVDs. SU B T I T LE DivX(R) REGISTRATION Press the SETUP button on the REMOTE control, a menu like the one above will appear on your TV. -
Page 34: Playing Discs
PLAYING DISCS Basic Playback 1 NOTE: The disc door can only open in DVD mode when the To Load and Play a DVD or other Discs DVD indicator is on. NOTE: We call any DVD or AUDIO CD a "disc" in this booklet. When the set is in standby mode (the STANDBY indicator is on) press the ON/STANDBY button on the main unit or on the remote control to turn the set on. -
Page 35: Basic Playback
PLAYING DISCS Basic Playback 2 Using a Disc Menu A DVD movie disc is capable of having an on-screen menu (disc menu) that is separate from the TIP: Many discs skip the disc menu DVD player’s menu and on-screen display. The disc menu might only contain a list of the titles and and start playing automatically. -
Page 36: Speaker Volume
Speakers Volume PLAYING DISCS MUTE You can raise or lower each speaker’'s volume or all the speakers. To raise or lower the master volume, press the VOLUME or VOLUME button on the remote control or main unit. The level of all 6 speaker's will be increased or decreased together. -
Page 37: Special Functions
Search and Skip functions SPECIAL FUNCTIONS During play, you can search quickly through a chapter or track or use the skip function to jump to the next selection. Skipping through a Chapter or a Track During play, press the FORWARD button on the REMOTE CONTROL continuously or repeatedly to search forward at a faster speed X2, X4, X6 or X8 (the larger the number, the faster the speed), then press the PLAY/PAUSE button to resume normal play. -
Page 38: Repeat Play
Search and Skip functions SPECIAL FUNCTIONS Repeat play allows you to repeat the current track, chapter, title, a chosen section (A-B), or all of the disc over and over. Repeating a title, chapter or track press the REPEAT 1/ALL button, the repeat mode changes as follows: D V D ( MOV I E ) D I SC CD /V CD D I SC REPEAT A-B... -
Page 39: Programmed Play
Programmed Play (CD & VCD only) SPECIAL FUNCTIONS You can make a program of up to 99 tracks to play in the order you want them to be played. This feature can only be used on CDs & VCD discs. Press the PROGRAM button in the STOP mode, and the screen will display the program bar. -
Page 40: Zoom Play
Zoom Play SPECIAL FUNCTIONS allows you to zoom into a picture as well as to shift the zoom point. This DVD HOME During play, pressing the ZOOM button will enlarge the picture as below: To return to normal play, press the ZOOM button until the icon shows "ZOOM OFF". To change the zoom point (view), press the LEFT &... -
Page 41: Viewing From A Desired Angle
Viewing from a Desired Angle SPECIAL FUNCTIONS (DVD only) Some DVD video discs may contain scenes which have been shot simultaneously from a number of different camera angles. The jacket or case of discs that are recorded with angles will be marked with this icon: NOTE: The number 3 indicates For these discs, the same scene can be viewed from any of these different angles the number of angles. -
Page 42: Subtitle (Caption) Language Selection
Subtitle Language Selection SPECIAL FUNCTIONS You can selec t a d esire d sub title ea si ly wi th th e SUB TITL E bu tton. NOTE: This operation works only with DVD discs on which multiple subtitle lan gu age s are recorded. Press the SUBTITLE button during play, the screen will display the current language and also change the language or turn subtitles off, examples are: SUBTITLE 1: ENGLISH, SUBTITLE 2: FRENCH , or SUBTITLE OFF . -
Page 43: Divx, Mp3 Disc Operation
Mp3 disc operation You can use the DivX(R) registration code to rent and purchase videos. Follow the instructions and download a video onto a CD-R for playback on this DVD player. For more information, visit www.divx.com. Note: Basic playback operations are the same as a DVD. Mp3 disc playback Follow the steps for PLAYING DISCS on Page 32. -
Page 44: Playing Video Cds With Pbc
PLAYING VIDEO CDs with PBC PLAYING VIDEO CDs with PBC VCDs Video CDs (also called VCDs) are usually sold in foreign countries or in some local stores. They will show movies but without the sharp pictures or many of the features found on DVDs. When playing Video CDs with PBC functions, you can enjoy simple interactive operations with NOTE: search functions, etc. -
Page 45: Adjusting The Audio Mode
ADJUSTING THE AUDIO MODE Adjusting Surround Sound TV SCREEN DISPLAY This system has a built-in Dolby Pro Logic Decoder. It can transform the stereo (or PCM) signal to a Dolby Surround signal so that you can enjoy 5 speaker surround sound from normal 2 channel stereo CDs. -
Page 46: Displaying Disc Information
DISPLAYING DISC INFORMATION You can check information abou t the disc, such as the total When playing back a Video CD or Music CD numbers of titles or chapters or t ra ck s or time, usin g the d is pl ay function. -
Page 47: Viewing Jpeg Files Or Picture Cds
VIEWING JPEG FILES OR PICTURE CDs JPEG is short for the Joint Photographic Experts Group , a group of experts nominated to produce standards for continuous tone image coding. In other words, your HOME THEATRE can view picture CDs or CDs you made on your computer with names that end in the JPEG format (other formats may or may not be supported). -
Page 48: Am/Fm Radio
AM/FM RADIO Tuning to radio stations RDS functions are only available in areas that use RDS system. 1. Turn on the DVD player (the standby indicator will be off and the front panel display will be on). RDS (Radio Data System) is a broadcasting service that allows 2. -
Page 49: Troubleshooting
TROUBLE SHOOTING Remedy Symptom 1. Is the power cord firmly plugged into the power a socket? Insert the AC power plug securely into the power socket. Make sure your socket has power and the STANDBY indicator will turn on in red. No power 2. - Page 50 TROUBLE SHOOTING Symptom Remedy Did you connect the AM loop antenna? Please connect it now. AM radio does not work. 1. Connect the supplied internal wire antenna into the FM antenna jack and stretch FM radio does not work. the antenna wire out for best reception. 2.
- Page 51 TROUBLE SHOOTING Symptom Remedy The subtitles cannot be turned off when Depending on the DVD, you may not be able to turn the subtitles off. you play a DVD. Many DVDs have hidden damage which prevents normal play. Exchange that DVD at the store where purchased.
- Page 52 TROUBLE SHOOTING Symptom Remedy If a button is pressed too fast over and over, the signals may jam the circuits inside. To restore to normal, press the OPEN/CLOSE button or remove the AC power plug Picture is frozen. for 2 minutes and reinsert to reset the circuits. Also many "copied" discs have this problem.
-
Page 53: Glossary
GLOSSARY Here are a few definitions of words and terms used in this booklet. NTSC Chapter N a t ion a l T V S ys te ms C o mm it tee for TV broadcasts: a video Sections of a picture or a music piece on a DVD that are smaller standard used in USA. -
Page 54: Specification
SPEIFICATIONS DVD Player Pickup ----------------------------------------------------------------- Semiconductor laser, Wavelength 650nm Signal system ------------------------------------------------------- PAL Video signal horizontal resolution ----------------------------- More than 480 lines (DVD) Video signal-to-noise ratio --------------------------------------- More than 60 dB (DVD) Audio frequency response (at 2 CH stereo mode) --------- DVD(PCM): 20Hz-20kHz (+/-1.0dB) CD: 20Hz-20kHz (+/-1.0dB) Audio signal-to-noise ratio --------------------------------------- More than 80 dB (PCM) Total harmonic distortion ----------------------------------------- Less than 0.02% (PCM)
Need help?
Do you have a question about the DR2501 and is the answer not in the manual?
Questions and answers