
Subscribe to Our Youtube Channel
Summary of Contents for Lightwave Communications SCS1620
- Page 1 Secure Console Server Model SCS1620 Product Guide Part Number 15.00.032 Revision B February 2002...
- Page 2 SCS1620 Product Manual Lightwave Communications Page ii www.lightwavecom.com...
- Page 3 SCS1620 Product Manual Copyright & Trademark © 2002, Lightwave Communications, a Lantronix Company. All rights reserved. No part of the contents of this book may be transmitted or reproduced in any form or by any means without the written permission of Lantronix. Printed in the United States of America. Also electronically distributed via Adobe PDF file format.
- Page 4 SCS1620 Product Manual Lightwave Communications Disclaimer & Revisions Operation of this equipment in a residential area is likely to cause interference in which case the user, at their own expense, will be required to take whatever measures may be required to correct the interference.
-
Page 5: Declaration Of Conformity
(according to ISO/IEC Guide 22 and EN 45014) Manufacturer’s Name & Address: Lightwave Communications, 100 Washington Street, Milford, CT 06460 USA Declares that the following product: Product Name & Model: Secure Console Server 1620 (SCS1620) Conforms to the following standards or other normative documents: Safety: EN60950:... -
Page 6: Table Of Contents
SCS1620 Product Manual Lightwave Communications Table of Contents System Description ..................9 System Features ..................9 Hardware Features ..................10 System Overview...................11 Typical Use ....................11 System Components..................11 Access Control...................11 Connection Formats ..................11 2.4.1 Serial....................11 2.4.2 Network....................11 2.4.3 Modem ....................12 2.4.4 Power Manager ..................12 Device Port Buffer ..................12... - Page 7 A Lantronix Company SCS1620 Product Manual SCS1620 Administration ................21 System Administrator Functions..............21 5.1.1 Log In as System Administrator............21 5.1.2 Logging Out ..................22 Security and Passwords ................22 5.2.1 Change the sysadmin password ............22 5.2.2 Change the root password..............22 The setup User Interface................23 Auto-Run of setup on Initial Startup ...............23...
- Page 8 SCS1620 Product Manual Lightwave Communications Appendix A – Terminal Port and Adapter Pinouts ..........78 Appendix B – Flash Update Procedure..............84 Updating the SCS1620 Software...............84 B.1.1 Software Download ................84 Flash Replacement Procedure ..............84 Appendix C – System Specifications................87 Physical ......................87 Environmental....................87 Electrical ....................87...
-
Page 9: System Description
SCS1620 Product Manual 1.0 System Description The Lightwave Secure Console Server 1620 (SCS1620) is a fully customizable console server offering secure encryption and authentication. The SCS1620 is a compact solution for remote and local management of up to 16 devices with RS-232C compatible serial consoles. -
Page 10: Hardware Features
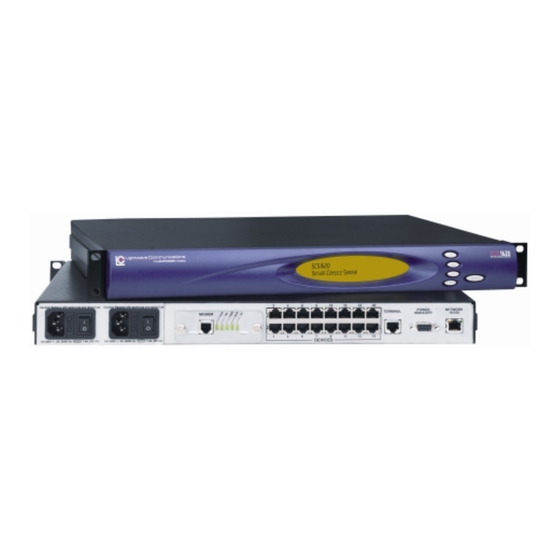
SCS1620 Product Manual Lightwave Communications Hardware Features • 1RU tall (1.75 inches) rack-mountable Server • One (1) 10/100 baseT Network Port for connection to your IP network • Sixteen (16) serial DEVICE ports, RS232, connected via Category 5 (RJ45) wiring •... -
Page 11: System Overview
SCS1620 Product Manual 2.0 System Overview Typical Use The SCS1620 is often used to manage up to 16 serial devices (servers, routers, switches, etc.) where security is mandatory. Each attached device must have an RS-232C compatible serial console port. A User accesses the attached servers with keyboard commands from their local terminal, through a network connection, or through a dial-up connection. -
Page 12: Modem
FIFO buffer. This data may be viewed while the user is not directly interacting with the attached device. System Resource Information The SCS1620 is programmable using OS-level commands and options. The System Administrator (sysadmin) configures the product using a command-line interface or one of several prepared scripts, using UNIX / Linux commands. -
Page 13: Installation
Physical Installation The SCS1620 may be installed either in an EIA-standard 19-inch rack (1U tall) or as a desktop unit. For desktop use, four rubber feet are provided, and the rack mount brackets may be removed. -
Page 14: Dc Input
See Appendix D for specifications regarding the DC power source. Connecting a Terminal (Console) The TERMINAL port (a Console port) is used for local access to the SCS1620 and the attached devices. A dumb terminal or computer may be attached to the serial port if the port uses RS-232-C protocol and VT100 emulation is supported. -
Page 15: Connecting To The Device Port
Turn on the terminal or start your computer’s communication program. Connecting to the Device Port Any serial device that has a console port may be connected to the SCS1620 for consolidated remote administration. Device Ports are individually configurable (DEVICE_1 through DEVICE_16). The console port must support the RS-232-C interface. -
Page 16: Connecting The Network Port
Connecting the Modem Port An optional modem module is available for the SCS1620. The modem may be installed at the factory or can be ordered separately for later installation. SCS1620 modem module The SCS1620 modem is an analog modem supporting connection rates up to 38,400 baud. -
Page 17: Power Manager Port
Refer to Section 7 for Modem Installation instructions, if installing a modem into a working SCS1620 system. Power Manager Port The Power Manager port is configured as Device Port 17, and operates like the other DEVICE ports, except that its physical interface is a DB9F serial connector. -
Page 18: Quick Start Set-Up
Quick Start assumes the system is plugged in and turned on, and that you know the IP address that the SCS1620 must be set to in order to operate on your network, and that you are ready to connect to your network port. - Page 19 A Lantronix Company SCS1620 Product Manual Use the arrow buttons to navigate from one option to another, or to increment or decrement a numerical entry of the selected feature. Use SELECT to enter the Edit mode of a chosen step, or to advance to the next step when editing.
-
Page 20: Method #2 - Quick Start Via Telnet
SCS1620 via telnet commands. If you add a route to your workstation, you can use telnet to connect to the SCS1620, instead of the Terminal Port. The default IP address of the SCS1620 is 10.0.0.1, with a subnet mask of 255.0.0.0. -
Page 21: Scs1620 Administration
<ENTER> key to respond, and are case-sensitive. System Administrator Functions When the SCS1620 is first installed and powered up, it must be configured to operate with your network. Connect the terminal port to a terminal device or computer using a terminal emulation program (refer to section 3.4 for instructions on connecting to the terminal port). -
Page 22: Logging Out
The sysadmin programming level is as close to 'root' as is required to administer the SCS1620, but it is not the most-senior root level. The root level is intentionally removed from the shell, however, it exists in the system and its password must be changed to protect from unauthorized access or changes. -
Page 23: The Setup User Interface
System The scripted programming session (setup Administrator logs into the SCS1620 for the first time. It is a text-based user interface, and requires VT100 terminal support using the keyboard (no mouse). At default values, SSH is not enabled (encryption keys have not been generated) so telnet is often used to initially access and configure the SCS1620. -
Page 24: Manually Using Setup
SCS1620 Product Manual Lightwave Communications Manually using setup setup setup setup The setup setup command is automatically run to initially configure the SCS1620; it setup setup may be run manually at any time thereafter. If using the setup setup setup... - Page 25 A Lantronix Company SCS1620 Product Manual If more than one sysadmin logs into setup at a time, the latter will get the following message: The setup screen is shown after successfully reaching the setup mode. The experienced Linux user may also directly edit any parameter they choose.
-
Page 26: Start Of Setup Script
SCS1620 Product Manual Lightwave Communications 5.3.1 Start of setup setup setup setup Script The following display is shown when the setup setup program starts, whether setup setup automatically (from the first time the sysadmin logs in) or if the sysadmin typed... -
Page 27: Configure Hostname And Ip
Configure Hostname, IP Address, Network Mask, LAN Router Address (Gateway), and NIS Domain • Hostname including domain • IP Address (of the SCS1620) • Network Mask (of IP address) • Gateway (IP address of the Router of this network) • If using NIS, the NIS domain name Select a menu item, and simply press Enter to proceed. - Page 28 (using Tab and Arrows) and press Enter to proceed. Note: The HOSTNAME appears as your command prompt when logged in to the system, and also appears on the front panel LCD display of the SCS1620. Type in a value; press Enter to proceed.
- Page 29 A Lantronix Company SCS1620 Product Manual Enter the value for the Network Mask, in dot-quad notation; select < Next > (using Tab and Arrows) and press Enter to proceed. Note: Do NOT use leading 0's in the numeric fields for numbers less than 100.
- Page 30 SCS1620 Product Manual Lightwave Communications Select < Next > (using Tab and Arrows) and press Enter to proceed. If you will be using NIS, enter a value for the NISDOMAIN; select < Next > (using Tab and Arrows) and press Enter to proceed.
-
Page 31: Configure Timezone
A Lantronix Company SCS1620 Product Manual 5.3.3 Configure Timezone Configure Timezone, using TUC time parameters. • Set the Local Timezone • For some Timezone entries, select the sub-entry for the Local Timezone Press Enter to proceed. 15.00.032 Rev. B Page 31... -
Page 32: Configure Dns
SCS1620 Product Manual Lightwave Communications Select a value; then select < Next > and press Enter to proceed. To go back one level in the Timezone script, select the ".." line from the top of the Timezone submenu. Select a value; then select < Next > and press Enter to proceed. - Page 33 A Lantronix Company SCS1620 Product Manual Press Enter to proceed. Enter a value for the Primary Nameserver. This is a required entry. After your entry is correct, select < Next > and press Enter to proceed. 15.00.032 Rev. B Page 33...
- Page 34 SCS1620 Product Manual Lightwave Communications Enter a value for the Secondary Nameserver (if you have one). This is optional. After your entry is correct, select < Next > and press Enter to proceed. Enter a value for the Tertiary Nameserver. This is optional; leave the line blank if unused.
-
Page 35: Configure Services
A Lantronix Company SCS1620 Product Manual You are returned to the setup program menu. 5.3.5 Configure Services Configure Services (syslog, ssh and/or telnet) • Enable syslog (system logging) -- yes / no • Enable System Logins using ssh -- yes / no •... - Page 36 SCS1620 Product Manual Lightwave Communications For System Logging, select Yes or No (using the arrows), then select Next (using Tab), and press Enter to proceed. For SSH, select Yes or No (using the arrows), then select Next (using Tab), and press Enter.
-
Page 37: Configure Modem
Enter. You are returned to the setup program menu. 5.3.6 Configure Modem The Modem is optional in the SCS1620. Configure Modem, if one is installed • Enable Modem Logins (to allow PPP and/or TTY) (no=exit) • Enable Modem TTY Logins? •... - Page 38 SCS1620 Product Manual Lightwave Communications This step assumes a positive response; press Enter to proceed. Select Yes or No (using the arrows), then select Next (using Tab), and press Enter. Page 38 www.lightwavecom.com...
- Page 39 A Lantronix Company SCS1620 Product Manual Select Yes or No (using the arrows), then select Next (using Tab), and press Enter. Enter the TTY Callback number. Press 'Esc' to end the editing mode. 15.00.032 Rev. B Page 39...
- Page 40 SCS1620 Product Manual Lightwave Communications Select Yes or No (using the arrows), then select Next (using Tab), and press Enter. If you choose No, this subroutine ends, and you return to the menu, and your menu choice will skip to Configure NIS since PPP features will be disabled.
-
Page 41: Ppp, And Chap Or Pap
A Lantronix Company SCS1620 Product Manual You are then prompted for CHAP or PAP Authentication. The SCS1620 supports either CHAP or PAP, but not both. PAP is the default authentication method. 5.3.7 PPP, and CHAP or PAP PPP Authentication: Either CHAP or PAP •... - Page 42 SCS1620 Product Manual Lightwave Communications • If you select No, you will be directed to the PAP secrets steps. • If you select Yes, you will be directed to the CHAP secrets steps. Select Yes or No (using the arrows), then select Next (using Tab), and press Enter.
- Page 43 A Lantronix Company SCS1620 Product Manual You will enter the CHAP Secrets information as 4 separate fields, separated by a space, consisting of CLIENT, SERVER, SECRET and IPADDRESS. Follow the prompts on-screen for the four required fields for each secrets entry.
-
Page 44: Configure Nis
SCS1620 Product Manual Lightwave Communications 5.3.8 Configure NIS Configure NIS • Enable NIS Authentication? (no=exit) • Enter IP Address of NIS Server Press Enter to continue. Page 44 www.lightwavecom.com... - Page 45 A Lantronix Company SCS1620 Product Manual Select Yes or No (using the arrows), then select Next (using Tab), and press Enter. Enter the value for the NIS server, then select Next (using Tab), and press Enter. 15.00.032 Rev. B Page 45...
-
Page 46: Configure Ldap
SCS1620 Product Manual Lightwave Communications 5.3.9 Configure LDAP Configure LDAP • Enable LDAP (version 2) Authentication? (no=exit) • Enter IP Address of LDAP Server • Input value for the LDAP Base Press enter to continue. Page 46 www.lightwavecom.com... - Page 47 A Lantronix Company SCS1620 Product Manual Select Yes or No (using the arrows), then select Next (using Tab), and press Enter. Enter the IP address of the LDAP server, select Next (using Tab), press Enter. 15.00.032 Rev. B Page 47...
-
Page 48: Configure The Firewall
SCS1620 Product Manual Lightwave Communications Enter the LDAP base information in the answer field, then select Next (using Tab), and press Enter. If your entry was improper, you'll get a warning statement: 5.3.10 Configure the Firewall Configure the Firewall • Enable the Firewall? (no = exit) •... - Page 49 A Lantronix Company SCS1620 Product Manual Press Enter to continue. Select Yes or No (using the arrows), then select Next (using Tab), and press Enter. If you choose No, this subroutine ends, and you return to the menu. 15.00.032 Rev. B...
- Page 50 SCS1620 Product Manual Lightwave Communications • Enter DENY to ignore and not respond to any connection attempts. • Enter REJECT to return a 'connection rejected' message to any connection attempts. Then select Next (using Tab), and press Enter. Page 50...
- Page 51 A Lantronix Company SCS1620 Product Manual Select Yes or No (using the arrows), then select Next (using Tab), and press Enter. Enter the names of the TCP Public Services to be enabled (separated by a space). Any service previous enabled that is not listed here will then be disabled.
- Page 52 SCS1620 Product Manual Lightwave Communications Enter the names of the UDP Public Services to be enabled (separated by a space). Any service previous enabled that is not listed here will then be disabled. Please note that this does not 'remove' a service from the system, but merely turns it off.
-
Page 53: Done
A Lantronix Company SCS1620 Product Manual 5.3.11 Done Upon completion of the previous programming options, you must save the values in order to commit them to memory and enable the changes. Likewise, you can exit the setup program without making any changes at this time. - Page 54 SCS1620 Product Manual Lightwave Communications Press Enter to continue. Select Yes or No (using the arrows), then select Next (using Tab), and press Enter. If you select Yes, the system will commit the changes to memory (same as performing a 'SAVE' but without requiring the sysadmin to use SAVE).
- Page 55 A Lantronix Company SCS1620 Product Manual The system then writes and properly stores the files. Depending on the features and options you have selected (especially Firewall options), this can take several minutes. Please be patient. 15.00.032 Rev. B Page 55...
-
Page 56: Save
SAVE the changes, and / or reboot in some cases. SAVE The SCS1620 will automatically save the programmed parameters after running the setup script for the first time only. The sysadmin MUST run the SAVE script after any programming changes, if the changes are to be maintained in the non-volatile memory. -
Page 57: Reboot
A Lantronix Company SCS1620 Product Manual Reboot The SCS1620 will automatically reboot after running the setup script for the first time only. Reboot may be manually run if required. If file changes are not yet saved into non-volatile memory, the Reboot operation includes a prompt, allowing you to SAVE the files if desired. -
Page 58: Commands
Set the Timeout timers version Show version information SAVE SAVE SAVE SAVE 6.1.1 Command The SCS1620 is a software based system that operates using both RAM and FLASH memory to function. Any programming changes are temporarily stored in Page 58 www.lightwavecom.com... -
Page 59: Reboot Command
6.1.2 reboot reboot reboot Command reboot The SCS1620 can be rebooted at any time using the command reboot reboot. The reboot reboot system will reset, all users will be disconnected, and the power-on self-test will run. -
Page 60: System Commands
SCS1620's shell, where this function is performed by the sysadmin. The root user is not used by the SCS1620, however some of the commands and functions of Linux / UNIX require root to exist, and others (e.g., ssh) can allow access to root (if so configured). - Page 61 Since this powerful user exists in the system, it presents a security issue that must be addressed by changing the default password for root (which is root) to some other value, in order to secure your SCS1620. The sysadmin must login...
- Page 62 SCS1620 listuser utility V1.04 modem_reset: SCS1620 modem_reset V1.01 perms: SCS1620 test permissions V1.09 timeoutd: SCS1620 logout users who have exceeded the idle timeout. V1.65 EXAR-XR16L788 Device Driver-LCI Buffers version 1.14 SCS1620 release date: Fri Mar 1 17:58:03 2002 sysadmin>...
- Page 63 Use ssh to open up a secure shell connection between two hosts, to transfer files or data between the systems. In this case, the SCS1620 is a client device, and will be connected to an ssh host elsewhere. The security keys for ssh may need to be generated using ssh-keygen, depending on your application of ssh.
- Page 64 SCS1620 Product Manual Lightwave Communications To change the logging level: 1. login as sysadmin 2. enter bash bash bash bash 3. edit the file /etc/syslog.conf /etc/syslog.conf /etc/syslog.conf /etc/syslog.conf (vi /etc/syslog.conf) 4. restart the system logger by typing: service syslog restart...
-
Page 65: Device Commands
A Lantronix Company SCS1620 Product Manual Device Commands Device port parameters must be defined by the administrator using the devices devices devices devices or editdev editdev commands. editdev editdev sysadmin>devices 1 Enter accepts present value D1: Enter device name | NAME: DEVICE_01>... - Page 66 SCS1620 Product Manual Lightwave Communications The format of the bit-wise transmission of data is determined by the stop bits, parity, and data bits parameters. The default settings are 1 stop bit, no parity, and 8 data bits. Check the equipment documentation for the proper settings.
-
Page 67: Creating And Managing Users
A Lantronix Company SCS1620 Product Manual Creating and Managing Users The following commands are performed by sysadmin to change settings for system Users. The sysadmin is also a User, although one that cannot be deleted. The administrator is prompted to define the device ports that the user will be allowed to access for direct connections. - Page 68 SCS1620 Product Manual Lightwave Communications listusers Use listusers listusers to get a list of all assigned users in the SCS1620. listusers listusers sysadmin>listusers test sysadmin user1 kevin ross bill anthony harry george adduser Use adduser <user adduser <user name> name> to add a new user profile including their adduser <user...
- Page 69 A Lantronix Company SCS1620 Product Manual NOTE: The passwords should be 6 characters or longer. If a password is less than 6 characters long, you will be warned that it is a 'bad password: too short'. However, if the sysadmin ignores this advice and re-enters the 'bad' password again (to confirm it), the system will accept it.
- Page 70 SCS1620 Product Manual Lightwave Communications deluser Use deluser <user name> deluser <user name> deluser <user name> to delete an existing User ID from the system. deluser <user name> Note: The 'delete user' prompt does not verify whether you wish to delete the user or not.
-
Page 71: End User Commands
A Lantronix Company SCS1620 Product Manual End User commands When the user is logged in to the system, their user name is the command prompt. For example, ross> will be displayed when Ross is logged in. 6.5.1 User Log In The user can log into the system using their User Name and their password, and can then perform different port selection steps. -
Page 72: Escape Sequence
SCS1620 Product Manual Lightwave Communications 6.5.2 Escape Sequence The user can disconnect from a port by performing an 'escape' using their programmed Escape sequence. The preset value for this option is 'ESC then A', which must be performed quickly but not simultaneously. -
Page 73: Modem Setup
SCS1620 Product Manual 7.0 Modem Setup If your SCS1620 system was shipped with a modem installed, it is not necessary to perform the Modem Setup and you can skip this chapter. This may only be required if the modem module is installed in the field. -
Page 74: Modem Initialization
SCS1620 Product Manual Lightwave Communications Modem Initialization If a modem card is installed into a working SCS1620, it must be initialized for proper operation with the system. The sysadmin does this using the install_modem install_modem command. This command forces a hardware reset of the... -
Page 75: User Access And Functions
10 or 100 Mbits, auto-negotiating, on 10/100base T (Cat 5) wiring. To connect to the SCS1620 network port, the user should use a TCP/IP telnet client to telnet to the IP address assigned to the SCS1620, or use ssh. -
Page 76: Selecting A Device Port
2. If the system administrator has determined that the user does not have permission to access a server, the SCS1620 will display the message NO ACCESS TO DEVICE CHANNEL, and the connection will not be made. The user may exit from their current device port first by using the exit... - Page 77 A Lantronix Company SCS1620 Product Manual It is recommended that the user only change the escape sequence if it causes problems with the hardware or software used. It is also recommended that the user avoid combinations of the <CTRL> key and other keys, as these combinations are usually reserved for sending and receiving special characters through the terminal.
-
Page 78: Appendix A - Terminal Port And Adapter Pinouts
SCS1620 Product Manual Lightwave Communications Appendix A – Terminal Port and Adapter Pinouts SCS1620 SCS1620 Terminal / Device Terminal / Device (DCE) (DTE) pin 1 100 Washington Street, Milford CT 06460 800 871-9838 * Fax 203 874-0157 * www.lightwavecom.com Title:... - Page 79 A Lantronix Company SCS1620 Product Manual pin 1 DB25 RJ45 MALE 261 Pepe's Farm Road, Milford CT 06460 800 871-9838 * Fax 203 874-0157 * www.lightwavecom.com Title: RJ45 Receptacle to DB25M Adapter Part Number 200.0066 Drawing Number 700.200.0066 SCS1620 System:...
- Page 80 SCS1620 Product Manual Lightwave Communications pin 1 DB25 RJ45 FEMALE 100 Washington Street, Milford CT 06460 800 871-9838 * Fax 203 874-0157 * www.lightwavecom.com Title: RJ45 Receptacle to DB25F Adapter Part Number 200.0067 Drawing Number 700.200.0067 SCS1620 Size: System: Rev: 200d0067-1620.vsd...
- Page 81 A Lantronix Company SCS1620 Product Manual pin 1 RJ45 MALE 261 Pepe's Farm Road, Milford CT 06460 800 871-9838 * Fax 203 874-0157 * www.lightwavecom.com Title: RJ45 Receptacle to DB9M Adapter Part Number 200.0069 Drawing Number 700.200.0069 System Console Switch...
- Page 82 SCS1620 Product Manual Lightwave Communications Use PN 200.0070 Adapter with a PC's serial port pin 1 RJ45 FEMALE 100 Washington Street, Milford CT 06460 800 871-9838 * Fax 203 874-0157 * www.lightwavecom.com Title: RJ45 Receptacle to DB9F Adapter Part Number 200.0070...
- Page 83 Use this Adapter for Netra / SUN / CISCO, others RJ45 RJ45 female female 100 Washington Street, Milford CT 06460 800 871-9838 * Fax 203 874-0157 * www.lightwavecom.com Title: Netra t1 to SCS1620 RJ45 adapter pinout Part Number 200.0225 Drawing Number 700.200.0225 SCS1620 Size: System: Rev: 200d0225.vsd...
-
Page 84: Appendix B - Flash Update Procedure
(downloaded from Lightwave's FTP site) which consists of two files: a tar file and an update script file. The two files must always be used as a matched set (same version). The update files will affect the data stored on the SCS1620's FLASH device, however the programmed data will remain intact. - Page 85 A Lantronix Company SCS1620 Product Manual The SCS1620 system must be shut down (using the "poweroff" command) and disconnected from power before replacing the Flash. The cover must be removed, so if it is installed it must be removed from service so that the case is accessible.
- Page 86 5. The Flash installation is complete. Replace the cover, and reinstall the screws. The system is ready to go back into service. It is now a 'factory fresh' system. Start up your Factory-Fresh SCS1620 System 6. When the system is started up, you will have to configure all of your parameters.
-
Page 87: Appendix C - System Specifications
A Lantronix Company SCS1620 Product Manual Appendix C – System Specifications Physical Width: 17.25 inches (4.45 cm) Depth: 8.00 inches (20.32 cm) Height: 1.75 inches (4.45 cm) 1 RU Shipping weight: 15 pounds (6.80 kg) Environmental Operating temperature range: 32°F (0°C) to 125°F (52°C) -
Page 88: Dc Power
SCS1620 Product Manual Lightwave Communications C.3.2 DC Power -48 volt only, externally fused Input voltage: -48 VDC Maximum power consumption: 25 W Typical power consumption: 15 W (total input power) Interface C.4.1 Terminal and Device Connector: RJ45 Specification: EIA-232 Maximum baud rate:... -
Page 89: Compliance And Certification
Compliance and Certification Safety For USA and Canada: The SCS1620 has been tested and listed by Entela Inc, a Nationally Recognized Test Lab, as compliant with UL 1950 3 edition and CSA 22.2 No. 950-95. Entela is a USA OSHA Nationally Recognized Testing Laboratory (NRTL), an accredited Certification Organization by the Standards Council of Canada (SCC), and an IECEE –... -
Page 90: Appendix D - Dc Power Specifications
• fast trip • DC rated • Overcurrent protection devices (e.g., circuit breakers) must be provided as part of each installation, and are not included with the SCS1620 • The device must be located between the DC power source and the SCS1620 DC Supply Connector The supply input connectors are provided with each SCS1620. -
Page 91: Appendix E - Hexadecimal Ascii Code
A Lantronix Company SCS1620 Product Manual Appendix E – Hexadecimal ASCII Code Equivalent characters in italics are non-printing characters or signals. Hexadecimal Equivalent Hexadecimal Equivalent Code Character Code Character “ & ‘ < > 15.00.032 Rev. B Page 91... - Page 92 SCS1620 Product Manual Lightwave Communications Hexadecimal Equivalent Hexadecimal Equivalent Code Character Code Character Page 92 www.lightwavecom.com...
-
Page 93: Appendix F - Some Unix Command Help
A Lantronix Company SCS1620 Product Manual Appendix F – Some UNIX Command Help Some UNIX / Linux commands are used in administering the SCS1620. The less less less less command is automatically invoked by some of the system commands (e.g.,... - Page 94 SCS1620 Product Manual Lightwave Communications SEARCHING /pattern Search forward for (N-th) matching line. ?pattern Search backward for (N-th) matching line. ESC-^B <c1> <c2> Find open bracket <c1> ?pattern Search backward for (N-th) matching line. Repeat previous search (for N-th occurrence).
-
Page 95: Editor Commands
A Lantronix Company SCS1620 Product Manual OPTIONS Most options may be changed either on the command line, or from within less by using the - or -- command. Options may be given in one of two forms: either a single character preceded by a -, or a name preceeded by --. -
Page 96: Using Vi In Command Mode
SCS1620 Product Manual Lightwave Communications F.2.3 Using vi in Command mode The following keyboard commands apply to vi in Command mode. The cursor is moved within the open file using the following position commands: • h moves cursor to left (left arrow) •... -
Page 97: Release Notes
This information is provided to clarify the steps required for root level access, and in changing the root password. To Change the root-level password of the SCS1620, follow the example above. The default root password is root. - Page 98 SCS1620 Product Manual Lightwave Communications For Your Notes Page 98 www.lightwavecom.com...
Need help?
Do you have a question about the SCS1620 and is the answer not in the manual?
Questions and answers