Table of Contents
Advertisement
SAFETY PRECAUTION
CAUTION:
The lightening flash with
arrowhead symbol, within an
equilateral triangle, is intended
to alert the user to "dangerous
voltage" and to prevent from a
risk of electric shock.
WARNING: The apparatus shall not be exposed to dripping or splashing and that no objects filled
with liquids, such as vases, shall not be placed on the apparatus.
WARNING: Do not put the candle or lamp stand on the cabinet; otherwise, there is the danger of
fire.
WARNING: The unit should be connected to a power supply only of the type descry bed in the
operating instructions or as marked on the unit. If you are not sure of the type of power supply (for
example: 120 or 230V) to your home, consult your local dealer or local power company.
WARNING: Do not open the cabinet or touch any parts in the inner mechanism. Consult your local
dealer for technical service if the opening is required.
WARNING: The mains plug is used as the disconnect device, the disconnect device shall remain
readily operable.
WARNING: The battery of remote control should not be exposed excessive heat such as sunshine,
fire or the like.
WARNING: Maintenance man must use the appointed screw in the rear plate.
Note: Do not open the cabinet to avoid the unit direct exposure to radiation.
Unit Cleaning: After the unit power is turned off, you can clean the cabinet, panel and remote
control with a soft cloth lightly moistened with a mild detergent solution.
Attachments: Never add any attachments and/or equipment without the manufacturer consent; as
such additions may result in the risk of fire, electric shock or other personal injury.
Warning:
To reduce the risk of electric
shock, don't open the cabinet.
Refer servicing to qualified
personnel only.
The exclamation point within an
equilateral triangle is intended to
alert the user to important
operating and maintenance
(servicing).
Advertisement
Table of Contents

Summary of Contents for starsat SR-98USB
-
Page 1: Safety Precaution
SAFETY PRECAUTION CAUTION: The lightening flash with Warning: The exclamation point within an arrowhead symbol, within an To reduce the risk of electric equilateral triangle is intended to equilateral triangle, is intended shock, don't open the cabinet. alert the user to important to alert the user to "dangerous Refer servicing to qualified operating and maintenance... - Page 2 Locating: Slots and openings in the cabinet are provided for ventilation to protect it from overheating. Do not block these openings or allow them to be blocked by placing the STB on a bed, sofa or other similar surface, nor should it be placed over a radiator or heat register. Power-Cord Protection: Place the power-supply cord out of the way, where it will not be walked on.
-
Page 3: Table Of Contents
Contents Contents 1 Remote Control & Panel Description ..................3 1.1 Front Panel Description ......................3 1.2 Rear Panel Description......................4 1.3 Remote Control Description .....................5 2. Basic Operations.......................... 7 2.1 Switch on STB ..........................7 2.2 Standby Mode...........................7 2.3 Mute ............................7 2.4 TV/Radio ...........................7 2.5 Format ............................7 2.6 V.OUT ............................8 2.7 Audio ............................8... - Page 4 Contents 2.43 ►I◄ ............................15 2.44 I◄◄/►►I ..........................15 2.45 LNB Short..........................15 3 Menu Operations ......................... 16 4 Installation ............................ 17 4.1 Antenna setting ........................17 4.2 Automatic Satellite Search .....................18 4.3 Manual TP Search ........................19 4.4 Blind scan..........................19 4.5 Transfer Data ..........................19 4.5.1 Transfer Main S/W .......................20 4.5.2 Transfer Channel Data....................20 4.5.3 Transfer Main+Channel ....................20...
-
Page 5: Remote Control & Panel Description
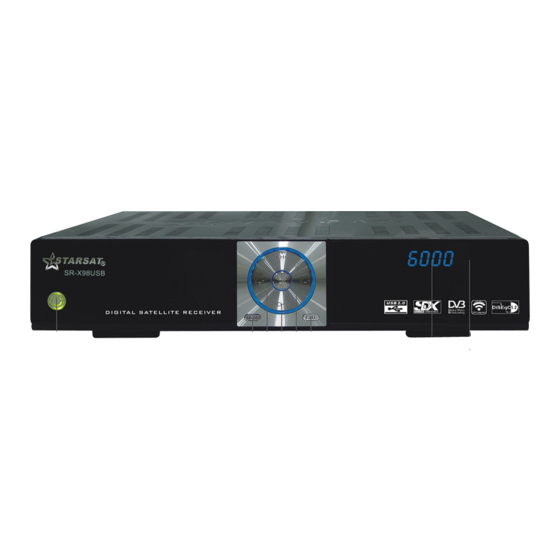
Remote Control & Panel Description 1 Remote Control & Panel Description 1.1 Front Panel Description POWER: Is used to switch between the working mode and the standby mode. MENU: To enter into the main menu and exit all menus. VOL+/-: To change volume to move cursor, change numbers in the menu or to change the choice. -
Page 6: Rear Panel Description
Remote Control & Panel Description 1.2 Rear Panel Description IF IN: Satellite input. IF OUT: Satellite output for cascading to other devices Note: The operation of another receiver at the same time is only possible with limited channel selection. RS-232: Serial Port allowing software upgrades. -
Page 7: Remote Control Description
Remote Control & Panel Description 1.3 Remote Control Description... - Page 8 Remote Control & Panel Description Power: The power key turns the receiver on and off. Mute: This key switches the sound on and off. TV/R: Selects TV or Radio channels. Format: Switch the display mode. V.OUT: Switch the video output. Audio: Open the Audio Mode window.
-
Page 9: Basic Operations
Basic Operations 2. Basic Operations 2.1 Switch on STB Switch the [Device’s Main Power] switch on. When the STB is first used it will display “Quick Setup” window. you will set Language, First Audio, Second Audio, LNB Power, Antenna Setup and Multi Search. Frequently Asked Question The power of my STB is on and it is running in TV mode but the TV screen shows nothing:... -
Page 10: V.out
Basic Operations 2.6 V.OUT In TV mode, press [V.OUT] button to display Mode is used to switch the video output. 2.7 Audio In TV mode, press the [Audio] button to open the Audio Mode window. Select the item you want to adjust with [CH▲/▼] and change the value with [VOL◄/►]. 2.8 SUB In “Subtitle Display”... -
Page 11: Zoom
Basic Operations 2.11 Zoom In TV mode, press [Zoom] to enter the “MULTI” menu. press [CH▲/▼] to switch ZOOM, 4 picture, 9 picture, 12+1 picture & 16 picture. press [OK] to confirm it. [ZOOM] The [Zoom] key allows you to magnify a certain area on the images and the current screen will show Press [Zoom &... -
Page 12: Sleep
Basic Operations 2.12 Sleep Press [Sleep] button in TV mode to set the sleep timer. You will see “Sleep TIME OFF / Sleep TIME 10 ~ Sleep TIME 120”. If you ser a sleep time, the system will change to standby mode after the chosen time period. 2.13 SAT In TV mode, press [SAT] button to open satellite list and select there, then press [OK] to open “TV Channel List”... -
Page 13: Epg
Basic Operations 2.16 EPG The STB supports Electronic Program Guides (EPG) to give you information about the actual programs of certain channels like event name, subtitle, description, start and finish time. This feature is depending on the service of the channel provider. Press [EPG] to open the EPG window. -
Page 14: Info ( )
Basic Operations 2.18 INFO ( ) In TV mode, press [INFO] button can open information screen, in the window shows the parameters of current channel. program information will be displayed for a few seconds. The information may include: if you press the [INFO] button again on the information mode, the detail EPG window will appear 2.19 CH▲/▼... -
Page 15: Menu
Basic Operations 2.22 MENU Press [Menu] button to enter or exit the current menu. 2.23 EXIT Press [Exit] button to exit the current menu. 2.24 PGUP / PGDN In menu list, Press [PGUP/PGDN] on the RCU to jump between the list by pages. 2.25 Used to display the main menu. -
Page 16: Cal
Basic Operations 2.33 Cal. Have no function. 2.34 Weather Have no function. 2.35 PVR LIST In TV mode, press [PVR LIST] button to access directly to the “Record List” menu. 2.36 A-B In recorded mode, during your watching, press [A-B] button to set up a starting point A, then set another point B by press [A-B] button again after a while, then it will start to playback from A to B and repeat the programs between this two points if no any interruption. -
Page 17: I◄◄/►►I
Basic Operations 2.40 ● ● In TV mode, press [ ] button you want to record. 2.41 ◄◄/►► When you play a recorded channel, press [◄◄] button to back the program fast and Press [►►] to fast forward the program. Selection: 2x, 4x, 8x speed . -
Page 18: Menu Operations
Menu Operations 3 Menu Operations During the installation, short information is displayed at the bottom of the menu screen. After you finish the setup procedure, you can start watching TV or listening to Radio. Turn on you TV and receiver. The pop-up menu for language selection will appears. -
Page 19: Installation
Menu Operations 4 Installation After selecting the installation menu you can see the window like. In “Installation” menu; Press [CH▲/▼] to select menu items among Antenna setting, Automatic Satellite Search, Manual TP Search, Blind Scan, Transfer Data, Reset Factory Default. Press [OK] to enter the selected item. -
Page 20: Automatic Satellite Search
Menu Operations when return to previous menu or exit the dish setup, press the exit button. if you changed the data in Dish setup, the confirmation window will appears. if you want to save the changes, select the YES, if you don't want to save the changes, Select the NO or press the EXIT button again. Press [CH▲/▼] to select menu items among Automatic Satellite Search, Manual TP Search &... -
Page 21: Manual Tp Search
Menu Operations 4.3 Manual TP Search After selecting the Manual TP Search menu you can see the window like. In “Manual TP Search” menu; In the “Satellite” item press [Vol◄/►] to select the “satellite list” to select directly with [CH▲/▼], press [OK] to confirm it. In the “Frequency”... -
Page 22: Transfer Main S/W
Menu Operations Press [CH▲/▼] to select menu items among Transfer Main S/W, Transfer Channel Data, Transfer Main+Channel, Download from USB, Upload to USB, OTA Upgrade. Press [OK] to enter the selected item. 4.5.1 Transfer Main S/W After selecting the Transfer Main S/W menu you can see the window like. In “Transfer Main S/W”... -
Page 23: Download From Usb
Menu Operations 4.5.4 Download from USB After selecting the Download from USB menu you can see the window like. In “Download from USB” menu; This option allows updating the software of the receiver with the received data from a USB memory device. -
Page 24: Reset Factory Default
Menu Operations This function can upgrade the software of your receiver through data sent by a satellite. Auto OTA Config: Select the type of upgrade you have. Off: Off auto OTA upgrade. Auto: Presetting timer mode and the system could upgrade automatically in standby mode. -
Page 25: Service Organizing
Menu Operations 5 Service Organizing After selecting the Service Organizing menu you can see the window like. In “Service Organizing” menu; Press [CH▲/▼] to select menu items among Channel Properties, Edit Channels, Remove Satellite, Channel Sort & Edit Transponder List. Press [OK] to enter the selected item. -
Page 26: Edit Channels
Menu Operations 5.2 Edit Channels After selecting the Edit Channels menu you can see the window like. In “Edit Channels” menu; This menu can support you to delete, move and rename the channel of normal channel. You can move the highlighted channel with [CH▲/▼] to preview the highlighted program in the preview window. -
Page 27: Channel Sort
Menu Operations 5.4 Channel Sort After selecting the Channel Sort menu you can see the window like. In “Channel Sort” menu; In this menu, you can choose the channel array type. In the “Channel Sort” item press [Vol◄/►] to switch Name(A-Z), Name(Z -A), FTA, Lock & Default . -
Page 28: Stb Setting
Menu Operations 6 STB Setting After selecting the STB Setting menu you can see the window like. In “STB Setting” menu; Press [CH▲/▼] to select menu items among Output Setting, Parental Lock, Language Setting, OSD Setting, Clock Set & Automatic Standby. Press [OK] to enter the selected item. -
Page 29: Parental Lock
Menu Operations 6.2 Parental Lock After selecting the Parental Lock menu you can see the window like. In “Parental Lock” menu; In this menu, You can select Rating & Mode. Rating: Press [Vol◄/►] to select menu items among No Rating, 7, 12, 15 &18. Mode. -
Page 30: Clock Set
Menu Operations In this menu, You can select TTXT Transparency, OSD Transparency, OSD Timeout & Subtitle Display. TTXT Transparency: With this parameter you can set the transparency of the menus. Press [Vol◄/►] select the value between 10%, 20%, 30%, & “Off”(means no transparency function). -
Page 31: Automatic Standby
Menu Operations Time Display: Press [Vol◄/►] to switch this function “On” or “Off”. NOTE: If the current channel provides the correct time information, you will see the current time after you entered “Local Time Setting” menu. If the channel doesn’t provide time information, you have to input the date and time information manually. -
Page 32: Stb Status
Menu Operations 7 STB Status When you select the “STB Status” menu you will see a screen like beside. The screen displays data about the current STB. Press [Exit] button to leave the information display. 8 Reservation You can reserve a channel recording at your desired time. In this mode, you can reserve channels up to 16. -
Page 33: Cas
Menu Operations If it is duplicated with the time zone that was already registered at a reservation list, the alarm message appears which it is not able to register. In this case, you must register a reservation for other time zone. 9 CAS When you enter to “CAS”... -
Page 34: Pvr
Menu Operations 10 PVR After selecting the PVR menu you can see the window like. In “PVR” menu; Press [CH▲/▼] to select menu items among PVR Setting, Disk Information, Format Disk, Picture Setup & Media list. Press [OK] to enter the selected item. 10.1 PVR Setting After selecting the PVR Setting menu you can see the window like. -
Page 35: Disk Information
Menu Operations 10.2 Disk Information When you select the “Disk Information” menu you will see a screen like beside. The screen displays data about the current HDD. Press [Exit] button to leave the information display. 10.3 Format Disk Format Disk: If you want to delete the hard disk totally, you can do it with the [OK] Button Format and the hard disk will be completely erased. -
Page 36: Media List
Menu Operations Select the item you want to adjust with [CH▲/▼] and change the value with [VOL◄/►] Size: Full and Real. Time: 0 Sec, 1 Sec, 2 Sec, 3 Sec, 4 Sec, 5 Sec, 6 Sec, 7 Sec, 8 Sec and 9 Sec. Repeat: On and Off. - Page 37 Menu Operations [Delete] Select the file you want to delete using the [CH▲/▼] button. If you decide to delete the file, Press OK on the pop-up window. Press [MENU & EXIT] button you will be asked “Are you sure to save?”. Select “OK” to confirm it. Select “No”...
- Page 38 Menu Operations [Rename] Select the file you want to Rename using the [CH▲/▼] button. If you decide to Rename the file, Press OK on the pop-up window. Press [CH▲/▼] & [Vol◄/►] to select the leading character of the channel name and press [OK] to confirm it.
-
Page 39: Troubleshooting
Troubleshooting 11 Troubleshooting There may be various reasons behind receiver problems. Check the receiver according to the procedures described below. If you can’t solve your problem even after following the troubleshooting procedures, please contact the dealer, Do not open the receiver cover, it may cause a dangerous situation. -
Page 40: Technical Specification
Technical Specification 12 Technical Specification VIDEO Decoding MPEG-2 & MEPG-1 compatible Bit rate Max 15Mbps Output PAL/NTSC Aspect ratio 4:3, 16:9, Auto Active pixel 720x480 @ 30fps; 720x576 @ 25fps Output connector RCA, SCART AUDIO Decoding MPEG-2/MPEG-1 layer I & II Mode Mono, Dual, Stereo, Joint stereo Bit rate...
Need help?
Do you have a question about the SR-98USB and is the answer not in the manual?
Questions and answers
سلام سال تولید این مدل کی است؟
@محمدجواد مومنی آشجردی