Advertisement
Quick Links
Advertisement

Related Manuals for FPV Model ZMR250 V2

Summary of Contents for FPV Model ZMR250 V2
- Page 1 ZMR250 V2 Build Manual...
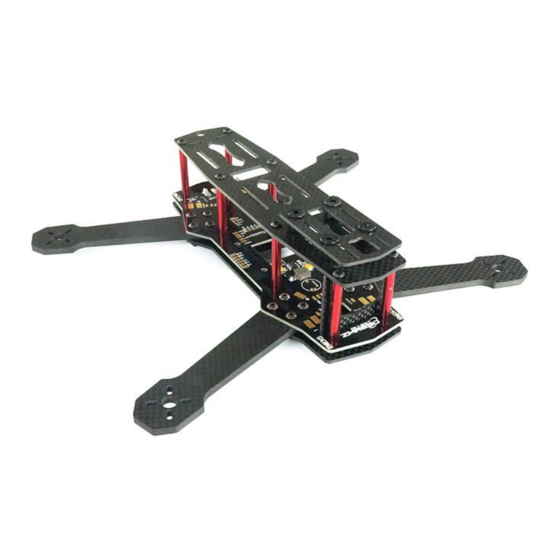
- Page 2 Our carbon fiber has been sourced and quality checked to ensure that you are getting the best quality 3k carbon fiber around. Including a full PDB w/LED lighting system you cant find a better deal out there! Introducing the ZMR250 V2!!!
- Page 3 Solder the Transmitter and Camera Cut the wires of camera to suitable length and solder them to PDB. Red wire: Power Black Wire: GND Yellow: Signal Solder the power supply wire and video wire (yellow) of transmitter to PDB.
- Page 4 Install OSD The OSD firmware must be flashed and compatible to the Flight Controller before installation. If you don’t need to install the OSD, please just skip this step. Solder the pin headers onto PDB. Install the OSD on PDB. Insert it onto the pin heads and soldered. After secured, cut off the unnecessary length of pins.
- Page 5 Install the Buzzer Pay attention to the positive pole “+” on the buzzer. It needs to be soldered to the buzzer location on PDB. Cut off the unnecessary pins.
- Page 6 Install ESCs Solder the ESCs onto PDB. The black wires can be parallel connected to the negative pole “-”. Install Brushless Motors The motor’s rotation direction can be changed by changing any two wires.
- Page 7 Extension If the OSD and buzzer are installed, then you’ll need to use the supplied wires to solder onto PDB. Please take notice of wire length.
- Page 8 Install Flight Controller...
- Page 10 If you’re using the old version PDB (V1.0), you’ll need to use the supplied insulation washers when fastening arms to the PDB. The washers are not required if use higher version PDB (v1.2 or above). Note: The ZMR250 V2 that sold after August 25th, 2015 does not need to use the washers.
- Page 12 Way to go! You’ve completed the ZMR250 V2 build.
Need help?
Do you have a question about the ZMR250 V2 and is the answer not in the manual?
Questions and answers