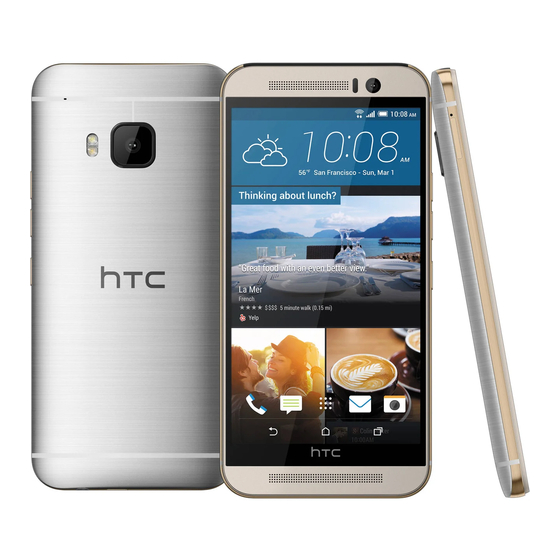
HTC One M9 User Manual
Hide thumbs
Also See for One M9:
- User manual (337 pages) ,
- Getting started manual (15 pages) ,
- Get started manual (9 pages)
Table of Contents
Advertisement
Quick Links
Download this manual
See also:
User Manual
Advertisement
Table of Contents

Related Manuals for HTC One M9


Summary of Contents for HTC One M9
-
Page 1: User Guide
User guide HTC One® M9... -
Page 2: Table Of Contents
Charging the battery Switching the power on or off Phone setup and transfer Setting up HTC One M9 for the first time Restoring content from HTC Backup Transferring content from an Android phone Ways of transferring content from an iPhone... - Page 3 Contents Turning HTC BlinkFeed on or off Restaurant recommendations Ways of adding content on HTC BlinkFeed Customizing the Highlights feed Posting to your social networks Removing content from HTC BlinkFeed Camera Camera basics Selfies and people shots Raw Camera Split Capture...
- Page 4 Contents Moving messages to the secure box Blocking unwanted messages Copying a text message to the nano SIM card Deleting messages and conversations Entertainment HTC BoomSound with Dolby Audio HTC Music FM Radio HTC Connect Power and storage management Battery...
- Page 5 Internet connections Turning the data connection on or off Managing your data usage Wi-Fi connection Connecting to VPN Using HTC One M9 as a Wi-Fi hotspot Sharing your phone's Internet connection by USB tethering Wireless sharing Bluetooth Settings and security...
- Page 6 Contents Index...
-
Page 7: About This Guide
About this guide About this guide In this user guide, we use the following symbols to indicate useful and important information: This is a note. A note often gives additional information, such as what happens when you choose to do or not to do a certain action. A note also provides information that may only be applicable to some situations. - Page 8 Important RF Notice Important RF Notice This device was tested for compliance with the applicable FCC and Industry Canada specific absorption rate (SAR) limits for radio frequency (RF) exposure during typical body-worn operations. To ensure that RF exposure levels remain at or below the tested levels, use a belt-clip, holster, or similar accessory that maintains a minimum separation distance of 1.0 cm between your body and the device, with either the front or back of the device facing towards your body.
- Page 9 Important note on recoverable data Important note on recoverable data Files and other data that have been deleted, cleared, removed, or erased from your device may still be recoverable by third-party data recovery software. Even a factory reset may not permanently erase all data from your mobile device, including personal information.
-
Page 10: What's New
123 and Setting up your storage card as internal storage on page 123. Network settings reset Quickly reset all network settings when HTC One M9 has a hard time connecting to the mobile data or Wi-Fi ® network or Bluetooth ®... -
Page 11: Htc App Updates
185. HTC app updates ® From time to time, HTC adds or enhances features in apps such as HTC Sense Home, Camera, Gallery, and more. Download and install the latest updates of HTC and other apps from Google Play ™... -
Page 12: Unboxing
§ If you want to use a case or screen protector, don’t cover and block the proximity sensor. Purchase a case or screen protector designed for HTC One M9. § Avoid connecting third-party headsets or accessories with metallic charms that dangle near the headset jack. -
Page 13: Nano Sim Card
Unboxing Also, if you want to use a protective case, make sure to buy a case that's designed for HTC One M9 and that doesn't block the trays. nano SIM card HTC One M9 uses a nano SIM card. Use a standard nano SIM card only. Inserting a modified card that is thicker than the standard nano SIM card may cause the card to not fit properly or damage the card slot. -
Page 14: Storage Card
5. Insert the card tray back into the slot. Removing a nano SIM card Make sure to switch off HTC One M9 before removing the card. 1. Hold the phone face down. 2. Insert the tip of the tray eject tool that came with your phone—or a small bent paperclip—... -
Page 15: Inserting The Microsd Card
If it's the first time you insert a microSD card, you'll be prompted to set it up. Unmounting the storage card When you need to remove the storage card while HTC One M9 is on, unmount the storage card first to prevent corrupting or damaging the files in the storage card. -
Page 16: Removing The Microsd Card
Unboxing Removing the microSD card Make sure to unmount your microSD card before removing it. See Unmounting the storage card on page 15. 1. Hold the phone face up. 2. Insert the tip of the tray eject tool that came with your phone—or a small bent paperclip— into the microSD tray eject hole. -
Page 17: Charging The Battery
Before you turn on and start using HTC One M9, it is recommended that you charge the battery. § If the battery has been discharged for several days, you may need to charge HTC One M9 for several minutes before powering it on. - Page 18 Unboxing Switching the power off 1. If the display is off, press the POWER button to turn it back on. 2. Press and hold the POWER button for a few seconds. 3. Tap Power off on the options menu.
-
Page 19: Phone Setup And Transfer
Phone setup and transfer Setting up HTC One M9 for the first time When you switch on HTC One M9 for the first time—or after you've done a factory reset—you’ll be asked to set it up. You can enable TalkBack to navigate by voice feedback before selecting the language. Press and hold two fingers on the screen until you hear a message saying that accessibility mode is enabled. -
Page 20: Restoring Content From Htc Backup
131 for details. Transferring content from an Android phone On your old Android phone, download the HTC Transfer Tool and use it to transfer your content to HTC One M9. The types of locally stored content on your old phone that the HTC Transfer Tool can transfer include contacts, messages, calendar events, music, photos, videos, and some settings. -
Page 21: Ways Of Transferring Content From An Iphone
4. Enter your iCloud email address and password, and then tap Sign in. 5. Choose the iPhone backup that you want to transfer to HTC One M9, and then tap Next. 6. Choose the types of content you want to transfer, and then tap Import. -
Page 22: Transferring Photos, Videos, And Music Between Your Phone And Computer
HTC One M9 and your computer on page 125. § Download and use the HTC Sync Manager software on your computer. You can set it up to automatically get music, photos, and videos off HTC One M9 to your computer. You can also sync playlists from your computer to the phone. - Page 23 Phone setup and transfer Customizing Quick Settings You can remove, replace, or rearrange the tiles in Quick Settings. 1. With two fingers, swipe down from the top of the screen to open Quick Settings. 2. Tap and do one of the following: §...
-
Page 24: Getting To Know Your Settings
§ Tap Accounts & sync to add and sign in to your different accounts, such as email, social networks, and more. § Tap Security to help secure HTC One M9, for example with a screen lock. in Settings to quickly find options and settings. - Page 25 App updates are installed automatically. You'll still need to confirm when to install system software updates. Installing a software update When HTC One M9 is connected to the Internet and there's a new software update available, the update notification icon appears in the status bar.
-
Page 26: Getting Apps From Google Play
Wi-Fi network. Once connected, tap Check now to check for updates. Getting apps from Google Play Google Play is the place to go to find new apps for HTC One M9. Choose from a wide variety of free and paid apps ranging from productivity apps, entertainment, to games. -
Page 27: Downloading Apps From The Web
§ Before you can install the downloaded app, make sure that you've set HTC One M9 to allow installation of third-party apps in Settings > Security > Unknown sources. -
Page 28: Uninstalling An App
Phone setup and transfer Uninstalling an app If you no longer need an app that you've downloaded and installed, you can uninstall it. Most of the preloaded apps cannot be uninstalled. From the Apps screen, press and hold the app you want to remove, and then drag it to Uninstall. If you purchased an app in Play Store, you can uninstall it for a refund within a limited time. -
Page 29: Your First Week With Your New Phone
Basics HTC Sense Home After you've turned on and set up HTC One M9 for the first time, you'll see the Home screen. § Set up the HTC Sense Home widget to experience the convenience of a Home screen that automatically adjusts when you're at home, work, or outdoors. -
Page 30: Unlocking The Screen
§ Press and hold the fingerprint sensor. § Swipe up to unlock the screen. If you've set up a screen lock, you'll be asked to provide your credentials before HTC One M9 unlocks. If you've set an event reminder or an alarm, you can snooze or dismiss the event or alarm right from the lock screen. - Page 31 Your first week with your new phone Pick up to lower volume In a business meeting or restaurant, pick HTC One M9 up when a call comes in to lower the ring volume automatically. You can turn this feature on or off. Go to Settings, tap Sound &...
-
Page 32: Touch Gestures
Your first week with your new phone Touch gestures Use touch gestures to get around the Home screen, open apps, scroll through lists, and more. Tap the screen with your finger when you want to select onscreen items such as application and settings icons, or press onscreen buttons. Press and hold To open the available options for an item (for example, a contact or link in a webpage), just press and hold the item. - Page 33 Your first week with your new phone Drag Press and hold your finger with some pressure before you start to drag. While dragging, don't release your finger until you have reached the target position. Flick Flicking the screen is similar to swiping, except that you need to swipe your finger in light, quicker strokes, such as when moving right and left on the Home screen, or flicking through a contacts or message list.
- Page 34 Your first week with your new phone Slide with two fingers In some apps, like Gallery, Messages, Mail, or the web browser, slide two fingers apart to zoom in when viewing a picture or text. Slide two fingers together to zoom out of the picture or text. Two-finger swipe Swipe down from the status bar using two fingers to access Quick Settings.
- Page 35 Three-finger swipe ® § Swipe up the screen with three fingers and HTC Connect streams music or video from HTC One M9 to your speakers or TV respectively. You can also share streaming media from ® apps such as YouTube §...
-
Page 36: Switching Between Recently Opened Apps
§ If you don't see the icon, tap > Share. Switching between recently opened apps When you're multitasking and using different apps on HTC One M9, you can easily switch between the apps you've recently opened. Press to see recently-opened apps. -
Page 37: Htc Sense Home Widget
Your first week with your new phone Capturing your phone's screen Want to show off your high game score or write a blog post about HTC One M9 features? It's easy to take a picture of the screen and share it from Gallery. - Page 38 4. Select all the options on the screen, and then press Setting your home and work locations In the HTC Sense Home widget, set your home and work locations based on your address, Wi-Fi network, or both. You can associate multiple addresses and Wi-Fi networks to each of these locations. Using your set addresses or Wi-Fi networks, the HTC Sense Home widget will be able to determine where you are and display the appropriate apps.
-
Page 39: Motion Launch
Motion Launch is a combination of a motion gesture followed by a finger gesture. With Motion Launch, you don't have to reach for the POWER button to wake up HTC One M9. Using a combination of simple gestures, you can wake up to your Home screen, HTC BlinkFeed, and more. - Page 40 2. Immediately double-tap the screen. Waking up and unlocking Go from sleep mode and unlock HTC One M9 to the last screen you were using without pressing the POWER button. If you've set up a screen lock with credentials, you'll be asked to provide your credentials first...
- Page 41 2. Immediately swipe left from the right side of the screen. Waking up to HTC BlinkFeed Go from sleep mode to HTC BlinkFeed without pressing the POWER button. If you've set up a screen lock with credentials, you'll be asked to provide your credentials first...
-
Page 42: Lock Screen
Choose to set a screen lock pattern, numeric PIN, or other means of locking your phone. You'll be asked to unlock the screen every time HTC One M9 is turned on or when it’s idle for a certain period of time. - Page 43 7. Tap Lock phone after, and then specify the idle time before the screen is locked. To help make Smart Lock more reliable and more secure, you can train HTC One M9 to recognize your face in different situations, such as when you're wearing glasses or sporting a beard.
- Page 44 Your first week with your new phone Changing lock screen shortcuts To change apps (or other shortcuts) on the lock screen, change the ones on the launch bar. To find out how, see Launch bar on page 55. Changing the lock screen wallpaper Use any photo you've taken with the camera as the lock screen wallpaper.
-
Page 45: Notifications
Your first week with your new phone Notifications Notifications panel Notification icons inform you of new messages, calendar events, alarms, and activities in progress such as files downloading. When you see notification icons, open the Notifications panel to check out details of the notifications that you've received. -
Page 46: Working With Text
Working with text Selecting, copying, and pasting text In HTC apps such as Mail and Messages, you can select and copy text, and then paste or share it. 1. Press and hold on a word. 2. Drag the start and end anchors to highlight the surrounding text you want to select. -
Page 47: Entering Text
The HTC Sense keyboard Typing is fast and accurate with the HTC Sense keyboard. § Word prediction also saves typing time. As you type, you'll see word suggestions that you can choose from. You can even add words to the word prediction dictionary. See... - Page 48 Your first week with your new phone Choosing and switching between keyboard languages If multiple keyboard languages are available on HTC One M9, you can choose which languages to enable in the onscreen keyboard. 1. Go to Settings, and then tap Language & keyboard > HTC Sense Input.
-
Page 49: Using The Trace Keyboard
This feature is available only for Latin-based languages. 1. Turn on the Trace keyboard in Settings > Language & keyboard > HTC Sense Input. 2. On the onscreen keyboard, slide your finger from one letter to the next to enter a word. -
Page 50: Htc Help
Check out the friendly walkthroughs and the FAQs in the Help app to learn how to use your phone. § When you see a Tips & Help tile in HTC BlinkFeed, just tap the tile to know more about the tip. -
Page 51: Personalizing
Themes What is the Themes app? Themes brings a quick and easy way for you to customize HTC One M9 with wallpapers, sounds, icons, and more. Log in with your HTC account to browse from the available themes in the Themes store, or make your own. - Page 52 Personalizing Creating your own theme from scratch You can create and customize your own theme and even share it for others to download. 1. From the Home screen, tap , and then find and tap Themes. 2. Tap > Choose Home image to set the main wallpaper for your theme. 3.
- Page 53 3. Tap > Remove. 4. Tap the themes you want to remove from your collection. 5. Tap Remove. If the theme you deleted is currently applied, it will still be applied to HTC One M9 until another theme is applied.
-
Page 54: More Ways To Personalize
Personalizing More ways to personalize Personalization settings Aside from using Themes, you can also make HTC One M9 look and sound the way you want in Settings. § Choose a ringtone and other sounds that you like to use. See... -
Page 55: Changing The Display Font
3. Tap Font size to choose the size of the font. Downloading fonts You must be logged on to your HTC Account to download fonts. 1. From the Home screen, tap > Settings > Personalize. 2. Under Font, tap Font style and then tap 3. -
Page 56: Adding Home Screen Widgets
Personalizing Adding Home screen widgets Widgets make at-a-glance important information and media content easily available. Choose from a selection of widgets and add the most useful ones to your Home screen. 1. Press and hold an empty space on a widget panel. 2. - Page 57 § You won't be able to add a new widget panel if you've already reached the maximum limit. § HTC BlinkFeed always appears as the first panel (if it's not removed). A widget panel cannot be added before HTC BlinkFeed.
- Page 58 2. When the widget or icon turns red, lift your finger. Changing your main Home screen Set HTC BlinkFeed or a widget panel as your main Home screen. 1. Press and hold an empty space on a widget panel. 2. In the pop-up menu, tap Manage Home screen pages.
- Page 59 2. Press and hold an app or shortcut in the folder, and then drag it out to Arranging apps On the Apps screen, you can rearrange the apps. 1. From HTC BlinkFeed or any widget panel, tap 2. Tap , and then choose how to arrange apps, such as alphabetically.
- Page 60 Personalizing 4. To add more apps, drag each app over to the folder. 5. To name the folder, open the folder, tap its title bar, and then enter a folder name. 6. When done, tap Removing apps from a folder 1.
-
Page 61: Htc Blinkfeed
§ Swipe right on HTC BlinkFeed to open the slideout menu where you can choose the type of feeds or add your custom topics to display. You'll see the clock widget on HTC BlinkFeed if you've set HTC BlinkFeed as the main Home screen. -
Page 62: Turning Htc Blinkfeed On Or Off
3. Tap Choose Highlights topics and make sure Mealtime recommendations is selected. To get restaurant recommendations, you'll need to actively use HTC BlinkFeed daily. Restaurant recommendations will show up as a tile in HTC BlinkFeed and also on your lock screen. -
Page 63: Ways Of Adding Content On Htc Blinkfeed
§ If you see numbers at the bottom, tap on a number to see alternative restaurant recommendations. Ways of adding content on HTC BlinkFeed Personalize HTC BlinkFeed to show articles and status updates from your favorite news sources and apps. Adding sources to HTC BlinkFeed Add news sources such as News Republic ®... - Page 64 § You need to sign in to your social networks before you can post a status update from HTC BlinkFeed. § When adding a social network to HTC BlinkFeed, you need to give HTC Sense permission to access it. 1. On HTC BlinkFeed, swipe right to open the slideout menu.
-
Page 65: Customizing The Highlights Feed
§ You need to sign in to your social networks before you can post a status update from HTC BlinkFeed. § When adding a social network to HTC BlinkFeed, you need to give HTC Sense permission to access it. 1. On HTC BlinkFeed, swipe right to open the slideout menu. -
Page 66: Camera
Camera Camera Camera basics Camera screen Take great photos and videos with the camera. 1. On the Home screen, tap the camera icon to open the Camera app. 2. Tap to see all controls on the Viewfinder screen. Choose a scene to use for taking photos. Choose a scene to use for recording videos. -
Page 67: Tips For Capturing Better Photos
Improving focus and sharpness § HTC One M9 has autofocus, which works best on a subject that is not moving too much. To change the focus, on the Viewfinder, tap the subject you want to focus on. § If the subject is moving, on the Viewfinder, press and hold the subject to lock the focus. - Page 68 Keep HTC One M9 steady or place it on a level surface when using HDR. § When taking a panoramic photo, consider the whole scene and focus on an object that has a neutral tone to help keep the exposure balanced in the composite image.
-
Page 69: Taking Continuous Camera Shots
> Volume button options. 4. Choose how you want to use the volume buttons when you're in the Camera app. Closing the Camera app To give you a full view of the Viewfinder screen, HTC One M9 replaces , and with small dots. - Page 70 Camera 4. Press and hold the onscreen shutter button The camera takes up to 20 consecutive shots of your subject. 5. Choose what you want to do with the continuous shots: § To keep just one photo, select the photo that you like the most, and then tap Best shot. §...
-
Page 71: Selfies And People Shots
Camera Selfies and people shots Tips for taking selfies and people shots Do you want yourself, your family, and friends to look best in your shots? Here are some camera options you can adjust or select before taking selfies and people shots. Portrait scene Using the Portrait scene helps a little in smoothing the skin in your selfies and people shots. - Page 72 Camera Applying skin touch-ups with Live Makeup Touch up your skin before taking your selfie. Live Makeup smoothens your skin in real time. 1. On the Home screen, tap the camera icon to open the Camera app. 2. Switch to Selfie or Photo Booth mode. To find out how to switch between capture modes, see Choosing a capture mode on page 66.
-
Page 73: Raw Camera
Camera 6. Pose and frame yourself on the Viewfinder screen. 7. Look at the front camera, and then: § Say Cheese or Capture to take a photo selfie. § Say Action or Rolling to record a video selfie. You can also use voice capture with the main camera. Switch to Camera mode, and then turn on Voice capture in the camera settings. -
Page 74: Split Capture
2 to 6 times larger than a JPEG file and is not viewable in most photo viewer apps, a photo is captured in both DNG and JPG formats. When you use the HTC Gallery app, you'll see the JPG copy of the photo, with a icon to indicate that there is a DNG RAW file of that photo. -
Page 75: Panoramic Shots
Sweep panorama mode. 4. When you're ready to take the shot, tap 5. Pan left or right in either landscape or portrait view. Hold HTC One M9 as smoothly as you can to automatically capture frames. You can also tap to stop capturing anytime. -
Page 76: Other Camera Features
The camera automatically captures the frame. 7. To take succeeding shots, pan HTC One M9 up, down, left, and right as smoothly as you can. As you pan in one direction, you'll see another white box. Center the white box again within the Viewfinder markers. -
Page 77: Camera Settings
Camera Recording videos in slow motion Relive high speed action bit by bit and add a touch of suspense to your videos. Audio is recorded when you're in this scene, but will only be available when video is played back in normal speed. - Page 78 Camera 7. When done, tap . To display the settings again, just tap 8. When you're ready to take a photo, tap You can save your customized settings as a new capture mode. See Saving your settings as a capture mode on page 78 for details.
-
Page 79: Gallery
Gallery Gallery Viewing photos and videos in Gallery Reminisce about good times. Use Gallery to view all your photos and videos. View them by time, album, or location. When viewing your photos and videos, the onscreen navigation buttons will be hidden. -
Page 80: Viewing Photos By Location
Gallery Viewing your favorite photos Easily see all your favorite photos in one place. You can add photos to the My favorites album. § To add a photo, find and view the photo in full screen, tap the photo, and then tap >... - Page 81 2. Tap a point of interest or tap New place to manually enter a new name. 3. Tap Save. Renaming the 1. Tap Rename this place. location You'll only see Rename this place if the name is stored on HTC One M9. 2. Enter a new name. 3. Tap Save.
-
Page 82: Adding Photos Or Videos To An Album
Gallery Adding photos or videos to an album 1. From the Home screen, tap , and then find and tap Gallery. 2. Tap , and then choose how you want to view your photos and videos. 3. Open a group of photos and videos, such as an event in Timeline view or an album. 4. -
Page 83: Searching For Photos And Videos
Gallery 8. If you need to remove a tag you've added, just tap the tag, and then tap OK. 9. Tap Save. To tag a single photo or video, press and hold the photo or video. Tap Add tag, and then enter your keywords. -
Page 84: Viewing Pan 360 Photos
Pan 360 photo. 6. Try any of the following: § Tilt HTC One M9 or drag your finger on the screen to pan the photo. § Tap the rotation indicator at the top left corner to re-center the photo. -
Page 85: Trimming A Video
Gallery Trimming a video 1. In Gallery, open the video you want to play in full screen. 2. Tap the onscreen controls to pause or resume playback, adjust the volume, and more. to share the video on your home network. 3. -
Page 86: Photo Editor
Photo Editor Photo Editor Basics Choosing a photo to edit You can select photos to edit from Photo Editor or Gallery. 1. From the Home screen, tap , and then find and tap Photo Editor. 2. Tap Gallery to open an existing photo on your phone, and then browse for the item to edit. Or, tap Camera if you want to take a new photo to edit. - Page 87 Photo Editor 5. Tap to open the toolbar, choose a pen type, and then tap to hide the toolbar. 6. Choose a pen color from the color bar. 7. Draw on the photo. You can tap to switch to full screen view. 8.
-
Page 88: Editing Continuous Shots
Photo Editor 9. Press to return to the Essentials screen. 10. Tap to save changes. The edited photo is saved as a new photo. The original photo remains unedited. Retouching photos of people 1. From Photo Editor, choose the photo you want to edit. Choosing a photo to edit on page 86 to find out how. - Page 89 The edited photo is saved as a new photo. The original photo remains unedited. GIF creator Create an animated gif that you can quickly upload and share. This feature is available for burst shots captured on HTC One M9. You can identify burst shots by the icon on the thumbnail.
-
Page 90: Creative Effects
Photo Editor 3. In the slideout menu that opens, tap Effects > . You'll see frames that you can combine in one photo. 4. Select the frames that you want to include in the sequence shot. 5. Tap when done. 6. - Page 91 Photo Editor 8. Press and hold the shape with two fingers and then drag your fingers in a circular motion to rotate it. 9. Tap to open the toolbar. 10. Tap , choose a different blending option for the selected layer, and then tap 11.
- Page 92 Photo Editor 9. Press and hold the shape mask with two fingers, and then drag your fingers in a circular motion to rotate it. 10. Tap to return to the image layer , and then drag your fingers apart or together on the image to adjust the image size inside the mask.
- Page 93 Photo Editor 11. Tap , adjust the settings for your photo layer, and then tap 12. Tap to save changes. The edited photo is saved as a new photo. The original photo remains unedited. Double Exposure With Double Exposure, combine and blend two photos and create something surreal. 1.
- Page 94 Photo Editor 10. If you want to adjust your background layer to blend with the top layer, tap to switch to the background layer. 11. Tap a setting and drag the slider to adjust its values, and then tap 12. Tap to save changes.
- Page 95 Photo Editor Face Fusion Wonder what you would like if you shared the same features as another person? Face Fusion uses a person’s photo and a target face to merge the two photos into one. To use Face Fusion, be sure that: §...
-
Page 96: Htc Print Studio
If you have more than twelve photos in an event in Gallery, you'll see collections of photos taken at a specific time or place on the HTC Print Studio screen. Tap a collection to use its photos to create the gift. -
Page 97: Placing Your Order
2. Tap Check Out to continue with the purchase. Or, tap Save for Later to create more photo gifts. You can then check out later by tapping on the HTC Print Studio screen. 3. Enter the shipping address and then tap 4. -
Page 98: Phone Calls
Phone calls Phone calls Video chat Face Tracking Want the other party to always have you in view? While doing a video chat using a third-party app, Face Tracking focuses on your face and others around you, and tracks faces that are within the camera's angle of view. -
Page 99: Phone Calls
Phone calls 4. Depending on the video chat app, you can single or double-tap the mini-window to switch screens with the called participant. 5. Tap again to turn off Face Tracking. Sharing your phone screen Want to show off some pics or teach your friend how to use a phone feature? Screen Share allows you to show your phone screen to the person you're video chatting with. -
Page 100: Dialing An Extension Number
Phone calls 3. Say the name of contact you want to call. For example, say "Call [person's name in phonebook]." 4. Follow screen instructions to make the call. Dialing an extension number To skip voice prompts when dialing an extension number, do one of the following: §... -
Page 101: Making An Emergency Call
Phone calls Making an emergency call In some regions, you can make emergency calls from HTC One M9 even if the nano SIM card has been blocked or if you don't have one installed. If you don't have a network signal, you won't be able to make an emergency call. - Page 102 2. To switch between the calls, tap the person you want to talk to on the screen. Turning the speakerphone on or off during a call To decrease potential damage to your hearing, do not hold HTC One M9 to your ear when the speakerphone is on.
-
Page 103: Call History
Phone calls Call History Use Call History to check missed calls, your dialed numbers, and received calls. 1. On the Home screen, tap the phone icon to open the Phone app. 2. Swipe to view the Call History tab. 3. Do one of the following: §... - Page 104 Phone calls Using a roaming service may incur additional charges. Check with your mobile operator for rates before using a roaming service. Changing the default country code for Home dialing 1. From the Home screen, tap , and then tap Settings > Call. 2.
-
Page 105: Messages
Messages Messages Sending a text message (SMS) 1. From the Home screen, tap , and then find and tap Messages. 2. Tap 3. Enter a contact name or mobile number in the To field. 4. Tap the area that says Add text, and then enter your message. 5. -
Page 106: Sending A Group Message
Similar to a group chat, sending a group MMS lets your recipients join the conversation you've started. HTC One M9 also organizes message replies in a single conversation thread. If this is your first time to send a group MMS, you may need to enter your mobile phone number. -
Page 107: Forwarding A Message
4. Tap Replying to a contact's other phone number When a contact has multiple phone numbers stored on HTC One M9, you can select which phone number to reply to. Keep in mind that if you don't select another number, your response will be sent to the phone number that your contact used to send the last message. -
Page 108: Blocking Unwanted Messages
Messages Blocking unwanted messages Declutter your Messages screen by moving spam messages from contacts to the block box. If you have blocked a contact, that contact's text or picture messages will also be in the block box. § Open the Messages app, press and hold a contact (or phone number) and tap Block contact. §... - Page 109 Messages Preventing a message from being deleted You can lock a message to prevent it from being deleted even if you delete the other messages in the conversation. 1. Open the Messages app. 2. Tap a contact (or phone number) to display the exchange of messages with that contact. 3.
-
Page 110: Entertainment
, or USB audio out. Using HTC BoomSound with headphones Plug in your headphones and turn on HTC BoomSound with Dolby Audio to enjoy refined audio details in a more personal way. 1. From the Home screen, tap , and then find and tap Settings. -
Page 111: Htc Music
Enjoy your favorite songs on HTC One M9 using the Music app. When you open the Music app for the first time, you'll be asked if you would like to automatically download related content, such as album covers and artist photos, to HTC One M9. 1. From the Home screen, tap , and then find and tap Music. -
Page 112: Updating Album Covers And Artist Photos
Adding a song to the queue While playing a song, you can also browse other tracks stored on HTC One M9. Add a song or an album to the queue so it plays when the current playlist has finished playing. -
Page 113: Viewing Song Lyrics
Ringtone. Viewing song lyrics Love a song so much that you want to sing along? HTC One M9 gives your music an extra kick with song lyrics and cool music visualizations. To save on data usage, connect to a Wi-Fi network when downloading lyrics. In Music settings, select Wi-Fi only. -
Page 114: Fm Radio
Listen to your favorite radio stations using the FM Radio app. You need to connect a headset first to the audio jack of HTC One M9 to use FM Radio. FM Radio uses the stereo headset as the FM radio antenna. - Page 115 Before you start, make sure you have set up your speakers, TV, or appliance to connect to your Wi-Fi network. Refer to its documentation on how to set it up. 1. Open and play any music or other media content that you want to share from HTC One M9. 2. Swipe up with three fingers on the screen.
- Page 116 Wi-Fi network. 1. After connecting your speakers to your Wi-Fi network, open a music app on HTC One M9. 2. Swipe up with three fingers on the screen.
- Page 117 If you're using Qualcomm AllPlay powered speakers, download and install the HTC BoomSound Connect app to HTC One M9 to manage them, queue your songs to a shared speaker, and more. 1. Connect HTC One M9 to a speaker or grouped speakers. For details, see...
- Page 118 7. To view the queue and check where your music is lined up in the list, tap 8. Tap to access HTC BoomSound Connect settings. You can rename speakers or clear the queue.
-
Page 119: Power And Storage Management
Checking battery history Check how long you've been using HTC One M9 since the last charge. You can also see a chart that shows how long the screen has been on, and how long you've been using connections like the mobile network or Wi-Fi. - Page 120 Power and storage management Battery optimization for apps When you have connections such as Wi-Fi on while the phone is in sleep mode, some apps may still continue to use the battery. Starting from Android 6.0, battery optimization is enabled for all apps by default which helps prolong battery standby time when you're not using the phone.
-
Page 121: Manage Your Apps
Power and storage management Tips for extending battery life How long the battery can last before it needs recharging depends on how you use HTC One M9. Try out some of these tips to help increase battery life. Use the power management features §... -
Page 122: Phone Storage
Power and storage management Limit background data and sync Background data and sync can use a lot of battery power if you have many apps syncing data in the background. It’s recommended not to let apps sync data too often. Determine which apps can be set with longer sync times, or sync manually. -
Page 123: Usb Storage
Removable storage Use a new storage card as removable storage to be able to insert and use the card on HTC One M9 and other Android phones. - Page 124 Power and storage management 3. Tap > Settings. 4. Tap Format as internal. 5. Tap Erase & format. 6. Tap Format. 7. Follow the onscreen instructions to move your installed apps and their data from the phone storage to the storage card. If you no longer want to use your storage card as internal storage, you can reformat the card as removable storage.
- Page 125 Copying files between HTC One M9 and your computer You can copy your music, photos, and other files to HTC One M9. § Save and close your files before copying them from your computer to HTC One M9, or vice versa.
-
Page 126: Manage Photos And Videos
6. After copying the files, disconnect HTC One M9 from the computer. Freeing up storage space As you use HTC One M9, you'll accumulate data and fill its storage capacity over time. Here are some tips on how to free up phone storage space. -
Page 127: File Manager
Power and storage management Unmounting the storage card When you need to remove the storage card while HTC One M9 is on, unmount the storage card first to prevent corrupting or damaging the files in the storage card. If your storage card is used as internal storage and there are apps that were moved to the card, you will not be able to open these apps after unmounting the card. - Page 128 Power and storage management 4. Press , and then browse for the folder where you want to copy or move the files. Or tap > Create folder to create a new folder. 5. Tap Paste. Favoriting files 1. In File Manager, browse for the file or folder. 2.
-
Page 129: Sync, Backup, And Reset
You can sync contacts, calendars, and other information from your social networks, email accounts, and online services on HTC One M9. Depending on the account type, signing in to your online accounts lets you sync updates between HTC One M9 and the Web. -
Page 130: Backup
Likewise, HTC Sync Manager is a good alternative if you don't want to back up your accounts, settings, and other personal content to the cloud. You can use it to create backups of HTC One M9 on your computer. - Page 131 131 for details. Restoring your backup to HTC One M9 with HTC Backup If you backed up your HTC phone to your cloud storage before using HTC Backup, you can restore the saved backup to HTC One M9.
- Page 132 Backing up HTC One M9 Automatically back up HTC One M9 to Google Drive so you can restore content such as app data and settings when needed.
- Page 133 Backing up your text messages Keep important text messages by backing them up so you can restore them to the HTC Messages app, if needed. The Messages app backs up either to the phone storage or to your storage card if you have one inserted.
-
Page 134: Htc Sync Manager
§ Play music and videos using the built-in player. Transfer content § Transfer iPhone photos, text messages, contacts, and more to your HTC phone. You can also find and install the same apps that you were using on your iPhone. -
Page 135: Back Up And Restore
Sync, backup, and reset Back up and restore Back up your HTC phone to your computer so you can easily restore your backup to the same phone or to another HTC phone. Sync data Sync data such as contacts and calendar between your phone and your computer. -
Page 136: Reset
Reset Restarting HTC One M9 (Soft reset) If HTC One M9 is running slower than normal, is unresponsive, or has an app that is not performing properly, try rebooting and see if that helps solve the problem. 1. If the display is off, press the POWER button to turn it back on. - Page 137 Resetting HTC One M9 (Hard reset) If HTC One M9 has a persistent problem that cannot be solved, you can perform a factory reset (also called a hard reset or master reset). A factory reset reverts the phone back to its initial state—the state before you turned on the phone for the first time.
-
Page 138: People
People Your contacts list The People app lists all contacts you've stored on HTC One M9 and from online accounts you're logged in to. Use the People app to easily manage communications with people that matter to you. 1. From the Home screen, tap , and then find and tap People. -
Page 139: Setting Up Your Profile
People Finding people Search for contacts stored on HTC One M9, your company directory if you have an Exchange ActiveSync account, or social networks you've signed into. 1. From the Home screen, tap , and then find and tap People. -
Page 140: Editing A Contact's Information
People How do I add an extension number to a contact number? While creating a new contact or editing a contact's details in People, you can add an extension number to their number so you can skip the voice prompts when calling. 1. -
Page 141: Getting In Touch With A Contact
2. Tap Search contacts in your Company Directory. 3. Tap the name of the contact you want copied to HTC One M9. 4. Tap to import the contact. -
Page 142: Merging Contact Information
Avoid duplicate entries by merging contact information from different sources, such as your social network accounts, into one contact. Accepting contact link suggestions When HTC One M9 finds contacts that can be merged, you’ll see a link notification when you open the People app. 1. From the Home screen, tap , and then find and tap People. -
Page 143: Sending Contact Information
We’ve also set up the Frequent group to automatically add the contacts you dial or get calls from the most. HTC One M9 also syncs with groups you've created in your Google Account. Creating a group 1. -
Page 144: Private Contacts
People Sending a message or email to a group You will be charged for each text message sent. For example, if you send a message to a group of five people, you will be charged for five messages. 1. On the Groups tab, tap the group you want to send a message or email to. 2. - Page 145 People Organizing your private contacts 1. On the People tab, tap > Manage contacts > Private contacts. 2. To add contacts to the private contacts list, tap , select the contacts you want to add, and then tap Save. 3. To remove private contacts from the list, tap >...
-
Page 146: Calendar And Email
Calendar and Email Calendar and Email Viewing the Calendar Use the Calendar app to view your events, meetings, and appointments. If you've signed into your online accounts, related events will also appear in Calendar. 1. From the Home screen, tap , and then find and tap Calendar. -
Page 147: Scheduling Or Editing An Event
Calendar and Email Scheduling or editing an event You can create or edit events on HTC One M9, and also sync events with your Exchange ActiveSync calendar. You can also create, modify, and sync events with your Google calendar. Editing events is not supported for all accounts. -
Page 148: Sharing An Event
4. Tap Save. Calendars are synced on HTC One M9, even if they are hidden. Sharing an event You can share a calendar event as a vCalendar using Bluetooth or by sending it as a file attachment with your email or message. -
Page 149: Dismissing Or Snoozing Event Reminders
Calendar and Email Dismissing or snoozing event reminders If you have set at least one reminder for an event, the upcoming event icon will appear in the notifications area of the status bar to remind you. 1. Slide the Notifications panel open. 2. -
Page 150: Checking Your Mail
Checking your mail The Mail app is where you read, send, and organize email messages from one or more email accounts that you’ve set up on HTC One M9. 1. From the Home screen, tap , and then find and tap Mail. The inbox of one of your email accounts appears. -
Page 151: Sending An Email Message
Calendar and Email Sending an email message 1. From the Home screen, tap , and then find and tap Mail. 2. Switch to the email account that you want to use. 3. Tap 4. Fill in one or more recipients. Want to loop in more recipients in a carbon copy (Cc) or blind carbon copy (Bcc) of the email message? Tap >... -
Page 152: Managing Email Messages
Calendar and Email Quickly replying to an email message You can quickly respond to a new email message from the Home screen or lock screen. 1. When you receive a new email message notification, slide the Notifications panel down. 2. On the email preview, tap Reply all. If you have several notifications and you don't see the email options, expand the email preview by sliding two fingers apart on the notification. -
Page 153: Searching Email Messages
3. Tap Show all mail from sender. A list of email messages from that contact appears. Working with Exchange ActiveSync email Enjoy the powerful email features of Microsoft Exchange ActiveSync right on HTC One M9. Flag important email messages, set your out of the office reply, or send invites to your next team meeting while you're on the go. -
Page 154: Adding An Email Account
Calendar and Email Setting your Out of the office status 1. Switch to your Exchange ActiveSync account. 2. Tap > Out of the office. 3. Tap your current office status, and then select Out of the office. 4. Set the dates and times. 5. -
Page 155: What Is Smart Sync
Calendar and Email What is Smart Sync? Smart Sync automatically extends the sync time the longer the Mail app is inactive. Set your email account to Smart Sync when you don't need to check new email messages frequently. Smart Sync helps save battery power. -
Page 156: Google Search And Apps
1. From the Home screen, tap , and then find and tap Google. 2. Tap Get started. Or if you've previously set up Google Now on HTC One M9 and turned it off, tap Get Now cards > Set up. - Page 157 Google Search and apps Changing card settings You can easily customize the settings of Google Now cards to suit your information needs. For example, you can change the weather units in the Weather card or your transportation mode in the Traffic card.
-
Page 158: Google Search
Google Search Searching HTC One M9 and the Web You can search for information on HTC One M9 and on the Web. In the Google Search app, start ™ your search by entering a keyword or by using Google Voice Search To open Google Search, from the Home screen, tap , and then find and tap Google. - Page 159 1. From the Home screen, tap , and then find and tap Google. If you've already set up a Google account on HTC One M9, you will be given the option to sign in to Google Now. 2. In the search box, enter what you want to search for. As you type, matching items on HTC One M9 and suggestions from Google web search are shown.
-
Page 160: Google Apps
Google Search and apps Google apps Google apps Count on the suite of Google apps on HTC One M9 to help you get productive, surf the Internet, be entertained, and more. Gmail Gmail lets you send and receive email from your Google Accounts or from other email accounts—all in one convenient app. -
Page 161: Android Pay
Just add your payment cards to Android Pay and pay for goods and services instantly using HTC One M9. Look for the Android Pay logo at stores and establishments in your location. For more information about Android Pay, visit https://www.android.com/pay/. -
Page 162: Other Apps
From the Home screen, tap , and then find and tap HTC Dot View. The HTC Dot View app is available in Google Play. Make sure to install the latest app update. Wallpaper Choose a preset wallpaper, or create your own dotted wallpaper from a photo. - Page 163 2. Choose which app notifications you want to show or hide. Not seeing recent calls on HTC Dot View? By default, up to 3 received or dialed numbers will be displayed on HTC Dot View. § If you're not seeing them, open the HTC Dot View app, tap >...
-
Page 164: Htc Car
HTC Car On the road with Car Now when you drive, you can easily use HTC One M9 to reach your destination, keep you entertained, and help you stay in touch with the people that matter to you. Access music, phone calls, maps, and more with Car. - Page 165 Other apps Finding places in Car 1. In Car, tap Navigation. 2. To search for a place, tap and enter a location in the search box. 3. To look up a previously searched for place, tap Previous. 4. To get directions for an upcoming event in Calendar, tap Appointments and then tap an upcoming appointment.
-
Page 166: Scribble
Other apps Scribble Using Scribble Want to make a page for your digital scrapbook? Use the Scribble app to get artistic and combine photos, text, and illustrations in a note. With several templates to choose from, you can even create lists or track your budget. Have a greeting card ready and link it to your friend's birthday in Calendar to send in a few taps. - Page 167 Other apps Creating a photo blog note Think photos can best convey your story? Group photos into a note, and make it more entertaining by including photo collages, stickers, and more. If inserting a collage, first group the photos in the same event or album in Gallery. 1.
-
Page 168: Clock
Using the Clock Get more from the Clock app than just the regular date and time. Use HTC One M9 as a world clock to see the date and time in cities across the globe. You can also set alarms or track your time using the stopwatch or timer. -
Page 169: Weather
2. Hold the microphone near the sound source. 3. Tap to start recording a voice clip. Voice Recorder can run in the background while you do other things on HTC One M9, except when you open other apps that also use audio functions. 4. Tap to stop recording. -
Page 170: Internet Connections
§ Refreshing apps to update info and feeds § Uploading and backing up your files to your online storage account § Using HTC One M9 as a Wi-Fi hotspot § Sharing your mobile data connection by USB tethering To help you save on data usage, connect to a Wi-Fi network whenever possible and set your online... - Page 171 Keeping track of your data usage Monitor your data usage to help prevent going over your monthly data allowance. Data usage measured by HTC One M9 may differ from, and be less than, your actual data usage. 1. From the Home screen, tap , and then find and tap Settings.
-
Page 172: Wi-Fi Connection
Connecting to a Wi-Fi network via WPS If you're using a Wi-Fi router with Wi-Fi Protected Setup (WPS), you can connect HTC One M9 easily. 1. Turn Wi-Fi on, and check the list of detected Wi-Fi networks. -
Page 173: Connecting To Vpn
Logging into a public Wi-Fi network automatically (WISPr) You can set HTC One M9 to automatically log into a public Wi-Fi network that you regularly use. This saves you the trouble of going through the Wi-Fi provider's web authentication every time you connect to their Wi-Fi network. -
Page 174: Using Htc One M9 As A Wi-Fi Hotspot
Disconnect. Using HTC One M9 as a Wi-Fi hotspot Share your data connection with other devices by turning HTC One M9 into a Wi-Fi hotspot. § Make sure the data connection is turned on. § You must have an approved data plan associated with your account from your mobile service provider to use this service. -
Page 175: Sharing Your Phone's Internet Connection By Usb Tethering
No Internet connection available for your computer? No problem. Use the data connection of HTC One M9 to connect to the Internet. § To make sure that the USB drivers for HTC One M9 are up-to-date, install the latest version of HTC Sync Manager on your computer. -
Page 176: Wireless Sharing
You can listen to music over a Bluetooth A2DP stereo headset, or have hands-free conversations using a compatible Bluetooth headset. Before you connect your headset, make it discoverable so HTC One M9 can find it. Refer to your headset manual for details. -
Page 177: Unpairing From A Bluetooth Device
2. On the sending device, send one or more files to HTC One M9. 3. If asked, accept the pairing request on HTC One M9 and on the sending device. You may also be prompted to enter the same passcode or confirm the auto-generated passcode on both devices. -
Page 178: Nfc
> Show received files to view files received via Bluetooth. Using NFC With built-in NFC (near field communication) on HTC One M9, you can share content to another NFC-capable mobile device in an instant. NFC may not be available in some phones. - Page 179 2. Hold HTC One M9 and the other phone back to back. Make sure that the NFC area (shaded part) of HTC One M9 and the other phone's NFC area are close to one another. Experiment by slightly moving the phones until a connection is made.
-
Page 180: Settings And Security
High accuracy. To save battery power, choose Battery saving. Turning off a location source (for example GPS) means no applications on HTC One M9 will collect your location data through that location source. However, third party applications may collect —... - Page 181 Settings and security Allowing prioritized notifications to bypass Do not disturb mode Add important contacts to an exceptions list so that you can still receive their calls even when Do not disturb mode is on. 1. From the Home screen, tap >...
-
Page 182: Airplane Mode
Settings and security Airplane mode When you enable Airplane (Flight) mode, all wireless radios on HTC One M9 are turned off, including the call function, data services, Bluetooth, and Wi-Fi. When you disable Airplane mode, the call function is turned back on and the previous state of Bluetooth and Wi-Fi is restored. -
Page 183: Touch Sounds And Vibration
Some people like the sound or vibration feedback they get when touching the screen, and some don't. You can turn on or off various types of touch sounds and vibration on HTC One M9. § Touch tones when tapping the phone dial pad §... -
Page 184: Glove Mode
When Glove mode is turned on, you'll be able to see where you've tapped the touch screen. Installing a digital certificate Use client and Certificate Authority (CA) digital certificates to enable HTC One M9 to access VPN or secured Wi-FI networks, and also to provide authentication to online secure servers. You can get a certificate from your system administrator or download it from sites that require authentication. -
Page 185: Disabling An App
Settings and security 5. On the thumbnail of the latest app you opened, tap 6. To unpin the screen, press and hold at the same. Disabling an app Apps, even if not used often, may be running in the background and downloading data. If an app cannot be uninstalled, you can disable it. -
Page 186: Setting Up App Links
If you enter the wrong PIN more times than the maximum number of attempts allowed, the card will become “PUK-locked.” You need a Pin Unlock Key (PUK) code to restore access to HTC One M9. Contact your mobile operator for this code. -
Page 187: Accessibility Features
Settings and security Accessibility features HTC One M9 comes with features and settings that allow easy access and use of apps and functions. Improve screen readability If you have low vision, take advantage of these features to help improve screen readability. -
Page 188: Accessibility Settings
Navigating HTC One M9 with TalkBack Use TalkBack if you need to navigate HTC One M9 by spoken feedback. When you touch the screen, HTC One M9 vibrates and gives you an audible response so you know what you are touching. - Page 189 Settings and security Using TalkBack gestures When TalkBack is turned on and the Explore by touch setting is selected, the regular touch gestures are replaced by the TalkBack gestures. Media gestures such as 3-finger swiping may not be available when TalkBack gestures are enabled.
- Page 190 Settings and security Using TalkBack context menus TalkBack has context menus for controlling continuous reading and global TalkBack controls. These menus can be accessed using TalkBack shortcut gestures. 1. Turn TalkBack on. 2. Do one of the following: § To open the continuous reading menu, use one finger to swipe up and right in one continuous movement.
- Page 191 Settings and security TalkBack language settings 1. From the Home screen, tap > Settings > Accessibility. 2. Tap Text-to-speech output > Google Text-to-speech Engine, and do one of the following: Select a different Tap Language. language Install a voice Tap Install voice data, and then tap the language. Tap next to the voice data you want to install.
-
Page 192: Trademarks And Copyrights
Not all marks listed necessarily appear in this User Guide. The HTC Sync Manager software can be used with materials that you own or are lawfully authorized to use and/or duplicate. Unauthorized use and/or duplication of copyrighted material may be a violation of copyright law in the United States and/or other countries/regions. - Page 193 The information is provided “as is” without warranty of any kind and is subject to change without notice. HTC also reserves the right to revise the content of this document at any time without prior notice.
- Page 194 - Split Capture 74 - about 130 - standby 66 - HTC Backup 131 - sweep panorama 75 - HTC Sync Manager 134 - taking a photo 67 - options 130 - taking photo while recording 68 - restoring backed up apps 27...
- Page 195 Index - playing music 165 - Out of office 154 - voice commands 164 - sending a meeting request 154 Change phone language 183 expanded storage 122 Clock 168 - alarm 168 - setting date and time 168 Face Fusion 95 Conference call 102 Face Tracking 98 Contacts...
- Page 196 - changing your main Home screen 58 - entering text 47 - feeds 61 - entering text by speaking 50 - folder 59 - HTC Sense keyboard 47 - launch bar 55 - multi-language keyboard 48 - rearranging widgets and icons 57 - predictive text 48...
- Page 197 - removing accounts 129 See Factory reset - syncing manually 129 Media streaming - what can you sync with 129 See HTC Connect Meeting request 154 Messages - block box 108 Pair a Bluetooth headset 176 - deleting a conversation 108...
- Page 198 Print screen - voice search 159 See Capture screen Security Print Studio - protecting phone with screen lock 42 See HTC Print Studio - security certificates 173 Prismatic 92 self-timer 73 PUK (PIN Unblock Key) 186 selfie - Auto Selfie 72...
- Page 199 - adding a connection 174 Split Capture 74 - connecting 174 Storage 122 - disconnecting 174 Sweep panorama 75 Sync - HTC Sync Manager 134 Waking up phone - through power button 30 Wallpaper Tethering - changing 54 See USB Tethering...
- Page 200 Index Wireless router 174 Word prediction 48 - bilingual prediction 48 YouTube 113, 160 - finding videos of songs 113 Zoe 85...
Need help?
Do you have a question about the One M9 and is the answer not in the manual?
Questions and answers