
Summary of Contents for Rev Electrix Cellpro 10XP
- Page 1 Cellpro 10XP Charger User’s Guide © Copyright 2011, 2014 FMA, Inc. Updated 09/02/2014...
-
Page 2: Table Of Contents
When using XH/EH WIRING mode ......................30 Estimating performance factors ....................32 Collect data ............................. 32 Calculate performance factors ........................ 32 Evaluate results ............................32 Specifications ..........................33 Quick start for the Cellpro 10XP Charger ................34 Troubleshooting ........................35 Support options ........................37 REVOLECTRIX limited warranty ....................38... -
Page 3: Description
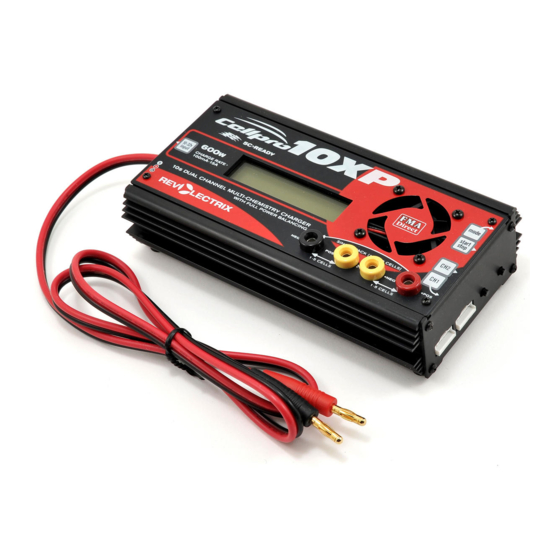
Description Model LC10S15ADC-MC, for use with LiPo, Li-Ion, A123, NiCd, NiMH, and Pb battery packs 10s Multi-Chemistry, 15 Amp, 600W model for automatic and manual charging with available high-power balancing, overcharge protection, and automatic charge/discharge to storage (for Li batteries) Features ... - Page 4 During discharge to storage, the CP10XP incorporates 1A-per-cell (nominal) discharge rate using the charger’s integrated balancing circuitry to provide up to 42W (at 10s) discharge power. Light-grey, 2 line, 16 character backlit LCD display provides easy readability. One button, Charge Optimization can be set for an Accurate 1mV cell balance and (C/20 termination) or for Faster Charging (less balancing accuracy and C/10 termination) using the Charge Control Software or at the CP10XP interface.
-
Page 5: Precautions
Minor arcing may occur when discharge wires are connected to the charger before charging. This is normal. Parts Cellpro 10XP Charger Removable input plier clips (red/black) for connecting the CP10XP to a DC power source Optional: FUIM2-US or FUIM3-US PC USB Adapter (required for using the Charge Control Software) ... -
Page 6: Charger Terminology
Charger terminology MODE button To DC Power START/STOP button Supply Channel 2 balance connector Channel 1 balance connector Connect FUIM2 or FUIM3 Display Channel 1 Channel 2 PC USB Interface here when connecting to Charge Control Software Banana jacks for discharge (black wire toward outside wall of case) wires when charging 2 packs at the same time... -
Page 7: Pack Terminology And Configurations
Blk = Pack negative (JST PA series) 6 position 5s REVOLECTRIX packs like the one shown above will connect directly to the Cellpro 10XP charger without requiring any additional adapter REVOLECTRIX Cellpro branded 2s, 3s, and 4s battery packs Discharge wires: Balance connector,... -
Page 8: Revolectrix Cellpro Branded 6S-9S Battery Packs
5s-to-4s adapter for one of the balance connectors for inter- connection to the Cellpro 10XP charger Note: Other brands of batteries will require Cellpro 10XP Adapters. For more information on REVO adapters, visit http://www.revolectrix.com/cellpro_adapters.htm... -
Page 9: Understanding The Cellpro 10Xp Charger
Understanding the Cellpro 10XP Charger Auto Charging vs. Manual Current Settings When balance charging Li batteries, you can set the Cellpro 10XP Charger’s charge rate to one of three AUTO modes—1.0C, 2.0C or 3.0C—as appropriate for the pack(s) being charged. When one of these rates is selected, the charger determines the pack’s capacity (over time) and automatically sets the... - Page 10 Example 2: You are powering one aircraft with a 3s 500mAh pack, and other aircraft with a 5s 5000mAh pack. If you charge these packs simultaneously using the Cellpro 10XP Charger, it would probably take a long time (the 500mAh pack would become full first, then the charger would switch to its 1A balancing rate to fill up the 5000mAh pack, which could take several hours).
-
Page 11: About Factory Presets
In Example 2 above, when the 500 mAh pack reaches 99% capacity (the charger beeps three times), it is a simple matter to remove the pack from the charger and continue charging the 5000 mAh pack at a higher charge rate. Here’s how: 1. -
Page 12: Connecting Packs To The Charger
Check http://www.revolectrix.com/cellpro_adapters.htm adapter compatibility. The Cellpro 10XP Charger works with all existing Cellpro 4s charger adapters. You must connect a 6-pin to 5-pin Adapter (REVO PN: CP10S-5S/4S-ADP-US) between the charger and the Cellpro 4s charger adapter, as shown here: If an adapter isn’t available for the pack you want to charge, or if the pack doesn’t have a balance... -
Page 13: Connecting One 1S To 10S Revolectrix Cellpro Pack
Connecting one 1s to 10s REVOLECTRIX Cellpro pack 1. How you connect the Cellpro pack’s balance connector(s) to the charger depends on the pack’s configuration. Use the photos in the section “Pack terminology and configurations” above, then find the configurations in the diagrams below and connect as shown in that diagram. 2. - Page 14 2. When charging two packs simultaneously, connect the discharge wires into the banana jacks as shown below.
-
Page 15: Applying Power To The Charger
Press the MODE button one time to advance to the “Preset Menu” Preset 1 [chem] [BAL] @ [charge current]* Press the MODE button repeatedly to scroll through and view/select the Cellpro 10XP’s 10 presets, one at a time. *Information in square brackets varies. -
Page 16: Operating The Charger
“Selecting a preset” and “Changing a preset,” in the next section, provide additional information. Note: If you programmed the charger using the Charge Control Software, different presets may be available. Also, if you have been using the software, you may have given the factory presets different names. -
Page 17: Performing Common Tasks
alternate between FMA or XH balance wiring schemes, and set quiet charging (no speaker beeps during charging). Performing Common Tasks: Selecting a preset At start up, press the MODE button to access and to scroll the Preset Menu and view/select pre- defined, named presets and their settings, one at a time. - Page 18 A123 (or LiFe) Unbalance Charge, 11s to 40.15V A123 12sU 43.80V A123 (or LiFe) Unbalance Charge, 12s to 43.80V To get help using the Cellpro 10XP: Press and hold the MODE button, then release it when the display changes to this:...
-
Page 19: Charging A Pack Or Packs
Show Help Screen Hold for More Exit, Note: If you hold the MODE button down longer, you’ll see etc (described below) Press the MODE button repeatedly to scroll the Help Screen information To Exit the Main Menu and return to the Preset Menu: Press and hold the MODE button, then release it when the display changes to this: Exit Hold for More... -
Page 20: Options Menu Explained
[chemistry] [BAL] [charge process] Chemistry and charge process (Fast [chemistry] [BAL] [charge process] Charging, Balance Charging, etc.) in effect for each channel. Ch1 Fuel = 47% Results of unique FMA algorithm that determines pack “fuel level.” Data is also Ch2 Fuel = 55% used to calculate correct C rate during 1/2/3C charging. - Page 21 Note: In addition to the Options Menu items described below, the CCS allows access to these and other charger options on the Options tab. 1. Press and hold the MODE button while you power up the Cellpro 10XP. 2. Continue holding the MODE button; the charger will enter the Options Menu and immediately start...
- Page 22 in 1V increments. 10V is the Factory Default setting and is the lowest input voltage for safe operation of the CP10XP; however, you may choose to raise this voltage to protect your input supply. For example, you should avoid operating at lower than 11 or 11.5V using a 12V Pb battery as input as over-discharge will severely shorten the life of the input battery.
-
Page 23: Alternate Charging Modes
SAFETY CHARGING . Fire may result! In Cold Weather Balancing Mode, unlike previous FMA chargers, the Cellpro 10XP does not support reduced end of charge voltage based on ambient or operating temperature. If the charger detects a problem, it will stop charging and display a safety code. If this happens: Press the MODE button to reset the charger. -
Page 24: Using The Charge Control Software
Connecting the charger to your computer * The Cellpro 10XP CCS is a free download. But to actually connect the charger to the PC and use the application you will require either the FUIM2-US or FUIM3-US PC USB Interface. -
Page 25: Limiting Charger Input Current
To monitor cell internal resistances during charging: Click the Int. Res. tab. Note: For the charger to calculate internal resistances, pack must be at less than 80% fuel level upon charge start. Internal resistances will be available for display after about 12 minutes of charging, and will be periodically updated after that. -
Page 26: Setting Charger Options
Note: Remember that presets can be overridden at the charger. Preset changes made at the charger are retained in the charger until manually changed again, or until a new group of presets is downloaded to the charger. When you connect the charger to the computer and launch the Charge Control Software, the program uploads and displays the presets stored in the charger. -
Page 27: Updating Charger Firmware
Charge data is stored in a semicolon-delimited format, which can be imported into a spreadsheet for analysis. Updating charger firmware 1. If your computer is connected to the Internet, after you launch the application, the program will check to see whether a new version is available. If a new version is available, it will automatically download in the background. -
Page 28: Balance Connector Wiring
The following diagrams shows how a 6 pin Cellpro (JST PA series) balance connector (REVO PN CPBP6P-10-US) must be wired to a 5s, 4s, 3s, 2s, and 1s battery pack when the Cellpro 10XP is set to FMA WIRING mode (Factory default). - Page 29 3s Pack Pack positive (red), 11.1V* Pack positive Cell 3 Node 2 Node 2, 7.4V* Node 1 Cell 2 Pack negative Pin 1 Node 1, 3.7V* Black Cell 1 Pack negative (blk), 0V * Nominal voltage with respect to pack negative FMA Cellpro Connector/FMA Wiring Mode 2s Pack Pack positive...
-
Page 30: When Using Xh/Eh Wiring Mode
These diagrams show how a 6 pin Cellpro (JST PA series) balance connector (REVO PN CPBP6P-10- US) must be wired to a 5s, 4s, 3s, 2s, and 1s battery pack when the Cellpro 10XP is set to XH/EH WIRING mode. You may choose to set the CP10XP to XH MODE and splice the CP 6 position to an XH adapter you already own. - Page 31 3s Pack Pack positive, 11.1V* Pack positive Cell 3 Node 2 Node 2, 7.4V* Node 1 Cell 2 Pack negative Pin 1 Node 1, 3.7V* Black Cell 1 Pack negative (blk), 0V * Nominal voltage with respect to pack negative FMA Cellpro Connector/XH and EH Wiring Mode 2s Pack Pack positive...
-
Page 32: Estimating Performance Factors
Estimating performance factors If you don’t have a way to directly measure your propulsion system’s electrical parameters, the Cellpro 10XP Charger enables you to estimate them using before- and after-flight measurements. Collect data Charge pack. When charging is finished, record Fuel % and total pack voltage (i.e. sum of cell voltages). ... -
Page 33: Specifications
Specifications For battery type Lithium Polymer, Lithium Ion, Lithium Manganese, A123 (LiFEPO4), NiCd, NiMH, Pb packs LiPo, LiIon, LiMg – 1s-10s balanced, 1s, 2s unbalanced Supported Cell Counts A123 (LiFEPO4) – 1s-10s balanced, up to 12s unbalanced NiCd – up to 28 cells (non-balanced) NiMH –... -
Page 34: Quick Start For The Cellpro 10Xp Charger
Quick start for the Cellpro 10XP Charger Refer to manual for complete operating details. A. Connect charger to a 12V to 32V (maximum) power source. B. Connect pack(s) to charger. Plug pack’s balance connector(s) into channel jack(s) on right side of the charger (use balance ... -
Page 35: Troubleshooting
Troubleshooting There are 26 ways to improperly connect two packs to a charger! After the START/STOP button is pressed, a special battery checking sequence automatically checks every wire before initiating a charge. It is possible to get an unrelated safety code from a simple wiring issue. Operating errors appear as messages in the display. - Page 36 …table continued from previous page Fuel not None Corrupted preset. Factory restore the charger Fuel not LiPo Corrupted preset. Factory restore the charger Fuel not A123 Corrupted preset. Factory restore the charger Safety Code #79 CH1CELLS out of range Safety Code #80 CH2CELLS out of range Safety Code #81 Bad Pb charge setup...
-
Page 37: Support Options
Support options For Sales Support on REVOLECTRIX Brand Products: Email: sales@revolectrix.com or phone: (301) 798 2770 For Sales or Technical Support on "Other Brands" in the REVO Store: Email: brandsupport@revolectrix.com To request information about a REVOLECTRIX product you are considering purchasing: Email: info@revolectrix.com or phone: (301) 798 2770... -
Page 38: Revolectrix Limited Warranty
REVOLECTRIX limited warranty REVOLECTRIX warrants this product to be free of manufacturing defects for the term of one year from the date of purchase. Should any defects covered by this warranty occur, the product shall be repaired or replaced with a unit of equal performance by REVOLECTRIX or an authorized REVOLECTRIX service station.
Need help?
Do you have a question about the Cellpro 10XP and is the answer not in the manual?
Questions and answers