Table of Contents
Advertisement
Advertisement
Table of Contents

Related Manuals for Genee World G-Touch

Summary of Contents for Genee World G-Touch
- Page 1 User Manual Please retain this manual properly for future reference...
-
Page 2: Table Of Contents
Table Of Contents Notice................................4 Mounting Requirements........................5 Bearing.............................5 Ventilation..........................5 Introduction............................7 Screen Benefits ........................7 Outer Appearance ......................8 Control Panel ........................9 Interface Panel ........................10 Functions of remote controller ...................11 Basic Operation...........................12 Power On..........................12 Power Off..........................12 Software Installation......................13 Software Uninstall......................13 Software Calibrate......................14 Assemble OPS Computer.........................18 Select Signal Channel........................18 Menu...............................19 Times...............................21... -
Page 3: Notice
Notice • Install or place components of which power supply voltage is high enough to cause personal injury in places out of the reach of children. • Do not use any types of power cables other than those provided together with the product to prevent the product from being damaged. - Page 4 Notice • Install or place components of which power supply voltage is high enough to cause personal injury in places out of the reach of children. • Do not use any types of power cables other than those provided together with the product to prevent the product from being damaged.
-
Page 5: Mounting Requirements
Mounting Requirements Bearing You can choose the potable or wall mounting method according to your needs. Wall mounting can substantially save the space. If you choose portable mounting, use the mounting rack or support. If you want to use a self-made mounting rack, the bearing capacity of the rack should be at least four times of the actual weight of the display. - Page 6 Figure: * See CAS 132-2006...
-
Page 7: Introduction
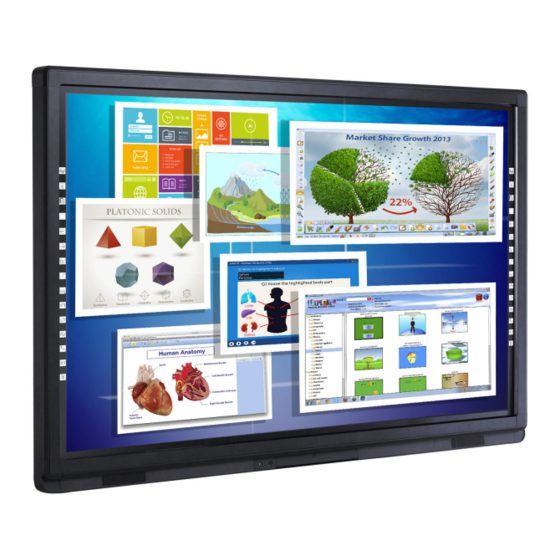
Introduction Thank you for your purchase. As our latest independently developed and produced Interactive touch screen are multi-functional. The perfect solution for teaching interactive teaching, digital demonstration, multi-media presentation, touch operations and handwriting. They are well designed and produced to meet needs of both education and corporate applications. -
Page 8: Outer Appearance
Outer Appearance Right Loudspeaker Control panel Left Loudspeaker (Front View) (Rear View) (Right view) Interface panel... -
Page 9: Control Panel
Control Panel 1. Menu: Enter/quit the menu 2. Source: Show or exit from the signal source menu 3. Eco: Switch to ECO mode 4. VGA: Switch to VGA input signal 5. HDMI: Switch to HDMI input signal 6. Vol+: Increase the volume 7. -
Page 10: Interface Panel
Interface Panel... -
Page 11: Functions Of Remote Controller
Functions Of Remote Controller : On or standby : Mute : Menu or return to parent menu : Quit 5. 0-9: Select TV channel or enter number : Freeze : Enable listen alone mode : Display or quit signal source menu : Show current signal status or information : Confirm selected item : Up/Down/Left/Right direction buttons... -
Page 12: Basic Operation
Basic Operation Power On • Power the interactive panel with a 100-240V 50/60Hz AC power supply. • Turn on the rocker switch on the bottom left of the interactive panel (besides the power interface) to switch on the interactive panel. The power LED turns on in red. -
Page 13: Software Installation
Software Installation • Recommended Configuration: CPU: Inter (R) Core i3 2.27GHz or AMD CPU with equivalent performance Memory: 1GB Hard drive: 1GB Graphics card: supports DirectX 9 or above • If the interactive panel is equipped with the latest version of handwriting software in the PC before being delivered, please skip the step. -
Page 14: Software Uninstall
Software Uninstall If you are sure to delete the touch LCD display software from your computer, click “Add or Remove Programs” in “Control Panel”. Choose “Spark” and click “Uninstall” to uninstall. Software Calibration To work normally, the handwriting of the projected image on the touch LCD display should coincide with the actual one so as to calibrate accurately. - Page 15 3. Select Nine Points and click Position. 4. Use the pen to click and hold the center of the flickering across. Do not release it until the flickering cross moves to the next calibration point. Complete the calibration process as instructed. After it completes, you will return to the desktop automatically.
- Page 16 Calibration Method for Windows 7 Connect the interactive panel to PC using the USB lead via the USB interface on the panel. Select Tablet PC Setting on Control Panel. Select on the setting window.
- Page 17 Use the pen to click and hold the center of the flickering cross. Do not release it until the flickering cross moves to the next calibration point. Complete the calibration process as instructed. Click Yes after it completes. Hits & Tips •...
-
Page 18: Assemble Ops Computer
Assemble OPS Computer Insert OPS computer into the slot and fasten it with two M4 screws on the left and right. Note: The OPS computer is not plug-and-play. Disconnect the interactive panel from the power before inserting the OPS computer. Select Signal Channel Press Source to show the list of signals sources. -
Page 19: Menu
Menu Press Menu on the remote controller to display the menu (Time > Channel>Image>Sound>Setting). Press to choose a sub-menu and press OK to enter the sub-menu. Press Quit to exit the menu. Times Enter the Time menu to display items including Clock, Off Time, On Time, Sleep Timer, Auto Sleep and Menu Disappear Timer. - Page 20 2. Off Time After you enter the Off Time sub-menu, the interface will show items including hour to change the off time mode: Once, Everyday, Monday and minute. Press to Friday, Monday to Saturday, Saturday and Sunday, Sunday and Off. •...
- Page 21 4. Sleep Timer After you enter the Sleep Timer sub-menu, the interface shows Off, 10 min, 20 min. 30min, 60 min, 90 min, 120 min, 180 min, and 240 min. • Press to select an item. Press Menu to return to the parent •...
-
Page 22: Channel
6. Menu Disappear Timer After you enter the Menu Disappear Timer sub-menu, the interface shows options including Off, 5s, 10s and 15s. • Press to select an item. • Press Menu to return to the parent menu Channel After you enter the Channel menu, the interface shows options including Auto Search, Digital Manual Search, Analogue Manual Search, Channel Edit, Signal Info, and File Burning Sys. - Page 23 1. Auto Search Press OK to start auto search. • • Press to select Yes or No. • After you press Yes, press select the type of channels to search (Digital, Analogue, Digital +Analogue); • Press to select a country. Press OK to start auto search.
- Page 24 2. Digital Manual Search After you enter the Digital Manual Search sub-menu, the interface shows the following information: • Press to select the channel to be searched. • Press OK to start search. Press Menu to return to the parent •...
- Page 25 3. Analog Manual Search After you enter the Analogue Manual Search sub-menu, the interface shows options including Store to, Audio, Pal (colour system), Current Channel, Search and Fine-Tune. • Press to select an item. • Press to adjust the value of the selected item.
- Page 26 5. Signal Info After you enter the Signal Info sub-menu, the interface shows options including Program, Network, Quality and Strength. Press OK to enter the option. 5. File Burning Sys After you enter the File Burning Sys sub-menu, the interface shows options including Choose Disk, Check File Burning Sys and USB Disk.
-
Page 27: Picture
Picture After you enter the Picture menu, the interface shows options including Picture Mode, Colour Temperature, Aspect Ratio, Noise Reduction, Screen and Backlight. to select an item and OK to enter the sub-menu. Press 1. Picture Mode After you enter the Picture Mode sub-menu, the interface shows options including Contrast, Brightness, Colour, Sharpness and Tint. -
Page 28: Colour Temperature
2. Colour Temperature When you enter the Colour Temperature sub-menu, the interface shows options including Red, Green and Blue. Press to choose Standard, Warm, User or Cold. When the colour temperature mode is User • Press to select an item. •... - Page 29 4. De-noise After you enter the De-noise sub-menu, the interface shows options including Off, Low, Middle, High and Default. • Press to select an item. Press Menu to return to the parent • menu. Press Quit to exit the menu. •...
-
Page 30: Sound Mode
2. Backlight When the Eco mode is set to Standard, press to adjust the value. Press Menu to return to the parent menu. Press Quit to exit the menu. Note: In the ECO and Auto mode, the Backlight option is in grey and cannot be adjusted. Sound After you enter the Sound menu, the interface shows options including Sound Mode, Balance, Auto Volume, Surround, Optical Mode, EQ and Listen Without... - Page 31 2. Auto Volume After you enter the Auto Volume sub-menu, the interface shows On and Off options. . • Press to select an item. Press Menu to return to the parent • menu. • Press Quit to exit the menu. 3.
- Page 32 4. SPDIF Mode After you enter the SPDIF Mode sub-menu, the interface shows options including PCM and Auto. • Press to select an item. • Press Menu to return to the parent menu. • Press Quit to exit the menu. 5.
-
Page 33: Setting
Setting After you enter the setting menu, the interface shows options including OSD Language, Audio Track, Subtitle, Blending, Restore to Factory Default, Signal Search and Power Key Turn On PC. Press to select an item and OK to enter the sub-menu. 1. - Page 34 2. Audio Language After you enter the Audio Language sub-menu, the interface shows options including Chinese and English. to select Main or • Press Standby. • Press to select the language. • Press Menu to return to the parent menu. Press Quit to exit the menu.
- Page 35 5. Restore to Factory Default After you enter the Restore to Factory Defualt sub-menu, the interface shows options including Yes and No. Press to reset it and to quit. 6. Signal Search After you enter the Signal Search sub-menu, press to select the signal search item.
-
Page 36: Multi-Media
Multi-Media Press Signal Source on the remote controller to display the list of signal sources. to switch to Multi-Media signal channel. Press OK to enter the Press channel. After you enter the multi-media signal source, the interface shows options including Image, Music, Movie and text. The colour of the USB icon indicates if USB is detected. - Page 37 When USB is detected, press OK to show content in the flash disk. 1. Image After you enter Image option, press to select images to be displayed. Press OK to select or de-select an image. Press to start or stop displaying.
- Page 38 • Press Show Info to display the operation function menu. Press to select a function and press OK to use the function. (The functions include: Play/Pause, Previous, Next, Stop, All, Music Off, Playlist, Information, Clockwise Rotation, Counter clock wise Rotation, Zoom Up, Zoom Down and Move.) •...
- Page 39 2. Music After you enter Music option, press to select music to be played. Press OK to select or de-select a song. Press to start or stop playing and shortcut buttons on the remote controller to use relevant functions. • Press Show Info to show the operation function menu.
- Page 40 3. Movie After you enter Movie option, press to select movies to be displayed. Press OK to select or de-select a movie. Press to start or stop playing. Press Show Info to show the operation function menu. Press • to select a function and press OK to use the function.
-
Page 41: Eco Mode
4. File After you enter File option, press to select files to be displayed. Press OK to select or de-select a file. Press to start or stop displaying. Press Show Info to show the operation function menu. Press • to select a function and press OK to use the function. -
Page 42: Serial Port Control
Serial Port Control The RS-232 port of the interactive panel is defined as follows: Connect RS-232 port to the PC or controlling device. Enable RS-233 serial port connection and complete the following configuration. Port: COM1 (Set according to PC or controlling device’s port number) 19200 Bit rate: Odd/even check... - Page 43 The following table lists button controlling codes. The buttons share same functions with corresponding buttons on the remote controller: Controlling Codes Controlling Codes Function Function 99 A2 B3 C4 02 ff 01 00 99 A2 B3 C4 02 ff 01 01 Power on Power Off 99 A2 B3 C4 02 ff 01 02...
-
Page 44: Specifications Of Pc Mode (Vga Input)
Specifications of PC Mode (VGA Input) Standard Resolution Refresh Horizontal Vertical Horizontal/ Rate (HZ) Frequency Frequency Vertical Sync (Khz) (Khz) Polarity (TTL) VESA 640x480 VESA 640x480 VESA 640x480 VESA 800x600 VESA 800x600 VESA 800x600 VESA 800x600 VESA 1024x768 VESA 1024x768 VESA 1024x768 VESA... -
Page 45: Faq & Troubleshooting
FAQ & Troubleshooting Possible cause Solution Failure Fail to connect to the service The drive program is not Install the drive program correctly installed. correctly program The USB interface (lead) is not Change the USB lead or check if connected or is faulty the USB interface is faulty The infrared tube is blocked Ensure that the surrounding... - Page 46 Possible cause Solution Failure Unable to write The color of strokes is same as Change the colour of strokes or similar to the background colour. You hand or other objects are Use the pen rather than a finger put on the display when writing to write.
- Page 47 Self-inspection: The following phenomena are not failures: • Given the high-precision production technology, the LCD panel may have a very few constantly bright or dark pixels, which turn out to be tiny red, blue, green or dark points on the panel. The phenomenon is normal. •...
-
Page 48: Maintenance Tips
Maintenance Tips • Do not put or install the product near a heat source or under direct sunlight, in dusty or humid places, or where the product can be affected or damaged by mechanical vibration. To maximize the performance, it should be put away from equipment such as grid, large metal objects and radar stations as far as possible. -
Page 49: Specifications
Genee World may modify the user manual without prior notice. • If you discover any unclear presentation, mistake or omission in this manual, please contact with us immediately. Genee World is not liable for any loss or damage if you fail to contact with us. - Page 50 Leaders In Learning Technology Libra House, Tel: +44(0) 1902 390878 Upper Zoar Street, Fax: +44(0) 870 405 0188 Wolverhampton, Email: enquiries@geneeworld.com West Midlands WV3 0LA Web: www.geneeworld.com...
Need help?
Do you have a question about the G-Touch and is the answer not in the manual?
Questions and answers