Table of Contents
Advertisement
Advertisement
Table of Contents

Related Manuals for Mec CAD-E0930 PR1D

Summary of Contents for Mec CAD-E0930 PR1D
-
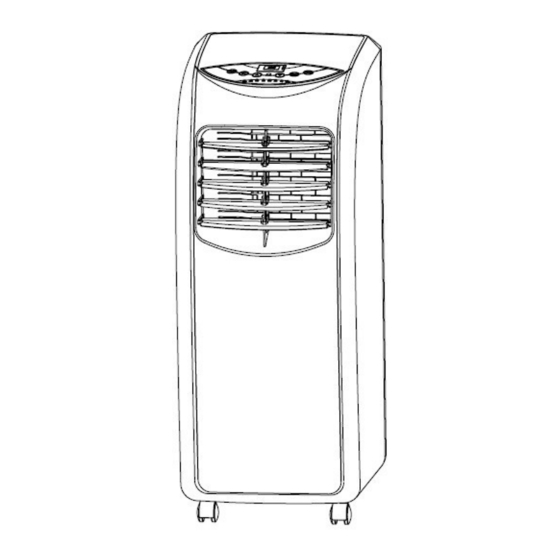
Page 1: User Manual
Page: 1/16 User Manual CAD-E0930 PR1D Portable Air-conditioner... -
Page 2: Table Of Contents
Page:2/16 Contents Important Safeguards.....………………………………………….…….…... 3 Function Description……………….……………………………….…………...…. 5 Features and Parts…………………………………………………….…………….5 Installation…………………………………………………..…………………. …….6 Control Setting…………………………………………………………….………….9 Remote Conrtol ………………………………………………………………… Water Drainage Methods………..…………………………………………………12 Maintenance…………………………………..………………….………….………13 End of Season Storage………………..……………………………………………15 Handling of the Unit……………………………………………………………….…15 Troubleshooting……………………….………………………………………….…16 Appendix………………………….……………………………………….…….……16... -
Page 3: Important Safeguards
Page: 3/16 Thank you for selecting this super quality air-conditioner. Please keep this User’s Manual properly for future reference. Read the User’s Manual carefully before operating this unit. Important Safeguards Important safeguards: * This air-conditioner is suitable for indoor use only rather than for other occasions. * Rated operating range: this unit shall be connected to 220 -240V/50Hz power output end. -
Page 4: Function Description
Page:4/16 * Do not use pest control aerosol or other flammable substances near the air-conditioner. * Do not wipe or wash the air-conditioner with chemical solvents such as gasolines and alcohols, etc. Before cleaning the air-conditioner, be sure to turn off the power supply and wipe it with soft semi-wet cloth;... -
Page 5: Installation
Page:5/16 2. Parts: 1. Control panel 14. Lower air duct bottom 2. Horizontal louvre 15. Wire-winding post 3. Vertical louvre 16. Drain cap 4. Air outlet frame 17. Evaporator filter mesh 5. Vertical Louvre connecting lever 18. Evaporator filter frame 6. - Page 6 Page: 6/16 Warning: leave this mobile air-conditioner in an upright position for at least 2 hours before first use. This air-conditioner may be moved indoor conveniently; leave the air-conditioner in an upright position while moving it. The air-conditioner shall be placed on a flat ground surface. Do not install or operate this air-conditioner in a bathroom or other wet environments.
- Page 7 Page: 7/16 3.The C shape buckle that clips the heat exhaust hose must clip the back shell and heat exhaust hose firmly. Position lower air duct bottom step Lower air duct bottom joint Figure 3 Figure 4 3). Hold the unit with one hand and the heat exhaust hose short connector with another hand;...
-
Page 8: Control Setting
Page:8/16 Figure 7). 2). Snap the flat end of the heat exhaust hose short connector into the elliptical hole of the window sealing board assembly (as shown in Figure 8 and 9). Note: 1. The flat end of the heat exhaust hose short connector must be snapped into place. -
Page 9: Remote Control
Page:9/16 REMOTE CONTROL Buttons of the remote control operating instructions as below: except Dry mode and sleep High Press this button to select high fan speed( mode 2) Low Press this button to select low fan speed. 3)Sleep Press this button to select sleep mode press this button to set the time of turn 4) Timer When turn off the unit,... -
Page 10: Water Drainage Methods
Page:10/16 Press this button to choose Dry mode 9) Fan Press this button to choose Fan mode. Vary from Celsius degree to Fahrenheit degree. Power Press this button to turn on/off the unit. Water Drainage 1. Manual drain: (as shown in Figure 10) 1). -
Page 11: Maintenance
7100-BF3AAQ1 MEC YPO2 User Mmnual.pdf 2014-7-12 8:28:40 Page: 11/16 3. If the vessel that holds water can not hold all water in the unit, before the vessel that holds water is full of water, block the water outlet with the water plug as soon as possible to prevent the water from flowing onto the ground or carpet. - Page 12 Page: 12/16 Prior to maintenance and servicing of the unit, turn off the power and unplug the plug. 1. Surface cleaning Clean the surface of the unit with wet soft cloth. Do not use chemical solvents such as alcohol and gasoline; otherwise, the surface of the air-conditioner may be damaged and even the whole unit may be damaged.
-
Page 13: Handling Of The Unit
Page: 13/16 2). To install the evaporator filter frame and condenser filter frame, point the back end of the filter frame toward the socket and then push the filter frame evenly and gently into the socket. Note: 1. Install the filter frame in the reverse order of removal. Be sure to install the filter mesh first before the filter frame is installed. -
Page 14: Troubleshooting
Page: 14/16 Air outlet Handle position Figure 17 End of Season Storage 1. Screw off the drain cap, unplug the water plug and drain the water in the water tray to another vessel that holds water. Note: the tilt angle of the unit shall not be greater than 30 degrees. 2. -
Page 15: Appendix
Page: 15/16 Problem/fault indication Connect the unit to a live socket and No power turn it on. Full water indicator illuminates? Drain the water stored in the unit. The air-conditioner It is recommended that this unit be Ambient temperature too low ? does not work operated at 10-35 . - Page 16 Page:16/16 For specific technical parameters of the models, refer to the nameplate on the product (s). Disposal: do not store waste products with other non-classified wastes. Such wastes shall be stored separately for other special purposes.
- Page 17 Imported & Distributed by: FIMACO SDN BHD (110749‐V) Website: www.mec.com.my 8‐2 WISMA FIAMMA TOLL‐FREE Customer Service Centre No. 20, Jalan 7A/62A Bandar Manjalara 1800‐28‐2093 52200 Kuala Lumpur Malaysia. Operation Hour: From Monday To Friday, 8.30am to 6.00pm Tel : +603‐6279 8888(General Line) Fax: +603‐6279 8665(Marketing Dept) Email: info@fimaco.com.my...
Need help?
Do you have a question about the CAD-E0930 PR1D and is the answer not in the manual?
Questions and answers