Table of Contents
Advertisement
Quick Links
Advertisement
Table of Contents

Summary of Contents for Sitecom WLC-1000
- Page 1 Wi-Fi Home Cam User Manual WLC-1000 / WLC-2000...
-
Page 2: Introduction
Wi-Fi Home Cam User Manual INTRODUCTION Congratulations on your purchase of the Wi-Fi Home Cam. Grab your phone and keep an eye on your home, business or loved ones, even when you are miles away. All in beautiful HD for crisp details and vivid colours. -
Page 3: Table Of Contents
Wi-Fi Home Cam User Manual TABLE OF CONTENTS Introduction ............................. 2 Get to know the Wi-Fi Home Cam......................5 What you get ............................5 What you need ............................ 6 Safety precautions ..........................7 Layout Wi-Fi Home Cam Mini ......................8 layout Wi-Fi Home Cam Twist ...................... - Page 4 WLC-1000 ............................58 WLC-2000 ............................59 Revision 1.0 © Sitecom Europe BV 2015 Note: All the information contained in this manual was correct at the time of publication. However, as our engineers are always updating and improving the product, your device’s software...
-
Page 5: Get To Know The Wi-Fi Home Cam
Important note: Do not throw this flyer away. The information in the flyer is unique per product and cannot be recovered by Sitecom. You will need this flyer again in case of any changes to your Wi-Fi home network (new router, changing Internet providers etc.). -
Page 6: What You Need
Wi-Fi Home Cam User Manual WHAT YOU NEED For the Wi-Fi Home Cam A wireless home network A free power socket For the MyCam app An Android or iOS smartphone or tablet Android version 3.xx or higher ... -
Page 7: Safety Precautions
Wi-Fi Home Cam User Manual SAFETY PRECAUTIONS The Wi-Fi Home Cam is designed and manufactured with your safety in mind. In order to safely and effectively use the Wi-Fi Home Cam, please read the following before usage. Usage Cautions Do not disassemble, repair or change the Wi-Fi Home Cam;... -
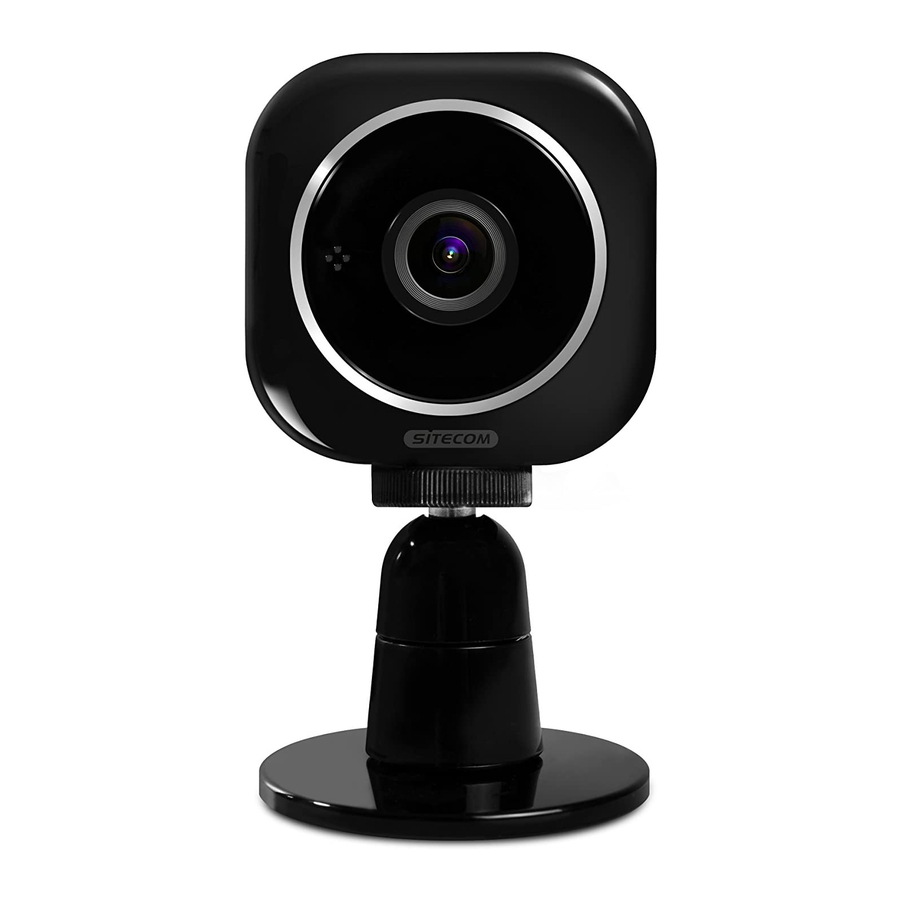
Page 8: Layout Wi-Fi Home Cam Mini
Wi-Fi Home Cam User Manual LAYOUT WI-FI HOME CAM MINI Micro USB port to power the cam: Reset button: Press for 3 seconds to reset the Wi-Fi Home Cam to the factory default settings. LEDs: Purple, blinking Starting up, connecting to a Wi-Fi device Purple, solid Camera is connected to a Wi-Fi device Blue, blinking... -
Page 9: Layout Wi-Fi Home Cam Twist
Wi-Fi Home Cam User Manual LAYOUT WI-FI HOME CAM TWIST Micro USB port to power the cam: Reset button: Press for 3 seconds to reset the Wi-Fi Home Cam to the factory default settings. LEDs: Left LED: Blue, solid Power connected Red, blinking microSD card is full, please format or replace... - Page 10 Wi-Fi Home Cam User Manual Right LED: Purple, blinking Starting up, connecting to a Wi-Fi device Purple, solid Camera is connected to a Wi-Fi device Blue, blinking Connecting to your Wi-Fi home network (router / modem router) Blue, solid Camers is connected to your Wi-Fi home network (router / modem router)
-
Page 11: Install Your Wi-Fi Home Cam
Wi-Fi Home Cam User Manual INSTALL YOUR WI-FI HOME CAM Step 1: Download the app. 1. Go to the App Store / Google Play and search for the ‘MyCam’ app. 2. Download and install the app. Info: Do not open the MyCam app yet. Wait until after step 3. (If you have already opened the app, close it completely. - Page 12 Wi-Fi Home Cam User Manual Step 3: Select the Wi-Fi Home Cam in your Wi-Fi settings 1. Go to settings on your iPhone / Android phone 2. Click ‘Wi-Fi’. 3. Select “Home Cam Mini / Home Cam Twist” from the list of available networks. Info: At this stage, this is an unsecured network, no password is required.
- Page 13 Wi-Fi Home Cam User Manual Step 5: Connect your phone back to your Wi-Fi home network 1. Go to settings on your iPhone / Android phone 2. Click ‘Wi-Fi’. 3. Select your Wi-Fi home network from the list of available networks. Info: Your phone might connect to your Wi-Fi home network automatically.
- Page 14 Wi-Fi Home Cam User Manual Step 7: Add your Wi-Fi Home Cam to your account 1. Press “Add camera” on the home screen 2. Pick an installation method. You can either scan the QR code on the back of the camera of add the camera by entering the information from the flyer.
-
Page 15: Get To Know The Mycam App
Wi-Fi Home Cam User Manual GET TO KNOW THE MYCAM APP Camera overview This screen is your home screen that you get to see after login. Here you can see all the Wi-Fi Home Cams that have been added to your account. Live view The live view of the camera lets you see the camera picture, control the camera and access the recordings of your camera. - Page 16 Wi-Fi Home Cam User Manual Camera settings The camera settings screen lets you change things such as the quality of the recordings, activate the motion and sound detection and the date & time. Click on the gear wheel symbol next to your installed camera to go to the camera settings. MyCam account settings The MyCam account settings screen lets you update the account settings, Google Drive settings, notifications settings and firmware updates.
- Page 17 Wi-Fi Home Cam User Manual Add a new camera The Add a new camera button allows you to add a new Wi-Fi Home Cam to your MyCam account to keep an eye on more room. You can add up to 99 cameras to your MyCam account, so there is practically no limit for you.
-
Page 18: Live View
Wi-Fi Home Cam User Manual LIVE VIEW Full screen view If you tilt your phone sideways 90 degrees, the live view of the camera will go to full screen. Back to home screen Press the “Camera list” button to go back to the camera overview screen Control ... -
Page 19: Recorded Events
Wi-Fi Home Cam User Manual RECORDED EVENTS On the screen, you see an overview of all the motion and sound events that the camera recorded. Filmstrip icon: Recorded on the microSD card and not saved in your Google Drive. Google Drive icon: Recorded on the microSD card and backed up in your Google Drive. Watch a recording 1. -
Page 20: Camera Settings
Wi-Fi Home Cam User Manual CAMERA SETTINGS You can change the settings for every camera in your MyCam account individually. 1. Click the gear wheel icon next to your camera on the camera overview screen. 2. You will see the overview screen of the Wi-Fi Home Cam settings. -
Page 21: Change The Camera Name
Wi-Fi Home Cam User Manual Change the camera name On this screen, you can change the name you have given to your camera during the installation process. 1. Enter a new name into the field. The camera name can be between 4-16 characters. No spaces are allowed. -
Page 22: Change The Date & Time
Wi-Fi Home Cam User Manual Change the date & time On this screen, you can change the date & time settings. You can either sync your camera with your phone or set the time zone manually. Sync date & time automatically 1. - Page 23 Wi-Fi Home Cam User Manual Set date & time manually 1. Click on the time zone that you currently see displayed on the screen. 2. You will see a pop-up screen with the time zones. Select the one you want to apply. 3.
-
Page 24: Change The Video Quality
Wi-Fi Home Cam User Manual Change the video quality On this screen, you can change the video quality. Depending on the speed and quality of your Internet and Wi-Fi connection, you might want to set the video quality lower to save bandwidth. 1. -
Page 25: Activate & Change The Motion Detection
Wi-Fi Home Cam User Manual Activate & change the motion detection On this screen, you can turn the motion detection on and off and adjust the sensitivity. With motion detection activated, your camera will start recording automatically when it detects motion. -
Page 26: Activate & Change The Audio Detection
Wi-Fi Home Cam User Manual Activate & change the audio detection On this screen, you can turn the audio detection on and off and adjust the sensitivity. With audio detection activated, your camera will start recording automatically when it detects sound. -
Page 27: Delete The Camera
Wi-Fi Home Cam User Manual Delete the camera On this screen, you can remove a camera from your MyCam account. You can then add that camera to a different MyCam account if you want to. 1. Click “Delete” to remove the camera from your MyCam account. After you press the button, you will automatically go back to the camera overview screen once the camera has been removed. -
Page 28: Mycam Account Settings
Wi-Fi Home Cam User Manual MYCAM ACCOUNT SETTINGS 1. Press the button “Settings” in the bottom left corner 2. You will see the overview screen of the MyCam account settings. -
Page 29: Update The Mycam Account Settings
Wi-Fi Home Cam User Manual Update the MyCam account settings On this screen, you can update your MyCam account password. 1. Type a new password in the “New password” field 2. Confirm the password by typing it again in the “Confirm new password” field 3. -
Page 30: Add A Google Drive Account Or Update It
Wi-Fi Home Cam User Manual Add a Google Drive account or update it On this screen, you can link a Gmail account to your MyCam account to back up your recordings into your personal Google Drive cloud or update the linked Gmail account. If you do not have an account yet and want to find out more about Google’s storage options, go to https://www.google.com/drive. -
Page 31: Update The Notification Settings
Wi-Fi Home Cam User Manual Update the notification settings On this screen, you can turn push notifications for the Wi-Fi Home Cam on or off. You can receive a real-time notification any time a sound or motion event occurs. 1. Swipe the button to turn notifications on or off 2. -
Page 32: Update The Firmware
Wi-Fi Home Cam User Manual Update the firmware On this screen, you can check if there is new firmware available for your Wi-Fi Home Cam. 1. Click “Firmware Update” to check if a new firmware is available. If a new firmware is available, it will be listed below. -
Page 33: Check The Version Info Of The Mycam App
Wi-Fi Home Cam User Manual Check the version info of the MyCam app On this screen, you can see which version of the MyCam app you are using. You might need this info when contacting the Sitecom support team. -
Page 34: Report A Bug
Wi-Fi Home Cam User Manual Report a bug On this screen, you can let us know about bugs or issues that you are experiencing with the MyCam app. Please describe the issue as detailed as possible and click “Save”. We take a look at all the reported issues and bugs and try to fix them for in the next app update. -
Page 35: Add A New Camera To Your Mycam Account
Wi-Fi Home Cam User Manual ADD A NEW CAMERA TO YOUR MYCAM ACCOUNT You can add as many cameras as you want to your MyCam account. Simply login to your MyCam app and follow the steps. Step 1: Add a Wi-Fi Home Cam to your account 3. -
Page 36: Get To Know The Mycam Portal
Since the MyCam portal uses Java Script, you need a compatible browser (Internet Explorer or Firefox) to access it. You can access the MyCam portal via the following URL: https://mycamera.sitecom.com Log in with your MyCam account credentials or your Gmail account. -
Page 37: Home Screen
Wi-Fi Home Cam User Manual HOME SCREEN On the home screen you can see all the cameras that have been added to your MyCam account. Double click on a camera to access the live view screen. Above each of the screens of your camera sits a status bar with several icons. Camera status Green: Online... -
Page 38: Live View
Wi-Fi Home Cam User Manual LIVE VIEW The live view screen shows the current view of your camera, lets you control the camera and watch recorded events. Control The buttons are only functional if your camera has the ability to move (e.g. Wi-Fi Home Cam Twist). - Page 39 Wi-Fi Home Cam User Manual Listen Click to mute or unmute the microphone so that you can listen to the people or pets you are watching. Snapshot Click to take a screenshot. The screenshot will be saved on your computer.
- Page 40 Wi-Fi Home Cam User Manual Speak Click to speak through the speaker of your Wi-Fi Home Cam, so that the people or pets you are watching, can hear you. Recorded events Click one of the tabs to look back at the events by hour, day or week. ...
- Page 41 Wi-Fi Home Cam User Manual Camera settings 2. Click to change the camera settings.
-
Page 42: Mycam Account Settings
Wi-Fi Home Cam User Manual MYCAM ACCOUNT SETTINGS 1. Click Account’ at the top of the home screen to change your MyCam account settings. 2. Type a new password in the “Password” field 3. Confirm the password by typing it again in the “Confirm password” field 4. -
Page 43: Add, Change Or Delete A Camera
Wi-Fi Home Cam User Manual ADD, CHANGE OR DELETE A CAMERA 1. Click Account’ at the top of the home screen to change your MyCam account settings. 2. Click “Device” in the top right corner. -
Page 44: Change The Settings
Wi-Fi Home Cam User Manual Change the settings 1. Click the settings symbol in the right column of the listed camera to adjust the settings. 2. Change the name of the camera by typing a new name in the field. - Page 45 Wi-Fi Home Cam User Manual 3. Adjust the quality of the video recordings by selecting a radio button. Depending on the speed and quality of your Internet and Wi-Fi connection, you might want to set the video quality lower to save bandwidth. 4.
-
Page 46: Delete A Camera
Wi-Fi Home Cam User Manual Delete a camera 1. Click the x-symbol in the right column of the listed camera to delete the camera. 2. You will see the following message: 3. Click “OK” to confirm deleting the camera, click “Cancel” to stop the process. -
Page 47: Add A Camera
Wi-Fi Home Cam User Manual Add a camera We strongly recommend to follow the steps in the printed Installation guide or in this manual, and install the camera with the MyCam app instead of going through the steps in the portal. 1. - Page 48 Wi-Fi Home Cam User Manual If the installation was not successful, the message “No matching device” will appear. Reboot the camera by removing the power cable. Connect the cable again to switch on the device, and make sure the camera is connected to your Wi-Fi home network. This is necessary to activate the camera.
-
Page 49: Product Support
Wi-Fi Home Cam User Manual PRODUCT SUPPORT Do you want to ask a question about the Wi-Fi Home Cam? Or is there something you don’t understand? In our Learning Centre we answer all your questions about the Wi-Fi Home Cams and show you how to get the most out of them. -
Page 50: Addendum A: Gnu-Gpl
Wi-Fi Home Cam User Manual ADDENDUM A: GNU-GPL WLC-1000... - Page 51 Wi-Fi Home Cam User Manual...
- Page 52 Wi-Fi Home Cam User Manual...
- Page 53 Wi-Fi Home Cam User Manual...
-
Page 54: Wlc-2000
Wi-Fi Home Cam User Manual WLC-2000... - Page 55 Wi-Fi Home Cam User Manual...
- Page 56 Wi-Fi Home Cam User Manual...
- Page 57 Wi-Fi Home Cam User Manual...
-
Page 58: Addendum B: Declaration Of Conformity
Chicony Electronics (Dong Guan) Co., Ltd. San Zhong Guan Li Qu, Qingxi Town, Dongguan City Guangdong 523651 China We, as the manufacturer of Sitecom Europe BV. P.O. BOX 12040 3004 GA Rotterdam, The Netherlands declare under our sole responsibility that the product:... -
Page 59: Wlc-2000
Chicony Electronics (Dong Guan) Co., Ltd. San Zhong Guan Li Qu, Qingxi Town, Dongguan City Guangdong 523651 China We, as the manufacturer of Sitecom Europe BV. P.O. BOX 12040 3004 GA Rotterdam, The Netherlands declare under our sole responsibility that the product:... - Page 60 Wi-Fi Home Cam User Manual...
Need help?
Do you have a question about the WLC-1000 and is the answer not in the manual?
Questions and answers