Table of Contents
Advertisement
Quick Links
Advertisement
Table of Contents

Summary of Contents for Jumbl Tape to Digital Converter
- Page 1 Tape to Digital Converter User Manual...
- Page 2 USB Cassette Capture We would you like to thank you for choosing our product. You have made an excellent decision. The following contents guide you how to use the product. Hope this device will bring you nice digital experience Redisccover those old songs with USB Cassette Capture by turning your tapes into MP3’s to use on your computer, iPod or in the car! USB Cassette Capture is a portable, handheld USB tape player that works with all kinds of tapes.It has an easy-to-use USB connection for converting the music on your tapes into MP3 files.
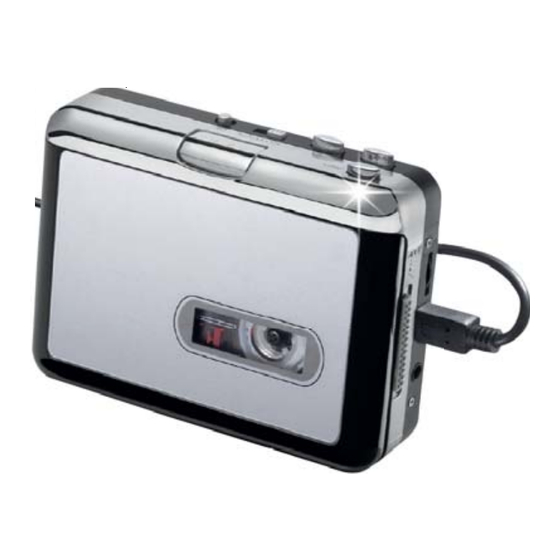
- Page 3 USB Cassette Capture 1, Eject: Slide this switch to open the cassette holder. 2, Volume: Adjusts the volume of the headphones and USB connection 3, Headphones : You can connect 1/8” headphones here 4, USB Connection: Use the included USB cable to connect USB Cassette Capture to your computer . For transfering your recordings to your computer, we have provided a software package on the included CD.
- Page 4 USB Cassette Capture Please click “NEXT” to go forward Please select the desitination location, and click “NEXT” to go forward...
- Page 5 USB Cassette Capture Please click “NEXT” to go forward Please click “Install” to install the software.
- Page 6 USB Cassette Capture Please waitting for installation finished, and click “Finish” to complete the installation. Now, you need to set software for capturing and editing audio. Double click “Audacity” icon on your desktop, and select your language.
- Page 7 USB Cassette Capture Please click “Edit” key on the software panel, and select “Preferences”. Please set recording device to be “USB Audio Device”, and channels to “2(Stereo)”. And select “Software Play through (Play new track while recording it)”.
- Page 8 USB Cassette Capture Now, you can start to record analog audio to be digital MP3 format file. Begin playing your vinyl or cassette and click red record key (see below) to start recording audio - when you want to finish, click the yellow stop key. For the first time you do this, you need to follow a few more steps if you want to export as MP3file.
- Page 9 USB Cassette Capture and select “Export As MP3”. You need to select a file name and location now. If requested, you may need to locate the plug-ins file – “lame_enc.dll” – see below.
- Page 10 USB Cassette Capture You may be asked to provide some additional information about your recording. You can now use the file for your iPod by iTunes or other MP3 player. Setting Audacity for Windows Vista or Seven OS: When you play this device on Vista or Win7 OS, you may need to do following setting in order to record two channel audio:...
- Page 11 USB Cassette Capture Setting the " Recording device" on "Audio setting" panel Click USB PnP Audio Device and setting: In " Advanced" panel of pop-up properties setting, set the rate to " 2 channel, 16 bit, 48000hz" then apply, click "ok"...
- Page 12 USB Cassette Capture Frequently Asked Questions Question: How to use the ‘Effects’ functions provided in the drop-down menus on Audacity software (such as noise removal or bass boost)? Answer: you need to select the portion of your recorded music to be changed – to do this ‘click, hold and drag’ with your left mouse key the section of music from the horizontal time bar found in the Audacity window (on screen).
- Page 13 USB Cassette Capture 2, Change the Mixer Device to “USB Audio Device” then click “OK”. 3, Check the volume level on the popup panel; Drag the level to a lower level and you will get better quality sound.
- Page 14 USB Cassette Capture info@jumbl-etc.com JUMBL is a trademark of C&A IP Holdings, LLC ©2013 All Rights Reserved Distributed by C&A Marketing, Inc. 2 Bergen Turnpike, Ridgefield Park, NJ 07660 MADE IN CHINA...
Need help?
Do you have a question about the Tape to Digital Converter and is the answer not in the manual?
Questions and answers