Table of Contents
Advertisement
Available languages
Available languages
Quick Links
Fax +1 305 430 9692
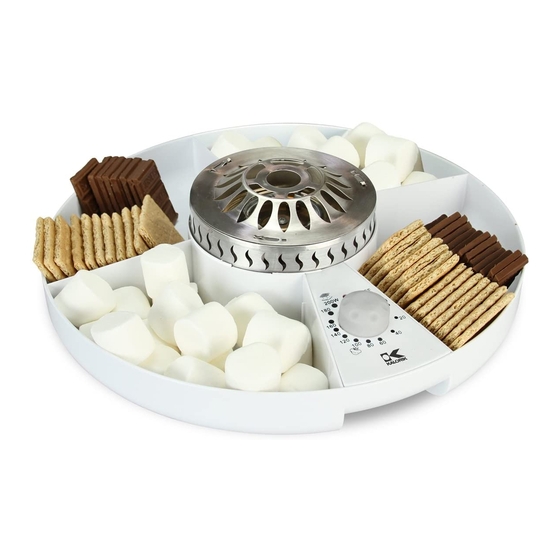
3-in-1 S'mores and Candy
Maker
Appareil 3-en-1 pour
S'mores et bonbons
www.KALORIK.com
Copies of the I/B. Please reproduce them without any
changes except under special instruction from Team
International USA. The pages must be reproduced and
folded in order to obtain a booklet A5 (+/- 148.5 mm
width x 210 mm height). When folding, make sure you
keep the good numbering when you turn the pages of
the I/B. Don't change the page numbering. Keep the
language integrity.
Print only what is inside the frame.
120V~60 Hz - 200W (1.7A)
Front cover page (first page)
Assembly page 1/28
CYM 42228
Advertisement
Table of Contents

Related Manuals for Kalorik CYM 42228


Summary of Contents for Kalorik CYM 42228
- Page 1 Print only what is inside the frame. Fax +1 305 430 9692 3-in-1 S’mores and Candy Maker Appareil 3-en-1 pour S’mores et bonbons CYM 42228 www.KALORIK.com 120V~60 Hz - 200W (1.7A) Front cover page (first page) Assembly page 1/28...
-
Page 2: Important Safeguards
13. Do not let cord hang over edge of table or counter, or touch hot surfaces. 14. Do not place on or near a hot gas or electric burner, or in a heated oven. CYM 42228 - 120501 Assembly page 2/28... -
Page 3: Polarized Plug Instructions
The resulting extended cord should be arranged so that it will not • drape over the counter top or tabletop where it can be pulled on by children or tripped over. CYM 42228 - 120501 Assembly page 3/28... - Page 4 (5) into the candy tray (6), and place each candy tray over the compartment in the food tray (1). 3. Always make sure the cover (4) is firmly in place before using the appliance. CYM 42228 - 120501 Assembly page 4/28...
- Page 5 2. In case food or an object falls on the cover, always switch off and unplug the unit. Then wait until it cools (at least 20 minutes) CYM 42228 - 120501 Assembly page 5/28...
- Page 6 2. Place the silicone molds (5) into the candy trays (6), and place the candy trays into the compartments in the base (1). 3. Plug the appliance into a wall outlet. 4. Place the mixture to melt into the melting bowl (3). CYM 42228 - 120501 Assembly page 6/28...
- Page 7 You can also use the appliance with a preparation of chocolate, • soft caramel or candy melts, and dip fruit, cake, or any delight in CYM 42228 - 120501 Assembly page 7/28...
- Page 8 Do not use oversized kitchen utensils for stirring. • It is often preferable to let the gummies cool in their molds in the • refrigerator, and keep them stored in the refrigerator after unmolding them. CYM 42228 - 120501 Assembly page 8/28...
- Page 9 Turn the knob on the heated base on a higher setting than usual • to melt Continuously stir the mixture until it is thin. • Remove from heat and carefully pour into the molds. • CYM 42228 - 120501 Assembly page 9/28...
- Page 10 Continue to heat and stir until the mixture is thin. • Remove from heat and stir in the amount of vitamins of your • choosing. Carefully pour the mixture into the molds and let it chill. • CYM 42228 - 120501 Assembly page 10/28...
- Page 11 Remove the melting bowl from heat. • Pour into the silicone molds. • Place the filled molds into the refrigerator, for at least 15 • minutes. Remove the gummy candies from mold. Keep stored in the • refrigerator. CYM 42228 - 120501 Assembly page 11/28...
-
Page 12: Cleaning And Maintenance
The candy trays (6) and the silicone molds (5) can be hand- washed or are dishwasher safe. Note: Never use abrasive cleaners on the base, the melting bowl or the • cover. Any other servicing shall be performed by an authorized service • representative. CYM 42228 - 120501 Assembly page 12/28... -
Page 13: Warranty
You can also fill out this warranty card online, at the following address: www.KALORIK.com This KALORIK product is warranted in the U.S.A. for 1 year from the date of purchase against defects in material and workmanship. This warranty is not transferable. - Page 14 If this is the case, bring the product, or send it, postage prepaid by the user (all Kalorik customers are responsible for the initial shipment back to the warranty center), along with proof of purchase and indicating a return authorization number given by our Customer Service Representatives, to the authorized KALORIK Service Center (please visit our website at www.KALORIK.com or call our Customer...
-
Page 15: Consignes De Securite
13. Ne laissez pas le cordon pendre de la table ou d'un comptoir et évitez qu’il touche une surface chaude. 14. Ne placez pas l'appareil sur ou près d'un brûleur à gaz ou électrique ou dans un four chaud. CYM 42228 - 120501 Assembly page 15/28... - Page 16 Assurez-vous que l'ampérage de la rallonge soit égal ou • supérieur à celui de l'appareil. Une rallonge avec un ampérage inférieur à celui de l'appareil risquerait de surchauffer et de brûler. CYM 42228 - 120501 Assembly page 16/28...
- Page 17 à bonbons) Fourchette à fondue / S’more Boitier pour élément (x4) chauffant Cadran de réglage de la Bol à fondre puissance/chaleur avec Couvercle du boitier pour voyant lumineux l’élément chauffant marche/arrêt CYM 42228 - 120501 Assembly page 17/28...
- Page 18 8. Tournez le marshmallow fréquemment pour que toutes les faces dorent et qu’il commence à chauffer. 9. Quand le marshmallow est brun-doré, et commence à fondre, placez-le sur le carré de chocolat et pressez légèrement l’autre CYM 42228 - 120501 Assembly page 18/28...
- Page 19 4 centimètres, après l’avoir étalée avec du beurre de cacahuète, ajoutez des pépites de chocolat et le marshmallow et roulez la galette autour. S’more Banane : étalez du beurre de cacahuète sur un • CYM 42228 - 120501 Assembly page 19/28...
- Page 20 10. Laissez la préparation prendre complètement avant de tenter de démouler les bonbons. Conseils : CYM 42228 - 120501 Assembly page 20/28...
- Page 21 N’utilisez pas des accessoires surdimensionnés pour mélanger • dans le bol. Il est souvent préférable de laisser la préparation refroidir dans les • moules au réfrigérateur. Conservez les bonbons gélifiés au réfrigérateur après les avoir démoulés. CYM 42228 - 120501 Assembly page 21/28...
- Page 22 Tournez le cadran sur la base chauffante pour chauffer la préparation • Continuez à mélanger jusqu’à ce que la préparation soit parfaitement • lisse. Retirez du feu et versez précautionneusement la préparation dans les • moules. CYM 42228 - 120501 Assembly page 22/28...
- Page 23 Continuez à mélanger jusqu’à ce que la préparation soit parfaitement • lisse. Retirez du feu et ajoutez la quantité de vitamines choisies. • Versez précautionneusement la préparation dans les moules ; laissez • refroidir. CYM 42228 - 120501 Assembly page 23/28...
- Page 24 Versez dans les moules en silicone. • Placez les moules au réfrigérateur et laissez refroidir pendant au moins • 15 minutes. Retirez les bonbons gélifiés des moules et conservez les au réfrigérateur. • CYM 42228 - 120501 Assembly page 24/28...
-
Page 25: Nettoyage Et Entretien
être lavés à l’eau chaude savonneuse ou au lave-vaisselle. Note : N’utilisez pas de nettoyants abrasifs pour nettoyer le couvercle ou • la base. Toute autre maintenance de l’appareil doit être effectuée par un • service technique qualifié. CYM 42228 - 120501 Assembly page 25/28... -
Page 26: Garantie
à l’adresse suivante : www.KALORIK.com. A compter de la date d’achat, ce produit KALORIK est garanti un an, sur le territoire des Etats-Unis, contre les défauts matériels et de fabrication. Cette garantie n’est pas transférable. Conservez la preuve d’achat originelle. - Page 27 KALORIK agrée (visitez notre site internet www.KALORIK.com ou appelez notre département Service Clientèle pour obtenir l’adresse du service après-vente KALORIK agréé).
- Page 28 Copies of the I/B. Please reproduce them without any changes except under special instruction from Team International USA. The pages must be reproduced and folded in order to obtain a booklet A5 (+/- 148.5 mm width x 210 mm height). When folding, make sure you keep the good numbering when you turn the pages of the I/B.
Need help?
Do you have a question about the CYM 42228 and is the answer not in the manual?
Questions and answers