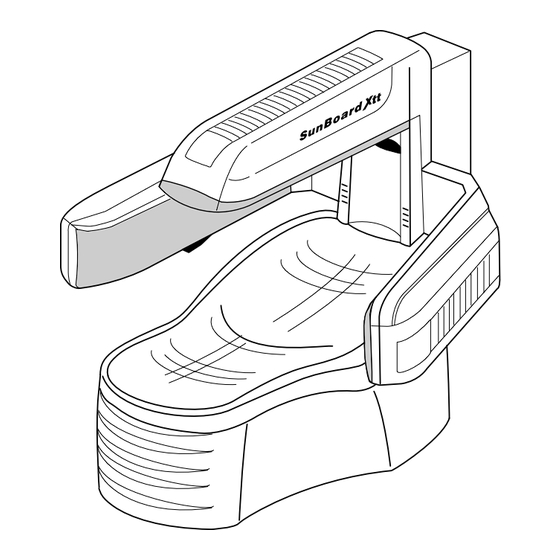

Summary of Contents for FastTan SunBoard XTT
- Page 1 INDOOR TANNING EQUIPMENT CARE, USE AND INSTALLATION INSTRUCTIONS Model: SunBoard XTT PC MARKETING 1040 WILT AVENUE RIDGEFIELD, NJ 07657 1-800-FAST TAN...
-
Page 2: Table Of Contents
Preface Your unit has been built in accordance with the latest state of technology and is safe. However, the unit can be dangerous if it is operated by persons who have not recei- ved the necessary training or instruction, or if it is used improperly. Therefore, everyone entrusted with the task of installing the unit, setting it into operation, operating, main- taining and repairing it must read and understand the Operating Instructions and - especially - the Safety Instructions. -
Page 3: Notes On Safety
1 SAFETY INSTRUCTIONS: 1.1 Before installation and placing in operation, the Safety Instructions and Operating Instruc- tions must be carefully read and observed. 1.2 Before the unit is placed in operation, the local Safety Regulations and the Safety Instructions must be complied with. 1.3 SAFETY / WARNING DANGER –... -
Page 4: Operation
NOTE THE TAN PRODUCED BY THIS UNIT IS A DEEP. RICH ”COSMEDIC” TAN, HOWEVER, REGARDLESS OF HOW MUCH AN INDIVIDUAL MAY TAN WITH THIS UNIT, IT WILL NOT PROVIDE ADEQUATE PROTEC- TION AGAINST OVEREXPOSURE TO NATURAL SUNLIGHT OR UVB TANNING SYSTEMS. SKIN TYPE II - THIS IS THE INDIVIDUAL THAT USUALLY BURNS EASILY AND SEVERELY. -
Page 5: Operation I Information For The User Of The Unit
OPERATION I INFORMATION FOR THE USER OF THE UNIT 2.1 Start of Sunbathing Observe the time chart. Do not exceed the sunbathing time recommended for your skin type. You must definitely avoid sunburn. Never sunbathe if you already have sunburn. Depending on the type of skin there is a certain final bronzing to be achieved. -
Page 6: Cleaning The Acrylic Sheet: Use Uwe Cleanser Only
2.4 Cleaning the Acrylic Sheet: Use uwe Cleanser Only! Always ensure extremely strict hygiene. After every period of use, the lying surface must be disinfected and cleaned. uwe cleanser and other cleaning materials must not be sprayed into the eyes. Do not spray them into naked flames. - Page 7 53 32 33 connection Speaker X5a-X9a see picture 8 • Assembly of the tripod (27, picture 2) Remove the tripod (27) out of the cardboard and disassemble the back covering hood (55, picture 4). Arran- ge the tripod in the middle behind the footrack. Thereby introduce the pins of the M8 screws, which are welded in and standing out of the foot casing (4 pieces) and the light casing (2 pieces), into the corresponding drill-holes of the tripod.
- Page 8 • Assembly of the upper tanning arm (41, picture 3) Take the upper tanning arm (5 sunbathing units) and hold it in front of the respective place of installation at the tripod. First pull the cable X5 (42, picture 2) with the 18-poled plug-in connection and the 4-poled cable X5a (105) through the gap relief (25 x 25 mm) into the tripod.
- Page 9 • Assembly of the tanning arm right/left (84, picture 3) Attention! Take care that you assemble the tanning arm with the operation panel (48) on the correct side (left). Warning At first take the tanning arm with operation panel and hold it in front of the corresponding place of assembly at the tripod.
- Page 10 • Assembly of the lounger (picture 4). Place the pipeframe (2) over the footrack. Take care, that the front foot is being fixed by the support (73). Attention! The feet of the pipeframe are adjustable for height. The knurling screws (103) have been unscrewed up to 25mm ex works.
-
Page 11: Connecting The Unit's Air Outlet (Figure 1 And 2)
3.3 Connecting the Unit’s Air Outlet Attention! Important Information! On using the SunBoard XTT unit you really must draw oft the already warmed up cooling air through a direct air removal. uwe recommends as standard connexion a special adapter part (59), which you can obtain from Warning uwe. -
Page 12: Setting Into Operation
1950 1010 1635 1950 dimensions in mm 4 SETTING INTO OPERATION 4.1 Technical data and dimensions Designation SunBoard XTT Type of unit 7823 Power 13.500 Operating voltage (V) 3PE~60 Hz 220 V 50 A Fusing 3 x 50 A (K 50) -
Page 13: Before Setting Into Operation
Cover of the Lights The sources of UV-radiation in the arms are covered each by one 3-4,5 mm thick filter with the denomination Type 322 XTT (PKZ 02935) and by one disk out of 3 mm thick acrylic glass. The sources of UV-radiation in the lounger are covered each by one 3-4,5 mm thick filters with the denomination Type 324 XTT (PKZ 02936) and with one disk out of 6 mm thick acrylic glass. -
Page 14: Maintenance And Repair
MAINTENANCE AND REPAIR Always disconnect the unit from the mains! Warning The company operating the unit must ensure that the unit is always operated in perfect condition only. Ensure regular maintenance and checking of the technical equipment. In the case of repair work or activities for setting the unit back into operation, additional measures - such as preventing access by unauthorised persons - are absolutely essential. -
Page 15: Exchanging The High Pressure Burner
6.2 Exchanging the high pressure burner The high pressure burner shall only be used with the XTT- filter disk. The unit must not be operated if the disks are damaged or missing. Danger of burning! Danger of lightning damage to the eyes! The XTT-filter disk is protected by BreakSafe (see Section 8 BreakSafe) Please exclusively use high pressure burners from uwe, because an exact centring of the centre of gravity of the light in the reflector must be guaranteed. - Page 16 96 97 Exchanging of the high pressure burner in the lounger (picture 7) Take down the acrylic sheet (1) according to the above detailed description. Unscrew the two oval-head and self- tapping screws (74) out of the disk support (75). Disassemble the disk support by lifting the disk support on the side showing to the foot, and then pull it out into that direction.
-
Page 17: Exchanging The Illumination Light
Warning! Install the XTT filter disk (72) nearest the user. Install the XTT filter disk in the disk holder as shown in Fig. 7. Introduce the clean XTT filter disk again into the disk support (75). Screw in tight again the covering plate (98). Hold the disk support in such a way, that the covering plate (98) shows in direction of the tripod. -
Page 18: Tips For Correcting Minor Defects
8 TIPS FOR CORRECTING MINOR DEFECTS Before you begin maintenance and repair work, you must disconnect the unit from the mains. Repairs should only be performed by the uwe company or by authorised persons. Safety devices must not be removed or disabled. After each repair, there must be made an examination of the unit, which has to be reported. -
Page 19: Waste
9 WASTE • High pressure burner The high pressure burner and the illumination light are special ref uses. They should not be thrown together with the regular waste. The local offices will inform you, where the burner could be properly wasted. •... - Page 20 PC MARKETING 1040 WILT AVENUE RIDGEFIELD, NJ 07657 1-800-FAST TAN...
Need help?
Do you have a question about the SunBoard XTT and is the answer not in the manual?
Questions and answers