Table of Contents
Advertisement
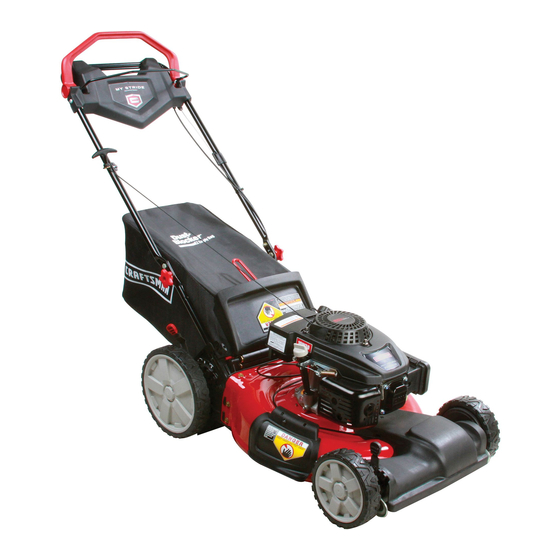
Operator's Manual
21" LAWN MOWER
Model No. 247.375910
CAUTION: Before using this product,
read this manual and follow all safety
rules and operating instructions.
Sears Brands Management Corporation, Hoffman Estates, IL 60179, U.S.A.
Visit our website: www.craftsman.com
• SAFETY
• ASSEMBLY
• OPERATION
• MAINTENANCE
• ESPAÑOL
Form No. 769-09384A
(February 25, 2014)
Advertisement
Table of Contents

Related Manuals for Craftsman 247.375910


Summary of Contents for Craftsman 247.375910
- Page 1 Operator’s Manual 21” LAWN MOWER Model No. 247.375910 • SAFETY • ASSEMBLY • OPERATION CAUTION: Before using this product, • MAINTENANCE read this manual and follow all safety • ESPAÑOL rules and operating instructions. Sears Brands Management Corporation, Hoffman Estates, IL 60179, U.S.A.
-
Page 2: Table Of Contents
For two years from the date of purchase, this product is warranted against any defects in material or workmanship. Defective product will receive free repair or free replacement if repair is unavailable. For warranty coverage details to obtain repair or replacement, visit the web site: www.craftsman.com. This warranty covers ONLY defects in material and workmanship. Warranty coverage does NOT include: •... -
Page 3: Safety Instructions
SAFETY INSTRUCTIONS WARNING DANGER This symbol points out important safety instructions which, if not This machine was built to be operated according to the safe operation followed, could endanger the personal safety and/or property of practices in this manual. As with any type of power equipment, yourself and others. -
Page 4: Slope Guide
SAFETY INSTRUCTIONS • If the equipment should start to vibrate abnormally, stop the engine and • Keep children out of the mowing area and under watchful care of a check immediately for the cause. Vibration is generally a warning of trouble. responsible adult other than the operator. -
Page 5: Spark Arrestor
SAFETY INSTRUCTIONS DO NOT MODIFY ENGINE General Service: • Never run an engine indoors or in a poorly ventilated area. Engine exhaust To avoid serious injury or death, do not modify engine in any way. Tampering contains carbon monoxide, an odorless and deadly gas. with the governor setting can lead to a runaway engine and cause it to operate at unsafe speeds. -
Page 6: Safety Instructions
SAFETY INSTRUCTIONS SAFETY SYMBOLS This page depicts and describes safety symbols that may appear on this product. Read, understand, and follow all instructions on the machine before attempting to assemble and operate. Symbol Description READ THE OPERATOR’S MANUAL(S) Read, understand, and follow all instructions in the manual(s) before attempting to assemble and operate DANGER —... - Page 7 SLOPE GAUGE...
-
Page 8: Assembly
ASSEMBLY IMPORTANT: This unit is shipped without gasoline or oil in the engine. Be certain to service engine with gasoline and oil as instructed in the Operation section before starting or running your machine. NOTE: Reference to right and left hand side of the Lawn Mower is observed from the operating position. - Page 9 ASSEMBLY Follow the steps below to complete handle assembly: Pull upward on the handle until holes in lower handle (shown in Figure 3 deck cutaway) line up with holes in handle bracket. See Figure 4. NOTE: When pulling upward on handle, make sure to not pull handle all the way out.
- Page 10 ASSEMBLY Attaching the Grass Catcher Follow steps below to assemble the grass catcher. Make certain bag is turned right side out before assembling (warning label will be on the outside). Place bag over frame so that its black plastic side is at the bottom. Slip plastic channel of grass bag over hooks on the frame.
-
Page 11: Assembly
ASSEMBLY Adjustments Higher Cutting Height There is a cutting height adjustment lever located above the rear left wheel. Pull the height adjustment lever outward towards wheel (unit will tend to fall when lever is moved outward). See Figure 10. Lower Move lever to desired position for a change in cutting height. -
Page 12: Operation
Your mower’s deck is equipped with a water port on its surface as part of its deck wash system. Use the deck wash to rinse grass clippings from the deck’s underside. Meets ANSI Safety Standards Craftsman Lawn Mowers conform to the safety standard of the American National Standards Institute (ANSI). - Page 13 OPERATION GAS AND OIL FILL-UP Checking Oil Level NOTE: Be sure to check the oil while on a level surface with the engine stopped. IMPORTANT: This unit is shipped without gasoline or oil in the engine. Be certain to service engine with gasoline and oil as instructed in this section before starting or Remove the oil filler cap/dipstick and wipe the dipstick clean.
- Page 14 OPERATION Gasoline Fuel Requirements CAUTION Operating the engine with E15 or E85 fuel, an oil/gasoline mixture, dirty gasoline, or without fuel stabilizing additive gasoline over 30 days old may result in damage to your engine’s carburetor. Subsequent damage would be covered under the manufacturer’s warranty. Use automotive gasoline (unleaded or low leaded to minimize combustion chamber deposits) with a minimum of 87 octane.
-
Page 15: Operation
OPERATION Using Your Lawn Mower Be sure lawn is clear of stones, sticks, wire, or other objects which could damage lawn mower or engine. Such objects could be accidently thrown by the mower in any direction and cause serious personal injury to the operator and others. Once the engine is running and while continuing to hold the blade and drive controls together, push the drive control forward to propel mower. -
Page 16: Service And Maintenance
SERVICE AND MAINTENANCE MAINTENANCE SCHEDULE Follow the maintenance schedule given below. This chart describes service WARNING guidelines only. Use the Service Log column to keep track of completed Before performing any type of maintenance/service, disengage all controls maintenance tasks. To locate the nearest Sears Service Center or to schedule service, and stop the engine. -
Page 17: General Recommendations
SERVICE AND MAINTENANCE WARNING Always stop engine, allow engine to cool, disconnect spark plug wire, and ground against engine before performing any type of maintenance on your machine. Porcelain Electrode General Recommendations • Always observe safety rules when performing any maintenance. • The warranty on this lawn mower does not cover items that have been subjected to operator abuse or negligence. To receive full value from warranty, operator must maintain the equipment as instructed here. 0.030 in. (.76mm) •... - Page 18 SERVICE AND MAINTENANCE • Check oil level regularly. • Be sure correct oil level is maintained. Check every five hours or daily before starting engine. See oil checking procedure in the Operation section. Change Engine Oil WARNING Air Filter Gasoline and its vapors are extremely flammable and explosive. Fire or explosion can cause severe burns or death. Oil Fill/ Dipstick Change engine oil after the first five hours of operation, and every fifty hours or once a season thereafter. WARNING Before tipping the unit to drain the oil, the fuel tank must be empty or fuel can leak out and result in a fire or explosion.
- Page 19 SERVICE AND MAINTENANCE To clean foam element, wash in mild liquid detergent and water. Squeeze or press the foam element to rinse out dirt and water. Do not twist, this could damage or tear the foam element. Allow to dry thoroughly before using. Oil the foam element with a light engine oil. Carefully place foam filter back into canister assembly and reattach the rubber cap removed earlier. Angled Nipple Snap the carbon canister filter assembly back into place under the inner engine shroud. See Figure 21 inset. IMPORTANT: Be sure the angled nipple points upwards into the shroud to avoid interference with the autochoke linkage. Place the inner engine shroud back onto the engine and fasten back down with nuts removed earlier. Reattach the recoil housing. Fuel Filter The fuel filter cannot be cleaned and must be replaced once a year or every 100 operating hours; more often if run with old gasoline. Figure 21 Remove all fuel from tank by running engine until it stops from lack of fuel. Remove hose clamp from fuel line and remove fuel line from tank outlet. See Figure 22. Pull out old fuel filter from tank outlet. Replace when dirty or damaged. Grasp new fuel filter from shouldered end and insert it completely to the shoulder into the tank outlet. Replace fuel line and hose clamp. Clean Engine • Daily or before every use, clean grass, chaff or accumulated debris from engine. Keep linkage, spring, and controls clean. Keep area around and behind muffler free of any combustible debris. • Keeping engine clean allows air movement around engine. Fuel Filter •...
-
Page 20: Blade Care
SERVICE AND MAINTENANCE Deck Wash Your mower’s deck is equipped with a water port on its surface as part of its deck wash system. Use the deck wash to rinse grass clippings from the deck’s underside and prevent the buildup of corrosive chemicals. Complete the following steps AFTER EACH MOWING: Push the mower to a level, clear spot on your lawn, near enough for your garden hose to reach. - Page 21 SERVICE AND MAINTENANCE Drive Adjustment Replace bushing in the lower hole and reattach the cable through the bushing and lower hole in the handle. See Figure 28. The drive system consists of pulleys, a belt , and a cable linking the transmission to the drive handle.
-
Page 22: Off-Season Storage
OFF-SEASON STORAGE WARNING Never store lawn mower with fuel in tank indoors or in poorly ventilated areas where fuel fumes may reach an open flame, spark, or pilot light as on a furnace, water heater, clothes dryer, or gas appliance. Preparing The Engine Preparing The Lawn Mower For engines stored over 30 days:... -
Page 23: Troubleshooting
TROUBLESHOOTING WARNING Disconnect the spark plug wire and ground it against the engine to prevent unintended starting. Before performing any type of maintenance/service, disengage all controls and stop the engine. Wait until all moving parts have come to a complete stop. Always wear safety glasses during operation or while performing any adjustments or repairs. - Page 24 TROUBLESHOOTING Problem Cause Remedy Mower will not mulch grass 1. Wet grass. 1. Do not mow when grass is wet; wait until later to cut. 2. Excessively high grass. 2. Mow once at a high cutting height, then mow again at desired height or make a narrower cutting path.
- Page 25 (This page applicable in the U.S.A. and Canada only.) Sears Brands Management Corporation (Sears), the California Air Resources Board (CARB) and the United States Environmental Protection Agency (U.S. EPA) Emission Control System Warranty Statement (Owner’s Defect Warranty Rights and Obligations) EMISSION CONTROL WARRANTY COVERAGE IS APPLICABLE TO CERTIFIED ENGINES AND TO CERTIFIED MODEL YEAR 1997 AND LATER ENGINES WHICH ARE PURCHASED AND PURCHASED IN CALIFORNIA IN 1995 AND THEREAFTER, WHICH ARE USED IN CALIFORNIA,...
- Page 26 REPAIR PROTECTION AGREEMENT Congratulations on making a smart purchase. Your new Craftsman® product is designed and manufactured for years of dependable operation. But like all products, it may require repair from time to time. That’s when having a Repair Protection Agreement can save you money and aggravation.
- Page 27 Para respuestas a preguntas o problemas, y ordenar piezas o pedir servicio para la reparación de su equipo. To help us help you, register your product at www.craftsman.com/registration Para poderte ayudar mejor, registra tu producto en www.craftsman.com/registration Join the Craftsman Club today!
Need help?
Do you have a question about the 247.375910 and is the answer not in the manual?
Questions and answers