Table of Contents
Advertisement
Quick Links
Hedge Trimmer Attachment
SSHH
Instruction Manual
For Safe Use of Hedge trimmer
Attachment
● Be sure to read this manual and the powerhead
(separately sold) manual to have a good understanding
of the contents before handling the hedge trimmer.
● If there is no powerhead manual, you can purchase
one from your servicing dealer.
● Keep this manual and the powerhead manual in a
readily accessible location.
Copyright (C) 2015 NIKKARI Co., Ltd. All Rights Reserved
SSHH-S
Click to Save As
Contents
Important Information ···················· 2
1. Safety ··································· 4
1.1 Warnings ······································· 4
1.2 General Precautions ························ 6
1.3 Safety Devices and Protective Guard ······ 11
1.4 Protective Equipment ····················· 12
1.5 Noise ·········································· 12
1.6 Vibration ······································ 12
2. Outline ·································13
2.2 Specification ································ 14
2.3 Attached Material ································ 14
2.4 Position of Model and Serial No. ··········· 15
2.5 Replaceable Items ························· 15
3. Installation and Adjustment ··········16
3.1 Installation Method ························ 16
3.2 Adjustment of Cutter Bar Angle ········ 19
4. Operation ·····························20
4.1 Transporting Method ······················ 20
4.2 Pre-operation Check ······················ 21
4.3 Start and Stop ······························ 22
4.5 Precautions for Operation ··············· 23
4.6 Operation Method ························· 24
4.7 Actions after Operation ··················· 26
5. Maintenance ·························27
5.1 Daily ··········································· 28
5.2 Every 25 hours ····························· 29
5.3 As Necessary ······························· 30
6. Storing ·································31
7. Waste Disposal ······················33
8. Troubleshooting ·····················33
9. Servicing ······························34
10. Technical data ·······················35
How to Contact Honda ·················37
PRODUCT REGISTRATION ··········39
Advertisement
Table of Contents

Related Manuals for NIKKARI SSHH

Summary of Contents for NIKKARI SSHH
-
Page 1: Table Of Contents
9. Servicing ······························34 ● Keep this manual and the powerhead manual in a 10. Technical data ·······················35 readily accessible location. How to Contact Honda ·················37 PRODUCT REGISTRATION ··········39 Copyright (C) 2015 NIKKARI Co., Ltd. All Rights Reserved... -
Page 2: Important Information
(to be purchased separately) for cutting hedges. (Refer to page 16 for approved powerheads.) Do not use the hedge trimmer for any other purpose or in any other way. Powerhead (Separately sold) Optional Attachments SSHH-S Hedge trimmer Attachment Attachment series separately sold (This product) General ●... - Page 3 Important Cautions for Safe Work ● NIKKARI Co., Ltd. (hereinafter referred to as NIKKARI) cannot foresee all the risks in handling the hedge trimmer. Therefore, also give consideration to general safety measures not stated in this manual, powerhead manual to prevent injuries when handling the hedge trimmer.
-
Page 4: Safety
1. Safety California Proposition 65 This product contains or emits chemicals known to the State of California to cause cancer, birth defects, or other reproductive harm. 1.1 Warnings For appropriate use of the hedge trimmer, follow the instructions in this manual. Warning labels are attached to places where there are potential risks or in the periphery. - Page 5 1.1.2 Warning Labels Cautions for Handling (a) This hedge trimmer is provided with warning labels to indicate important cautions. Understand the meanings of the warning labels thoroughly to work in a safe environment . (b) Do not operate the hedge trimmer until you have a good understanding of the meanings of the warning labels.
-
Page 6: General Precautions
1.2 General Precautions 1.2.1 Overall Precautions When handling the hedge trimmer, follow the precautions of the powerhead manual in addition to the following precautions. Do not use the hedge trimmer when tired, ill, or after consuming alcohol, drugs, or medication. Be sure to firmly tighten the knob bolt at the attachment connection between the powerhead and the extension pipe before using the attachment. - Page 7 Wear goggles meeting the requirements of ANSI Z87.1 when using the hedge trimmer. Also use a face shield (or face screen) if possible. * Failure to use goggles or face shield, could result in eye injury from flying debris. Wear hearing protective equipment such as ear protections when using the hedge trimmer. 1.2.3 Precautions before Operation Do not allow children or animals to enter the working range of the hedge trimmer within 50 ft (15 m).
- Page 8 1.2.4 Precautions at Start-up The hedge trimmer must only be started and operated by one person. * Operation by more than one person increases the likelihood of mishandling and resulting injury. Always start the hedge trimmer in an open, flat area with the trimmer blade off the ground.
- Page 9 When trimming higher than the eye level, frequently check for obstacle in the hedge. * If the check is neglected, the hedge trimmer could make contact with a person or obstacle, resulting in serious injury or death. Remove obstacles, and watch your step when transporting the hedge trimmer. * If the footing is insecure, an injury due to tripping over or falling could happen.
- Page 10 1.2.7 Precautions for Transporting Before transporting the hedge trimmer, stop the engine, and ensure the blade has stopped. Install the trimmer blade guard on the trimmer blade. Note ● When transporting the hedge trimmer, install it to a harness or keep it balanced by holding the shaft tube.
-
Page 11: Safety Devices And Protective Guard
1.3 Safety Devices and Protective Guard 1.3.1 Safety Devices (Stop Devices) To stop the hedge trimmer in case of an abnormality, use the stop device on the powerhead to stop blade rotation. Refer to the powerhead manual for details. 1.3.2 Safety Devices (Quick Release) In case of an abnormality, the hedge trimmer can be released from the harness by using the quick release device. -
Page 12: Protective Equipment
1.4 Protective Equipment When using the hedge trimmer for cutting, it is recommended to wear the following protective equipment. (a) Hard hat Hard hat (b) Working wear (long sleeve jackets and full- Goggles length pants of heavy material) Ear protection Face shield (c) Protective shoes (sturdy boots with nonslip sole) (Steel-toed safety boots are recommended.) -
Page 13: Outline
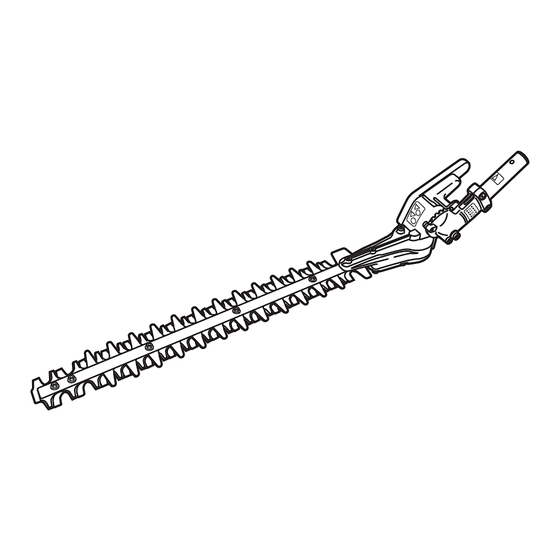
The hedge trimmer is a device with the attachment installed to the powerhead (separately sold). The following is the structure of the attachment and name and function of each part. Note ● There is one type of powerhead. For details about the powerhead, refer to the powerhead manual. ■ SSHH-S Name Description Trimmer blade A steel blade to cut the hedges or low trees. -
Page 14: Specification
■ Standard Specification Item Specification Model SSHH-S (short shaft) Attachment weight SSHH-S: 4.8 Ib (2.2 kg) Dimension (L x W x H) Short shaft: 35.2 x 4.9 x 4.9 in Weight Short shaft: 4.8 lbs (2.2 kg) Shaft length Short shaft: 5.3 in (135 mm) -
Page 15: Position Of Model And Serial No
2.4 Position of Model and Serial No. Check the model code of your attachment on the ■ SSHH-S nameplate attached to the machine shaft. Record serial No. (See “9. Servicing”). You will need this model code and serial No. when ordering parts, and when making technical or warranty inquiries. -
Page 16: Installation And Adjustment
3. Installation and Adjustment 3.1 Installation Method Before installing or removing any attachment or part, stop the engine and, if attached, let the trimmer blade come to a complete stop. * If the engine starts during the work, hands or fingers could be severed by the moving parts or trimmer blade. When handling the trimmer blade, wear gloves. * If you touch the edge of the trimmer blade or tip of the sharp blade, it could cause injury to hands or fingers. - Page 17 3.1.2 Connecting Loosen the knob bolt [1] of powerhead connections. Align the boss (protrusion) [2] at the end of the pipe with the slit of the joint case [3], and insert it to the label [4] position. Make sure that the positioning knob [5] is lowered to the locked position as shown, and then tighten the knob bolt [1] of the powerhead connections.
- Page 18 3.1.3 Removing Loosen the knob bolt [1] of powerhead connections. Lift the positioning knob [5], and turn it 90°, either clockwise or counterclockwise. Pull out the shaft tube [6]. If the shaft tube is hard to remove, hold it so that the attachment is parallel to the pipe of the powerhead, and then pull it out.
-
Page 19: Adjustment Of Cutter Bar Angle
3.2 Adjustment of Cutter Bar Angle On this type of cutter bar, the angle relative to the cutter bar can be adjusted to 7 positions between -54°to +54°. Adjust as follows. Before this adjustment, stop the engine. Lay down the hedge trimmer on the ground, and install the guard [1] to the trimmer blade. -
Page 20: Operation
4. Operation 4.1 Transporting Method When transporting the hedge trimmer, wear appropriate clothes and personal protective equipment. * Otherwise, it could cause injury. Before transporting the hedge trimmer, stop the engine, and ensure the blade has stopped. Install the trimmer blade guard on the trimmer blade. Remove obstacles, and watch your step when transporting the hedge trimmer. -
Page 21: Pre-Operation Check
4.2 Pre-operation Check Make sure that the hedge trimmer is operated normally or there is not any part missing or damaged before starting the operation. Before operating the hedge trimmer, check the following. (a) If any part is damaged or worn out, replace before using. Contact your service dealer for a replacement part. -
Page 22: Start And Stop
4.3 Start and Stop The hedge trimmer is operated by the powerhead. Refer to the powerhead manual. 4.3.1 Start hedge trimmer must only be started operated by one person. * Operation by more than one person increases the likelihood of mishandling and resulting injury. -
Page 23: Precautions For Operation
4.5 Precautions for Operation When operating the hedge trimmer, observe the following as well as “1.2 General Precautions”. ■ General ● The hedge trimmer is not insulated against electric shock. Have a person qualified for electric work remove wires and cables. If there are still wires or cables not removable, do not operate the hedge trimmer. ●... -
Page 24: Operation Method
4.6 Operation Method Do not allow children or animals to enter the working range of the hedge trimmer within 50 ft (15 m). hedge trimmer must only be started and operated by one person. * Operation by more than one person increases the likelihood of mishandling and resulting injury. - Page 25 ■ Examples of Use <Example 1 vertical cut> <Example 2 vertical cut> Use an angled cutter bar. Use a straight cutter bar. Cut without standing directly in front of the hedge Large working radius is obtained even without in case of cutting reaching over flower beds. additional aids. <Example 3 horizontal cut> Use a straight cutter bar.
-
Page 26: Actions After Operation
4.7 Actions after Operation After using the hedge trimmer, take the following actions. Set the start/stop switch to OFF (O side) to stop the engine. Note ● Make sure that trimmer blade rotation has come to a complete stop, before setting the unit down. Tighten all the nuts, bolts, and screws other than the ones for adjusting the carburetor. -
Page 27: Maintenance
5. Maintenance Before performing maintenance, repair or cleaning, stop the engine and remove the attachment from the powerhead. * If the engine starts during the work, hands or fingers could be severed by the moving parts or trimmer blade, resulting in serious injury or death. When handling the trimmer blade, wear gloves. * If you touch the edge of the trimmer blade or tip of the sharp blade, it could cause injury to hands or fingers. -
Page 28: Daily
5.1 Daily 5.1.1 Inspection of Blade If the trimmer blade is excessively worn, bent or damaged, replace the trimmer blade assembly with a new one. * Otherwise, pieces of the damaged trimmer blade could scatter, resulting in serious or fatal injury. If the cutting performance has deteriorated, e.g. -
Page 29: Every 25 Hours
5.2 Every 25 hours 5.2.1 Greasing the Transmission Case Remove the plug [1] from the grease filler opening with the specialized tool attached to powerhead. Grease from the grease filler opening [1]. Refit the plug [1] of the grease filler opening with the specialized tool attached to powerhead. -
Page 30: As Necessary
5.3 As Necessary 5.3.1 Removal of Foreign Objects Remove the stains from the trimmer blade with a cloth, etc. Clean the trimmer blade as necessary, and then apply oil thinly. Note ● Be sure to clean the trimmer blade. If it is not cleaned, dust, wood chips, grease, etc. will be accumulated and hardened, by which the hedge trimmer is not able to be operated for the next time. -
Page 31: Storing
6. Storing When storing the attachment with the hook of the pipe cap attached to the pipe, etc., do not pull or swing the attachment. When handling the trimmer blade, wear gloves. * If you touch the edge of the trimmer blade or tip of the sharp blade, it could cause injury to hands or fingers. - Page 32 Install the trimmer blade guard [4]. Store the hedge trimmer in the following place: (a) Locked place (b) High place out of reach of children and other unauthorized person (c) Dry and cool dark place...
-
Page 33: Waste Disposal
7. Waste Disposal For disposal, observe the standards and regulations of your region. If there is any question, contact your servicing dealer. 8. Troubleshooting In case of failure, follow the table below. When troubleshooting, stop the engine and then remove the attachment from the powerhead. -
Page 34: Servicing
9. Servicing For repair, handling method or cleaning, contact your servicing dealer. ■ When Requesting for Repair If there is any problem, try finding the cause and take measures according to “8. Troubleshooting”. If it does not solve the trouble, contact your servicing dealer. ■ Contact for Repair Contact your servicing dealer for repair. Record serial No. (See “2.4 Position of Model and Serial No.”) in the space below. You will need this model code and serial No. -
Page 35: Technical Data
10. Technical data Model SSHH-S Powerhead UMC425A UMC435A Handle LOOP LOOP Mass lb (kg) 4.8 (2.2) (without guard and powerhead) Length in (mm) 35 (895) (without guard and powerhead) Cutting attachments in (mm) 22 (550) (diameter for blades) 35.2 x 4.9 x 4.9... - Page 36 MEMO...
-
Page 37: How To Contact Honda
How to Contact Honda Honda Power Equipment dealership personnel are trained professionals. They should be able to answer any question you may have. If you encounter a problem that your dealer does not solve to your satisfaction, please discuss it with the dealership’s management. The Service Manager or General Manager can help. - Page 38 To Obtain Warranty Service: You must, at your expense, take the Nikkari attachment and proof of purchase to any Honda Power Equipment dealer in the United States, Puerto Rico, or the U.S. Virgin Islands who is authorized to sell and/or service that product, during the dealer’s normal business hours. To locate a dealer near you, visit our web site at http://PowerEquipment.Honda.com and click on Find a Dealer.
-
Page 39: Product Registration
Please complete and mail the postage paid card or register online at http://powerequipment.honda.com Please register your hedge trimmer attachment, even if you've already registered your UMC425 or UMC435 powerhead. ■ SSHH-S xxxxxxx Serial No. Print the serial number here. Serial number... - Page 40 1. Go to www.PowerEquipment.Honda.com to register your unit. 2. Click on Product Registration. 3. Complete the required information and click Submit. It's that simple! NO POSTAGE Product Registration NECESSARY IF MAILED IN THE UNITED STATES BUSINESS REPLY MAIL FIRST-CLASS MAIL PERMIT NO.
Need help?
Do you have a question about the SSHH and is the answer not in the manual?
Questions and answers