Accu-Chek Inform II Quick Reference Manual
Hide thumbs
Also See for Inform II:
- Operator's manual (248 pages) ,
- Quick reference manual (39 pages) ,
- Manual (39 pages)
Advertisement
Table of Contents
Advertisement
Table of Contents

Related Manuals for Accu-Chek Inform II


Summary of Contents for Accu-Chek Inform II
- Page 1 Inform II BLOOD GLUCOSE MONITORING SYSTEM Quick Reference Guide...
-
Page 3: Table Of Contents
Table of Contents Important ............ 4 General Information ....... 5 Accu-Chek Inform II Meter ....9 How to Perform Patient Testing ..11 How to Perform Control Testing ..19 Storing Strip Lot Information ....28 How to Clean the System ....33 Troubleshooting ........37... -
Page 4: Important
Do not dispose of the battery pack with normal domestic waste. As a component of the Accu-Chek Inform II system it must be deemed as potentially biohazardous. Treat it accordingly. Refer to the Accu-Chek Inform II System Operator’s Manual and package inserts for detailed information. -
Page 5: General Information
General Information For questions call: 1-800-440-3638 (USA) 1-877-273-3433 (Canada) Other Countries: Please call your Roche affiliate. - Page 6 ID, may or may not be used. If so configured, the Accu-Chek Inform II system may not allow patient testing when controls have not been run (QC Lockout).
-
Page 7: Error Messages
General Information QC Lockout occurs when • patient testing is attempted and controls have not been run in the time interval or frequency designated by your institution. • controls have been run but the control values were not in range. •... - Page 8 General Information Reagents You need the following reagents to perform patient tests and glucose control tests: • Accu-Chek Inform II or Accu-Chek Performa Test Strips • Accu-Chek Performa Control Solutions • Accu-Chek Linearity Kit (if required by your facility guidelines)
-
Page 9: Accu-Chek Inform Ii Meter
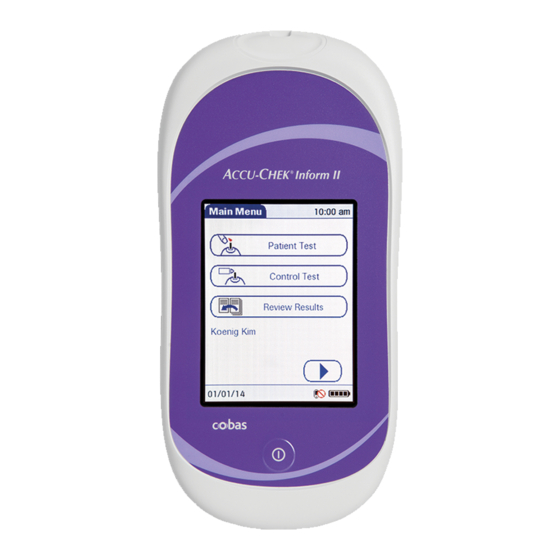
Accu-Chek Inform II Meter Test Strip Port Touchscreen On/Off Button Meter, Front View... - Page 10 Accu-Chek Inform II Meter Barcode Scanner Window Battery Pack Reset Button Infrared interface Meter, Back View...
-
Page 11: How To Perform Patient Testing
How to Perform Patient Testing Press the On/Off button power on the meter. Once the Power Up screen appears, touch to proceed to the Operator ID screen, or wait 5 seconds and the meter automatically proceeds to the Operator ID screen. - Page 12 How to Perform Patient Testing Enter or scan operator ID, then touch to display the Main Menu screen. Main Menu 12:48 Patient Test Control Test Review Results Maria S. 03/16/10 Touch Patient Test to display the Patient ID screen.
- Page 13 How to Perform Patient Testing Enter or scan patient ID, then touch . You are prompted to confirm the test strip lot. Patient ID 12:48 03/16/10...
- Page 14 How to Perform Patient Testing Verify the strip lot. • If correct, touch . You are prompted to insert the test strip. • If incorrect, touch to select a different lot number. Patient Test 12:48 Patient 123456789 Patient Test 12:48 Patient 123456789 Strip Lot 545794 Use Strip Lot 545794 ?
- Page 15 How to Perform Patient Testing Slide the test strip into the test strip port as far as it will go in the direction indicated by the arrows on the test strip. Wait until the flashing drop appears in the screen before applying the blood.
- Page 16 How to Perform Patient Testing Apply the drop of blood to the front edge (yellow dosing area) of the test strip. Do not apply the blood to the top of the strip. Blood is pulled into the test strip by capillary action. The meter beeps, and an hourglass appears while the meter completes the test.
- Page 17 How to Perform Patient Testing When the test is completed, the result is displayed. Touch to enter the desired comments. Touch to return to the Main Menu. Patient Test 12:48 Patient 123456789 Date 03/16/10 12:48 mmol/L Range 03/16/10...
- Page 18 How to Perform Patient Testing Remove the test strip and dispose of it in accordance with applicable regulations and directives for disposal of potentially infectious samples and materials.
-
Page 19: How To Perform Control Testing
How to Perform Control Testing Press the On/Off button power on the meter. Once the Power Up screen appears, touch to proceed to the Operator ID screen, or wait 5 seconds and the meter automatically proceeds to the Operator ID screen. - Page 20 How to Perform Control Testing Enter or scan operator ID, then touch to display the Main Menu screen. Main Menu 12:48 Patient Test Control Test Review Results Maria S. 03/16/10 Touch Control Test to display the Control Test screen.
- Page 21 How to Perform Control Testing Touch the control level to be run. Control Test 12:48 Level 1 (Lo) Level 2 (Hi) Required 03/16/10...
- Page 22 How to Perform Control Testing Verify the control lot number. • If correct, touch . You are prompted to confirm the test strip lot. • If incorrect, touch to enter or scan a different lot number. Control Test 12:48 Control Test 12:48 Control L2 (Hi) Control L2 (Hi) 123456...
- Page 23 How to Perform Control Testing Verify the strip lot. • If correct, touch . You are prompted to insert the test strip. • If incorrect, touch to select a different lot number. Control Test 12:48 Control L2 (Hi) 123456 Control Test 12:48 Control L2 (Hi) 123456 Strip Lot 545794...
- Page 24 How to Perform Control Testing Slide the test strip into the test strip port as far as it will go in the direction indicated by the arrows on the test strip. Wait until the flashing drop appears in the screen before applying the control solution.
- Page 25 How to Perform Control Testing Apply a drop of glucose control solution to the front edge (yellow dosing area) of the test strip. Do not apply the control solution to the top of the strip. The control solution is pulled into the test strip by capillary action.
- Page 26 How to Perform Control Testing When the test is completed, the result is displayed. Touch to enter the desired comments. Touch to continue with the next level, if necessary, or to return to the Main Menu. Control Test 12:48 Main Menu 12:48 Control L2 (Hi) 123456 Date 03/16/10 12:48...
- Page 27 How to Perform Control Testing Remove the test strip and dispose of it in accordance with applicable regulations and directives.
-
Page 28: Storing Strip Lot Information
Storing Strip Lot Information Press the On/Off button power on the meter. Once the Power Up screen to proceed appears, touch to the Operator ID screen, or wait 5 seconds and the meter automatically proceeds to the Operator ID screen. Enter or scan operator ID, then touch to display the... - Page 29 Storing Strip Lot Information Touch Strip Lots to open the related menu. Main Menu 2 12:48 Strip Lots 12:48 Maintenance Beeper Type Exp. Date Lot Num. Strip 03/15/11 845678 Proficiency Diagnostics Strip 12/31/10 855732 Strip 03/15/11 845723 Strip Lots Linearity Control Lots Linearity Lots Admin.
- Page 30 Storing Strip Lot Information Insert the new code key in the opening of the code key reader. An LED starts flashing and signals that the reader is ready to transfer data.
- Page 31 Storing Strip Lot Information Hold the meter 10-15 cm (4-6 in) above the code key reader so that a connection can be made between the two infrared windows. Touch to begin downloading data. The meter provides you with status information on the download.
- Page 32 Storing Strip Lot Information Confirm the strip lot information. • Touch to store the data for this lot number without changes, • Touch to modify the data for this lot number before storing. Add Strip Lot 12:48 Strip Lot Confirmation D-530: Do you want to use the suggested values for strip 545603?
-
Page 33: How To Clean The System
How to Clean the System NOTICE Precautions to avoid damage to the system • Do not spray the base unit directly with solutions. • Do not use cleaners containing the chemicals ether, polyhexanide, or prepared solutions or wipes containing a mixture of bleach and detergent on the system components. - Page 34 How to Clean the System Remove the meter from the base unit and unplug the base unit in preparation for cleaning. Use a dampened cloth or pre- moistened wipe with one of the following: • mild soapy water • 70 % (or less) solution of isopropyl alcohol in water •...
- Page 35 How to Clean the System Alternatively, you may spray the meter (but not the base unit). Do not spray while the meter is docked in the base unit! WARNING: Do not spray directly into the strip port! Moisture in the strip port may lead to incorrect blood glucose results.
- Page 36 How to Clean the System NOTICE Ensure meter/base unit (including connectors) are thoroughly dried after cleaning or disinfecting. Plug in the base unit and resume use of the system. For information about disinfecting the system, refer to the Accu-Chek Inform II System Operator’s Manual.
-
Page 37: Troubleshooting
Solution: Run controls. Patient testing cannot proceed until control tests are successfully run. The meter displays a non- numeric result or error message. Solution: Consult the Accu-Chek Inform II System Operator's Manual or take the action suggested on screen to resolve the problem. - Page 38 ACCU-CHEK, ACCU-CHEK INFORM, ACCU-CHEK PERFORMA and COBAS are trademarks of Roche. ©2010 Roche Diagnostics. All rights reserved. Roche Diagnostics GmbH Sandhofer Strasse 116 68305 Mannheim, Germany...
Need help?
Do you have a question about the Inform II and is the answer not in the manual?
Questions and answers