
Related Manuals for E-FLITE Carbon-Z Cub


Summary of Contents for E-FLITE Carbon-Z Cub
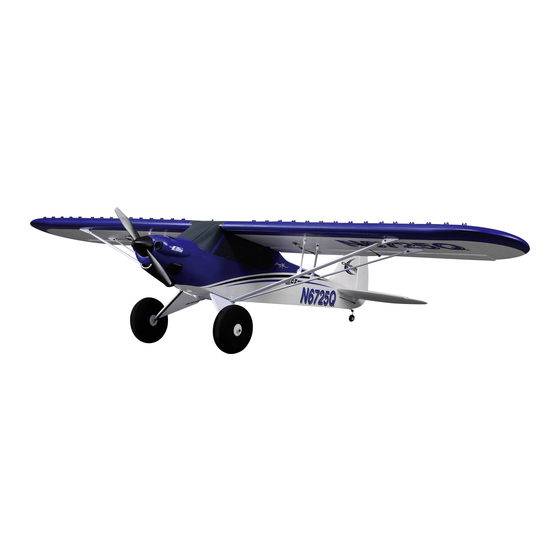
- Page 1 ® Carbon-Z Instruction Manual Bedienungsanleitung Manuel d’utilisation Manuale di Istruzioni IMAA Legal...
- Page 2 NOTICE All instructions, warranties and other collateral documents are subject to change at the sole discretion of Horizon Hobby, Inc. For up-to-date product literature, visit www.horizonhobby.com and click on the support tab for this product. Meaning of Special Language: The following terms are used throughout the product literature to indicate various levels of potential harm when operating this product: NOTICE: Procedures, which if not properly followed, create a possibility of physical property damage AND little or no possibility of injury.
-
Page 3: Table Of Contents
Plus, you can make your Carbon-Z Cub even more versatile by adding the optional Carbon-Z Cub Float Set to the hard points already built into the airframe that allow you to make virtually any place in the world a viable fl... -
Page 4: As3X System
AS3X System Horizon Hobby has always made RC sport, scale and unique aircraft with The outstanding control agility delivers an ultra smooth, locked-in feel that the kind of performance experts appreciate. First used in Blade ® ultra micro obeys your every command with performance that’s natural feeling. It’s so fl... -
Page 5: Transmitter And Receiver Binding
Transmitter and Receiver Binding WARNING AGAINST COUNTERFEIT PRODUCTS: If you ever need to replace your Spektrum receiver found in a Horizon Hobby product, always purchase from Horizon Hobby, Inc. or a Horizon Hobby authorized dealer to ensure authentic high-quality Spektrum product. Horizon Hobby, Inc. disclaims all support and warranty with regards, but not limited to, compatibility and performance of counterfeit products or products claiming compatibility with DSM or Spektrum. -
Page 6: Battery Installation
Battery Installation Battery Selection • We recommend the E-fl ite 3200mAh 22.2V 6S Li-Po battery (EFLB32006S30). Refer to the Optional Parts List for other E-fl ite batteries. If using a battery other than those listed, the battery should be within the range of capacity, dimensions and weight of the E-fl... -
Page 7: Arming The Esc And Receiver
Arming the ESC and Receiver Arming the ESC also occurs after binding as previously described, but subse- quent connection of a fl ight battery requires the steps below. AS3X The AS3X system will not activate until the throttle stick or trim is increased for the fi... -
Page 8: Landing Gear Installation
Landing Gear Installation Required Adhesives: Thread Lock Assembly 1. Install 2 tundra tires (A) on the main strut (B) using 4 wheel collars (C) as shown. Ensure the set screws (D) are aligned with the fl at spots on the strut. -
Page 9: Rudder Installation
Rudder Installation Required Adhesives: Thin CA Assembly 1. Slide the rudder’s CA hinges (A) in the hinge slots (B) of the vertical tail. 2. Install the screw (C) in the rudder mount. 3. Rest the aircraft on its nose, holding the tail up so the thin CA (cyanoacrylate adhesive) will flow into the slots. -
Page 10: Horizontal Tail Installation
Horizontal Tail Installation 1. Slide the horizontal tail tube (A) into the hole in the rear of the fuselage. 2. Install the 2 piece (left and right) horizontal tail as shown. Ensure the control horn faces down. 3. Install 4 screws (B) in the front and rear holes in the bottom of the horizontal tail. -
Page 11: Motor And Propeller Installation
Motor and Propeller Installation 1. Correctly align and connect the motor wire colors with the ESC wires. 2. Install the motor (A) with pre-installed X-mount (B) on the fuselage using 4 screws (C) and 4 lockwashers (D). 3. Install the collet (E), and back plate (F) on the motor shaft (G). 4. -
Page 12: Wing Installation
Wing Installation Before each fl ight, ensure all wing connectors and fasteners are secure. Assembly Assemble both wings using the following steps. (Only the right wing shown) A A A 1. Install 6 vortex generators (A) in the wing channels (B) by using double- sided tape (C). - Page 13 Wing Installation continued Installation 1. Slide the wing tube (A) into the fuselage. 2. Install the left and right wing (B and C) over the wing tube and into the wing slot of the fuselage. 3. Connect the servo connectors (D) to the respective connectors on the fuselage (connectors are marked AIL or FLAP).
-
Page 14: Center Of Gravity (Cg)
Center of Gravity (CG) The CG location is measured from the leading edge of the wing at the root. This CG location has been determined with the recommended Li-Po battery (EFLB32006s30) installed in the middle of the battery compartment. 120mm back from leading edge at the root. -
Page 15: Control Surface Centering
Control Surface Centering IMPORTANT: Perform the Control Direction Test before performing control • Turn the linkage clock- surface centering. wise or counterclockwise until the control surface is Control Surface Centering and Adjusting a Linkage centered. While AS3X is inactive (before advancing the throttle), mechanically center the •... -
Page 16: Transmitter Setup
Transmitter Setup IMPORTANT: The AR635 receiver’s default setting in this aircraft is normal Transmitter Setup Checklist mode. We recommend that you do not change this setup. Refer to the receiver manual for more information. Before binding for Computerized Transmitters (DX6i, DX7/DX7se, DX7s, DX8, DX10t, DX18): A programmable DSM2/DSMX six-channel (or better) transmitter with Dual 1. -
Page 17: Flying Tips And Repairs
Flying Tips and Repairs Consult local laws and ordinances before choosing a fl ying location. When deploying the fl aps, slow the aircraft down to 1/4 throttle. If the fl aps are deployed when the aircraft is at a higher speed, the aircraft will pitch up. Flying Field Set your down elevator to fl... -
Page 18: Post Flight Maintenance
Post Flight Maintenance 1. Disconnect fl ight battery from ESC (Required for Safety and battery life). 5. Repair or replace all damaged parts. 2. Power off transmitter. 6. Store fl ight battery apart from aircraft and monitor the battery charge. 3. -
Page 19: Optional Camera Mount Installation
Optional Camera Mount Installation The optional camera mount (EFL1045023) is sold separately. IMPORTANT: Consult local laws and ordinances before installing and operating any type of photograph-capable or video recording device in this product. 1. Carefully cut a slot (the size of the tab on the camera mount) in the top of the fuselage centered between the wings as shown. -
Page 20: Ama National Model Aircraft Safety Code
AMA National Model Aircraft Safety Code Effective January 1, 2011 B. RADIO CONTROL A. GENERAL 1. All pilots shall avoid fl ying directly over unprotected people, vessels, vehicles or structures and shall avoid endangerment of life and property A model aircraft is a non-human-carrying aircraft capable of sustained fl ight of others. -
Page 21: Troubleshooting Guide As3X
Troubleshooting Guide AS3X Problem Possible Cause Solution Flying over recommended Reduce air speed airspeed Damaged propeller or Replace propeller or spinner spinner Balance the propeller. For more information, view John Redman’s propeller balancing video at www. Imbalanced propeller horizonhobby.com Adjust gain to current fl ight conditions (wind, updrafts, local conditions [elevation, humidity, Flight condition variations temperature, etc.]) Motor vibration... -
Page 22: Troubleshooting Guide
Troubleshooting Guide Problem Possible Cause Solution Throttle not at idle and/or throttle trim too high Reset controls with throttle stick and throttle trim at lowest setting Aircraft will not re- Throttle servo travel is lower than 100% Make sure throttle servo travel is 100% or greater spond to throttle but responds to other Throttle channel is reversed... -
Page 23: Limited Warranty
Limited Warranty What this Warranty Covers Horizon Hobby, Inc. (“Horizon”) warrants to the original purchaser that the Inspection or Services product purchased (the “Product”) will be free from defects in materials and If this Product needs to be inspected or serviced and is compliant in the workmanship at the date of purchase. -
Page 24: Contact Information
Compliance Information for the European Union Declaration of Conformity Declaration of Conformity (in accordance with ISO/IEC 17050-1) (in accordance with ISO/IEC 17050-1) No. HH2013081601 No. HH2013081602 Product(s): EFL Carbon-Z Cub BNF Basic Product(s): EFL Carbon-Z Cub PNP Item Number(s): EFL10450 Item Number(s): EFL10475 Equipment class:... - Page 25 HINWEIS Allen Anweisungen, Garantien und anderen zugehörigen Dokumenten sind Änderungen nach Ermessen von Horizon Hobby, Inc. vorbehalten. Allen Anweisungen, Garantien und anderen zugehörigen Dokumenten sind Änderungen nach Ermessen von Horizon Hobby, Inc. vorbehalten. Aktuelle Produktliteratur fi nden Sie unter www.horizonhobby.com im Support-Abschnitt für das Produkt. Aktuelle Produktliteratur fi...
- Page 26 Die E-flite Carbon-Z Cub ielen Dank für den Kauf der E-fl ite Carbon-Z Cub. Wie die von Cub Crafters hergestellte Originalmaschine ist das von World Aerobatic Champion Quique Somen- zini designte Modell ein echter Alleskönner, der das Vergnügen eines Cruisers mit unglaublicher Power kombiniert. In Verbindung mit der hochfesten Carbon Z Konstruktion sorgt das im Spektrum AR635 Empfänger integrierte AS3X System für Flugleistungen die vorher so nicht vorstellbar waren mit einer absolut präzisen...
-
Page 27: As3X System
AS3X System Horizon Hobby hat schon immer RC Sport, Scale und einzigartige Flugzeuge Das System bietet eine hochpräzise Kontrolle mit dem sicheren Gefühl der mit Performance entwickelt, die die Herzen von Experten schneller schlagen absoluten Neutralität. Dabei arbeitet es so überzeugend, dass Sie das Gefühl lassen. -
Page 28: Binden Von Sender Und Empfänger
Binden von Sender und Empfänger WARNUNG GEGEN GEFÄLSCHTE PRODUKTE: Sollten Sie jemals einen Empfänger aus einem Horizon Hobby Produkt wechseln wollen, kaufen Sie diesen bitte bei Horizon Hobby oder einem autorisierten Horizon Hobby Händler um sicher zu stellen, dass Sie ein authentisches qualitativ hochwertiges Spektrum Produkt erhalten. -
Page 29: Akkueinbau
Akkueinbau Akkuauswahl Wir empfehlen den E-fl ite 3200mAh 22,2 6S Li-Po Akku (EFLB32006S30). Für andere E-fl ite Akkus lesen Sie bitte in der optionalen Teileliste nach. Sollten Sie einen anderen Akku verwenden muß dieser die gleiche Kapazität, Abmes- sungen und Gewicht des E-fl ite Akkus haben, damit sich der Schwerpunkt nicht wesentlich ändert. -
Page 30: Armieren Des Reglers Und Empfängers
Armieren des Reglers und Empfängers Das AS3X System wird auch nach dem Binden initialisiert, für nachfolgende Flüge und dem Anschließen des Flugakkus folgen Sie bitte den erforderlichen Schritten wie unten beschrieben. AS3X Das AS3X System wird so lange nicht aktiv, bis der Gashebel oder Trimmung zum ersten Mal erhöht wird. -
Page 31: Montage Des Fahrwerks
Montage des Fahrwerks Benötigter Klebstoff: Schraubensicherung Montage 1. Setzen Sie die beiden Tundrareifen (A) wie abgebildet mit den vier Stellrin- gen auf den Fahrwerksdraht. Bitte achten Sie darauf, dass die Schrauben der Stellringe auf die fl achen Stellen des Drahtes greifen und sichern diese mit Schraubensicherung. -
Page 32: Einbau Des Seitenruders
Einbau des Seitenruders Benötiger Klebstoff: Dünnfl üssiger Sekundenkleber Montage 1. Schieben Sie die CA Scharniere (A) in die Schlitze (B) des Leitwerks. 2. Schrauben Sie die Schraube (C) in den Ruderhalter. 3. Stellen das Flugzeug auf seine Nase mit dem Leitwerk nach oben, so dass der dünnfl... -
Page 33: Einbau Des Höhenleitwerks
Einbau des Höhenleitwerks 1. Schieben Sie die Leitwerksverbinder (A) durch die Öffnung im Heck des Flugzeuges. 2. Setzen Sie das rechte und linke Höhenleitwerk wie abgebildet an den Rumpf und achten bitte darauf dass die Ruderhörner nach unten zeigen. 3. Schrauben Sie die 4 Schrauben (B) in die vorderen und hinteren Löcher auf der Ruderunterseite. -
Page 34: Motor- Und Propellereinbau
Motor- und Propellereinbau 1. Schließen Sie die Motor- und Regerkabel farblich passend an. 2. Installieren Sie den Motor (A) mit dem montierten X-Halter (B) mit den 4 Schrauben (C) und Sprengringen (D) am Rumpf. 3. Setzen Sie den Mitnehmer (E) und die Spinnerrückplatte (F) auf die Motor- welle (G) 4. -
Page 35: Montage Der Tragfl Ächen
Montage der Tragfl ächen Überprüfen Sie vor jedem dem Flug dass alle Flächenanschlüsse und Befesti- gungen gesichert sind. Montage Montieren Sie die beiden Tragfl ächen in den folgenden Schritten (Abgebildet ist A A A nur die rechte Tragfl äche). 1. Kleben Sie die 6 Vortex Generatoren (A) mit doppelseitigem Klebeband (C) in den Tragflächenkanal (B). - Page 36 Montage der Tragfl ächen - Fortsetzung Montage 1. Schieben Sie den Flächenverbinder (A) in den Rumpf. 2. Schieben Sie die linke und rechte Tragfläche über den Flächenverbinder und in den Schlitz im Rumpf. 3. Schließen Sie die Servoanschlüsse (D) an die entsprechenden Anschlüsse im Rumpf (Anschlüsse markiert mit AIL oder FLAP).
-
Page 37: Der Schwerpunkt (Cg)
Der Schwerpunkt (CG) Der Schwerpunkt wird von der Vorderkante der Tragfl äche nach hinten ge- messen. Der Schwerpunkt wurde mit in die Mitte des Akkufach eingesetzten empfohlenen LiPo Akku (EFLB32006S30 ) ermittelt. 120mm von der Vorder- kante der Tragfl ä- che nach hinten gemessen. -
Page 38: Zentrieren Der Kontrollen
Zentrieren der Kontrollen WICHTIG: Führen Sie den Steuerrichtungstest durch bevor Sie die • Drehen Sie den Anschluß Kontrollen zentrieren. auf dem Gestänge im oder gegen den Uhrzeigersinn Zentrieren der Ruderund Einstellen des Gestänges bis das Ruder zentriert ist. Zentrieren Sie mechanisch die Ruder bevor das AS3X aktiv ist. •... -
Page 39: Sendereinstellung
Sendereinstellung WICHTIG: Die Grundeinstellung des AR635 Empfängers ist der Normale Mode. Checkliste für Sendereinstellung Wir empfehlen, dass Sie diese nicht ändern. Für mehr Informationen lesen Sie bitte die Bedienungsanleitung des Empfängers. Bevor Sie einen Computersender binden (DX6i, DX7/DX7se, DX7s, DX8, DX10t, DX18): Um dieses Flugzeug mit den Klappen und der optionalen Schleppkupplung zu 1. -
Page 40: Tipps Zum Fliegen Und Reparieren
Tipps zum Fliegen und Reparieren Bitte beachten Sie lokale Gesetze und Vorschriften bevor Sie sich einen Platz Gehen Sie beim Ausfahren der Klappen auf 1/4 Gas. Sollten Sie die Klappen bei zum fl iegen suchen. höheren Geschwindigkeiten ausfahren wird das Flugzeug steigen. Program- mieren Sie den Klappen - Höhenruder nach unten Mischer auf 42 % Tiefenbei- Flugplatz mischung um diese Tendenzen zu kompensieren. -
Page 41: Wartung Nach Dem Flug
Wartung nach dem Flug 1. Trennen Sie den Flugakku vom Regler/ESC (notwendig zur Sicherheit und 5. Reparieren bzw. ersetzen Sie beschädigte Bauteile. Akkuhaltbarkeit). 6. Lagern Sie den Flugakku gesondert vom Fluggerät und überwachen Sie 2. Schalten Sie den Sender aus. die Aufl... -
Page 42: Montage Des Optionalen Kameraträgers
Montage des optionalen Kameraträgers Der optionale Kameraträger (EFL1045023) ist separat erhältlich. WICHTIG: Bitte beachten Sie lokale Gesetze und Verordnungen bevor Sie jede Art von Foto- oder Videokamera auf diesem Produkt montieren. 1. Schneiden Sie vorsichtig einen Schlitz (in der Größe des Reiters von dem Kameraträger) in der Mitte der Tragfl... -
Page 43: Leitfaden Zur Hilfestellung As3X
Leitfaden zur Hilfestellung AS3X Problem Mögliche Ursache Lösung Geschwindigkeit zu hoch Reduzieren Sie die Geschwindigkeit Beschädigter Propeller oder Ersetzen Sie den Propeller oder Spinner Spinner Wuchten Sie den Propeller. Für mehr Informationen sehen Sie bitte John Redmanns Propeller Balancing Propeller nicht gewuchtet Video unter www.horizonhobby.com Stellen Sie den Gainwert passend zu den Flugbedingungen ein (Wind,Drift, lokale Bedingungen Luft- Geänderte Flugbedingungen... - Page 44 Problem Mögliche Ursache Lösung Sender steht während des Bindens zu nah am Emp- Stellen Sie den Sender etwas weiter vom Empfänger weg Trennen Sie den fänger Flugakku und schließen ihn erneut an Fluggerät oder Sender sind zu nahe an einem großen Stellen Sie den Sender weiter weg von den großen metallischen Objekten Metallgegenstand Das Fluggerät lässt...
-
Page 45: Garantieeinschränkungen
Garantieeinschränkungen Warnung Fragen, Hilfe und Reparaturen Ein ferngesteuertes Modell ist kein Spielzeug. Es kann, wenn es falsch eing- Ihr lokaler Fachhändler und die Verkaufstelle können eine Garantiebeurteilung esetzt wird, zu erheblichen Verletzungen bei Lebewesen und Beschädigungen ohne Rücksprache mit Horizon nicht durchführen. Dies gilt auch für an Sachgütern führen. -
Page 46: Kontakt Informationen
Horizon Hobby GmbH Christian-Junge-Straße 1 Christian-Junge-Straße 1 D-25337 Elmshorn D-25337 Elmshorn erklärt das Produkt: EFL Carbon-Z Cub BNF Basic (EFL10450) erklärt das Produkt: EFL Carbon-Z Cub PNP (EFL10475) declares the product: EFL Carbon-Z Cub BNF Basic (EFL10450) declares the product: EFL Carbon-Z Cub PNP (EFL10475) Geräteklasse:... - Page 47 REMARQUE Toutes les instructions, garanties et autres documents de garantie sont sujets à la seule discrétion de Horizon Hobby, Inc. Veuillez, pour une littérature pro- duits bien à jour, visiter www.horizonhobby.com et cliquer sur l’onglet de support de ce produit. Signifi...
- Page 48 3D insoupçonnées. De plus ce modèle est un formidable utilitaire, il deviendra votre remorqueur favori et il peut facilement porter une caméra au-dessus de sa cabine. Votre Carbon-Z Cub se convertit très facilement en hydravion car les fi xations pour le kit optionnel de fl...
-
Page 49: Système As3X
Système AS3X Horizon Hobby a toujours fabriqué des avions de loisir, maquette et des Son agilité remarquable procure une grande précision et des trajectoires modèles uniques qui offrent des performances appréciées par les experts. tendues, il obéit à chaque commande de façon totalement naturelle. C’est D’abord utilisé... -
Page 50: Affectation (Binding) Entre L'émetteur Et Le Récepteur
Affectation (binding) entre l’émetteur et le récepteur AVERTISSEMENT CONTRE LES PRODUITS CONTREFAITS : Si un jour vous aviez besoin de remplacer un récepteur Spektrum trouvé dans un produit Horizon Hobby, achetez-le uniquement chez Horizon Hobby, Inc ou chez un revendeur offi ciel Horizon Hobby, vous serez sûr d’obtenir un produit Spektrum authentique de haute qualité. -
Page 51: Installation De La Batterie
Installation de la batterie Choix de la batterie • Nous vous recommandons la batterie Li-Po E-fl ite 3200mA (EFLB32006S30). Référez-vous à la liste des pièces optionnelles pour les autres batteries E- fl ite. Si vous utilisez une batterie autre que celles mentionnées dans la liste, elle devra avoir une capacité, des dimensions et une masse équivalente aux batteries E-fl... -
Page 52: Armement Du Contrôleur Et Du Récepteur
Armement du contrôleur et du récepteur L’armement du contrôleur se produit à la suite de l’affectation décrite précédemment, cependant les prochains branchements de la batterie nécessitent de suivre les étapes suivantes. AS3X Le système AS3X ne sera pas activé sans que la manette ou le trim des gaz ne soient relevés pour la première fois. -
Page 53: Installation Du Train D'atterrissage
Installation du train d’atterrissage Adhésifs requis: Frein fi let Assemblage 1. Installez les 2 roues Tundra (A) sur les jambes principales (B) en utilisant les 4 bagues (C) comme sur l’illustration. Contrôlez que les vis (D) sont bien placées sur les méplats des jambes du train. Appliquez du frein fi let et serrez. -
Page 54: Installation De La Dérive
Installation de la dérive Adhésifs requis: Colle CA fl uide Assemblage 1. Glissez les charnières CA (A) dans les fentes (B) de la partie fi xe de la dérive. 2. Vissez la vis (C) dans le support de dérive. 3. Posez l’avion sur son nez, en maintenant la queue du fuselage vers le haut, de façon que la colle CA fl... -
Page 55: Installation Du Stabilisateur
Installation du stabilisateur 1. Insérez la clé de stabilisateur (A) dans le trou à l’arrière du fuselage. 2. Installez les 2 parties du stabilisateur dans les supports du fuselage comme sur l’illustration. Contrôlez que le guignol est bien dirigé vers le bas. -
Page 56: Installation Du Moteur Et De L'hélice
Installation du moteur et de l’hélice 1. Connectez les câbles du moteur aux câbles du contrôleur en respectant les couleurs. 2. Installez le moteur (A) dans le fuselage avec le support en “X” (B) pré- installé en utilisant les 4 vis (C) et les rondelles-freins (D). 3. -
Page 57: Installation De L'aile
Installation de l’aile Avant chaque vol, vous devrez contrôler les liaisons des haubans, et que tous les éléments soient correctement fi xés. Assemblage Assemblez les deux ailes en suivant les étapes suivantes. (Seule l’aile droite A A A est représentée). 1. -
Page 58: Suite De L'installation De L'aile
Suite de l’installation de l’aile Installation 1. Glissez la clé d’aile (A) dans le fuselage. 2. Installez l’aile gauche et la droite (B et C) sur la clé d’aile et dans l’emplacement du fuselage. 3. Connectez les prises des servos (D) dans leurs connecteurs respectifs notés Ail (Ailerons) et Flap (Volets). -
Page 59: Centre De Gravité (Cg)
Centre de gravité (CG) L’emplacement du CG se mesure depuis le bord d’attaque de l’aile au niveau de l’emplanture. L’emplacement du CG a été déterminé en plaçant la batterie Li-Po recommandée (EFLB32006s30) au milieu du compartiment à batterie. 120mm en arrière du bord d’attaque au niveau de... -
Page 60: Centrage Des Gouvernes
Centrage des gouvernes IMPORTANT: Effectuez un test de direction des gouvernes avant de • Faites tourner la chape centrer les gouvernes. dans le sens horaire ou anti-horaire jusqu’au Centrage des gouvernes et réglage des tringleries centrage de la gouverne. Centrez mécaniquement les gouvernes pendant que l’AS3X est inactif (avant •... -
Page 61: Paramétrage De L'émetteur
Paramétrage de l’émetteur IMPORTANT: Le récepteur AR635 est par défaut en mode normal pour ce Listes des vérifi cations des paramètres de l’émetteur modèle. Nous vous recommandons de ne pas changer ce paramètre. Référez- vous au manuel du récepteur pour des informations complémentaires. Avant l’affectation d’un émetteur programmable (DX6i, DX7/DX7se, DX10t, DX18): Un émetteur programmable 6 voies ou plus compatible DSM2/DSMX avec... -
Page 62: Conseils De Vol Et Réparations
Conseils de vol et réparations Consultez les lois et règlements locaux avant de choisir un emplacement pour Durant l’atterrissage, les volets permettent une approche par palier tout en faire voler votre avion. utilisant plus de puissance. Les volets permettent de réduire la vitesse relative de l’avion et de faciliter l’arrondi pour effectuer des atterrissages en douceur. -
Page 63: Check-List D'après Vol
Check-list d’après vol 1. Déconnecter la batterie de vol du contrôleur (ESC) (Impératif pour votre 5. Réparer ou remplacer les pièces endommagées. sécurité et la durée de vie de la batterie). 6. Stocker la batterie de vol à un endroit différent de celui où se trouve 2. -
Page 64: Installation Du Support De Caméra Optionnel
Installation du support de caméra optionnel Le support de caméra (EFL1045023) est vendu séparément. IMPORTANT: Respectez les lois en vigueur concernant les droits d’image avant d’installer votre appareil photo ou caméra sur ce modèle. 1. Découpez délicatement une fente (de la taille de la languette du support de caméra) sur le dessus du fuselage, au centre entre les 2 ailes, comme sur l’illustration. -
Page 65: Guide De Dépannage As3X
Guide de dépannage AS3X Problème Cause possible Solution Vitesse de vol supérieure aux vitesses recomman- Réduire la vitesse de vol dées Hélice ou cône endom- Remplacer l’hélice ou le cône magés Equilibrer l’hélice. (Pour plus d’information, consultez la vidéo d’équilibrage d’hélice de John Redman, en Déséquilibre de l’hélice anglais.) Variation des conditions... -
Page 66: Guide De Dépannage
Guide de dépannage Problème Cause possible Solution La manette des gaz n’est pas au ralenti (idle) et/ou le Réinitialiser les commandes avec la manette des gaz et mettre le trim des gaz trim des gaz est régléà une valeur trop élevée à... -
Page 67: Garantie Et Réparations
Problème Cause possible Solution Le contrôleur (ESC) utilise la coupure progressive de Recharger la batterie de vol ou remplacer la batterie qui ne donne plus les per- tension basse (LVC) par défaut formances prévues L’alimentation du moteur se fait par Il se pourrait que les conditions météorologiques soi- Reporter le vol jusqu’à... -
Page 68: Informations De Contact
Déclaration de conformité (conformément à la norme ISO/IEC 17050-1) (conformément à la norme ISO/IEC 17050-1) No. HH2013081601 No. HH2013081602 Produit(s) : EFL Carbon-Z Cub BNF Basic Produit(s) : EFL Carbon-Z Cub PNP Numéro(s) d’article : EFL10450 Numéro(s) d’article : EFL10475 Catégorie d’équipement :... - Page 69 AVVISO Tutte le istruzioni, le garanzie e gli altri documenti pertinenti sono soggetti a cambiamenti a totale discrezione di Horizon Hobby, Inc. Per una documentazione aggiornata sul prodotto, visitare il sito horizonhobby.com e fare clic sulla sezione Support del prodotto. Signifi...
- Page 70 L’aereo Carbon-Z Cub rappresenta il punto di riferimento per le sue prestazioni e la versatilità in acrobazia. Vi viene offerto in due livelli di completamento, il Bind- N-Fly Basic e il Plug-N-Play.Quello che voi dovete fare è di leggere e mettere in pratica le informazioni presenti in questo manuale.
-
Page 71: Sistema As3X
Sistema AS3X Horizon Hobby ha realizzato da sempre aeromodelli RC unici, sia in scala L’elevata manovrabilità garantisce una particolare sensibilità che permette che sportivi, con prestazioni molto apprezzate anche dagli esperti. Dapprima all’aeromodello di rispondere a ogni comando con delle prestazioni che usato sugli elicotteri ultra micro Blade senza barra stabilizzatrice (fl... -
Page 72: Connessione Trasmettitore E Ricevitore
Connessione trasmettitore e ricevitore ATTENZIONE AI PRODOTTI CONTRAFFATTI: Doveste avere bisogno di rimpiazzare una ricevente Spektrum, magari acquistata assieme ad una nostra radio, affi date la vostra sicurezza di volo solo ai prodotti originali Horizon Hobby che potrete trovare presso i nostri rivenditori autorizzati. Horizon Hobby Inc. declina ogni responsabilità, servizio tecnico e garanzia per l’uso di materiale non originale o che dichiara di essere compatibile con la tecnologia DSM o con Spektrum. -
Page 73: Installazione Della Batteria
Installazione della batteria Scelta della batteria • Noi consigliamo la batteria Li-Po E-fl ite 3200mAh 22,2V 6S (EFLB32006S30). Si faccia riferimento all’elenco delle Parti Opzionali per altri tipi di batterie. Se si usa una batteria al di fuori di quelle elencate, le sue caratteristiche devono essere in linea con quelle elencate prima, in modo che si possa collocare nella sede prevista in fusoliera senza modifi... -
Page 74: Armare L'esc E Il Ricevitore
Armare l’ESC e il ricevitore Dopo aver fatto la connessione descritta precedentemente, si deve armare anche il regolatore (ESC) e nei successivi collegamenti della batteria di bordo bisogna seguire la procedura spiegata di qui di seguito. AS3X Il sistema AS3X non si attirerà fi no a quando la barra o il trim del throttle viene aumentata per la prima volta. -
Page 75: Installazione Del Carrello
Installazione del carrello Adesivi richiesti: Frena fi letti Montaggio 1. Installare 2 gomme tundra (A) sulla gamba principale (B) usando i 4 collari (C), come si vede in fi gura. Stringere i grani (D) accertandosi che siano alli- neati con la parte piatta della gamba. Stringere applicando del frena fi letti. 2. -
Page 76: Installazione Del Timone
Installazione del timone Adesivi richiesti: Colla CA liquida Montaggio 1. Inserire le cerniere (A) del timone nelle fessure (B) dell’impennaggio verticale. 2. Mettere la vite (C) nel supporto del timone. 3. Appoggiando l’aereo sul suo muso, tenere la coda rivolta verso l’alto in modo che la colla CA liquida possa scorrere bene nelle fessure. -
Page 77: Installazione Del Piano Di Coda Orizzontale
Installazione del piano di coda orizzontale 1. Infilare il tubo (A) del piano orizzontale nel suo foro sul retro della fusoliera. 2. Installare sulla fusoliera i piani di coda orizzontali destro e sinistro, come di vede nel disegno. Accertarsi che le squadrette siano rivolte verso il basso. -
Page 78: Installazione Di Motore Ed Elica
Installazione di motore ed elica 1. Collegare i fi li del motore a quelli dell’ESC facendo corrispondere i colori. 2. Installare sulla fusoliera il motore (A) con il supporto a X preinstallato (B), usando 4 viti (C) e 4 rondelle di blocco (D). 3. -
Page 79: Installazione Dell'ala
Installazione dell’ala Prima di ogni volo, assicurarsi che tutti i connettori e i fi ssaggi dell’ala siano sicuri. Montaggio Prima di ogni volo, assicurarsi che tutti i connettori e i fi ssaggi dell’ala siano A A A sicuri. 1. Installare i 6 generatori vortex (A) nell’apposito canale (B) usando del nastro biadesivo (C). - Page 80 Continua Installazione dell’ala Installazione 1. Inserire il tubo (A) nella fusoliera. 2. Inserire l’ala destra e quella sinistra (B e C) sulla baionetta a tubo e poi nella fusoliera. 3. Collegare i connettori dei servi (D) alle prese corrispondenti in fusoliera (i connettori sono marcati AIL o FLAP).
-
Page 81: Baricentro (Cg)
Baricentro (CG) La posizione del baricentro viene misurata alla radice dell’ala dal suo bordo di entrata. Questa posizione si ottiene utilizzando le batterie Li-Po consigliate (EFLB32006s30) e installandole in mezzo al compartimento batteria. 120mm dietro al bor- do di entrata alla radice dell’ala. -
Page 82: Centraggio Delle Superfi Ci Mobili
Centraggio delle superfi ci mobili IMPORTANTE: prima di controllare il centraggio bisogna eseguire un test • Girare le barrette in senso sulla direzione dei movimenti. orario o antiorario per centrare le superfi ci. Centraggio delle superfi ci di controllo e regolazione delle barrette di comando •... -
Page 83: Impostazioni Del Trasmettitore
Impostazioni del trasmettitore IMPORTANTE: in questo aereo il ricevitore AR635 è impostato di default in Impostazioni del trasmettitore modo Normal. Noi consigliamo di non cambiarlo. Per maggiori informazioni si faccia riferimento al manuale del ricevitore. Prima della connessione per trasmettitori computerizzati (DX6i, DX7/DX7se, DX7s, DX8, DX10t, DX18): Con questo aereo è... -
Page 84: Consigli Per Il Volo E Riparazioni
Consigli per il volo e riparazioni Prima di scegliere il luogo dove volare conviene consultare le ordinanze e le Flaps leggi locali. Quando si usano i fl aps, i decolli e gli atterraggi si accorciano. Quando si decolla, la coda si stacca quasi subito dal suolo per avere un controllo migliore Campo di volo con il timone. -
Page 85: Manutenzione Dopo Il Volo
Manutenzione dopo il volo 1. Scollegare la batteria di volo dal controllo elettronico di velocità (ESC) 6. Conservare la batteria di volo separatamente dal velivolo e monitorare la (operazione obbligatoria per la sicurezza e la durata della batteria). carica della batteria. 2. -
Page 86: Installazione Del Supporto Per La Fotocamera Opzionale
Installazione del supporto per la fotocamera opzionale Il supporto opzionale per la fotocamera (EFL1045023) viene venduto separata- mente. IMPORTANTE: prima di installare su questo aereo un sistema di ripresa foto- grafi ca o cinematografi ca, consultare le leggi e le ordinanze locali. 1. -
Page 87: Guida Alla Soluzione Dei Problemi As3X
Guida alla soluzione dei problemi AS3X Problema Possibile causa Soluzione Si vola oltre la velocità Ridurre la velocità consigliata Elica od ogiva danneggiate Sostituire l’elica o l’ogiva Elica sbilanciata Bilanciare l’elica. Si veda il video specifi co su www.horizonhobby.com Variazione delle condizioni Adeguare la sensibilità... -
Page 88: Guida Alla Soluzione Dei Problemi
Guida alla soluzione dei problemi Problema Possibile causa Soluzione Lo stick motore e/o il suo trim non sono posizionati Resettare i comandi con stick e trim motore completamente in basso in basso L’aereo non risponde al comando motore, La corsa del servo è minore del 100% Regolare la corsa ad almeno il 100% ma gli altri comandi Il canale del motore è... -
Page 89: Garanzia
Problema Possibile causa Soluzione La tensione della batteria è scesa sotto il suo valore minimo e quindi si è attivata la funzione LVC sul Ricaricare o sostituire la batteria regolatore Il motore pulsa e La temperatura ambiente potrebbe essere troppo alta Attendere che la temperatura ambiente diminuisca perde potenza La batteria è... -
Page 90: Replacement Parts
Tundra Tires: Carbon-Z Cub E-fl ite Carbon-Z Cub: Tundrareifen Carbon-Z Cub - Roues Tundra Gomme tundra: Carbon-Z Cub 15x5.5 Electric Propeller: E-fl ite Carbon-Z Cub: 15,5 x 5,5 Elektro Carbon-Z Cub - Hélice électrique 15x5.5 elica per elettrico: EFLP1555E Carbon-Z Cub Propeller 15x5.5... -
Page 91: Optional Parts
Description Descrizione Numéro | Codice Set completo galleggianti: EFL1045017 Float Set Complete: Carbon-Z Cub E-fl ite Carbon-Z Cub: Schwimmer Set Carbon-Z Cub - Set de fl otteurs complet Carbon-Z Cub EFL1045023 Camera Mount: Carbon-Z Cub E-fl ite Carbon-Z Cub: Kamerahalter Carbon-Z Cub - Support de caméra... - Page 92 © 2013 Horizon Hobby, Inc. E-fl ite, AS3X, Blade, Celectra, EC3, DSM, DSM2, DSMX, the DSMX logo, Z-Foam, Carbon-Z, Bind-N-Fly, the BNF logo, Plug- N-Play and ModelMatch are trademarks or registered trademarks of Horizon Hobby, Inc. The Spektrum trademark is used with permission of Bachmann Industries, Inc. Cub Crafters, Carbon Cub, associated emblems and logos, and body designs of vehicles are either registered trademarks or trademarks of Cub Crafters, Inc.
Need help?
Do you have a question about the Carbon-Z Cub and is the answer not in the manual?
Questions and answers