Table of Contents
Advertisement
Quick Links
Download this manual
See also:
Instruction Manual
5091
Laser 5091
3388
OBDII/EOBD Code Reader (00-)
Instructions
The CAN OBDII/EOBD Code Reader is an innovative and affordable
solution specially designed for DIYers to get easy and quick access
to engine problems on all OBDII compliant vehicles sold worldwide
since 2000.
Laser 5091 Code Reader User's Guide
Laser 5091 Code Reader User's Guide
www.lasertools.co.uk
www.lasertools.co.uk
Advertisement
Table of Contents

Related Manuals for Laser 5091


Summary of Contents for Laser 5091
- Page 1 The CAN OBDII/EOBD Code Reader is an innovative and affordable solution specially designed for DIYers to get easy and quick access to engine problems on all OBDII compliant vehicles sold worldwide since 2000. Laser 5091 Code Reader User’s Guide Laser 5091 Code Reader User’s Guide www.lasertools.co.uk www.lasertools.co.uk...
-
Page 2: Table Of Contents
Printing ................59 Battery Replacement ............61 Troubleshooting ................62 Error Message ..............62 Code Reader Does Not Power Up ........62 Laser 5091 Code Reader User’s Guide Laser 5091 Code Reader User’s Guide_ Laser 5091 Code Reader User’s Guide... -
Page 3: One-Year Limited Warranty
Indicates a potentially hazardous situation which, CAUTION if not avoided, may result in moderate or minor injury to the operator or to bystanders. Laser 5091 Code Reader User’s Guide Laser 5091 Code Reader User’s Guide... -
Page 4: Important Safety Instructions
WARNING engine. • Select menu languages. • Change measurement unit. CAUTION Make sure to turn off ignition before connecting or disconnecting • Adjust display contrast. the code reader. Laser 5091 Code Reader User’s Guide Laser 5091 Code Reader User’s Guide... -
Page 5: Introduction
An arrow icon indicates a procedure. Example: To change menu language: 1. Use the UP/DOWN key to select Language from System Setup screen. 2. Press the ENTER key to confi rm. Laser 5091 Code Reader User’s Guide Laser 5091 Code Reader User’s Guide... - Page 6 “ashtray”, which must be removed to access it, or on the far left corner of the dash. If the DLC cannot be found, consultthe vehicle’s service manual for the location. Laser 5091 Code Reader User’s Guide Laser 5091 Code Reader User’s Guide...
-
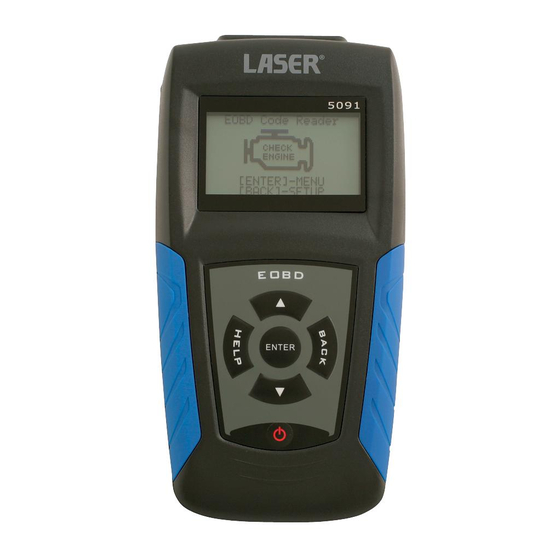
Page 7: About The Code Reader
Press it from home screen to do language selection. E. HELP Key - provides a USB connection for the PC or laptop. F. BACK Key - provides a USB connection for the PC or laptop. Laser 5091 Code Reader User’s Guide Laser 5091 Code Reader User’s Guide... - Page 8 If the code reader will not be used for an extended period of time, remove the battery to prevent battery leakage from damaging the battery compartment. Do not use a Lithium (Li) battery. IMPORTANT Laser 5091 Code Reader User’s Guide Laser 5091 Code Reader User’s Guide...
- Page 9 UP/DOWN key to select System Setup from Main Menu screen. 4. Press the ENTER key to save language setting and return. √ Follow on-screen instructions to program the code reader to meet your specifi c needs. Laser 5091 Code Reader User’s Guide Laser 5091 Code Reader User’s Guide...
- Page 10 3. Use the UP/DOWN key to select desired measurement unit. 4. Press the ENTER key to save contrast setting and return. 4. Press the ENTER key to save measurement setting and return. Laser 5091 Code Reader User’s Guide Laser 5091 Code Reader User’s Guide...
- Page 11 3. Use the UP/DOWN key to select desired choice. 3. Use the UP/DOWN key to increase or decrease time. 4. Press the ENTER key to save beeper sound setting. 4. Press the ENTER key to save. Laser 5091 Code Reader User’s Guide Laser 5091 Code Reader User’s Guide...
- Page 12 4. Use the ENTER key to confi rm and start testing. 5. Look for missing spot in black solid characters. 6. When completed, use the ENTER key to return. Laser 5091 Code Reader User’s Guide Laser 5091 Code Reader User’s Guide...
- Page 13 1. Use the UP/DOWN key to select Tool Information from Main Menu screen. 5. Double press the BACK key to return. 2. Press the ENTER key to view information. Laser 5091 Code Reader User’s Guide Laser 5091 Code Reader User’s Guide...
-
Page 14: Data Review
√ For manufacturer specifi c codes, you need to select a vehicle make on an additional screen to look for DTC defi nitions. 6. To quit Code Lookup, press the BACK key. Laser 5091 Code Reader User’s Guide Laser 5091 Code Reader User’s Guide... -
Page 15: Obdii/Eobd Diagnosis
Messages” on page 62 of Troubleshooting. √ When the code reader links to vehicle, it checks the status of I/M Monitors, and gives a summary report on the display as illustrated below. Laser 5091 Code Reader User’s Guide Laser 5091 Code Reader User’s Guide... - Page 16 √ If previous recording not to be erased, select NO. √ If no data exist in the tool, above prompt is not displayed. Laser 5091 Code Reader User’s Guide Laser 5091 Code Reader User’s Guide...
-
Page 17: Reading Dtcs
3. View DTCs and their defi nitions. √ This function is performed with KOEO. Do not start the engine. Laser 5091 Code Reader User’s Guide Laser 5091 Code Reader User’s Guide... -
Page 18: Live Datastream
5. Wait a few seconds or press any key to return to Diagnostic Menu. √ Some vehicle may not support this function, and a “Not Support This Function!” message display. Laser 5091 Code Reader User’s Guide Laser 5091 Code Reader User’s Guide... - Page 19 √ You are allowed to pick up a maximum of 18 PIDs. If you selected more than 18 PIDs, a “The selected data list is full!” message displays on the screen. 4. Press the BACK key to return to previous level. Laser 5091 Code Reader User’s Guide Laser 5091 Code Reader User’s Guide...
- Page 20 If Trigger On DTCs is selected to make a recording, there might not be drastic change in the data before and after trigger. Laser 5091 Code Reader User’s Guide Laser 5091 Code Reader User’s Guide...
- Page 21 Different vehicles communicate at different speeds and support a different number of PIDs. Therefore, the maximum number of frames that can be recorded varies. √ If Trigger on DTCs is picked, following screen displays: Laser 5091 Code Reader User’s Guide Laser 5091 Code Reader User’s Guide...
- Page 22 √ The G icon indicates graphing is available for the selected PID. Use the ENTER key to view graphing and use the UP/DOWN key to scroll back and forth through graphs. 6. Use the BACK key to return to Playback Data. Laser 5091 Code Reader User’s Guide Laser 5091 Code Reader User’s Guide...
-
Page 23: Viewing Freeze Data
√ If no freeze frame detected, a “No Freeze Data Found!” message displays. √ Some vehicle may not support this function, and a “Not Support This Function!” message display. 4. Press the ENTER key to return to Diagnostic Menu. Laser 5091 Code Reader User’s Guide Laser 5091 Code Reader User’s Guide... - Page 24 √ Some vehicle may not support this function, and a “Not Support This Function!” message display. 2. Press the ENTER key to confi rm. 4. Press the BACK key to return to Diagnostic Menu. Laser 5091 Code Reader User’s Guide Laser 5091 Code Reader User’s Guide...
-
Page 25: Monitor Test
√ When more than one screen of data is retrieved, use the UP/DOWN key to view additional information. 2. Press the ENTER key to confi rm 5. Press the BACK key to return to O2 Monitor Test screen. Laser 5091 Code Reader User’s Guide Laser 5091 Code Reader User’s Guide... -
Page 26: On-Board Monitor Test
2. Use the ENTER key to confi rm. 3. Use the UP/DOWN key to pick desired test results. 4. Use the ENTER key to view details of selected test results. Laser 5091 Code Reader User’s Guide Laser 5091 Code Reader User’s Guide... -
Page 27: Component Test
√ If vehicle being tested does not support this function, the code reader displays a “Not Support This Function!” prompt. 5. Press the BACK key to return to Diagnostic Menu. Laser 5091 Code Reader User’s Guide Laser 5091 Code Reader User’s Guide... -
Page 28: Reading Vehicle Information
3. Observe on-screen instruction and wait a few seconds or press any key to continue. 7. Press the ENTER key return. NOTE Not all data is supported by all vehicles. Laser 5091 Code Reader User’s Guide Laser 5091 Code Reader User’s Guide... -
Page 29: Modules Present
7. Updating and Printing The code reader identifi es module IDs and communication protocols for OBD2 Laser 5091 Fault Code Reader is able to be updated to enable you stay current modules in the vehicle. with the latest diagnostics development. Also, it allows you to upload recorded test results to your PC or laptop for analysis and printing. -
Page 30: Printing
5. Use to locate update fi le you can download from www.lasertools.co.uk/products/5091 3. Connect 5091 to computer with the USB cable supplied to power it on. 4. Use the UP/DOWN key to select Print Data from Main Menu screen. 6. Click to start updating. -
Page 31: Battery Replacement
6. Use the UP/DOWN key to select desired data to print. 7.3 Battery Replacement 5091 needs a 9V cell battery to operate when disconnected from vehicle. √ When the icon appears, replace the battery as instructed below. To replace battery: 1. -
Page 32: Troubleshooting
• Verify that the control module is not defective. 8.2 Code Reader Does Not Power Up If 5091 will not power up, communicate with vehicle’s control module, or functions incorrectly in any other way, do the following: • Check DLC for broken or bent pins and clean the pins if need be.