Table of Contents
Advertisement
Advertisement
Table of Contents

Related Manuals for Zte Legacy


Summary of Contents for Zte Legacy
- Page 1 LEGACY User Manual...
-
Page 2: Table Of Contents
Table of Contents Receive Phone Calls ..... 27 About This Manual ..... 3 Retrieve Your Voicemail ....28 For Your Safety ......4 In-call Options ....... 28 General Safety......... 4 Set Up Speed Dialing ....28 FCC RF Exposure Information (SAR)4 Call History ........ - Page 3 USB Tethering ....... 56 Bluetooth Tethering Setting ... 76 Sound Settings ......76 Camera and Video ....57 Display Settings ......78 Take Pictures ......... 57 Date & Time Settings ....79 Record Videos ....... 58 Language & Input Settings .... 79 Camera and Camcorder Settings ...
-
Page 4: About This Manual
The Bluetooth ® trademark and logos are owned by the Copyright Bluetooth Copyright © 2016 ZTE CORPORATION Copyright © 2016 Q LINK WIRELESS LLC SIG, Inc. and any use of such trademarks by ZTE Corporation is under license. All rights reserved. microSDHC logo is a trademark of No part of this publication may be quoted, SD-3C, LLC. -
Page 5: For Your Safety
Turn off when asked to in hospitals and For Your Safety medical facilities. General Safety Don‘t take your phone apart. Don‘t make or receive handheld calls Turn off when told to in aircrafts and while driving. Never text while driving. airports. -
Page 6: Fcc Regulations
the phone is designed to operate at multiple or lower to the reported level. To support power levels so as to use only the power body-worn operation, choose the belt clips or required to reach the network. In general, the holsters, which do not contain metallic closer you are to a wireless base station components, to maintain a separation of 15... -
Page 7: Hearing Aid Compatibility (Hac) Regulations For Mobile Phones
is encouraged to try to correct the do because of electromagnetic energy interference by one or more of the following emitted by the phone's antenna, backlight, or measures: other components. Your phone is compliant with FCC HAC regulations (ANSI C63.19- ... -
Page 8: Distraction
hear any interfering noise. Consult your and lead to an accident. You must comply service provider or the manufacturer of this with local laws and regulations restricting the phone for information on hearing aid use of wireless devices while driving. compatibility. -
Page 9: Normal Use Position
They could hurt themselves or others, or Do not expose your phone or its could accidentally damage the phone. accessories to open flames or lit tobacco products. Your phone contains small parts with sharp edges that may cause an injury or may Do not expose your phone or its become detached and create a choking accessories to liquid, moisture or high... -
Page 10: Electrical Safety
Turn down the volume before using Seizures/Blackouts headphones, Bluetooth stereo headsets or The phone can produce a bright or flashing other audio devices. light. A small percentage of people may be susceptible to blackouts or seizures (even if Phone Heating they have never had one before) when Your phone may become warm during exposed to flashing lights or light patterns... -
Page 11: Ctia Requirements
to a severe fall, do not use it until you have accordance with local regulations. taken it to be checked at an authorized Battery usage by children should be service center. supervised. Avoid dropping the phone or battery. If the CTIA Requirements phone or battery is dropped, especially on ... -
Page 12: Explosive Environments
on the opposite ear to your pacemaker and wireless devices onboard the aircraft. If your device offers a ‗flight mode‘, this must be do not carry it in a breast pocket. enabled prior to boarding an aircraft. Hearing Aids Interference in Cars People with hearing aids or other cochlear Please note that because of possible implants may experience interfering noises... -
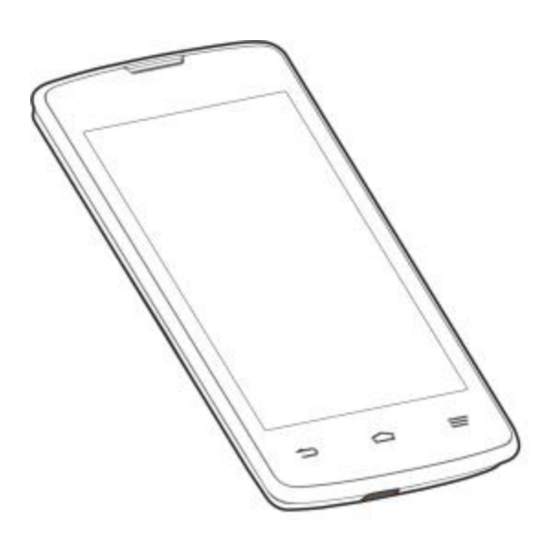
Page 13: Getting Started
Key Functions Getting Started Earpiece lets you hear the caller and automated prompts. Your Phone at a Glance Touch Screen displays all the information needed to operate your phone, such as The following illustrations and descriptions the call status, the Contacts list, and the outline your phone‘s primary external features date and time. -
Page 14: Set Up Your Phone
Volume Button allows you to adjust the ringtone or media volume or adjust the voice volume during a call. Camera Lens lets you take pictures and videos. 3.5 mm Headset Jack allows you to plug in either a stereo headset or an optional headset for convenient, hands-free conversations. -
Page 15: Install The Microsdhc Card
Install the microSDHC™ Card (Optional) A microSDHC card is an optional accessory that allows you to store images, videos, music, documents, and voice data on your phone. Remove the back cover and battery to install a compatible microSDHC card into your phone. -
Page 16: Activate Your Service
Dial 611 or 305-260-6232 3. Carefully insert the microSDHC card into using your Q Link Wireless phone the slot. Follow the recorded directions Complete the Setup Screens The setup screens help you set up certain 4. Re-install the battery and replace the back features and preferences on your phone. - Page 17 3. Follow the system prompts to: Create your password. Record your name announcement. Record your greeting. NOTE: It is strongly recommended that you create a password when setting up your voicemail to protect against unauthorized access. Without a password, anyone who has access to your phone is able to access your voicemail messages.
-
Page 18: Phone Basics
To save battery power, the phone Phone Basics automatically turns off the screen after a certain period of time when you leave it idle. Your phone is packed with features that You will still be able to receive messages and simplify your life and expand your ability to calls while the phone‘s screen is off. - Page 19 Touch When you want to type using the onscreen keyboard, select onscreen items such as application and settings icons, or press onscreen buttons, simply touch them with your finger. Drag To drag, press and hold your finger with some pressure before you start to move your finger.
-
Page 20: Your Home Screen
Pinch and Spread Your Home Screen ―Pinch‖ the screen using your thumb and forefinger to zoom out or ―spread‖ the The home screen is the starting point for your phone‘s applications, functions, and menus. screen to zoom in when viewing a picture You can customize your home screen by or a Web page. -
Page 21: Customize The Home Screen
Customize the Home Screen NOTE: Touch to return to the main home Add Items to the Home Screen screen from any other screen. 1. Touch and hold an empty area on a home screen. (If the current home screen Extended Home Screens doesn‘t have room, swipe the screen left or right to display an extended screen.) In addition to the main home screen, your... -
Page 22: Status Bar
icons in the folder and enter a new name. Status Bar 3. Touch Done or touch any empty area The status bar at the top of the home screen outside the folder to save the new folder provides phone and service status name. -
Page 23: Enter Text
Notification Icons Touch Screen Keyboards Icons Notifications Your phone offers you a choice of two touch screen keyboards for entering text. The New text message keyboard appears automatically onscreen New multimedia message when you touch a text entry field, and they can be used in either portrait or landscape New email mode. - Page 24 You can also use Curve® to speed up text input by replacing the key-tapping operation with a tracing gesture where you move your finger from letter to letter without lifting the finger until you reach the end of the word. ...
-
Page 25: Google Voice Typing
Drag the tab to move the cursor. To select text, touch and hold or double-tap the text. The nearest word is selected, with a tab at both ends of the selection. Drag the tabs to change the selection. To cancel the selection, simply touch the text field. -
Page 26: Text Input Settings
Text Input Settings To choose the text input settings, touch > Settings > Language & input from the home screen. Touch Personal dictionary to add or delete customized words. Touch Spell checker to enable or disable spell checking feature. You can touch to set the more options of installed spell checking services. -
Page 27: Phone Calls
2. Touch to display the call history. Phone Calls 3. Touch the phone icon next to a number or contact to place a call. For Make Phone Calls additional options, touch the name or number. There are several convenient ways to place calls from your phone. -
Page 28: Receive Phone Calls
1. From the home screen, touch > 2. Touch the conversation and then the phone number in the message. 3. Touch Call to place the call. Call Emergency Numbers You can place calls to 9-1-1 even if the phone‘s screen is locked or your account is restricted. -
Page 29: Retrieve Your Voicemail
speaker instead of the earpiece. Retrieve Your Voicemail Touch Mute to mute the microphone When you receive a new voicemail, the phone during an active call. Touch again to displays in the status bar. unmute the microphone. 1. From the home screen, touch >... -
Page 30: Call History
NOTE: Call Settings If you assign a number to an already in-use speed dial location, the new phone number From the home screen, touch > > will automatically replace the previous speed Settings to configure settings for the phone dial assignment. application. -
Page 31: Tty Mode
during the phone call. TTY Mode To turn on HAC, check Hearing aids in the A TTY (teletypewriter, also known as a TDD Call settings menu. or Text Telephone) is a telecommunications device that allows people who are deaf, hard DTMF Tones of hearing, or who have speech or language disabilities, to communicate by telephone. -
Page 32: Internet Call Settings
Internet Call Settings NOTE: See your service plan for applicable charges. If you need to add an Internet calling account or set Internet calling options, use the Internet Voice Privacy call settings menu. To add an Internet calling account, touch This option allows you to enable enhanced Accounts in the Call settings menu and privacy mode. -
Page 33: Contacts
Favorite contacts : This tab contains Contacts the favorite contacts that you manually add and the contacts you frequently contacted. The Contacts application lets you store and manage contacts from a variety of sources, including contacts you enter and save directly Add a Contact in your phone as well as contacts synchronized with your Google Account, your... -
Page 34: Edit A Contact
Import Contacts NOTE: You can save a phone number to Contacts 1. From the home screen, touch > directly from the phone dialpad. Enter the Contacts phone number with the dialpad and touch Add to contacts, and then follow the prompts 2. -
Page 35: Work With Contact Groups
NOTE: Work with Contact Groups You cannot rename the Emergency Contacts You can organize contacts into groups and (ICE) group. send messages to all group members. Remove Members from a Group Set Up a New Group 1. From the home screen, touch >... -
Page 36: Accounts And Messaging
instructions to sign in to your Google Account. Accounts and 1. From the home screen, touch > Messaging Settings > Add account > Google > Existing. With wireless service and your phone‘s 2. Enter your Google Account username and messaging capabilities, you have the password, and then touch opportunity to share information through many 3. -
Page 37: Email
enter your settings. These may include Send a Gmail Message mail type, user name, password, server, security type, etc. 1. From the home screen, touch > Gmail . If prompted, touch TAKE ME 3. Select your sync settings and then touch TO GMAIL. -
Page 38: Delete An Account
5. To add attachments, touch > General: Change settings that apply Attach file. to all email accounts, such as APN proxy, message text size, and 6. Touch to send the message auto-advance. immediately, or touch > Save draft Touch each email account name to save it as a draft. -
Page 39: Send A Message
―Draft‖ next to them. You can also touch See your service plan for applicable charges > Drafts to view them. for messaging. 3. Touch the message to resume editing it. Send a Message 4. When done, touch or Send to send 1. -
Page 40: Reply To A Message
touch the Download button at the right side of NOTE: the message. If you are concerned about the To view the details of a particular message, in size of your data downloads, check the the message thread, touch the message to multimedia message size before you open the options menu, and then touch View download it. -
Page 41: Text And Mms Options
Multimedia message limit: Choose the 3. If you want to delete more message maximum number of MMS messages to threads, touch them one by one. store in each conversation thread. 4. Touch > OK. Any locked messages SMS Reassembly: Automatically will not be deleted unless you check the reassemble segmented long SMS. - Page 42 Edit signature: Edit the signature for outgoing messages. Add signature: Select this option if you want to attach the signature to all outgoing messages. Enable wap push receiving: Check this option if you want to receive WAP push messages.
-
Page 43: Apps And Entertainment
comfortable with the third-party application‘s Apps and Entertainment policies, don‘t use the application. All your phone‘s features are accessible Find and Install an App through the Apps list. When you install apps from Google Play app NOTE: and use them on your phone, they may Available applications and services are require access to your personal information subject to change at any time. -
Page 44: Request A Refund For A Paid App
The first time you use your phone to buy NOTE: an item from Google Play, you‘re You need a Google Wallet account to prompted to enter your billing information purchase items on Google Play. See Create a to set up a Google Wallet account. Google Wallet Account on page 43 to set up a WARNING! Google Wallet account if you do not have one. -
Page 45: Google Maps
Uninstall an App View Maps of Specified Places You can uninstall any app that you have 1. From the home screen, touch > downloaded and installed from Google Play. Maps 1. From the home screen, touch > Play 2. Touch the search box at the top. Store 3. -
Page 46: Music
your destination. The following options of the music player are available: Check Detailed Operation for Maps: From the Maps app, touch > Help. Music Your phone lets you discover, download, and listen to your favorite music through a variety of applications. -
Page 47: Google Play Music App
Create a Playlist Set a Song as Ringtone Music playlists help you organize your music You can set a song or audio file as your files. default ringtone. This will not change the ringtones you have assigned individually to 1. From the home screen, touch >... - Page 48 Create a New Playlist NOTE: Music playlists help you organize your music For more information about Google Play files. Music, touch > Help in the Google Play Music screen to view the online instructions. 1. From the home screen, touch >...
-
Page 49: Web And Data
3. Touch a Wi-Fi network to connect. If you Web and Data selected an open network, you will be automatically connected to the network. If Your phone‘s data capabilities let you you selected a network that is secured wirelessly access the Internet or your with a password, enter the password and corporate network through a variety of then touch Connect. -
Page 50: Check The Wireless Network Status
Check the Wireless Network NOTE: Status If the wireless network you want to connect to is not in the list of detected networks, touch Check the status of your current wireless at the bottom of the screen. Enter the network, including speed and signal strength, wireless network settings and touch Save. -
Page 51: Browser
To zoom in, place your thumb and index Browser finger on the screen and expand them Your phone‘s web browser gives you full outward (spread). access to both mobile and traditional To zoom out, place your thumb and index websites on the go, using 3G or Wi-Fi data finger on the screen and bring them together connections. -
Page 52: Browser Options
Request desktop site: Check this Browser Options option to open the desktop version of Touch to discover additional options to the website you want to browse. expand your use of the web on your phone. Settings: Configure and manage your 1. -
Page 53: 3G Data Services
4. Check Default to use the default home functioning properly. Allow the phone some page, or uncheck Default and enter your time to process your data usage request. desired home page address on the URL Your Data Service User Name line. -
Page 54: Virtual Private Networks (Vpn)
page); when the symbol is not animated, your Before you can initiate a VPN connection, phone is connected to the network but is not your phone must first establish a Wi-Fi or data currently transferring data (for example, when connection. you are viewing a web page that is completely Set Up Secure Credential open). -
Page 55: Mobile Hotspot
Disconnect from a VPN NOTE: 1. Slide the status bar down to open the If you have not set a PIN or password for your Notifications panel. phone, you are prompted to set one up. 2. Touch the VPN connection to return to the 2. -
Page 56: Bluetooth Tethering
3. Set your name and security options as NOTE: follows: The best way to keep using the phone as a Network SSID: Enter or edit a hotspot is to have it connected to a power network SSID (name) that other supply. -
Page 57: Usb Tethering
3. From the home screen, touch > Settings > More…. 4. Check Bluetooth tethering. Your computer is now sharing your phone's data connection. To stop sharing your data connection, uncheck Bluetooth tethering. USB Tethering You can access the Internet on your computer via the USB tethering feature of your phone. -
Page 58: Camera And Video
Take a Picture Camera and Video 1. From the home screen, touch > You can use the camera or camcorder to take 2. Before taking the picture, you can zoom in and share pictures and videos. Your phone on your subject with two fingers or the comes with a two megapixel camera that let Volume Button. -
Page 59: Record Videos
Touch Details or > Details to see 1. From the home screen, touch > the file information of the current picture or 2. Touch to display the camera and video clip. camcorder settings screen and then you Touch at the top right of the screen to can change the settings. -
Page 60: View Pictures And Videos Using Gallery
Storage location: Change the Camera). storage location for captured pictures 3. Touch a thumbnail of picture or video to and videos via the Save location view it in full screen. Touch to play the setting. video. Restore defaults: Restore default NOTE: camera and camcorder settings. -
Page 61: Work With Pictures
2. Touch an album containing a video you Work with Pictures want to watch, and then touch the video When you‘re browsing pictures in the Gallery thumbnail to see it in full screen. application, you can touch the screen to 3. -
Page 62: Share Pictures And Videos
Share Pictures and Videos The Gallery application lets you send pictures and videos using email or multimedia messages. You can post videos on YouTube. You can also send them to another phone or your computer using Bluetooth. 1. From the home screen, touch >... -
Page 63: Tools And Calendar
TO, and TIME ZONE box. If the event is Tools and Calendar an all-day event such as a birthday, select the ALL DAY check box. Calendar 6. Enter the event description. 7. If the event occurs on a regular basis, Use Calendar to create and manage events, touch the REPETITION field and then meetings, and appointments. -
Page 64: Show Or Hide Calendars
Touch to keep the reminders 3. Touch pending in the notifications area of the 4. Touch OK. status bar. – or – To set reminder settings: If the calendar event is recurring, select On any Calendar view, touch > Only this event or This and future Settings >... -
Page 65: Clock
For Bluetooth, you'll be asked to turn 3. Check or uncheck the calendar to keep it on Bluetooth on your phone and synchronized or stop synchronizing. connect to the receiving Bluetooth Send a vCalendar device so the vCalendar can be sent. For more information, see Bluetooth You can send a calendar event as a vCalendar on page 67. -
Page 66: Calculator
Bed Clock Stopwatch You can use the phone as a bedside clock. Stopwatch allows you to record lap times. 1. From the home screen, touch > 1. From the home screen, touch > Tools > Clock Tools > Clock 2. Touch the Alarm tab. 2. -
Page 67: Sound Recorder
3. If necessary, hold the phone on its side to File Manager display the advanced panel. File Manager allows you to view and manage 4. Touch to view the result. files stored on your phone's internal storage and your microSDHC card. NOTE: 1. -
Page 68: Voice Dialer
follow the prompts to enable Google Now. Search with Text To turn Google Now off or on: You can search for information by entering text. 1. From the home screen, touch > Google or touch the search box at 1. From the home screen, touch >... -
Page 69: Turn Bluetooth On Or Off
Bluetooth devices. Turn Bluetooth On or Off Check or uncheck your phone name Use the settings menu to enable or disable and visibility status on the top of the your phone‘s Bluetooth capabilities. menu to make your phone visible or 1. -
Page 70: Microsdhc Card
3. Make sure that the headset is Disconnect or Unpair from a discoverable, so that your phone can find Bluetooth Device the headset. Refer to the instructions that You can manually disconnect or unpair from a came with the headset to find out how to Bluetooth device through the Bluetooth set it to discoverable mode. -
Page 71: Transfer Files Between Your Phone And A Computer
Remove a microSDHC Card 1. From the home screen, touch > Settings > Storage. 1. Turn the phone off. 2. Scroll down the screen, touch Erase 2. Find the notch on the lower left side of the external SD card > Erase SD card > back cover. - Page 72 app, just attach your phone to the computer NOTE: and copy the files to the music folder. For Windows XP, you need to install the driver 1. Connect your phone to your computer and Media Player 11 (or a later version) when using the supplied USB/charging cable.
-
Page 73: Settings
To quickly turn Airplane Mode on or off: Settings Press and hold the Power Button, and then touch Airplane mode. While in The following topics provide an overview of Airplane Mode, the status bar will display items you can change using your phone‘s Settings menus. -
Page 74: Mobile Networks Settings
To access Bluetooth settings: 1. From the home screen, touch > Settings > Mobile networks > From the home screen, touch > Roaming Guards. Settings > Bluetooth. 2. Tick the Voice or Data box in DOMESTIC section to enable the warning messages Mobile Networks Settings for the domestic roaming. -
Page 75: Data Usage Settings
– or – Domestic Voice: Enable or disable voice service while roaming off the Touch > Settings > Mobile home network. networks and check or uncheck Data Domestic Data: Enable or disable enabled. data service while roaming off the home network. -
Page 76: Mobile Hotspot Settings
2. Drag the white vertical lines in the data To choose which kinds of information to usage diagram to select a time period. sync within each account: A list of apps that used mobile data during 1. Touch > > Settings the time period appears under the 2. -
Page 77: Vpn Settings
VPN Settings Sound Settings Use the VPN settings menu to set up and The Sound settings menu lets you control your phone‘s audio, from ringtones and alerts manage Virtual Private Networks (VPN). For details on your phone's VPN settings, see to touch tones and notifications. -
Page 78: System Sounds And Tones
Vibrate Pattern to enable vibration mode, or touch to enable sound. You can select how the phone vibrates when it rings. Press the lower end of the Volume Button when no media application is active. When 1. From the home screen, touch >... -
Page 79: Display Settings
Screen lock sounds: Play sound Auto-rotate Screen when locking or unlocking the screen. This setting allows the screen to rotate the Vibrate on touch: Vibrate when contents it displays when you rotate the phone. touching soft keys and in certain other To enable the auto-rotate screen feature: instances. -
Page 80: Date & Time Settings
instead of using the network-provided NOTE: data. Touch When to daydream to set when to 3. Check or uncheck Use 24-hour format if start this feature. you want to change the time format; touch Choose date format to select the date Font Size Settings format you prefer. -
Page 81: Personal Dictionary
Personal Dictionary Voice Search Your phone lets you add words to a personal The Voice Search menus let you configure phone dictionary to improve word suggestion Google Voice Search settings. and spell check when entering text. 1. From the home screen, touch >... -
Page 82: Storage Settings
Text-to-speech output. Save Location 2. Touch an option to configure it. This menu allows you to choose the default PREFERRED ENGINE: Select the location for new data, such as files speech synthesis engine you want to downloaded, photos captured, and voice use or touch to change its settings. -
Page 83: Battery Settings
details, see View microSDHC Card Memory 3. Touch an app to see its information. You on page 70, Format the microSDHC Card on can stop the app, uninstall or disable the page 70 and Unmount the microSDHC Card app, clear data and cache, or clear on page 70. -
Page 84: Security Settings
2. Slide the location switch at the top right to To set a screen lock: turn location access on or off. 1. From the home screen, touch > 3. When location access is enabled, touch Settings > Security > Screen lock. Mode to select location sources you want 2. -
Page 85: Encrypt Phone
Power button instantly locks: Let prompted to wait for 30 seconds before you the screen lock to be activated as can try again. If you still cannot recall the soon as you press the Power Button. unlock pattern, you can touch Forgot Pattern and enter your Google Account user name ... -
Page 86: Make Passwords Visible
When you're ready to turn on encryption: 3. Enter your lock screen PIN or password and touch Next. 1. From the home screen, touch > 4. Read the onscreen attention and touch Settings > Security > Encrypt phone. 2. Read the information about encryption NOTE: carefully. -
Page 87: Backup & Reset
Install from SD card: Install Unknown Sources certificates from the microSDHC card. If you want to install apps from sources other Clear credentials: Delete all than the Google Play Store, you must allow the certificates. installation of apps from unknown sources first. 1. -
Page 88: Accounts And Sync Settings
2. Touch Reset phone. If you are setting up an email account with unique server settings or other parameters, If you want to remove all data saved to the touch Manual setup instead of Next and installed microSDHC card, check Erase enter the information as prompted. -
Page 89: Accessibility Settings
2. Touch and check or uncheck From the home screen, touch > Auto-sync data to enable or disable Settings > Accessibility and select automatic sync. Touch OK to confirm. an option: 3. From the home screen, touch > TalkBack: Get spoken feedback when Settings and scroll to the... -
Page 90: Printing
Touch & hold delay: Adjust the delay Use Cloud Print on Your Phone required for the phone to notice your To use Google Cloud Print on your phone, "touch & hold" gesture (for example, you must sign in to your Google Account. when you want to move an app to the home screen). -
Page 91: System Updates
activation process begins. Wait until it Model number: View the model finishes and touch Done to exit. number of your phone. If the phone is already activated, the Android version: View the Android usage details of your plan during the operating system version running on current billing period are displayed. -
Page 92: Index
Index Accessibility, 88 Calendar, 62 Accounts, 35 Add event, 62 Airplane Mode, 72 Erase events, 63 Answer a Call, 27 Event alerts, 62 Applications, 42 Share calendar event, 64 Apps, 42 Show or hide calendars, 63 Find and install, 42 Sync calendars, 63 Request refunds, 43 View events, 63... - Page 93 Data, 48 Google Play Data Services, 52 Find and install apps, 42 Status indicators, 52 Help, 44 User name, 52 Store, 42 Data Usage Settings, 74 Google Play Music, 46 Drag, 18 Google Voice Typing, 24 Editing Text, 24 Google Wallet, 43 Email Headset Account settings, 37...
- Page 94 View memory, 70 Power On, 17 micro-USB Jack, 12 Reject Incoming Call, 27 Ringtone, 77 Options, 40 Rotate, 19 Send messages, 38 SD Card, 69 Mobile Hotspot, 54, 75 Secure Credential Storage, 53 Mobile Network Settings, 73 Security Music, 45 App sources, 86 Google Play Music, 46 Device administrators, 85...
- Page 95 Alarm, 64 Record, 58 Bed clock, 65 Share, 61 Calculator, 65 View, 59 Countdown, 65 Watch, 59 File manager, 66 Voice Typing, 24 Google Now, 66 Voicemail, 28 Google search, 66 Settings, 29 Sound recorder, 66 Setup, 15 Stopwatch, 65 Volume Voice dialer, 67 Button, 13...
Need help?
Do you have a question about the Legacy and is the answer not in the manual?
Questions and answers